
27 Jaw-Dropping Dessert Table Ideas for 2026 That Will Elevate Your Next Celebration

You know that feeling when you finally find the dessert table inspiration that looks exactly right for your party? That perfect blend of jaw-droppingly beautiful and genuinely achievable. The problem is, most online galleries are a mix of impossible-to-replicate professional shoots and tired ideas from five years ago. We get it. After filtering through hundreds of options from professional event designers and top-tier caterers, we narrowed it down to the 27 best ideas that actually deliver in 2026. This is the year of the hyper-personalized, ultra-photogenic dessert display that tells a story. And stay until the end — we break down the most common mistakes that can ruin these looks. 📌 Save this to Pinterest for later — you’ll want to revisit these ideas.
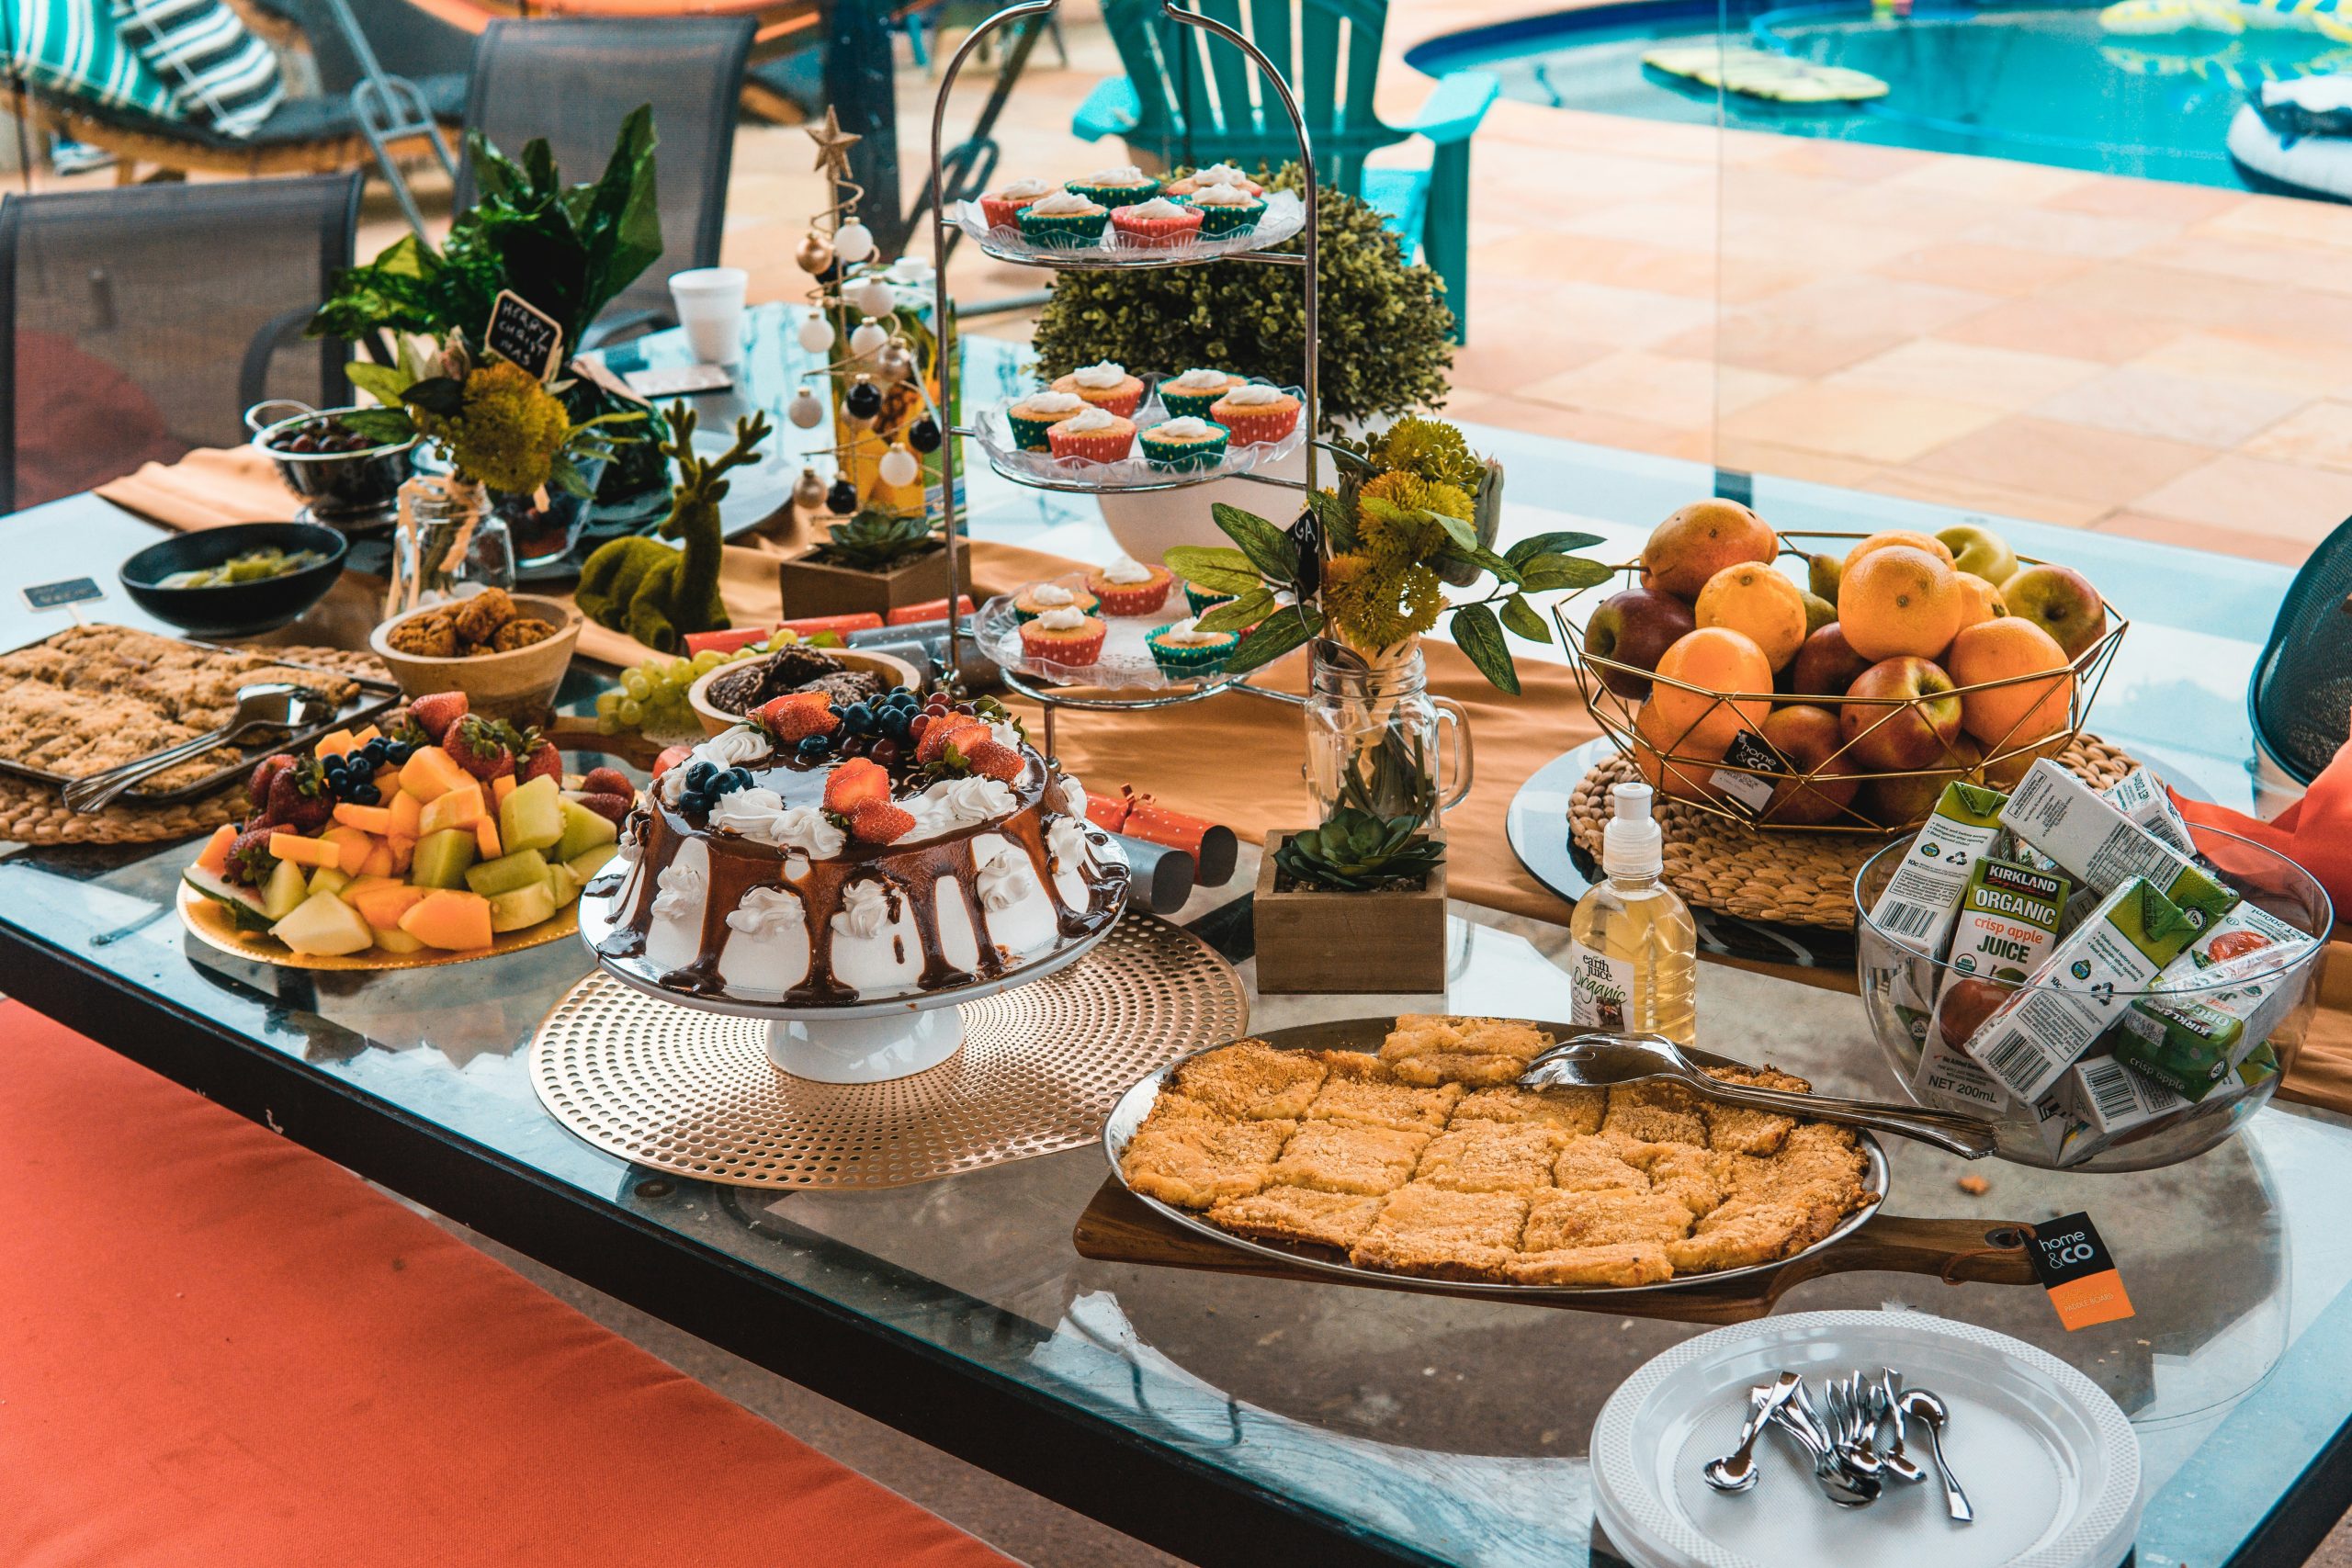
1. Festive Poolside Dessert Table with Christmas Accents
The magic of this setup is the unexpected juxtaposition. It combines the casual, sunny vibe of a pool party with the traditionally cozy feel of Christmas decor. The key is in the curated details: the olive green reindeer sculpture and small tree don’t scream “winter,” but rather add a quirky, festive note. This high-low mix of formal dessert presentation (tiered cupcake stand, drizzled cake) and relaxed outdoor setting creates a memorable, engaging atmosphere that feels both special and completely unstuffy.
💡 Designer Tip
A poolside dessert table is a fantastic idea, but be prepared for nature. Sun can be your enemy, causing frosting to melt and chocolate to soften within an hour. Consider placing the table under an umbrella or covered patio. Also, be mindful of insects. An elegant, sheer Cloche or mesh food cover can keep unwanted guests away from the sweets without ruining the visual appeal. Lastly, secure everything! A sudden gust of wind can easily topple a tiered stand, especially a lightweight one.
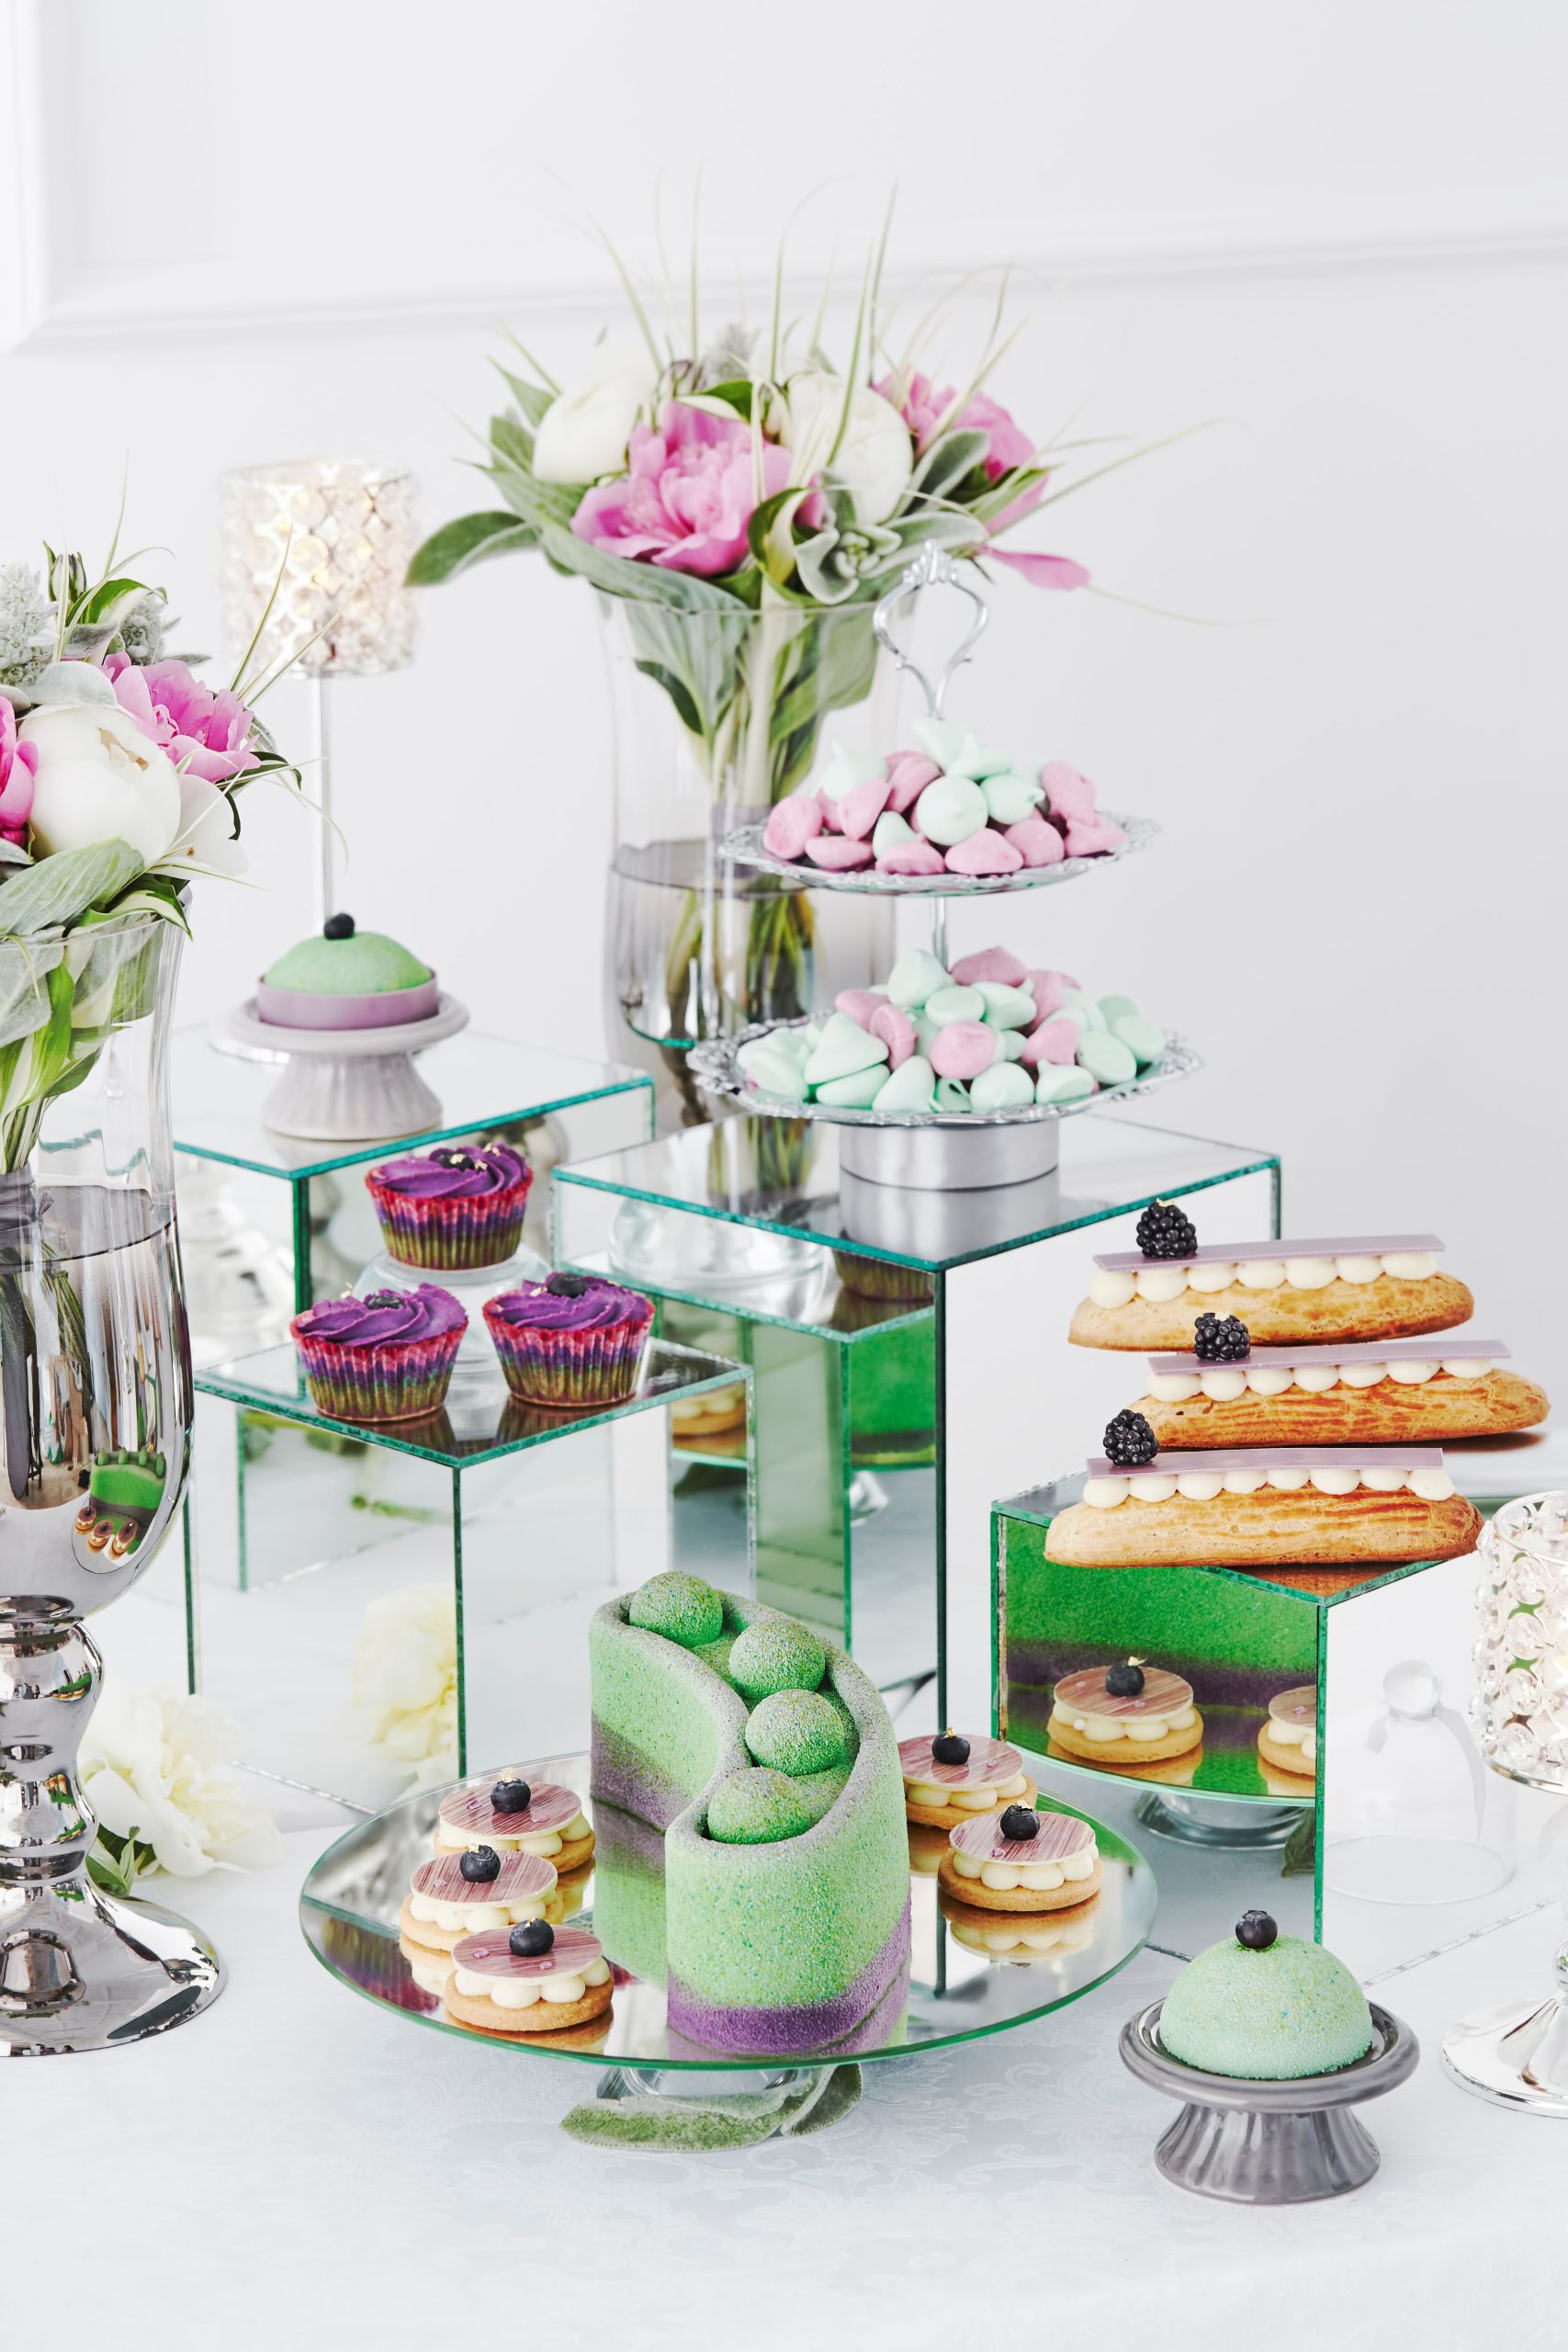
2. Mirrored Risers and Damask for a Soft, Elegant Spread
You don’t need a celebrity party planner’s budget to achieve this level of elegance. The core elements are mirrored surfaces and soft florals. Hunt for mirrored candle plates or charger plates at craft stores or online—they give the same reflective effect as custom risers for a fraction of the cost. For the damask tablecloth, check out fabric stores for remnants or look for affordable damask-patterned paper runners. A few strategically placed bouquets of fresh carnations and baby’s breath can replicate the high-end floral look for under $30.
⚠️ Real Talk
The visual recipe here is all about texture and reflection. Think of it as: 50% soft textures + 40% reflective surfaces + 10% delicate color. The white damask tablecloth provides a soft, patterned base. Mirrored risers and silver stands contribute the reflective quality, making the table feel brighter and more luxurious. The final 10% comes from the pops of soft pink, mint, and lilac in the pastries and florals. You could easily swap the pink for a soft blue or pale yellow to match a different theme while keeping the sophisticated formula intact.
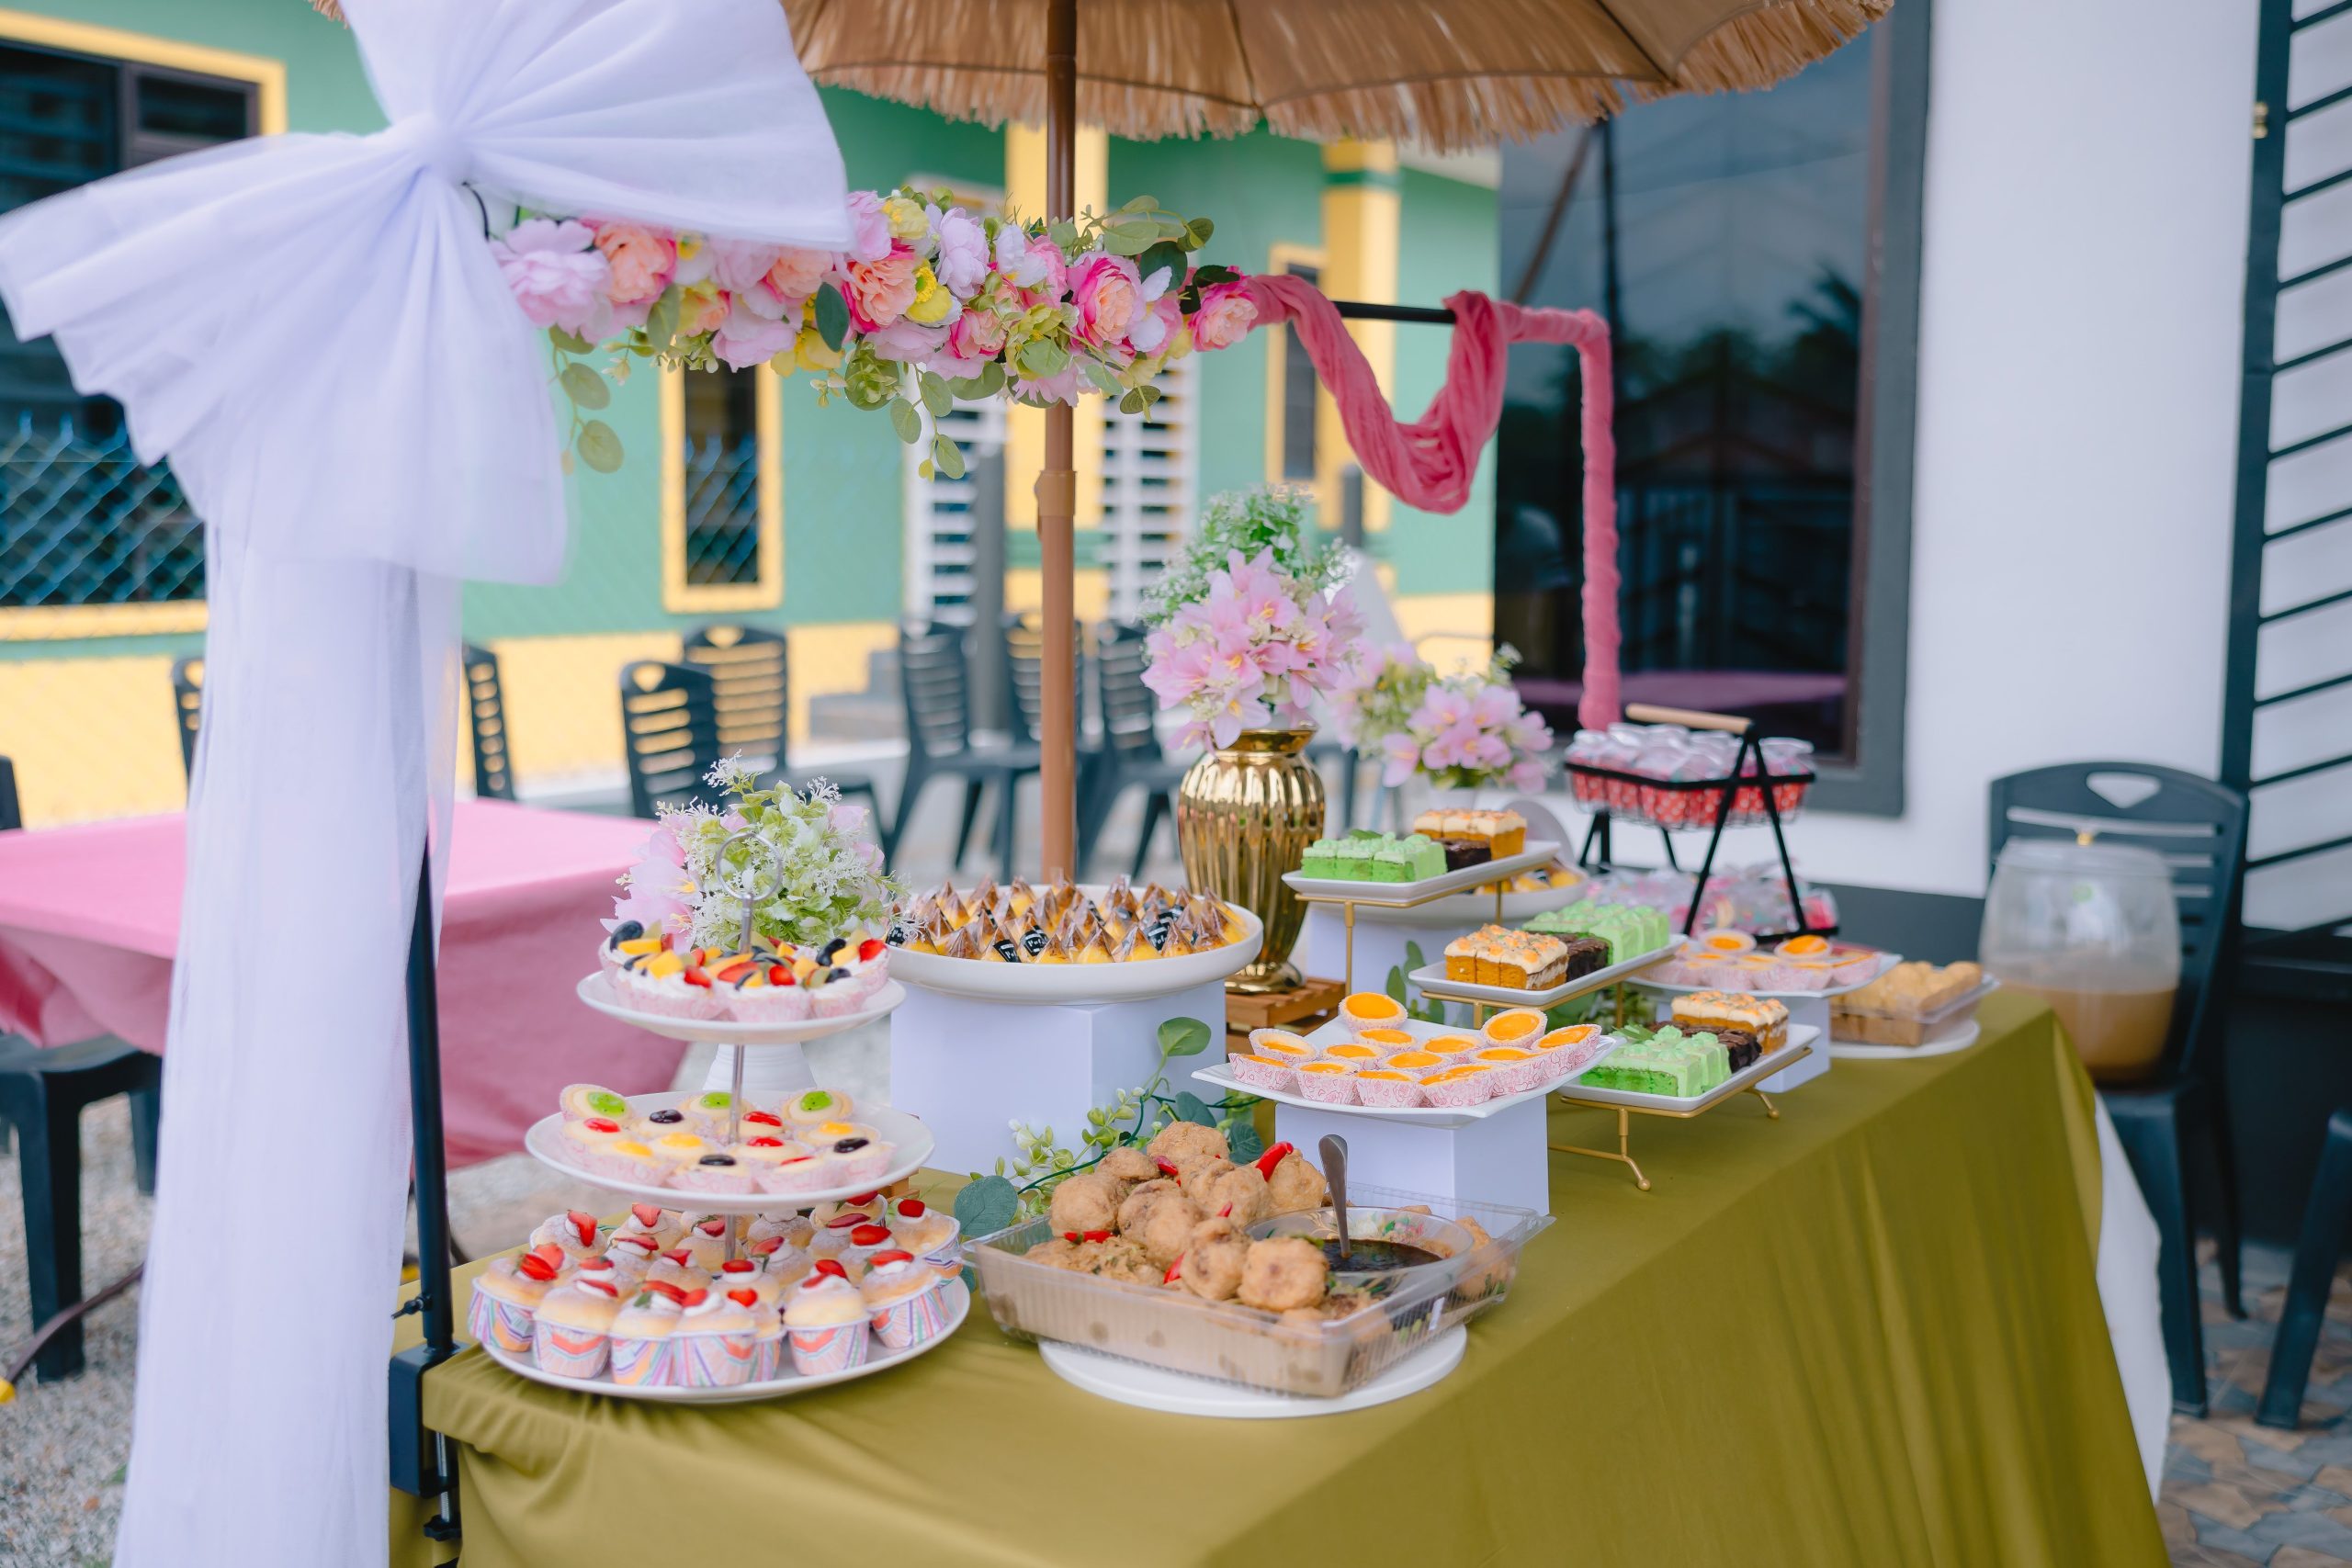
3. Cheerful Outdoor Dessert Arch with a Yellow and Pink Palette
To create a lush floral arch or garland without a huge budget or a professional florist, use a base of inexpensive greenery (like eucalyptus or lemon leaf) and then strategically insert a few high-impact flowers. For this look, a mix of faux and real flowers works wonders. Get a basic faux garland and then add 5-7 real, vibrant flowers like pink carnations or yellow gerbera daisies every 12-18 inches. This gives the aroma and texture of real flowers while the faux base provides volume and durability.
⭐ The One Thing
This idea is perfect for outdoor events in a space of at least 10×10 feet to allow for guest flow around the table. The umbrella structure requires a bit of overhead clearance, so ensure there are no low-hanging branches if setting up under a tree. This grand, festive style works beautifully for garden parties, bridal showers, or birthdays. For a more compact space, you could adapt this by creating a smaller floral runner down the center of the table, skipping the overhead arch entirely but keeping the same cheerful color story.
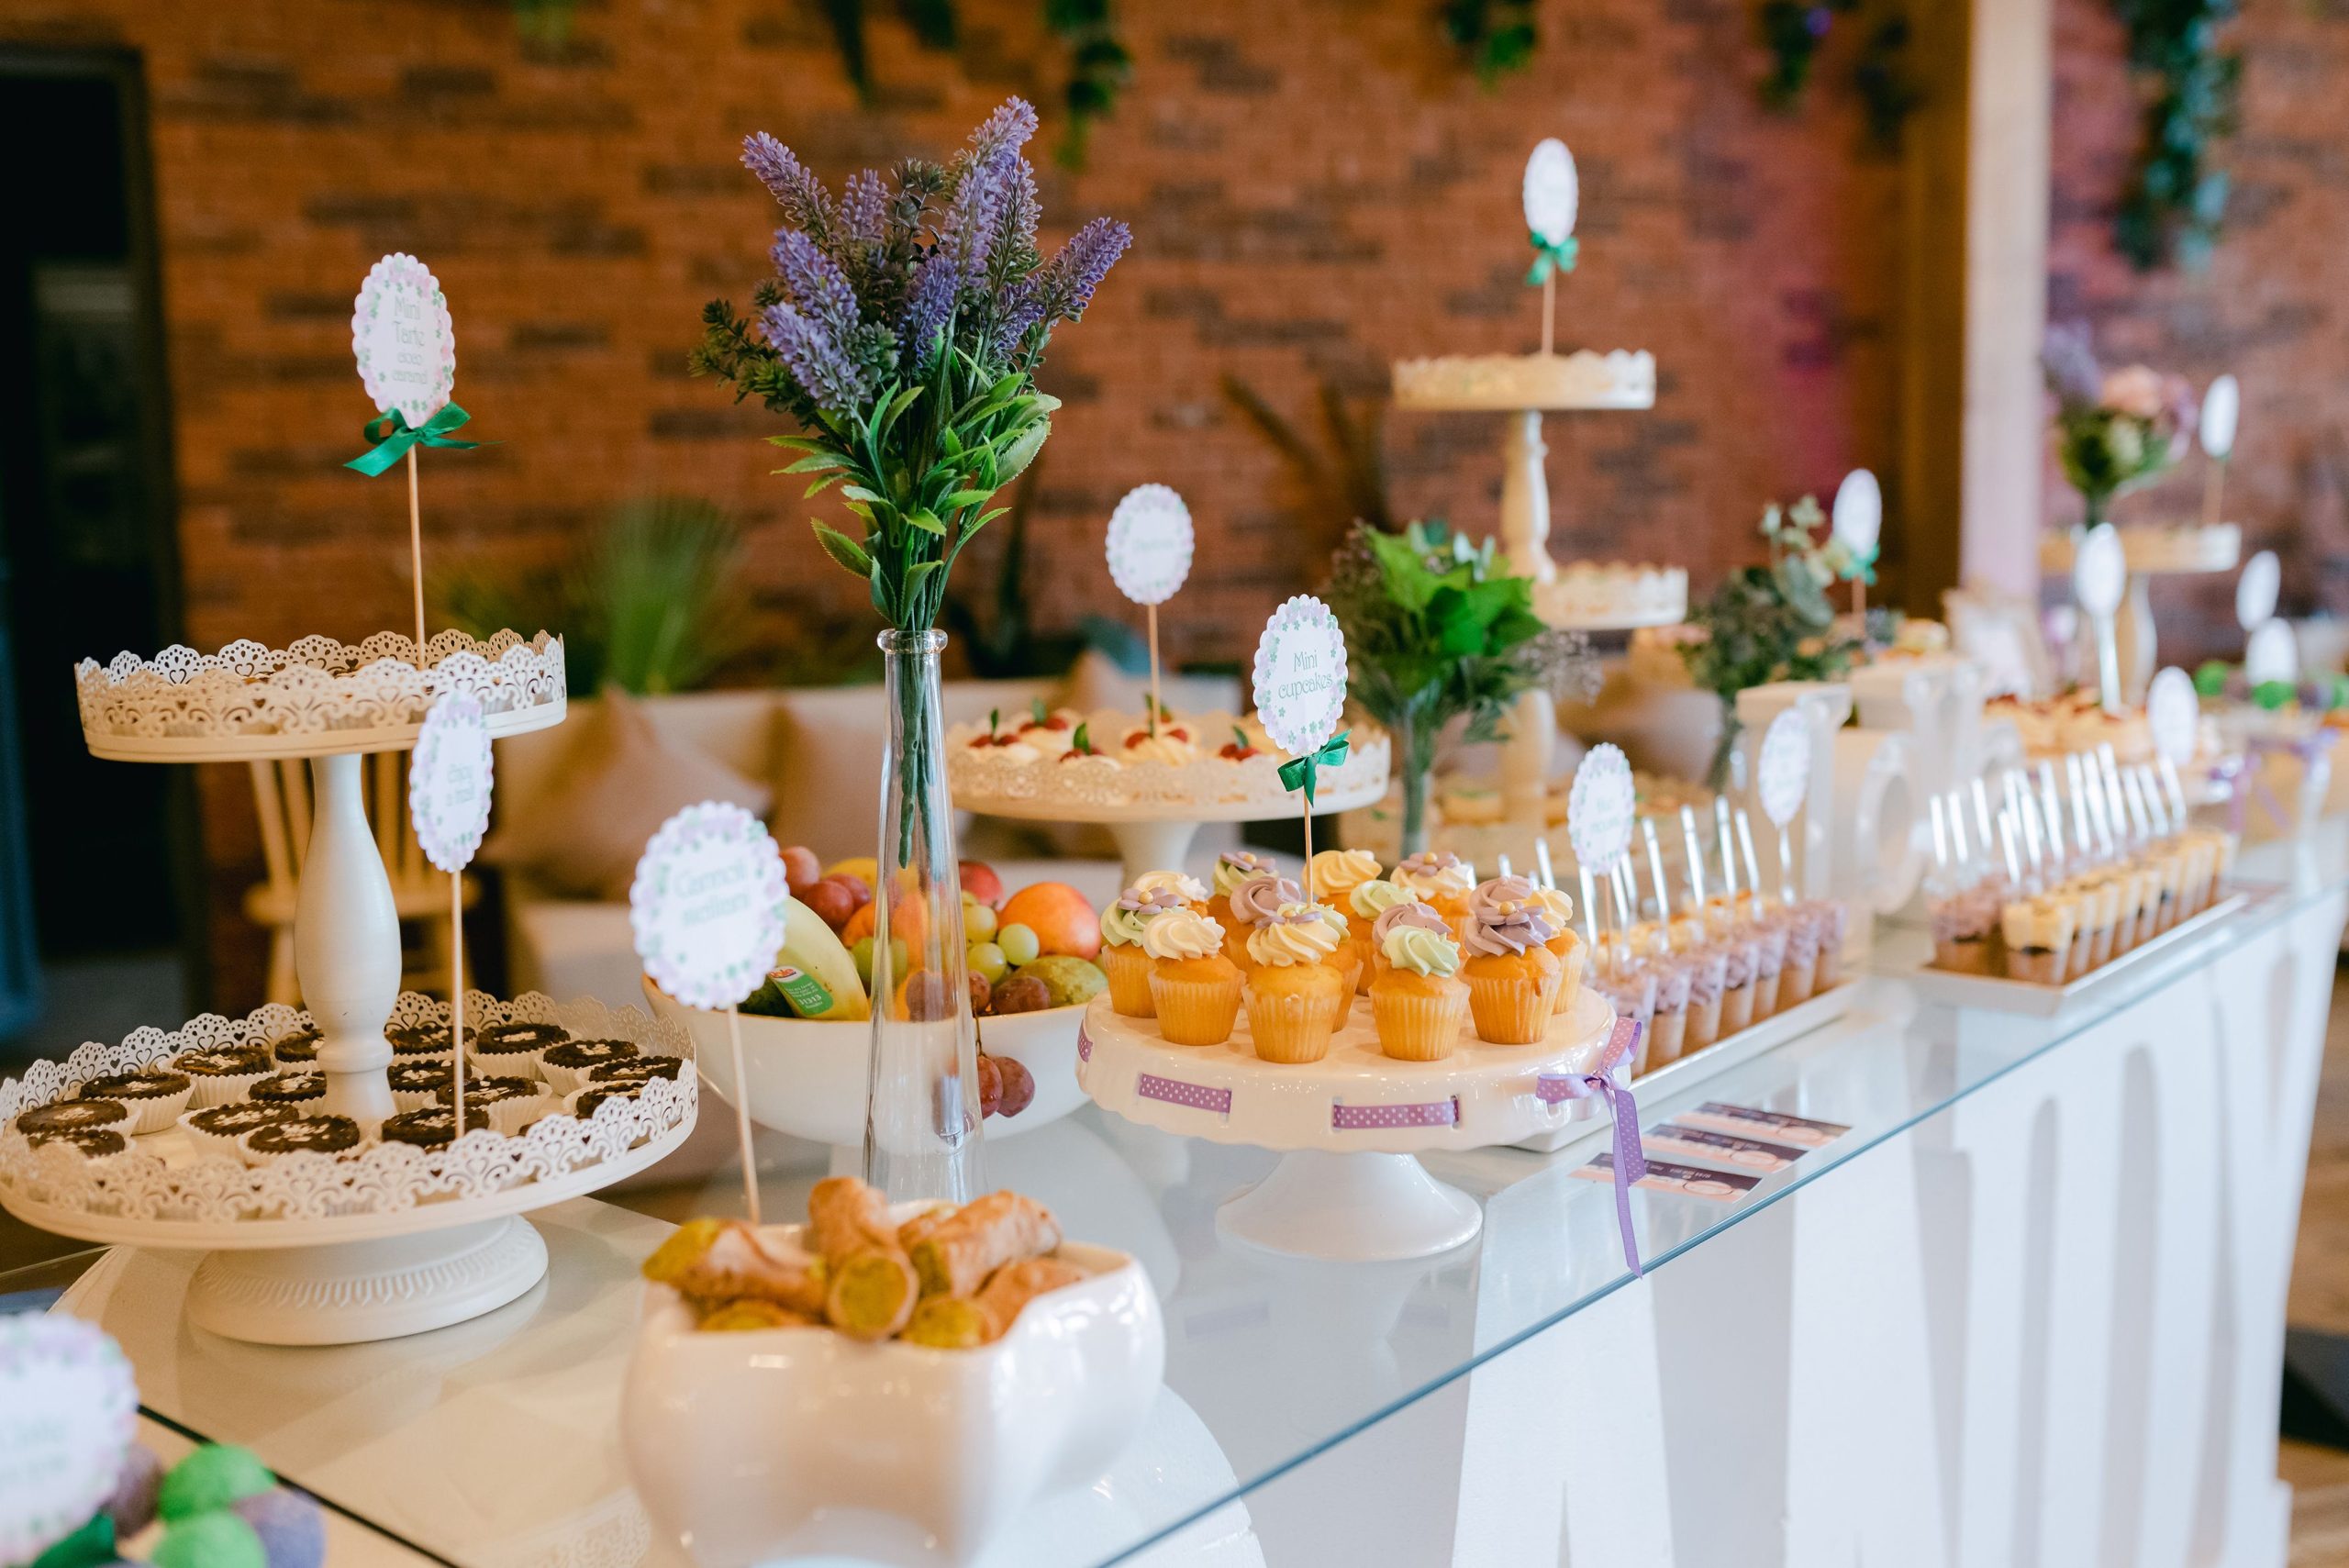
4. Neutral Dessert Display with Lavender Accents Against Brick
The single most important element in this design is the exposed brick background. Remove it, and the entire feeling changes. The rustic, earthy texture of the brick provides a crucial contrast to the delicate, refined white porcelain and glass stands. It adds warmth and an almost European bakery-like charm that keeps the all-white display from feeling too stark or clinical. This contrast is what makes the whole scene feel so effortlessly chic and inviting. It’s the perfect example of how the wall behind your table is just as important as the table itself.
📐 Style Math
While beautiful, an exposed brick wall can create dust that might settle on your desserts. A day before the event, give the brick a thorough wipe-down with a damp cloth or use a vacuum with a brush attachment to remove any loose particles. The lavender sprigs are a lovely touch, but be aware that fresh lavender has a strong scent that can compete with the aroma of your baked goods. Consider using it sparingly or opting for high-quality faux lavender to get the look without the fragrance battle.
5. Whimsical Tea Party Table with a Playing Card Cake
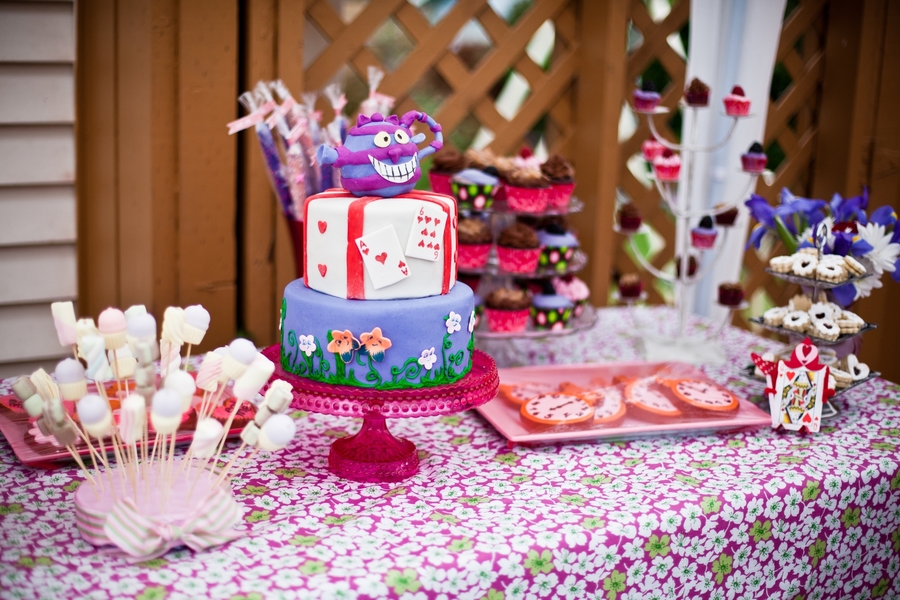
This playful “Alice in Wonderland” vibe is surging in popularity, driven by a desire for more immersive and narrative-driven party themes. In a world of minimalist aesthetics, this look is a joyful rebellion. It’s all about maximalism, storytelling, and creating a photo-worthy moment that’s bursting with personality. It resonates because it taps into nostalgia while feeling completely fresh and creative, perfect for bridal showers, milestone birthdays, or any event that calls for a touch of the fantastical. Compare this vibrant setup with the softer, more whimsical feel of Idea #7.
📏 Scale Guide
Creating marshmallow pops is a quick, high-impact addition to any dessert table. Here’s a simple how-to:
- Gather your materials: Large marshmallows, decorative paper straws or sticks, melting chocolate (in a color of your choice), and various sprinkles. (Time: 5 mins)
- Melt the chocolate in a microwave-safe bowl in 30-second increments, stirring until smooth. (Time: 2 mins)
- Insert a paper straw into the bottom of each marshmallow. (Time: 3 mins)
- Dip the top of each marshmallow into the melted chocolate, letting any excess drip off. (Time: 5 mins)
- Immediately cover with sprinkles before the chocolate sets. (Time: 5 mins)
- Place them on a wax paper-lined tray and let them cool completely. (Time: 10 mins)
Total Time: ~30 minutes. Material Cost: $15-$20.
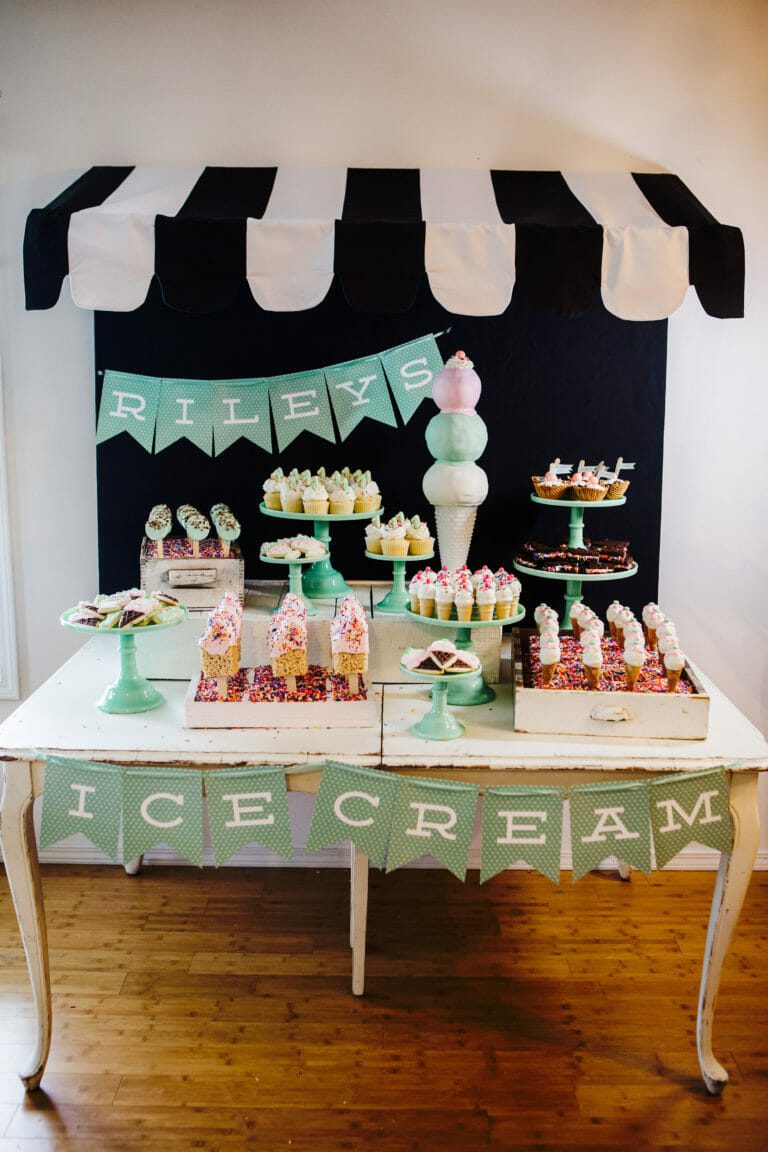
6. Farmhouse Dessert Stall with a Black and White Awning
Before you commit to this charming market-stall look, run through this quick checklist:
- Wall Space: Do you have a flat, clear wall at least 6-8 feet wide to mount the awning and backdrop? This look needs a solid background to shine.
- Table Dimensions: Is your table substantial enough to ground the display? A flimsy folding table will look out of place. A rustic wooden table around 5-6 feet long is ideal.
- Lighting: How is the lighting in the area? A dark corner will swallow the black backdrop. Ensure there is good ambient light or plan to add some small accent lamps on or near the table.
✅ Before You Start
Recreating this farmers-market aesthetic is surprisingly manageable on a budget. The key is the mix of rustic and graphic elements.
- Main Furniture (distressed table): $150 – $400 (or find on Facebook Marketplace for less)
- Awning & Backdrop: $70 – $150
- Textiles (banners): $30 – $60
- Decor & Accessories (stands, crates): $100 – $250
- Desserts: $150 – $400
- TOTAL: $500 – $1,260
Budget alternative: Use a white tablecloth on a standard folding table, create a DIY awning from striped fabric and dowel rods, and use painted cardboard boxes instead of wooden crates to get the look for around $250.
7. Pastel Blue and Coral Dessert Table with Sea-Themed Cookies
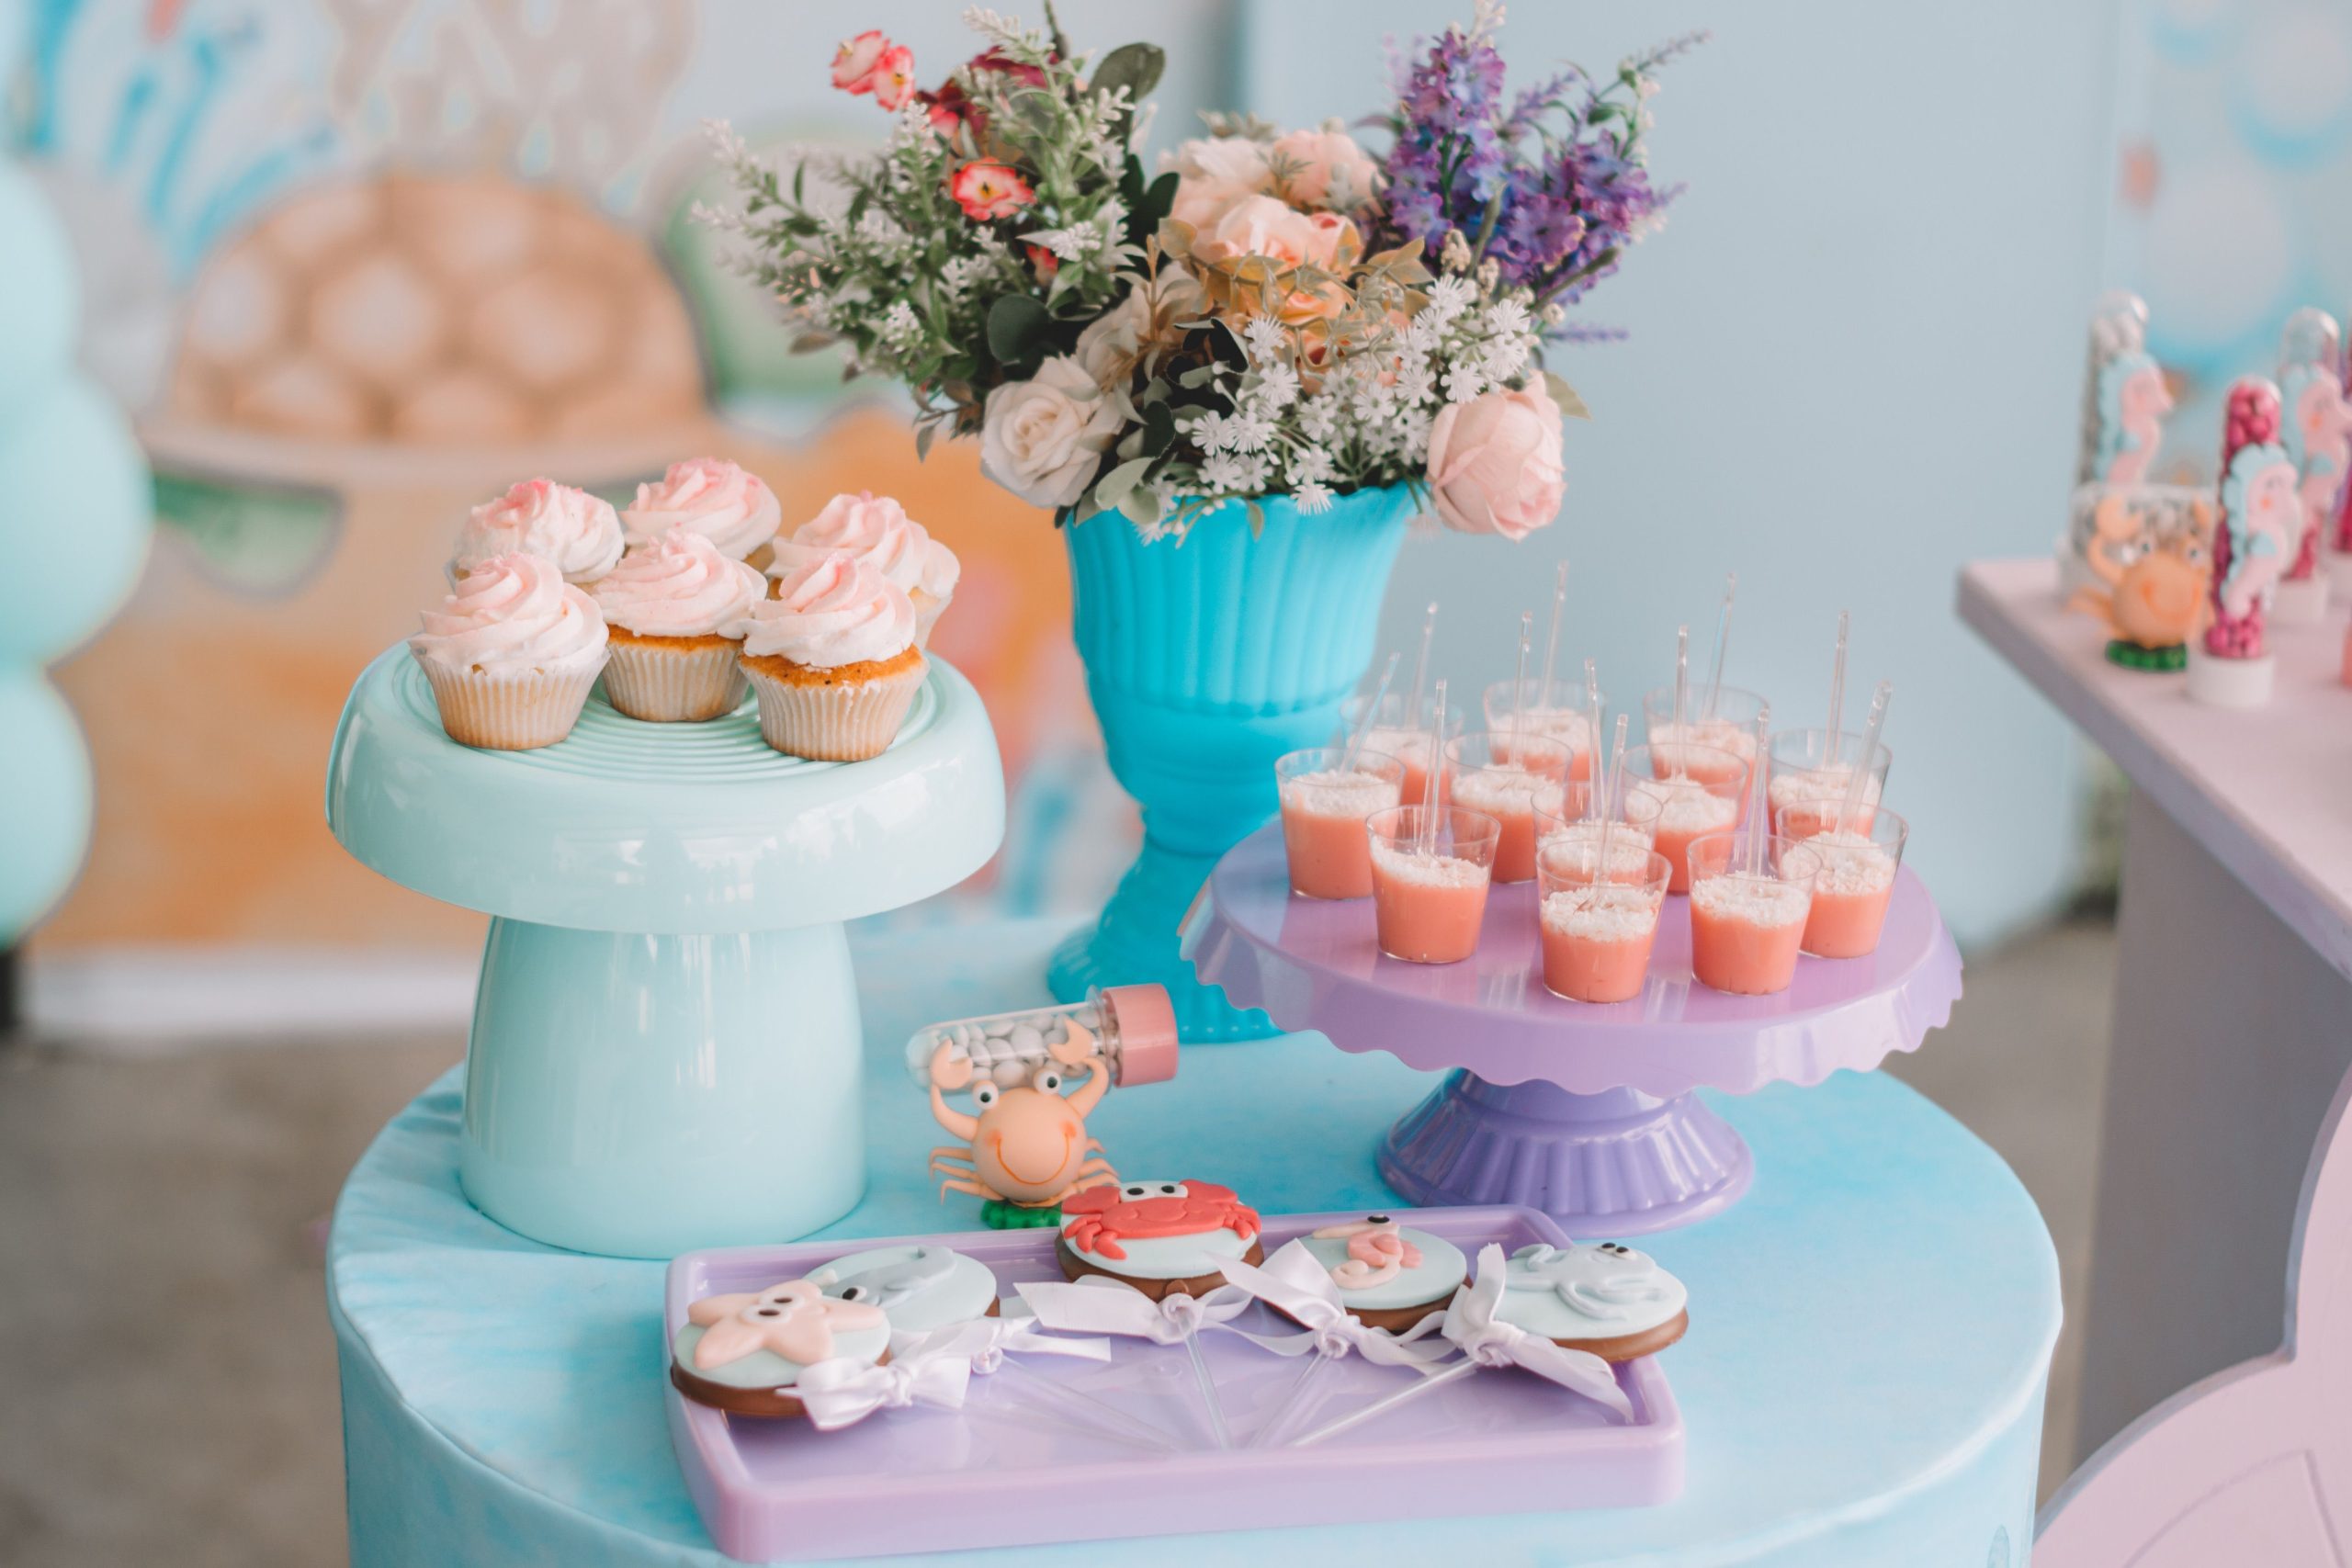
This display is a masterclass in color harmony. The success lies in the strict adherence to a limited pastel palette. The light blue tablecloth creates a calm, watery base, while the touches of coral and purple on the desserts provide a soft, warm contrast without being jarring. The repetition of these colors across the different elements—the cupcake stands, the frosting, the desserts in cups—creates a cohesive and visually pleasing rhythm that makes the entire table feel intentional and professionally styled. It’s gentle, dreamy, and perfectly coordinated.
🔧 How-To Brief
While gorgeous for photos, light-colored tablecloths are unforgiving. A single dropped cupcake or spilled drink can create a very noticeable stain that ruins the pristine look. If you’re using a fabric cloth, consider placing a clear vinyl protector over the top—it’s a simple trick used by event planners. Also, those adorable decorated cookies on sticks can be top-heavy. Make sure they are secured in a sturdy base, like a block of floral foam hidden inside a decorative container, to prevent them from tipping over.
8. Luxurious Pink and Floral Spread with Damask Drapes
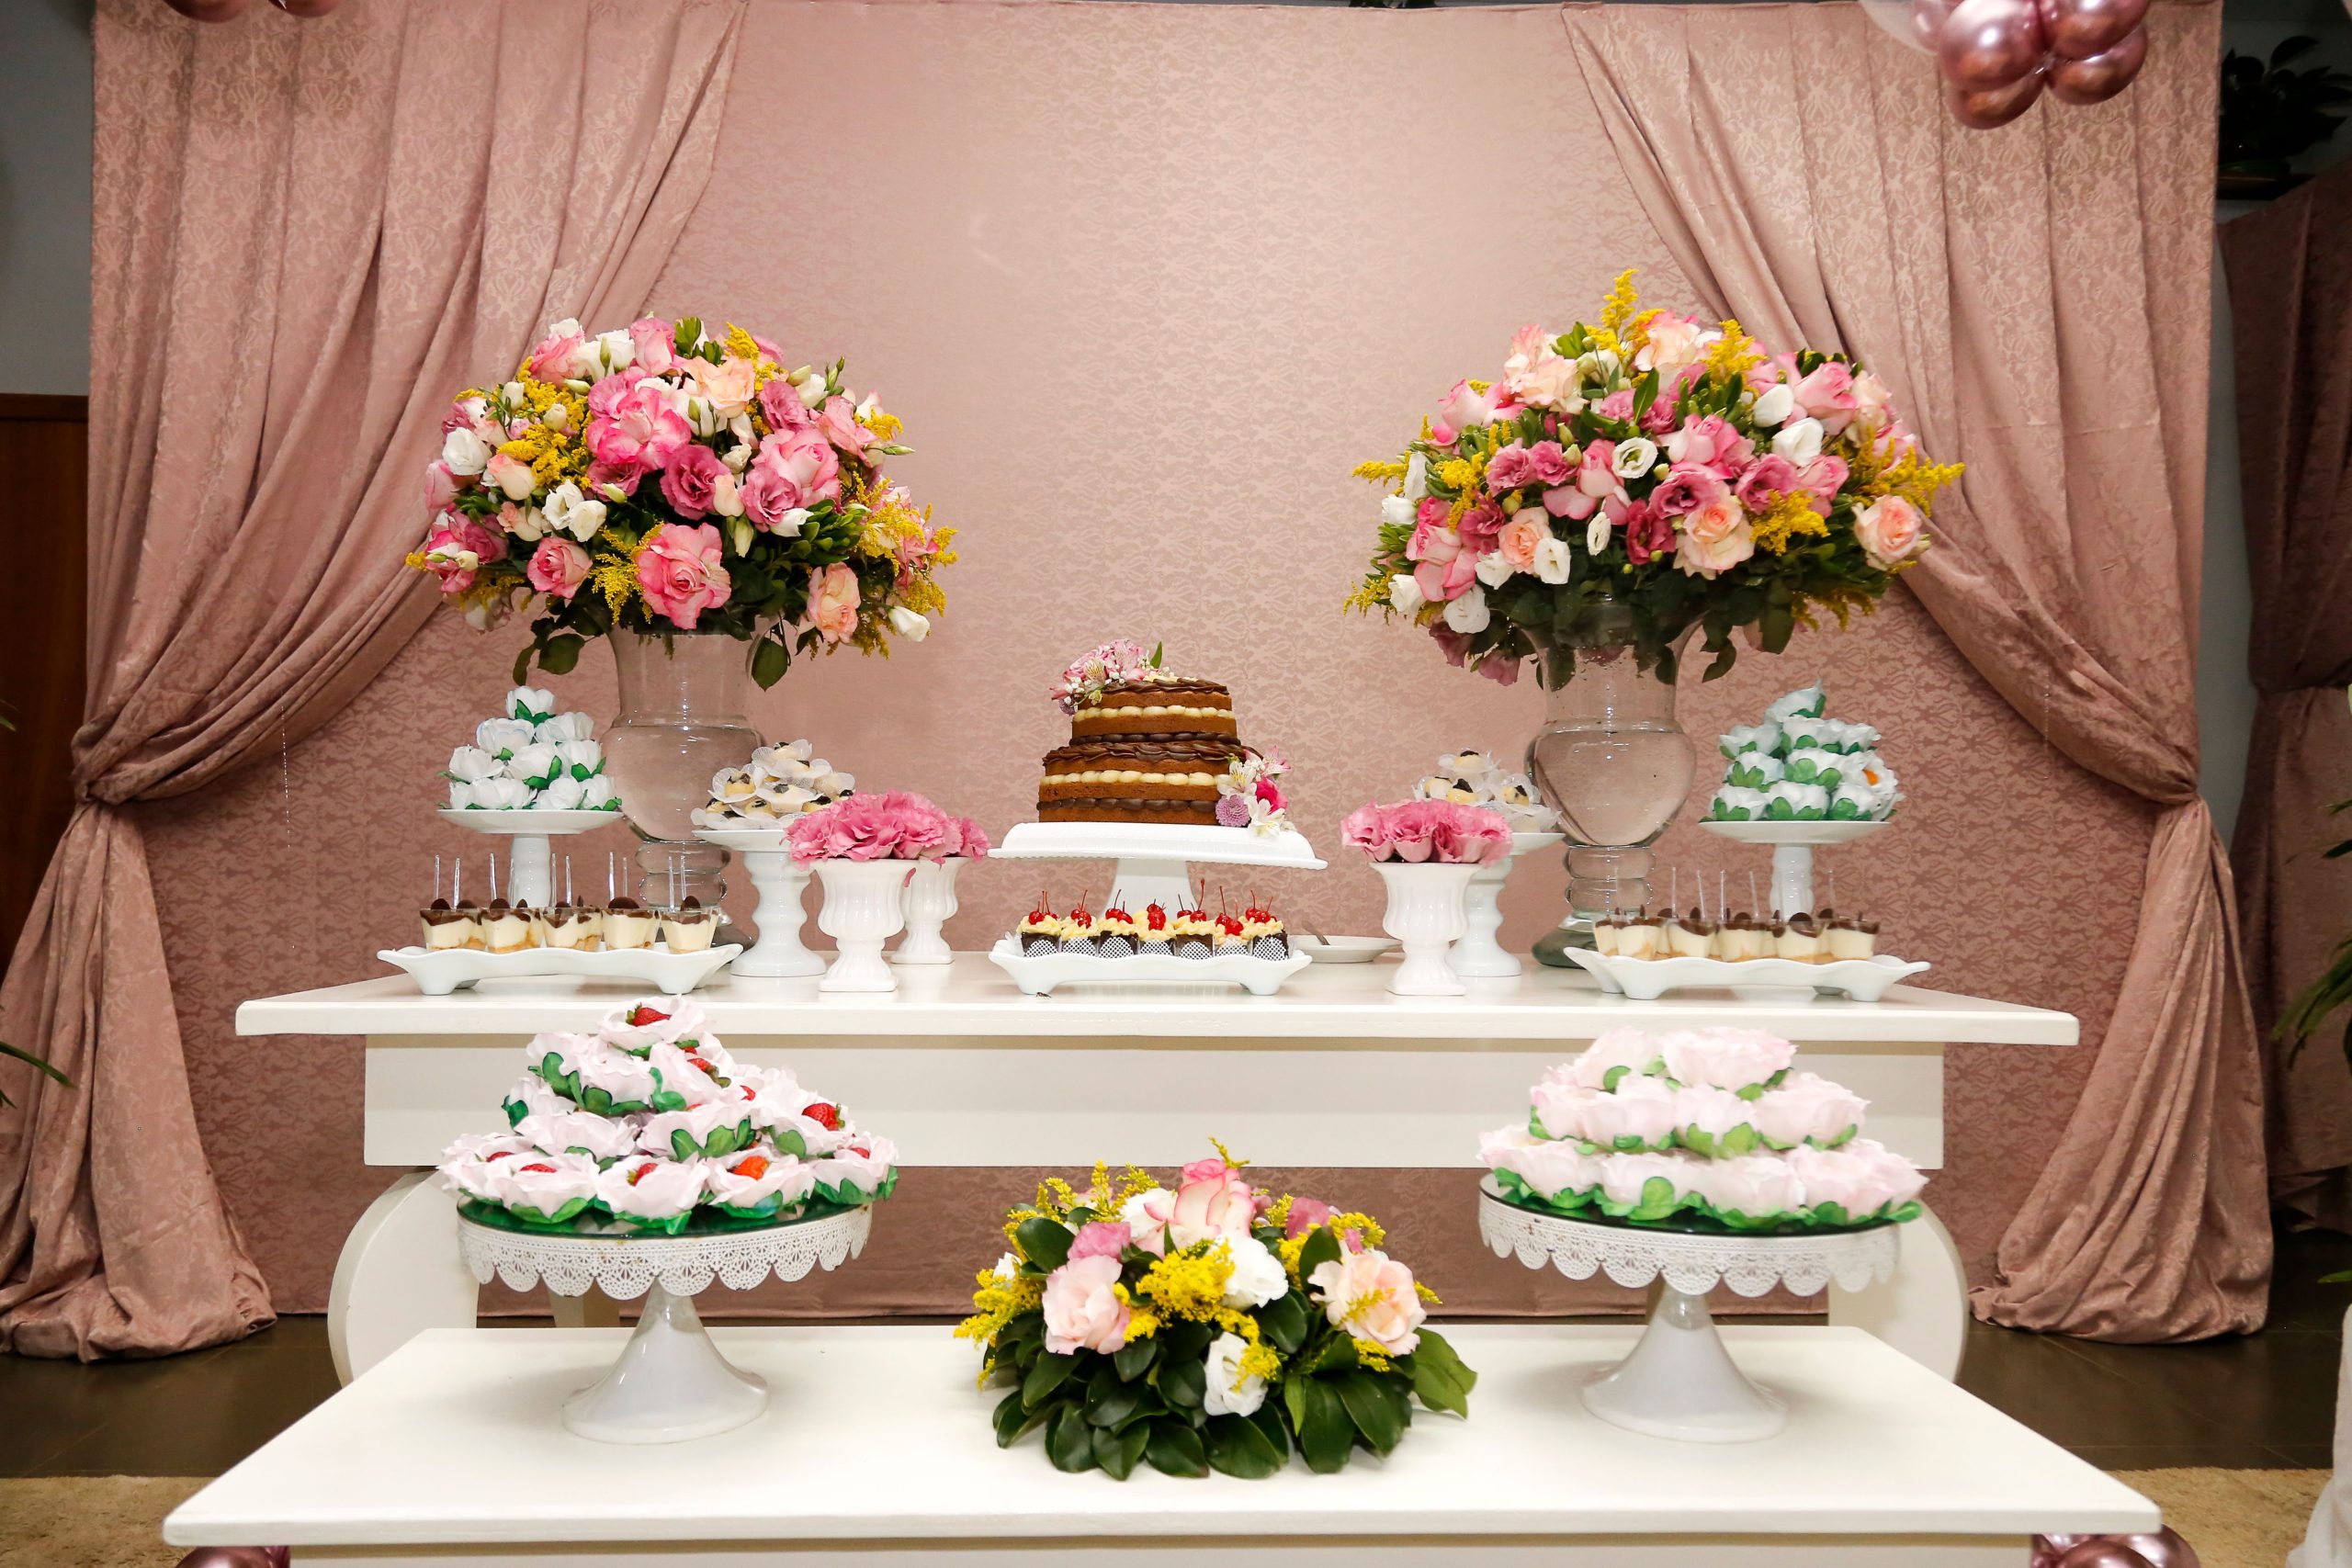
The formula for this opulent look is about layering shades of a single color. It’s approximately 60% Soft Pink + 30% Rich Textures + 10% Bold Contrast. The soft pink comes from the walls, drapes, and some florals. The richness comes from the textured damask pattern and the abundant, layered flowers. The final 10% of contrast is the deep, dark chocolate brown of the cake, which acts as a sophisticated anchor point, preventing the display from becoming overly sweet. This balance makes it feel luxurious, not just girly. You could achieve a similar feel by swapping the pink for a lavender or powder blue. See how Idea #12 uses a similar palette but with a more modern feel.
🎯 What Makes It Work
A grand, layered display like this demands space. It’s best suited for a large room with high ceilings (at least 9-10 feet) to accommodate the dramatic draped backdrop and large floral arrangements without feeling cramped. The minimum width for the setup itself is about 8-10 feet. Trying to scale this down too much will lose the sense of abundance and luxury. If your space is smaller, focus on one key element—like a single, stunning floral arrangement next to a tiered cake—rather than replicating the entire multi-table spread.
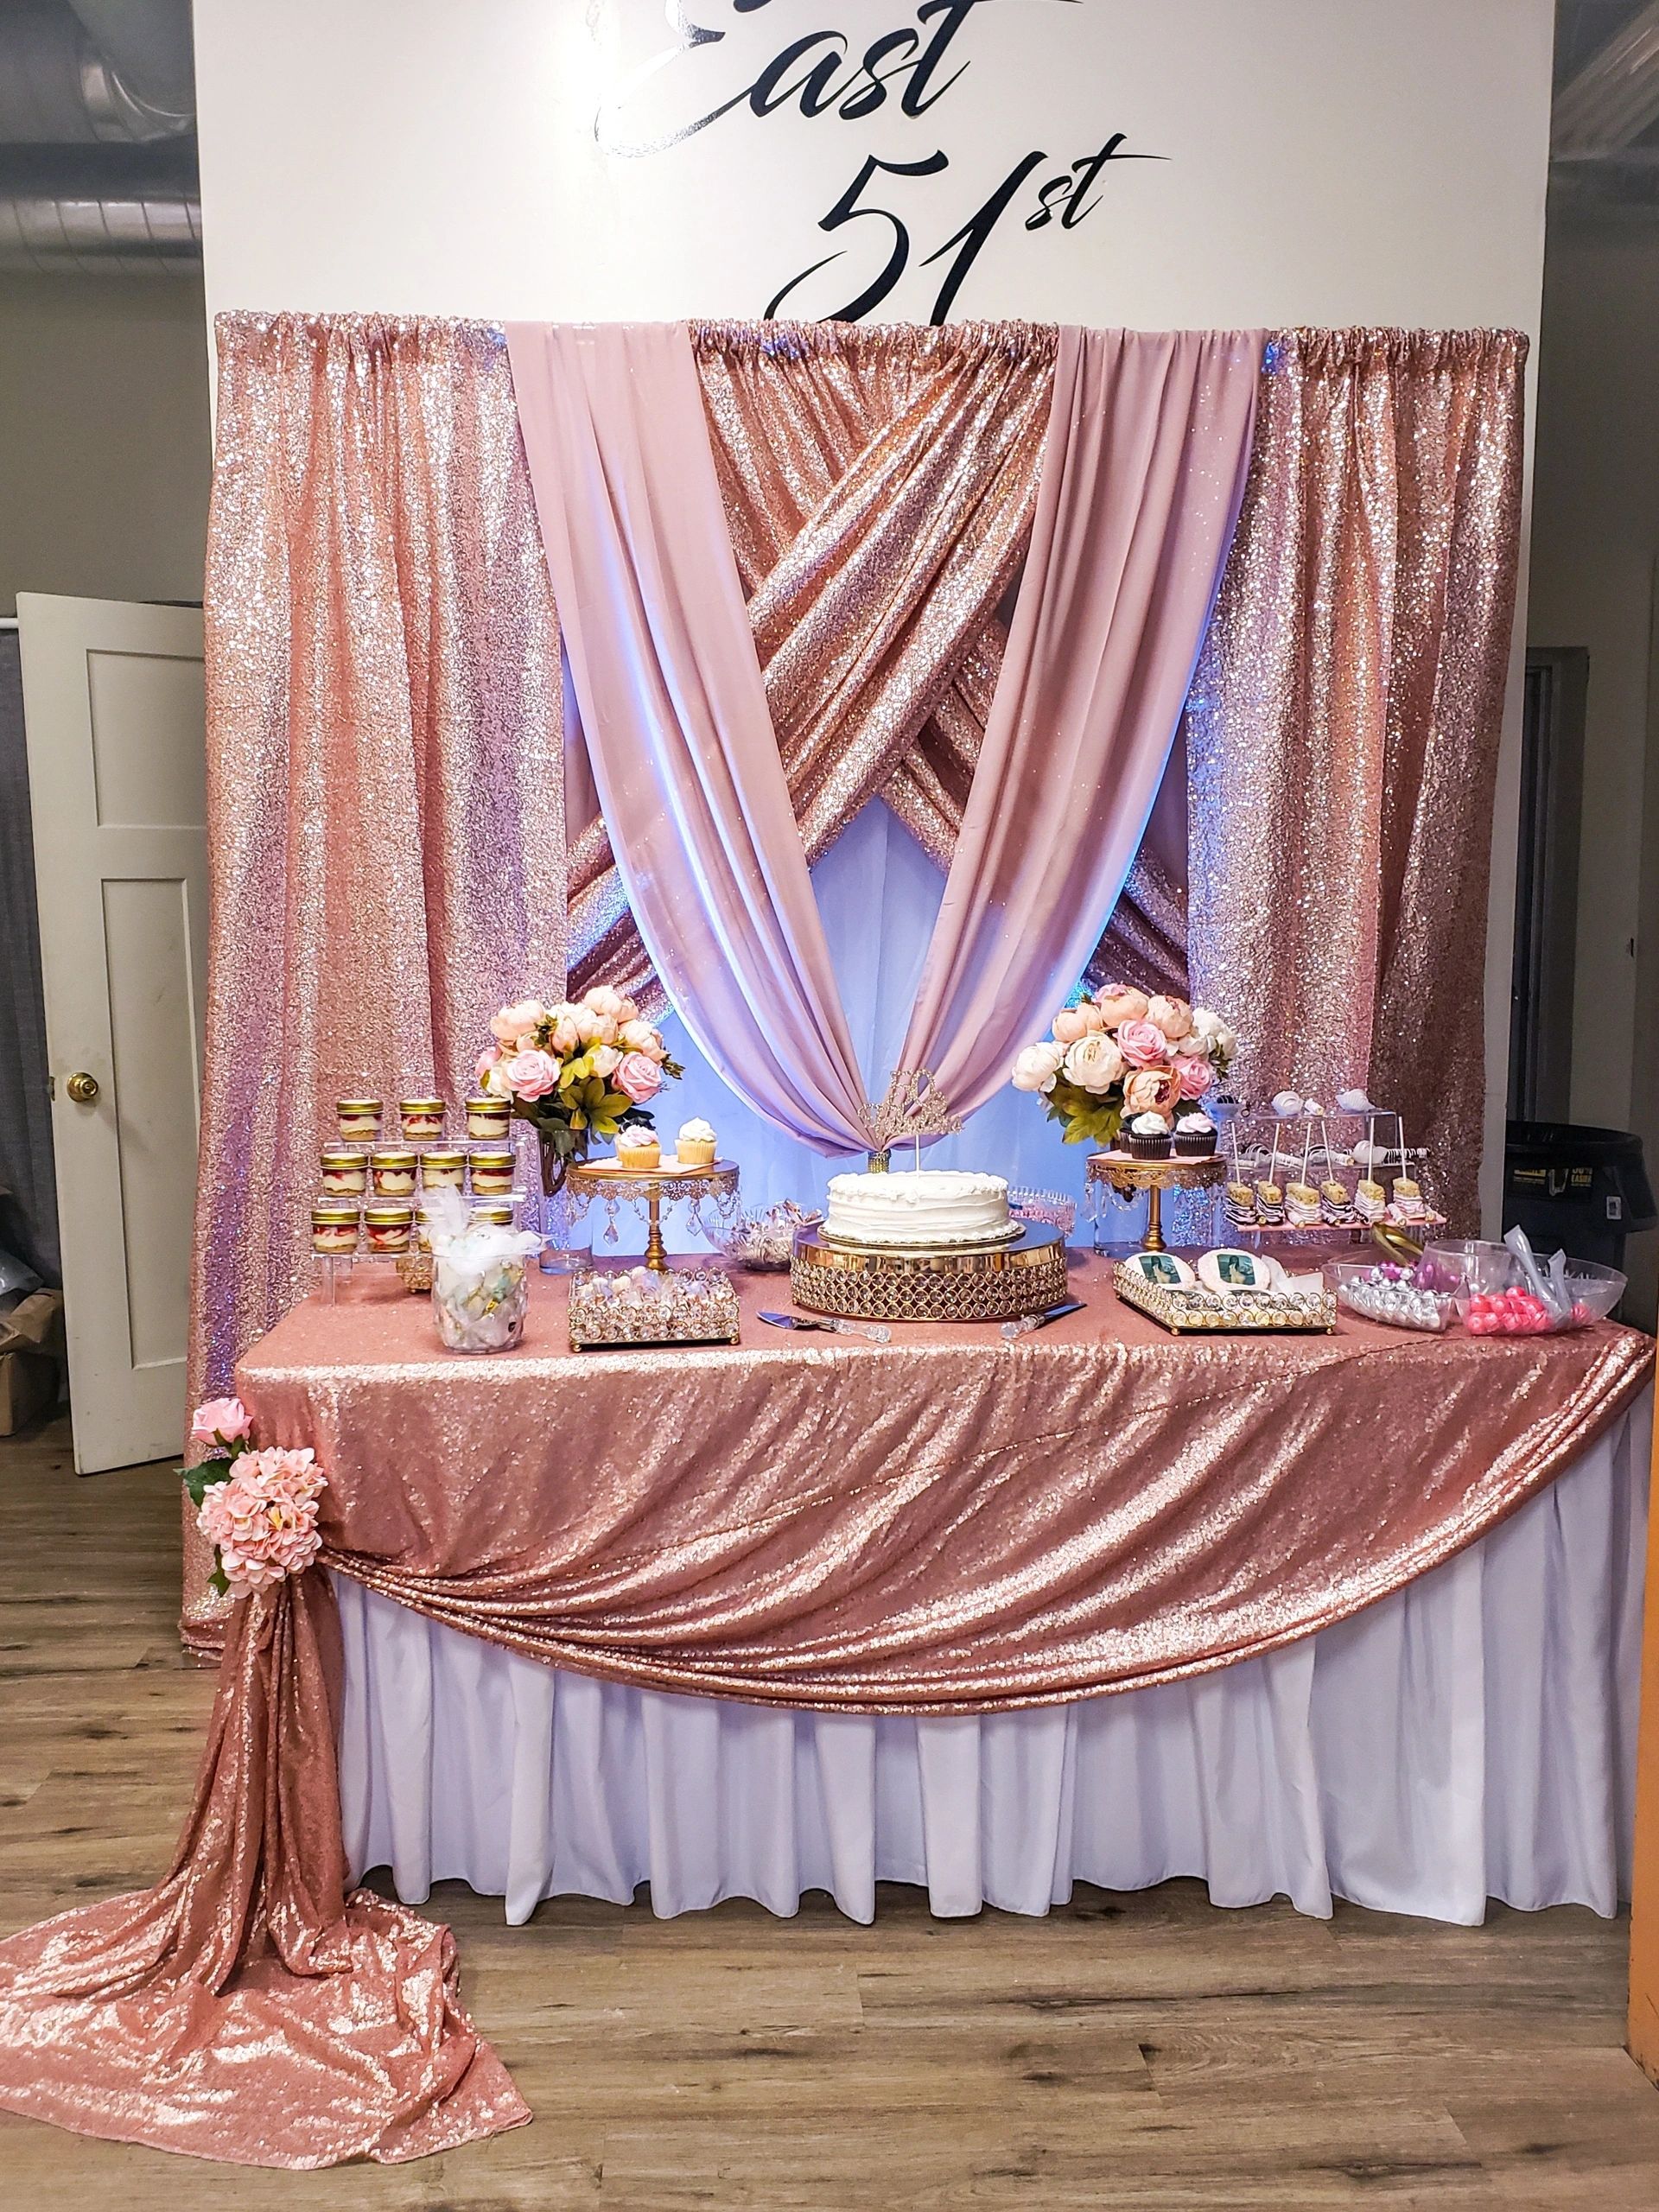
9. Glamorous Rose Gold Sequin and Mauve Dessert Table
The entire vibe of this table hinges on one thing: the rose gold sequin backdrop. It’s the undeniable star of the show. It catches the light, adds instant glamour, and sets a celebratory, festive tone before anyone even looks at the desserts. Without the sparkle, the mauve drape and white cake would be pretty, but they wouldn’t have that
10. Delicate Wedding Dessert Table with Pastels and Florals
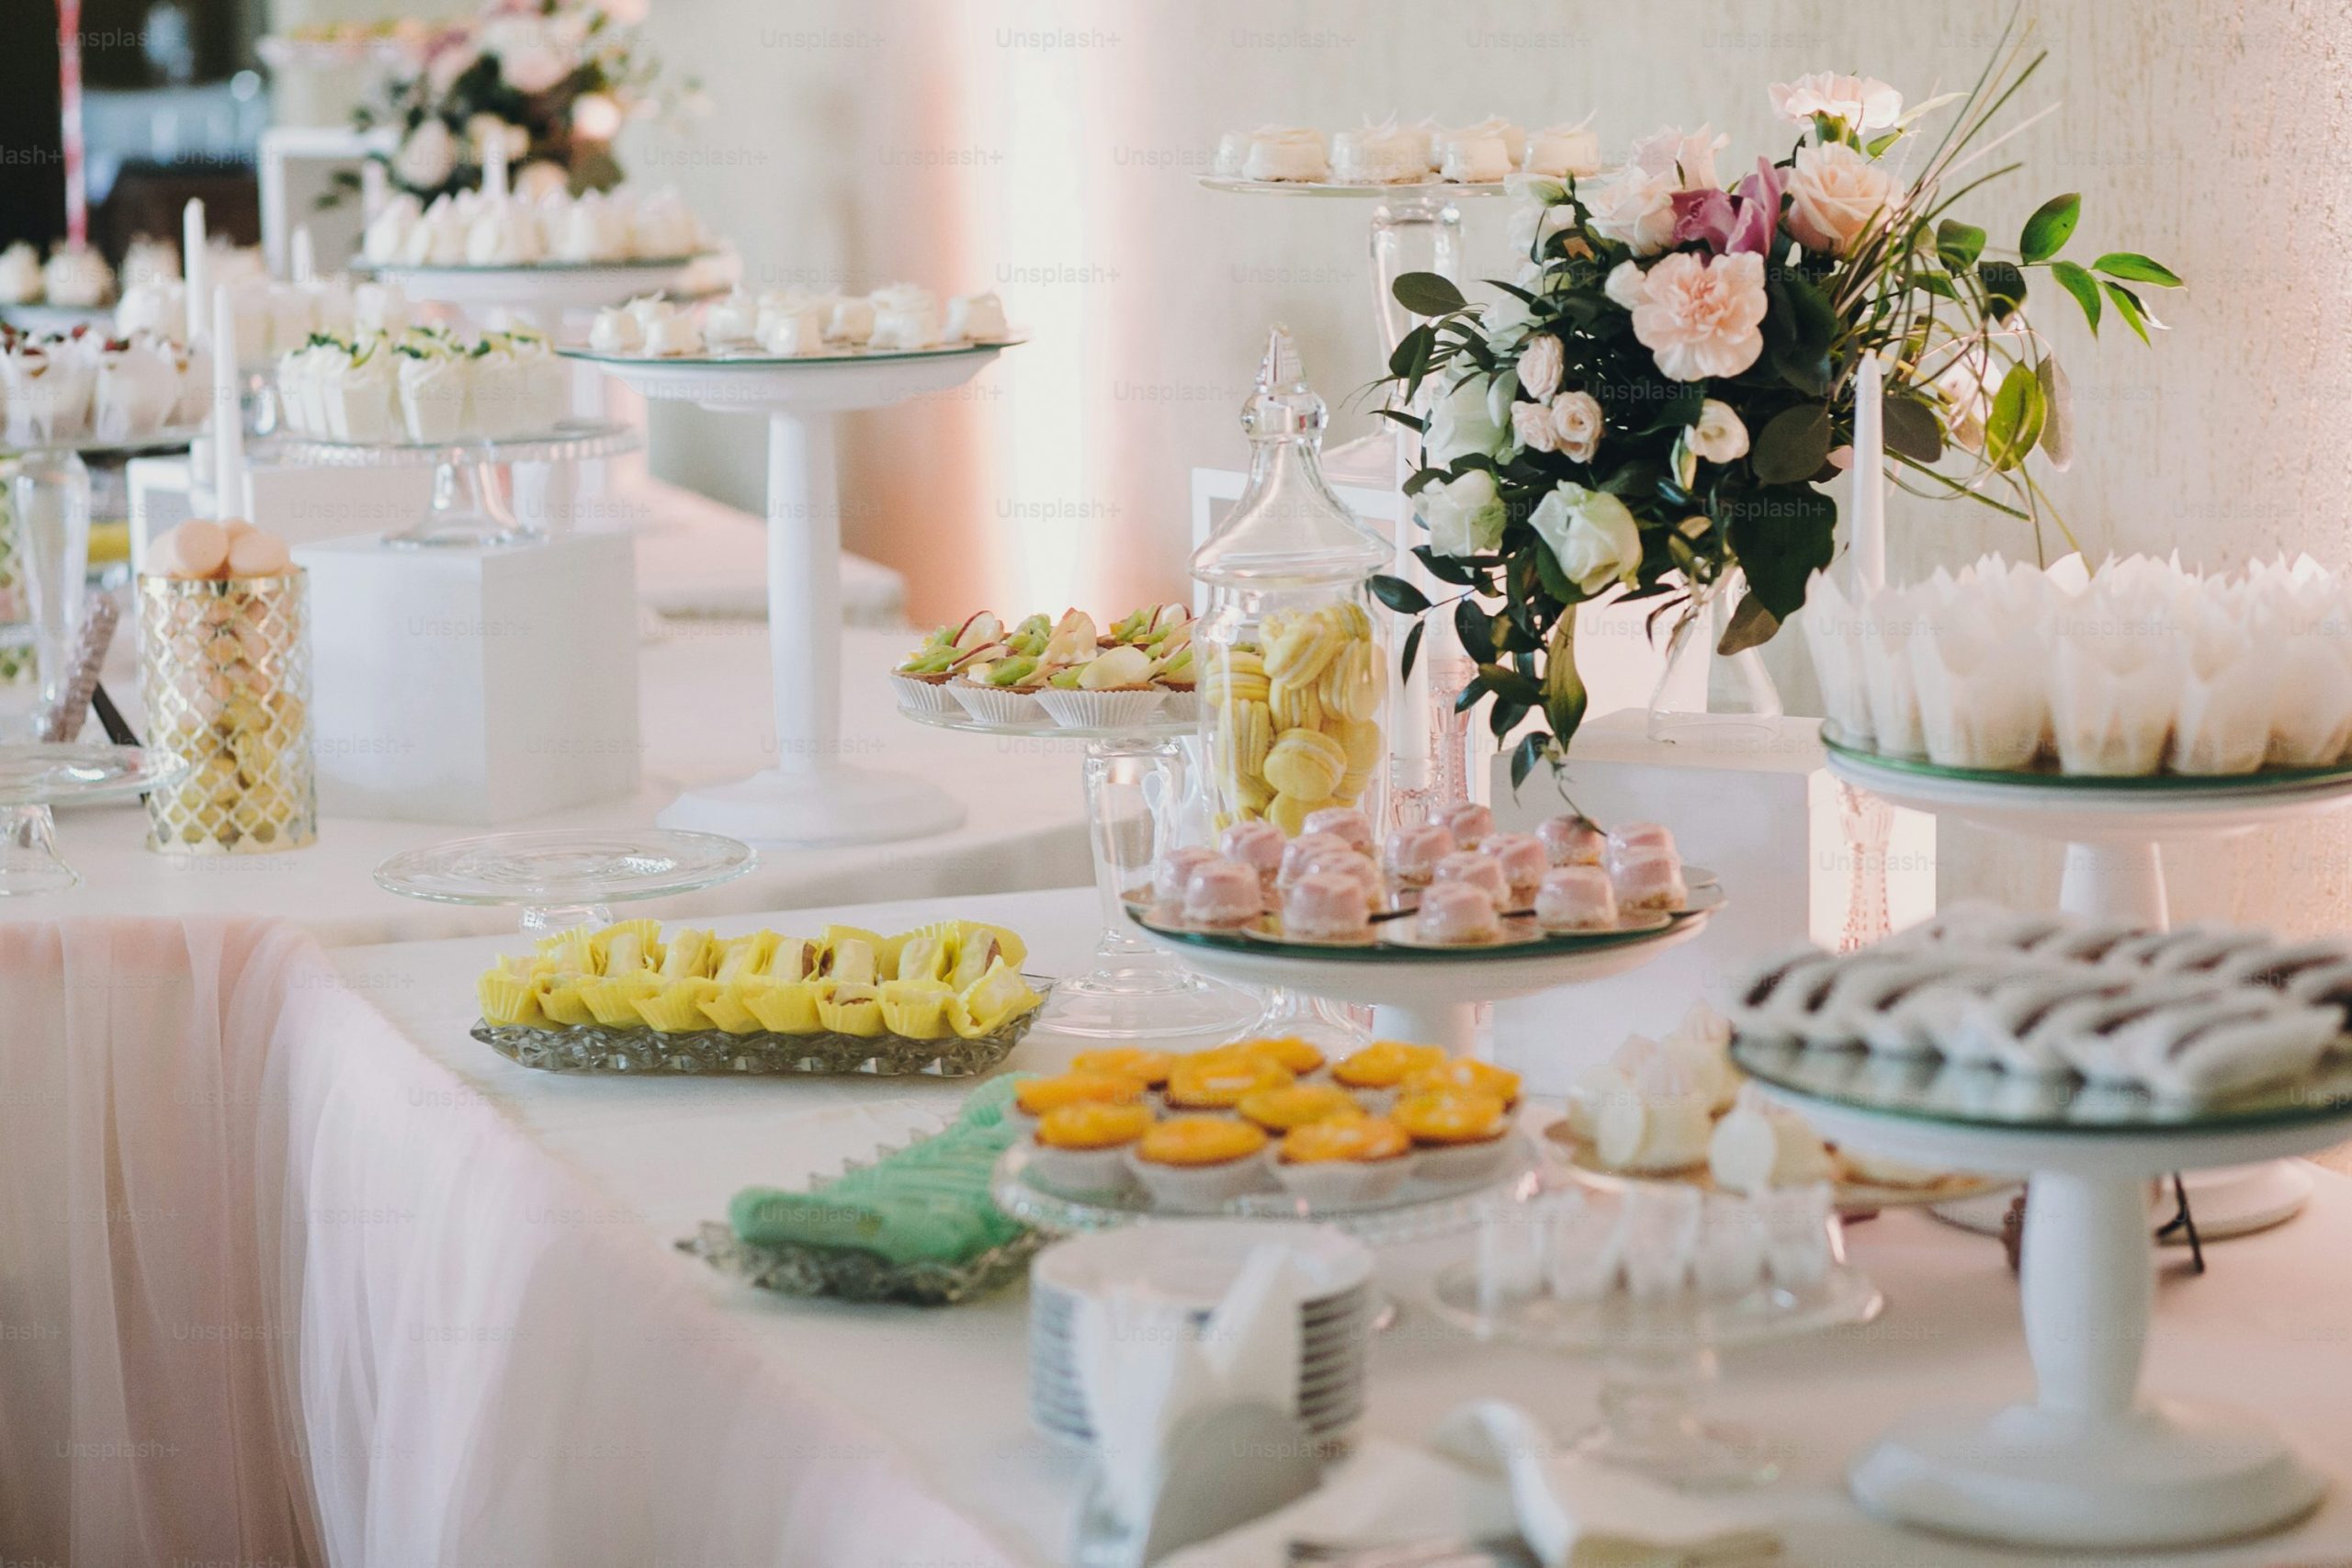
To get this delicate, high-end look for less, focus on glassware and simple sweets. Visit thrift stores and Facebook Marketplace for mismatched glass dessert stands, candy dishes, and pedestal bowls. The variety will add charm. Instead of custom pastries, buy store-bought mini cupcakes, macarons, and sugar cookies in your chosen pastel colors. The secret is in the presentation. A sheer light pink organza fabric, available for a few dollars a yard at any fabric store, can be draped over a basic white tablecloth to instantly elevate the entire table.
💰 Budget Breakdown
A table with this many individual, delicate items requires careful attention throughout the event. Those small pastries and sweets can get stale or dry if left out for hours. Consider bringing them out in waves, replenishing the platters every 60-90 minutes to keep them fresh. Fresh flower arrangements will also need care, especially if the event is long or in a warm room. Ensure their bases have plenty of water, and give them a light misting halfway through if they start to look wilted.
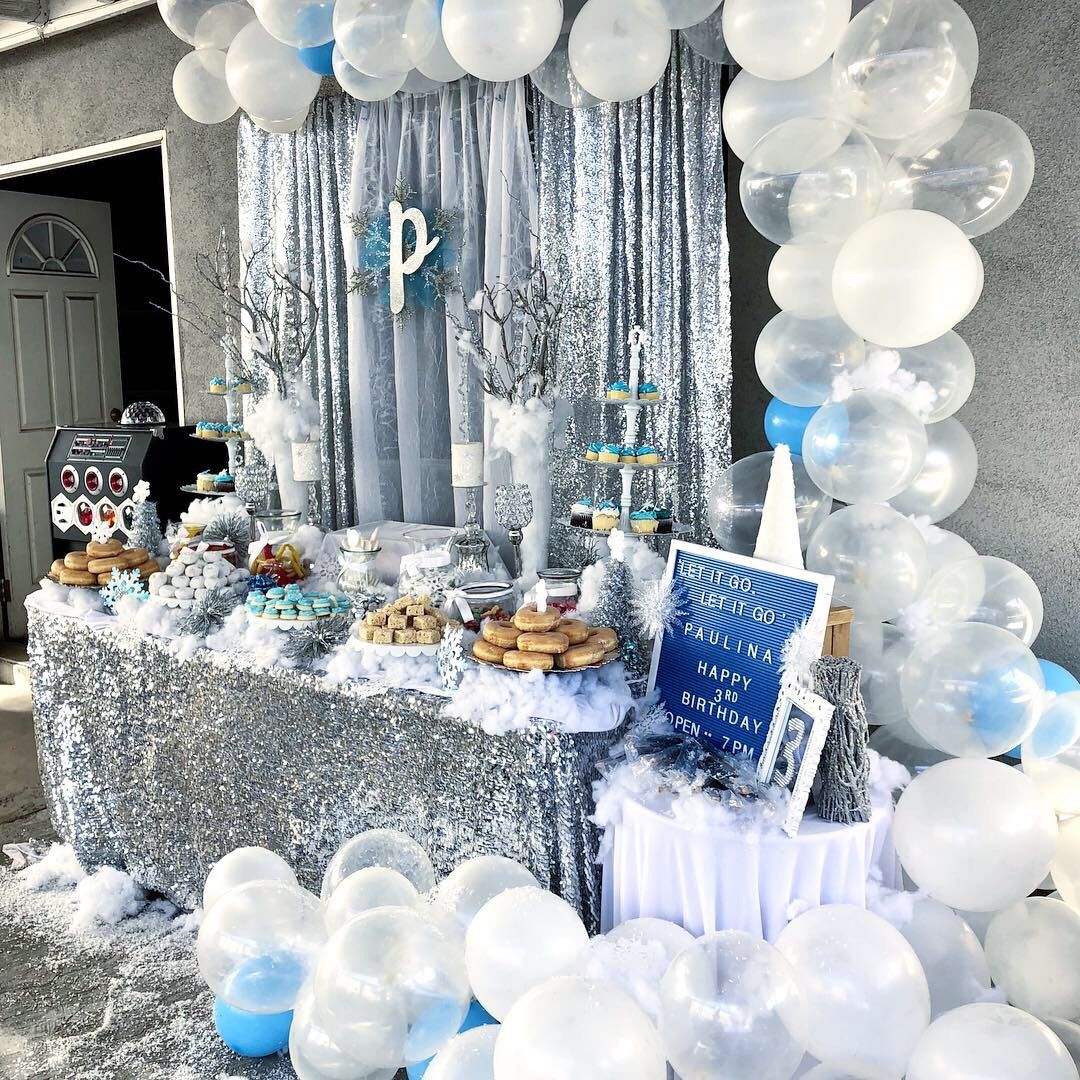
11. Winter Wonderland Table with a Silver Sequin Balloon Arch
A balloon arch looks intimidating, but it’s a very achievable DIY. Here’s the quick version for this look:
- You’ll need a balloon decorating strip (a clear plastic tape with holes), and an assortment of white, clear, and light blue balloons in various sizes.
- Inflate your balloons. For a dynamic look, inflate them to different sizes, from small 5-inch balloons to larger 12-inch ones.
- Pull the knotted ends of the balloons through the holes in the decorating strip, alternating colors and sizes to create a random, organic pattern.
- Once your strip is full, shape it into an arch and secure it to your backdrop or wall using command hooks or heavy-duty tape.
- Fill in any gaps with smaller balloons using glue dots for a full, professional look.
Total Time: 1.5 – 2 hours. Material Cost: $40 – $70.
12. Blush Pink and Gold Bar with Cane Webbing Screens
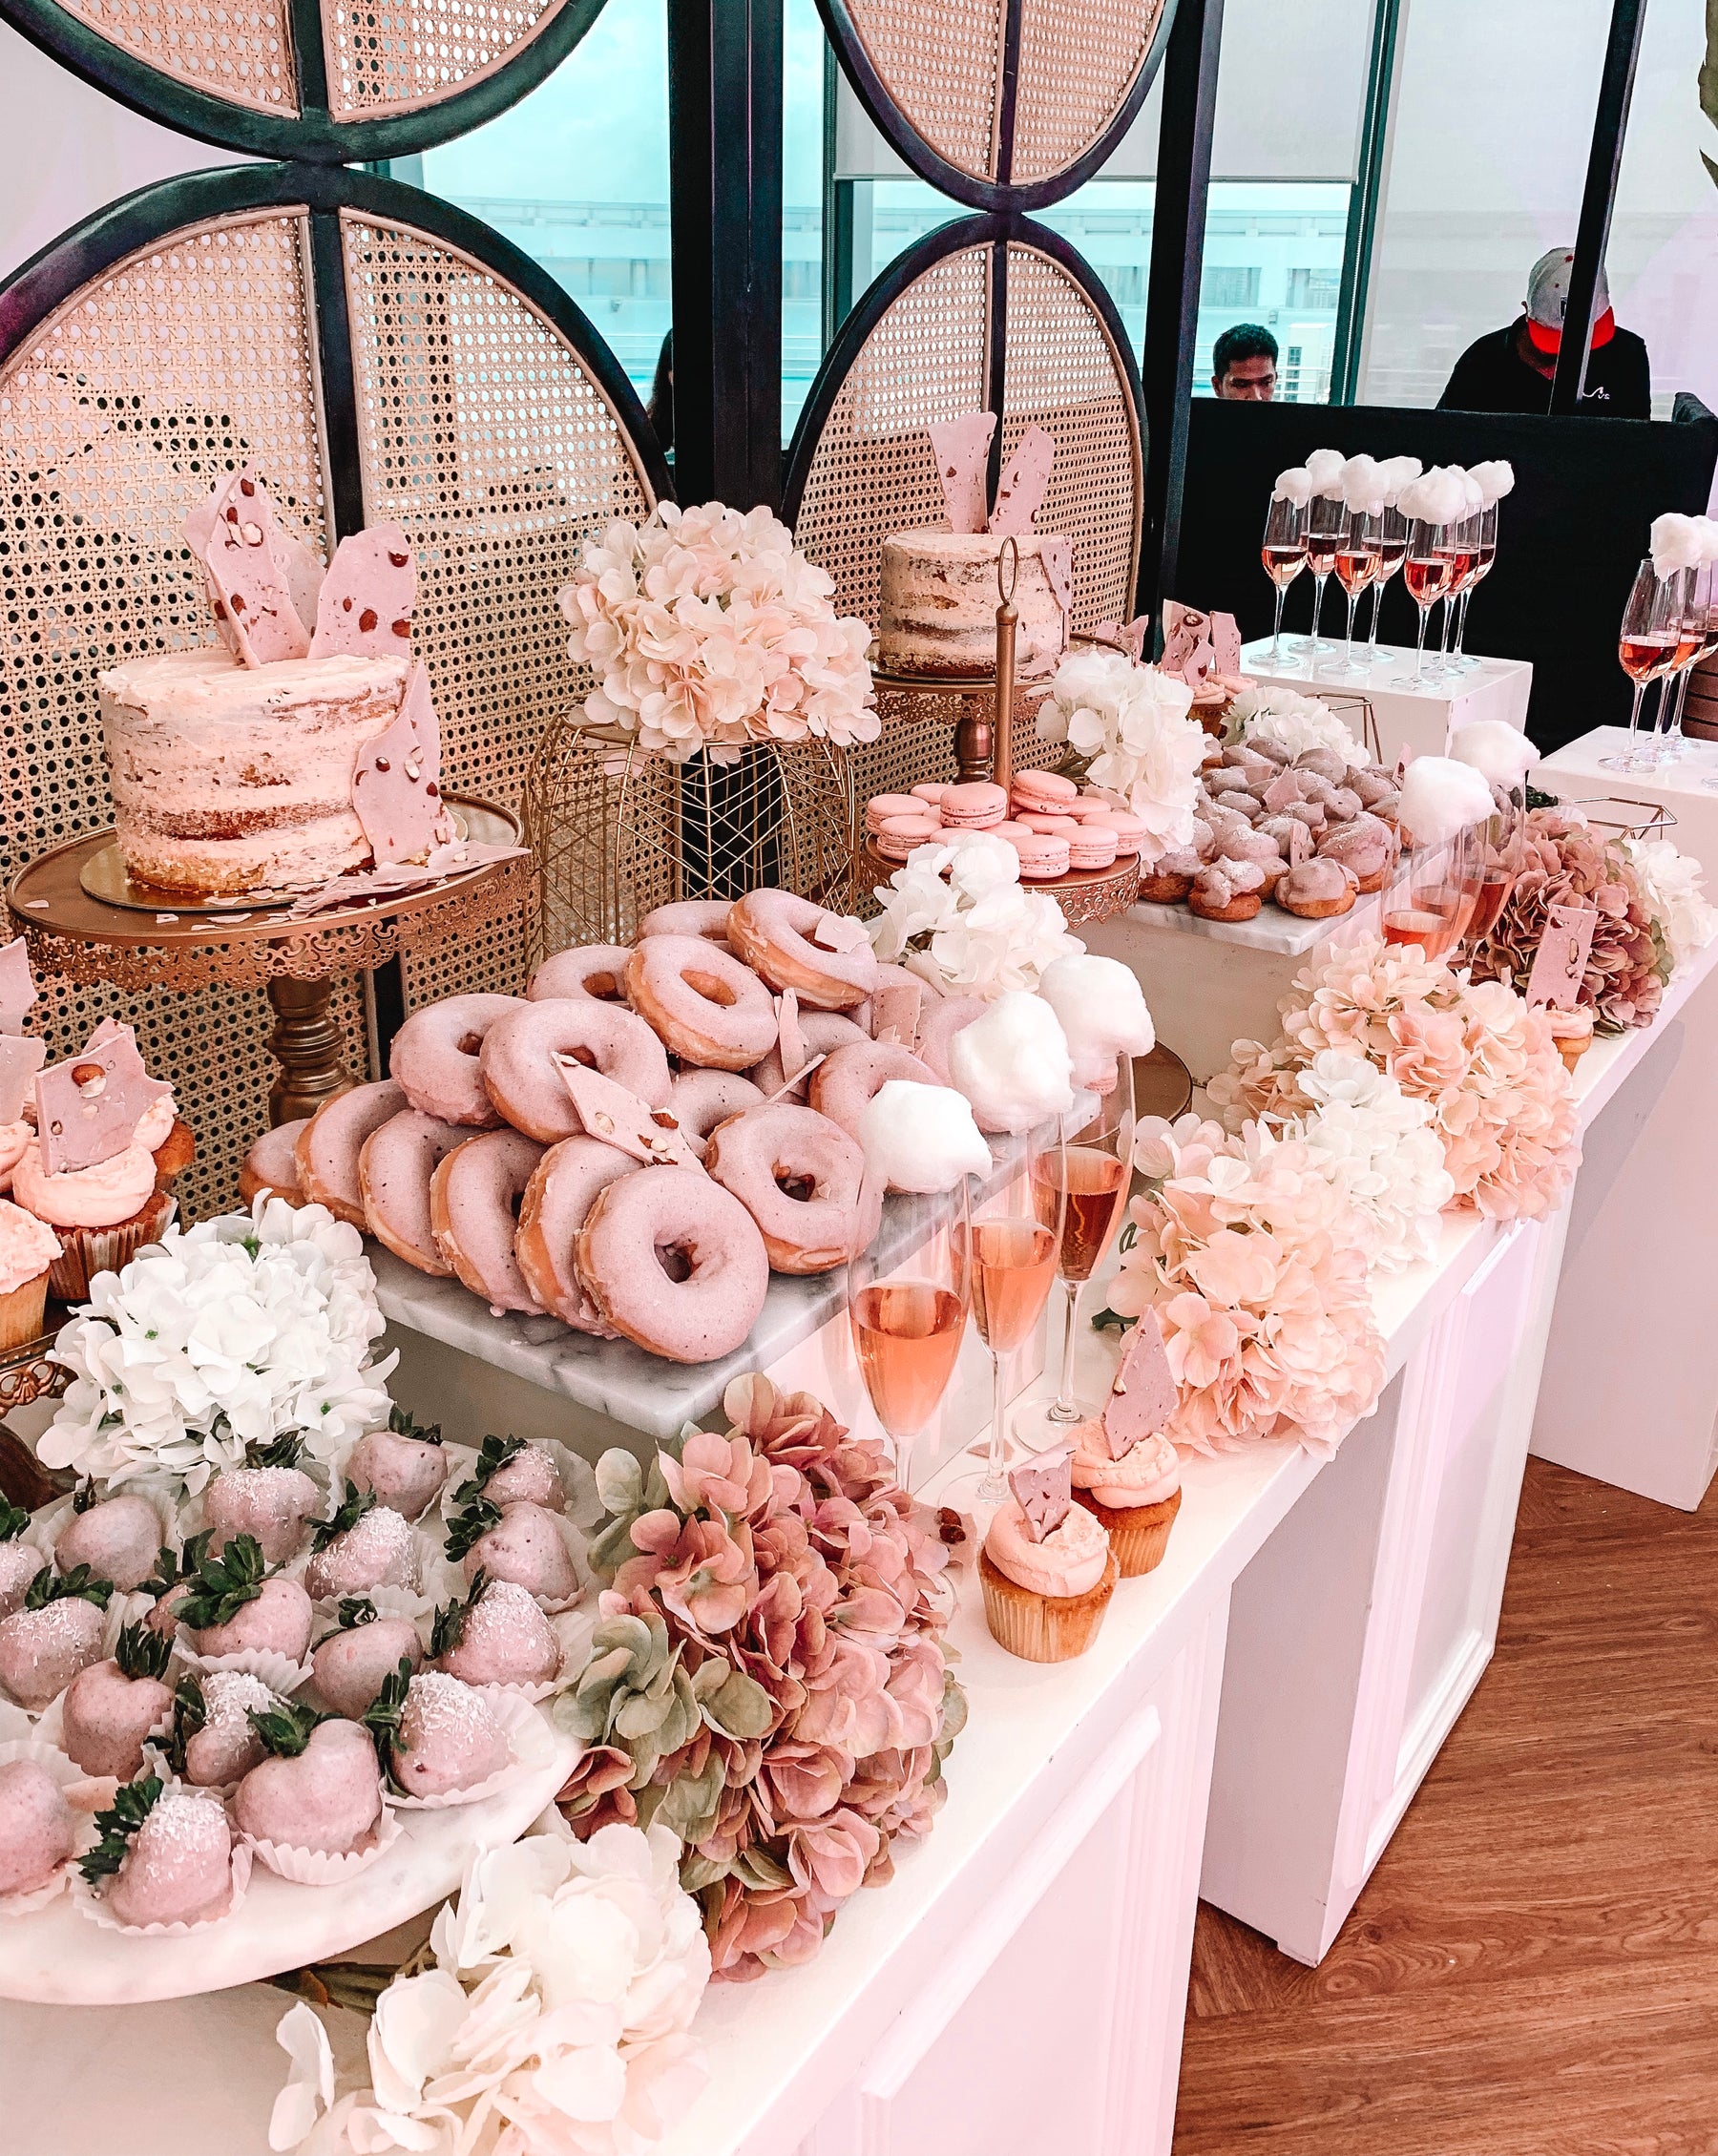
This is a high-end, luxurious look with a price tag to match, largely driven by the custom florals and sheer volume of desserts.
- Furniture (long table, decorative screens): $400 – $900
- Custom Desserts (cakes, donuts, macarons, etc.): $600 – $1,500
- Lush Floral Arrangements: $500 – $1,200
- Serveware (gold stands, flutes): $200 – $400
- TOTAL: $1,700 – $4,000
Budget alternative: Use a simple white table, focus on one type of dessert (like a donut wall), add two smaller floral arrangements, and find gold-painted cake stands from a craft store. This can bring the look into the $400-$700 range.
🔥 Trending Context
The success of this design lies in its sophisticated layering of texture and color. The cane webbing screens provide a natural, geometric texture that contrasts beautifully with the soft, lush florals and the sleek, smooth surfaces of the desserts. The color palette is tightly controlled—blush pink, cream, and gold—which allows the different shapes and textures to stand out without looking chaotic. The hint of black in the screen frames adds a modern, graphic punch that keeps the design from feeling overly sweet.
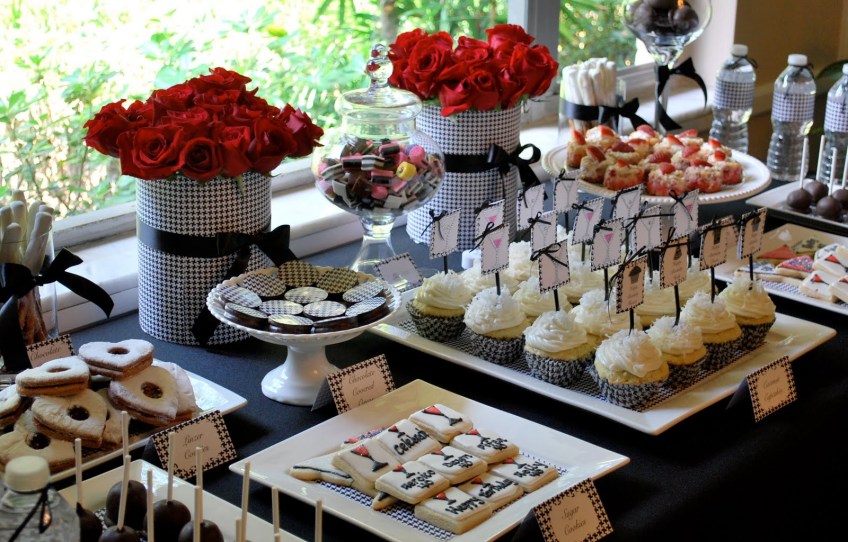
13. Classic Houndstooth and Red Rose Dessert Display
that makes this entire table work is the disciplined repetition of the houndstooth pattern. It’s the visual thread that ties everything together. From the vases to the cupcake wrappers to the water bottle labels, the consistent use of this classic, graphic pattern creates a powerful sense of cohesion. If you removed the houndstooth, you’d just have a collection of red, black, and white items. With it, you have a fully realized, sophisticated theme that feels intentional and incredibly chic. It proves that a strong pattern is more powerful than a strong color. For a different but equally cohesive look using pattern and wood, see Idea #20.
💡 Designer Tip
The visual formula here is a timeless classic: 50% Bold Pattern + 30% Solid Neutrals + 20% Dramatic Accent Color. The black and white houndstooth provides the bold, graphic base. The solid neutrals are the black tablecloth and the white frosting on the sweets, which give the eye a place to rest. The final 20% is that burst of vibrant, passionate red from the roses, which injects life and energy into the monochromatic scheme. You could swap the red for a deep emerald green or a bright yellow for a completely different mood.
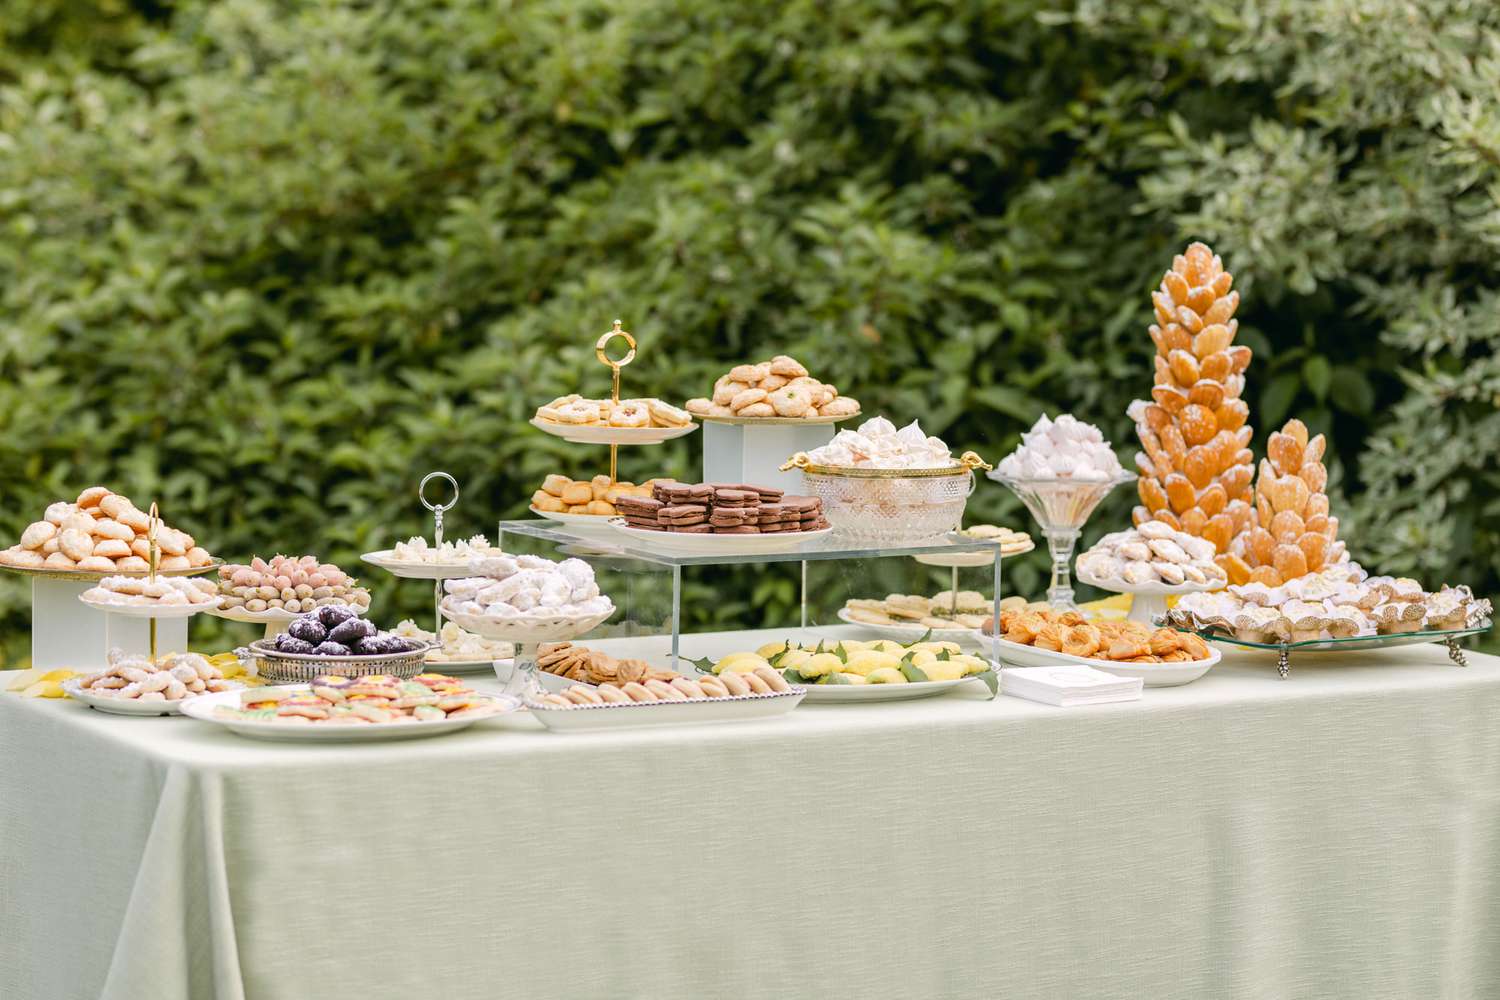
14. Abundant Cookie and Pastry Table with Acrylic Risers
To create a sense of abundance without breaking the bank, use clear acrylic risers of varying heights. They are the secret weapon of professional caterers. Because they are transparent, they don’t add visual clutter to the table. Instead, they create levels and dimension, making it look like you have far more food than you actually do. By elevating platters in the back, you ensure every single item is visible, from the front of the table to the back. A set of 3-5 risers is a fantastic investment for anyone who loves to host.
⚠️ Real Talk
This long-table, abundant style is ideal for events with 30 or more guests, where you need to display a large quantity and variety of items. The table itself should be at least 6-8 feet long to avoid looking cramped. This setup works well in a spacious area with a neutral backdrop, like the green hedge shown, which allows the desserts themselves to be the main focus. If your space is smaller, you can adapt this by using a round table and arranging the risers in a circular, tiered fashion, creating a ‘dessert tower’ effect.
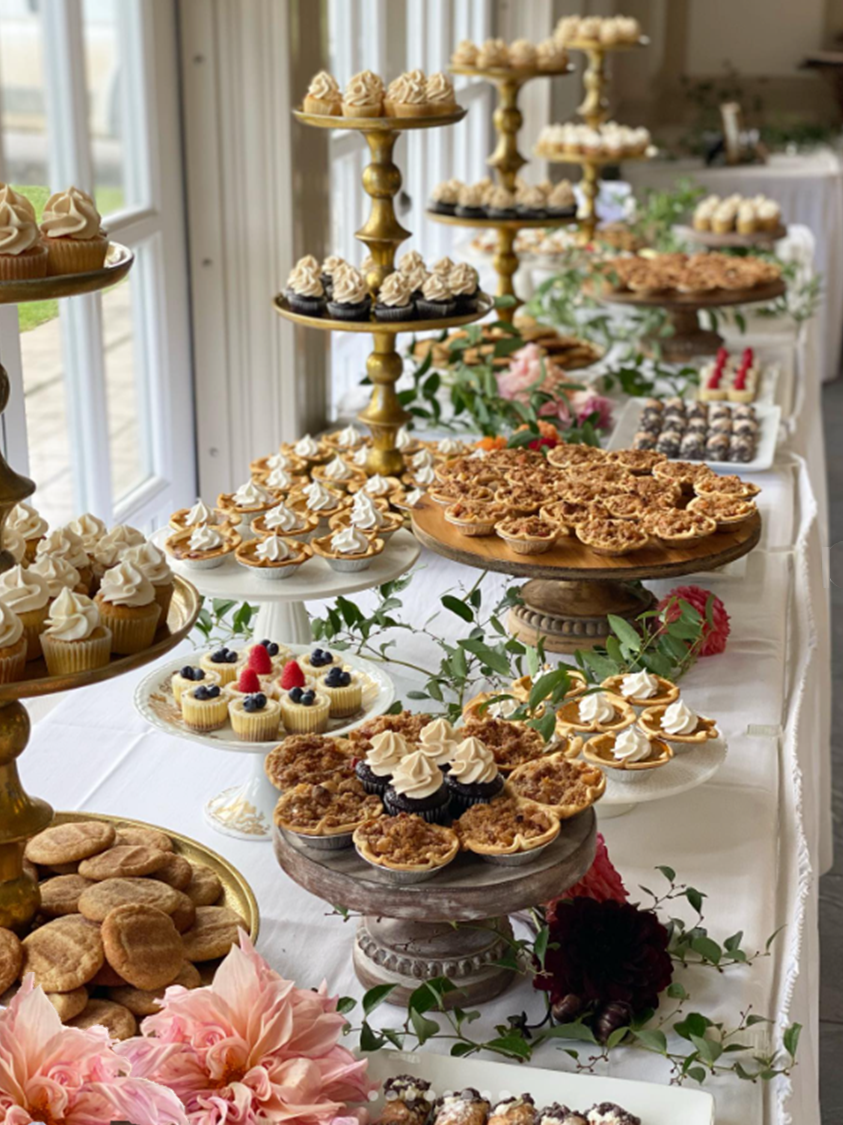
15. Autumnal Dessert Spread with Rustic Wooden Pedestals
This design works because it masterfully mixes textures and heights. The sleek, metallic gold of the multi-tiered stands provides a touch of modern elegance, which is beautifully contrasted by the rough, natural texture of the distressed wooden pedestals. This high-low mix feels curated and personal. Furthermore, the sheer variety of heights—from low platters to tall, three-tiered stands—keeps the eye moving and creates a landscape of treats, making the table feel incredibly generous and visually exciting.
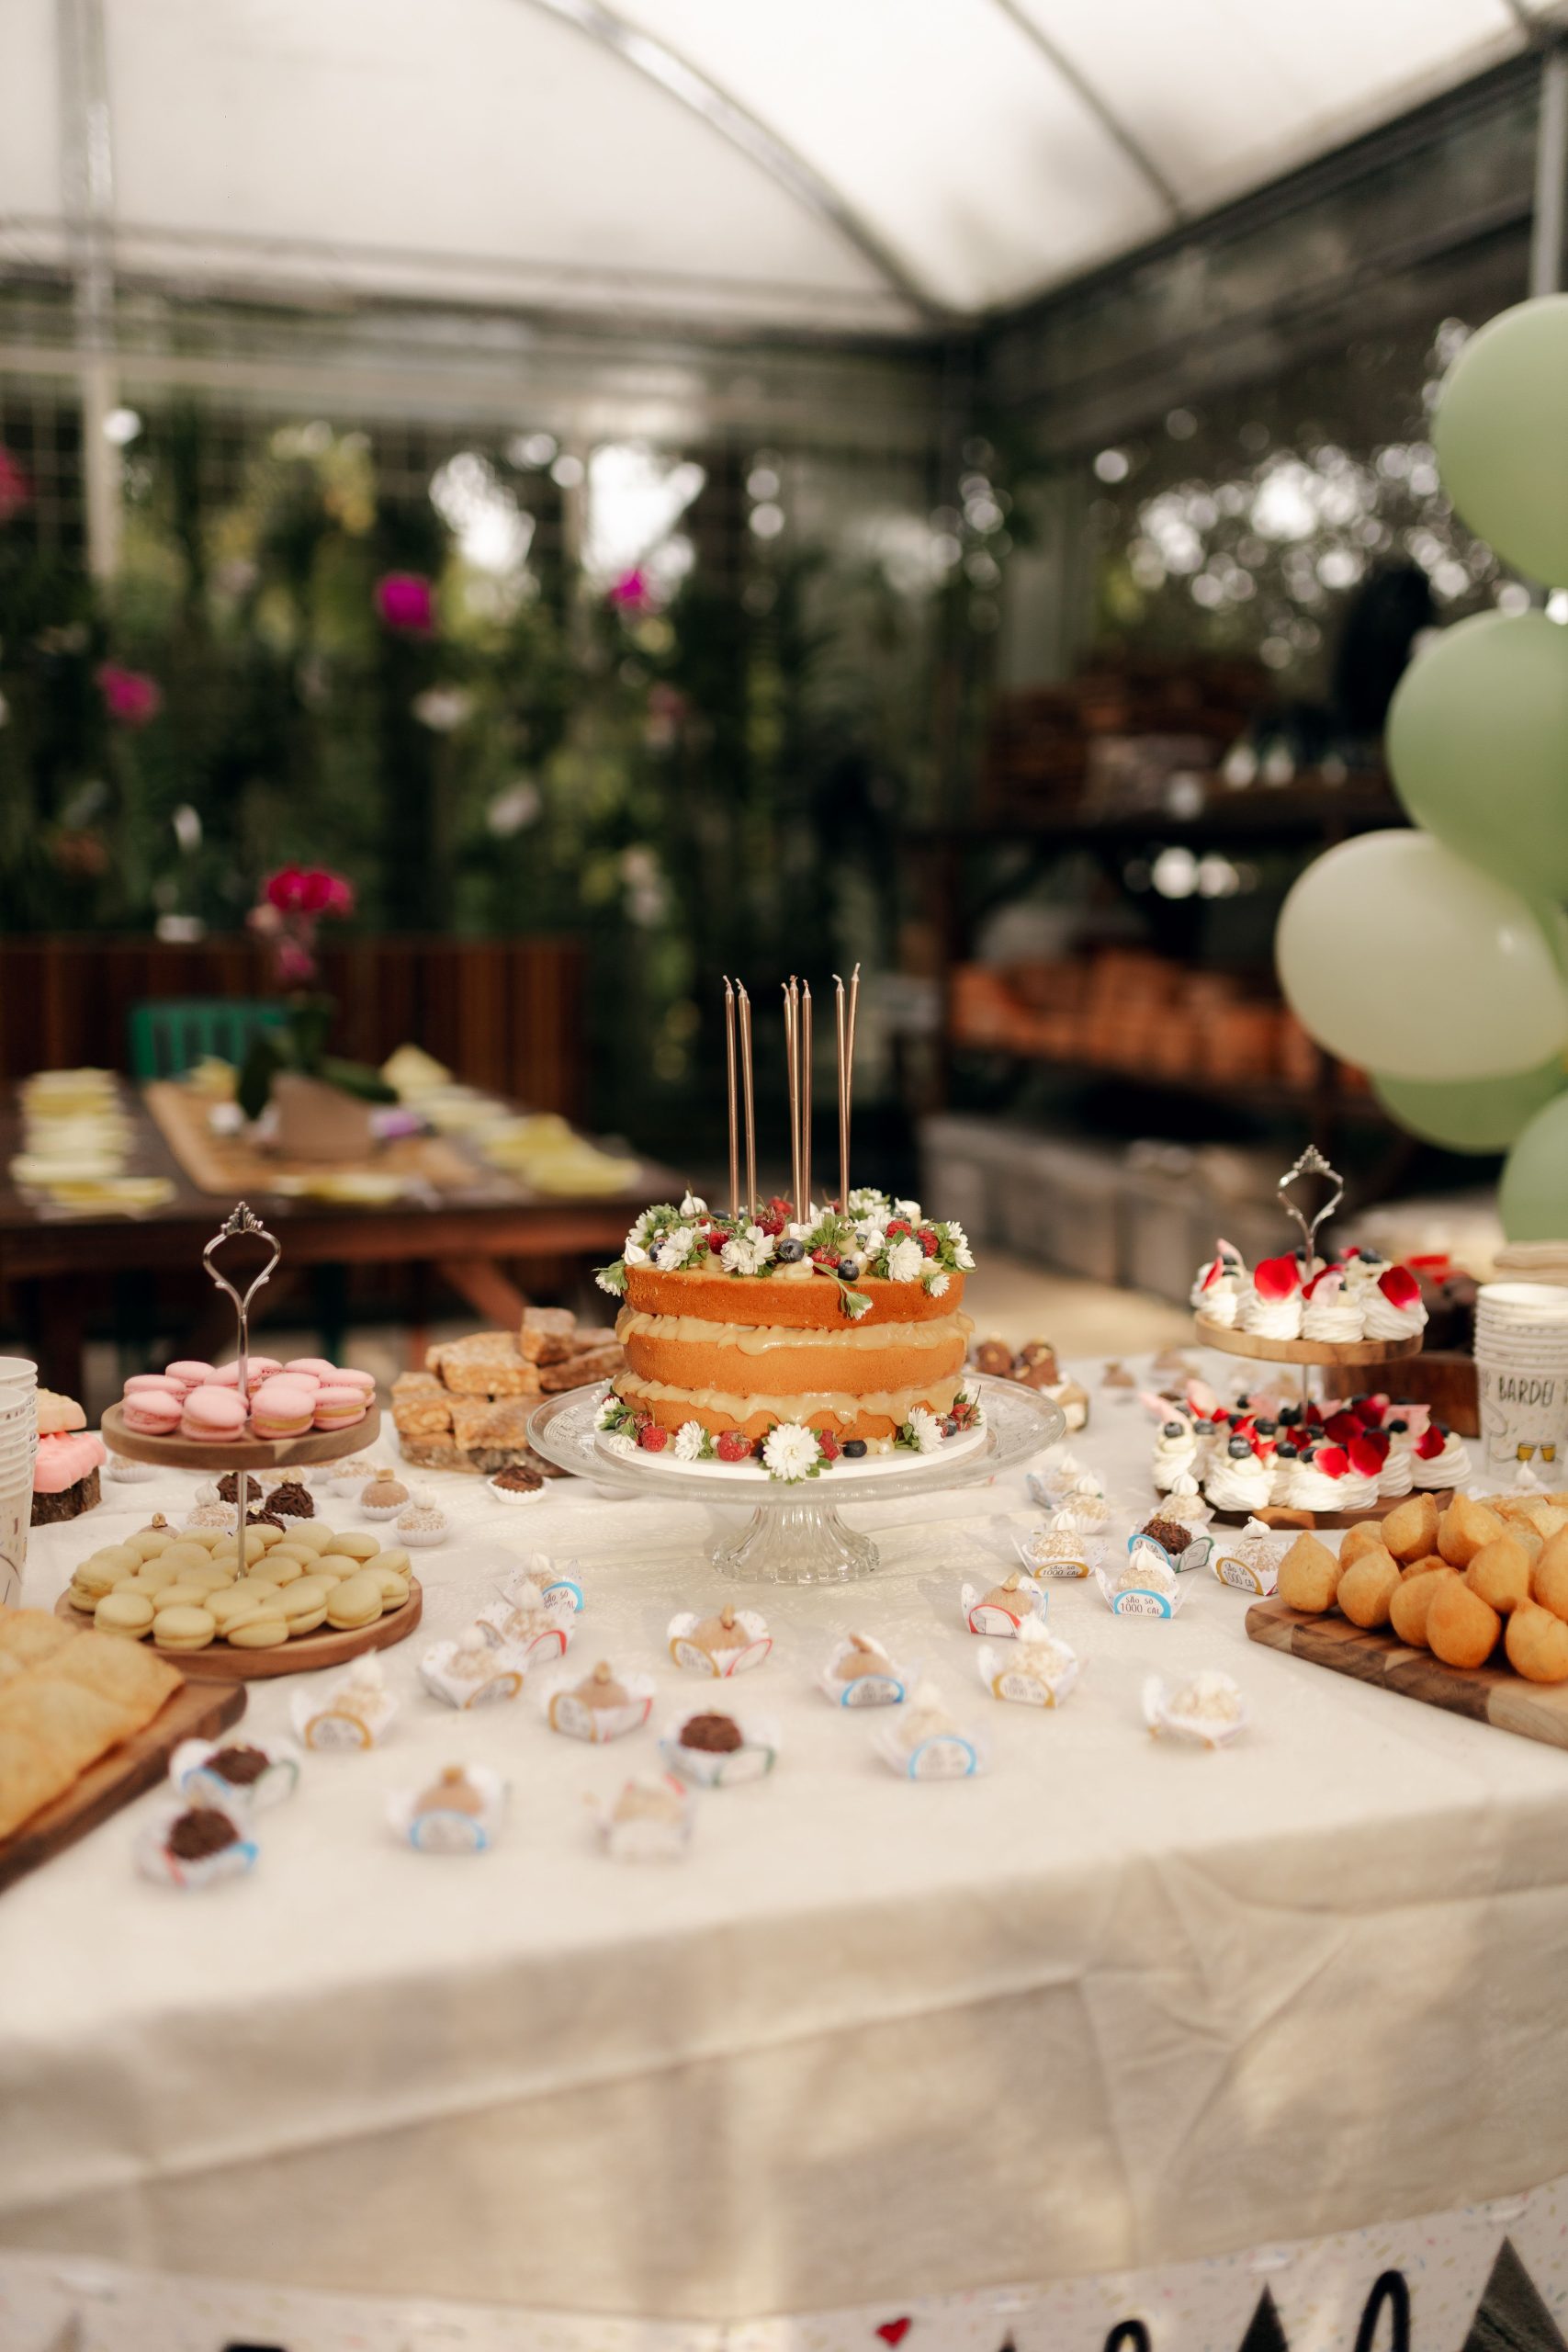
16. Naked Cake Centerpiece with Macarons and Meringues
Naked cakes are stunning, but their lack of outer frosting makes them prone to drying out much faster than a traditional cake. This cake should be one of the last things you set out on the table, ideally no more than 60-90 minutes before it’s scheduled to be cut. The same goes for the macarons and meringues, which can become soft or sticky in humid air. Keep them in an airtight container until just before the guests arrive to ensure they stay crisp and delicious.
📐 Style Math
The star of this show is the two-tiered naked cake, which can be pricey from a bakery. To get this look for less, create the illusion of a tiered cake. Buy two single-layer cakes from a grocery store bakery—one 8-inch and one 6-inch. Place the larger cake on the table, then use a small, sturdy box or can hidden behind it to elevate the smaller cake. Artfully arrange berries and a few flower sprigs to hide the gap. The effect is nearly identical for a fraction of the cost. Fill out the table with affordable store-bought meringues and cookies.
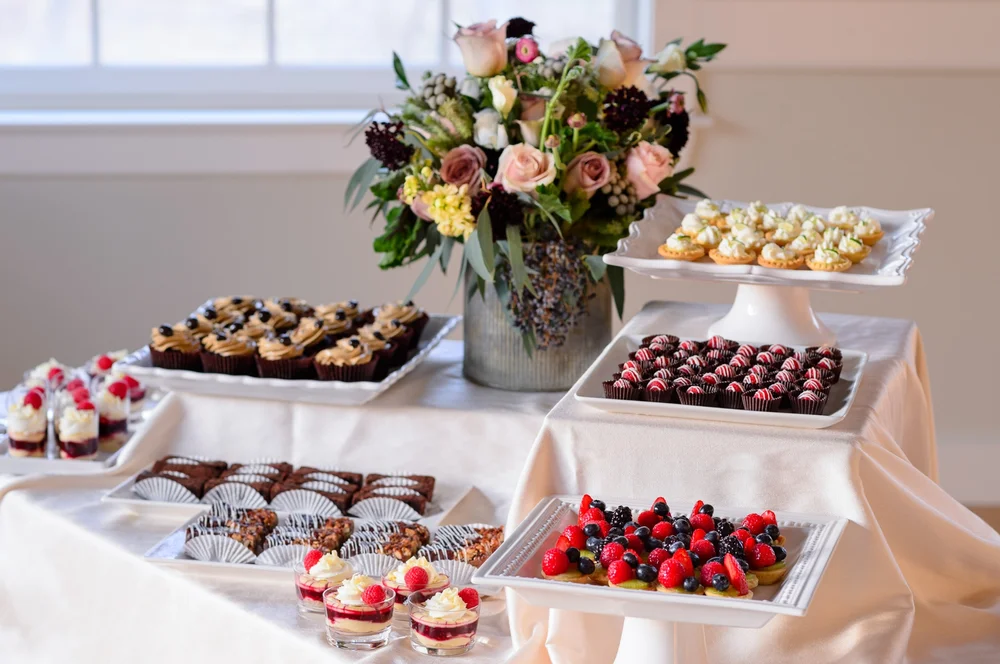
17. Elegant Dessert Buffet with a Grand Floral Centerpiece
When arranging a long buffet-style dessert table, symmetry is your friend. Place your largest, most impactful item—in this case, the grand floral arrangement—directly in the center. Then, arrange your platters symmetrically on either side. For example, if you have a tiered stand of cupcakes on the left, place another platter of similar height and visual weight (like brownies or tarts) in the corresponding position on the right. This creates a sense of balance and order that is incredibly pleasing to the eye and makes the spread look intentional and professional.
📏 Scale Guide
that elevates this from a simple dessert table to a true showpiece is the large, professional-style floral centerpiece. If you removed it, you’d have a lovely collection of treats. But with the arrangement, you have an undeniable focal point that adds height, color, and a sense of luxury. It acts as an anchor for the entire display, drawing the eye in and setting a sophisticated, celebratory tone. It proves that sometimes, one spectacular non-edible element can be the most important ingredient on the table.
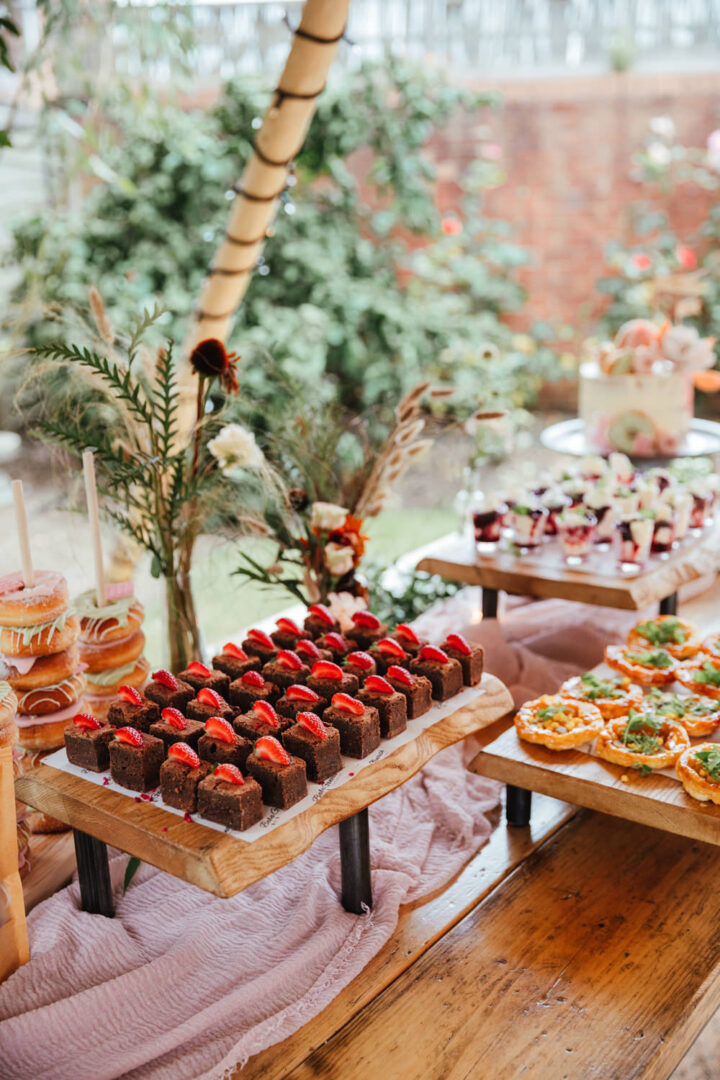
18. Rustic Outdoor Table with Live-Edge Wood and Donuts
Creating those appealing stacks of donuts is simpler than it looks and adds great height to a table. Here’s how:
- You will need a wooden dowel (about 1/2 to 3/4 inch thick) and a flat wooden base (a 4×4 inch square of plywood works well).
- Drill a hole in the center of the wooden base that is the same diameter as your dowel.
- Secure the dowel into the base using wood glue, ensuring it stands perfectly straight. Let it dry completely.
- Once dry, you can simply slide the donuts down the dowel to create a tower.
- For added stability on an outdoor table, use a small bit of museum wax or double-sided tape on the bottom of the base.
This simple DIY stand costs less than $10 in materials. For a more rustic version, as seen in Idea #27, use natural wood slices as stands.
✅ Before You Start
This rustic, natural look is gorgeous, but serving food directly on wooden surfaces requires some thought. Ensure the live-edge risers are treated with a food-safe sealant. If you’re unsure, or if it’s a rental item, place a small piece of parchment paper or a clear food-safe acetate sheet under the food. This protects your guests and makes cleanup a breeze. Also, brownies and donuts can attract bees and other insects, especially outdoors. Consider setting up just before guests arrive to minimize exposure.
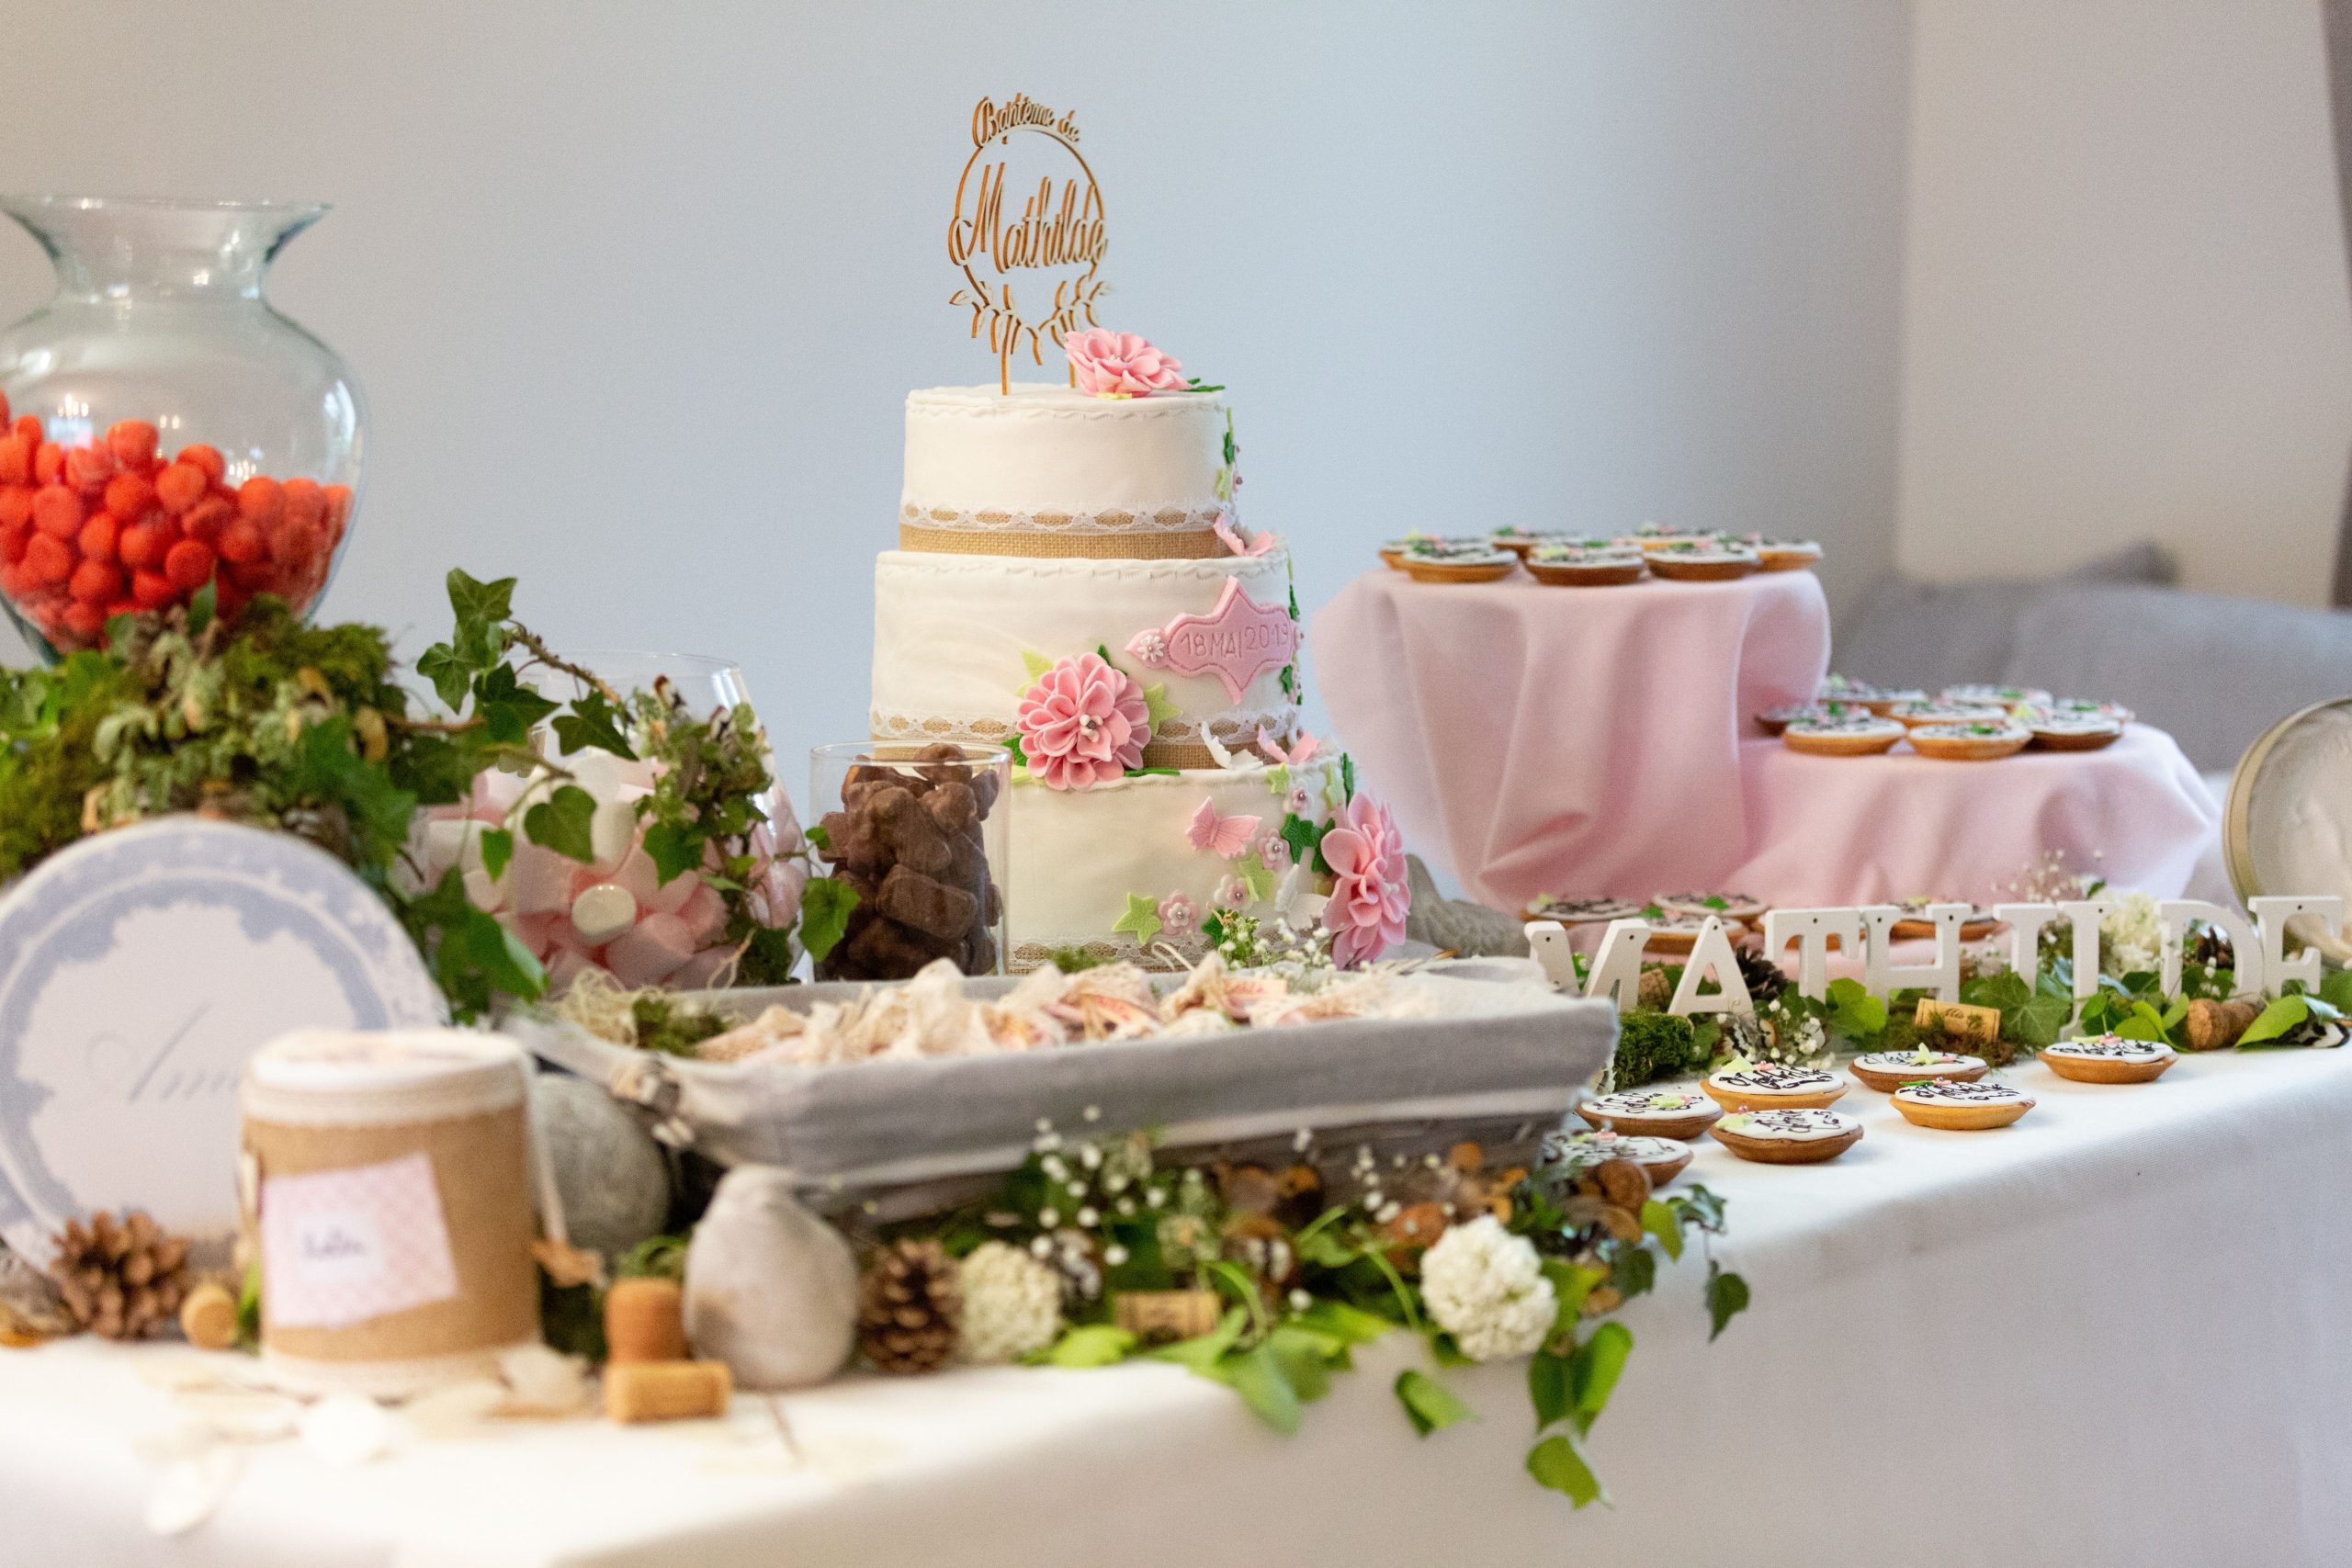
19. Natural Dessert Display with Pink Floral Cake and Ivy
Before you commit to incorporating natural foliage like ivy and moss, check these points:
- Source: Are you using real or high-quality faux foliage? If real, ensure it’s from a pesticide-free source and has been thoroughly cleaned to remove dirt and insects. Some plants, like certain types of ivy, can be toxic if ingested, so keep them away from direct contact with food.
- Allergies: Check if any of your guests have potent allergies to mold or specific plants, especially when using real moss or foliage indoors.
- Staining: Real moss and ivy can release moisture and pigments that may stain a white tablecloth. Use a clear plastic liner underneath the foliage to protect your linens.
🔧 How-To Brief
This sweet, natural aesthetic follows a simple visual recipe: 60% Rustic & Natural Textures + 30% Soft Pastels + 10% Bright Pop. The rustic/natural part comes from the burlap trim, the moss, and the ivy, providing an earthy base. The soft pastel is the dominant pink on the cake and display stands. The final 10% is that surprising pop of bright red from the candy jar, which adds a touch of playfulness and keeps the eye engaged. This formula prevents the rustic elements from looking too drab and the pink from looking too saccharine.
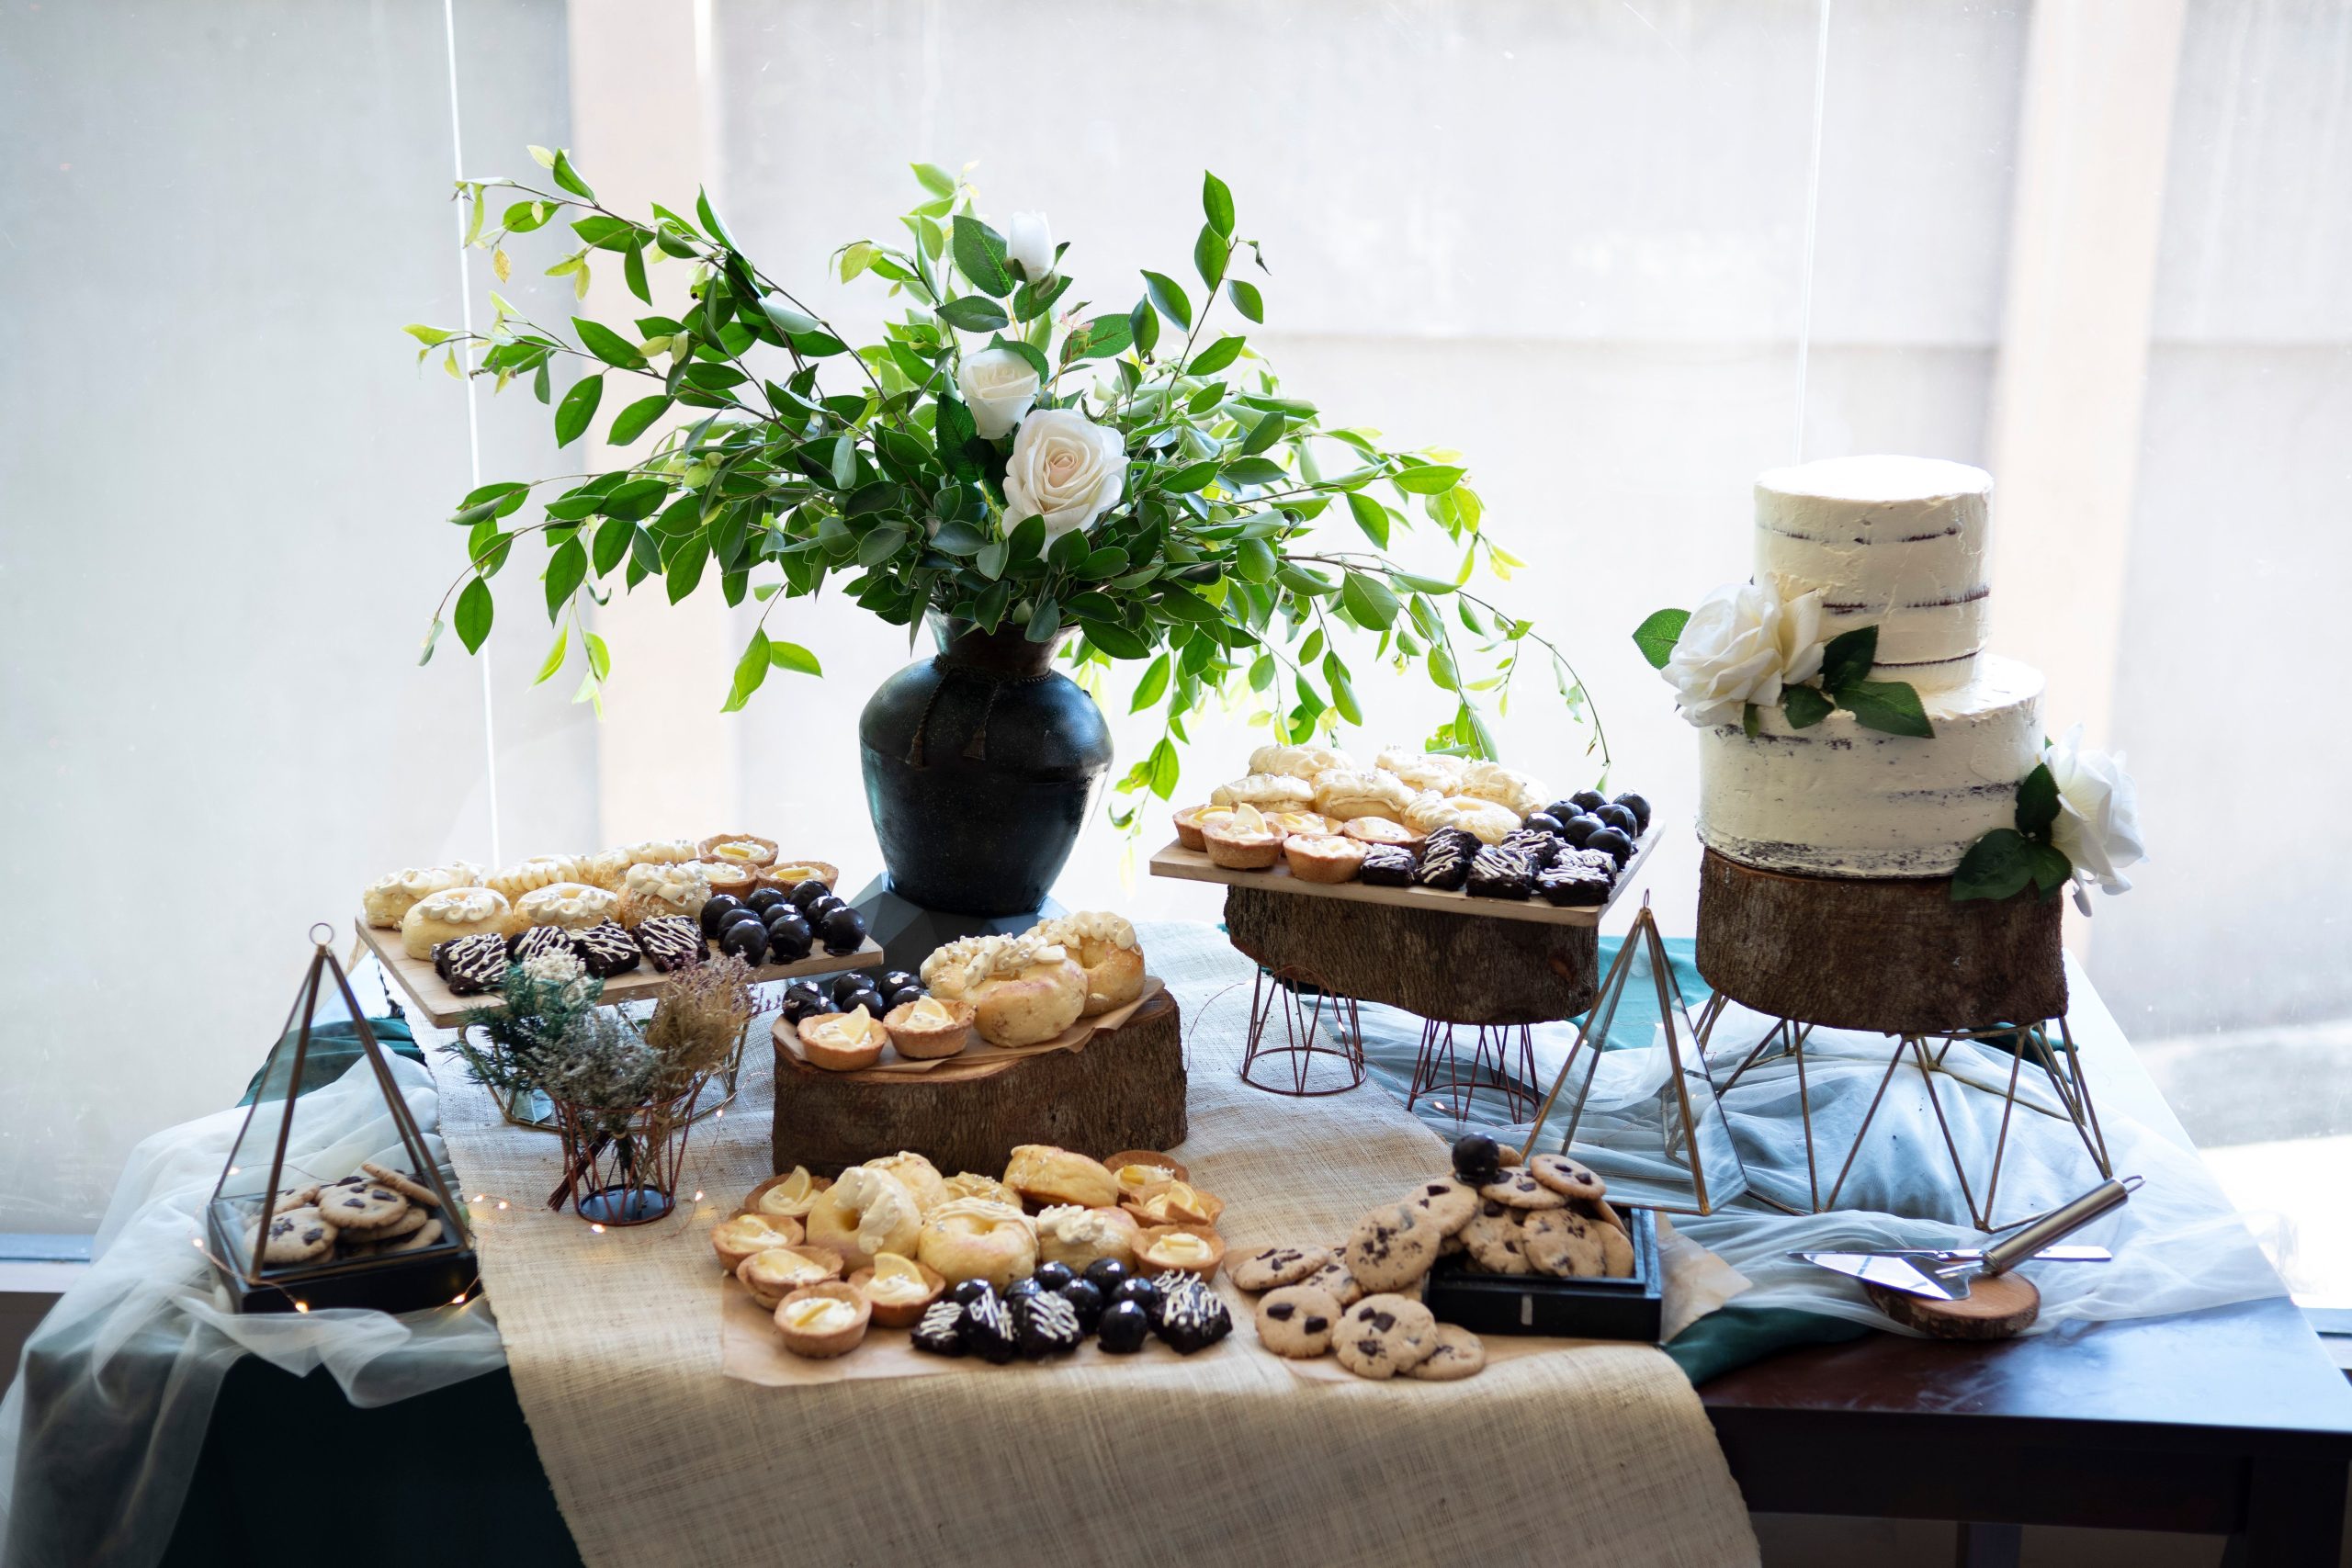
20. Refined Rustic Table with Forest Green and Wooden Risers
The refined feeling of this rustic table comes from the tension between organic and polished elements. The rough, natural texture of the wooden tree stump risers and serving planks screams rustic. However, this is balanced by the crisp, creamy white of the cake and linens, the classic elegance of the white roses, and the modern touch of the geometric gold terrarium. This thoughtful combination elevates the look beyond a simple woodland theme into something much more sophisticated. The deep forest green tablecloth grounds the entire composition, adding depth and richness. The balance in this setup is similar to the pattern and color balance seen in Idea #13.
🎯 What Makes It Work
This look achieves a high-end feel by focusing on quality materials and thoughtful layering. It’s more about curation than quantity.
- Table Linens (forest green tablecloth, cream runner): $80 – $150
- Serveware (tree stump risers, wooden planks): $150 – $300 (or DIY for less)
- Central Cake (two-tier): $150 – $250
- Assorted Pastries: $100 – $200
- Decor (vases, roses, terrarium): $70 – $150
- TOTAL: $550 – $1,050
Budget alternative: Use a simple green plastic tablecloth, make your own tree stump risers from found wood, and use a single-tier grocery store cake adorned with a few fresh roses. This can bring the cost down to the $200-$300 range.
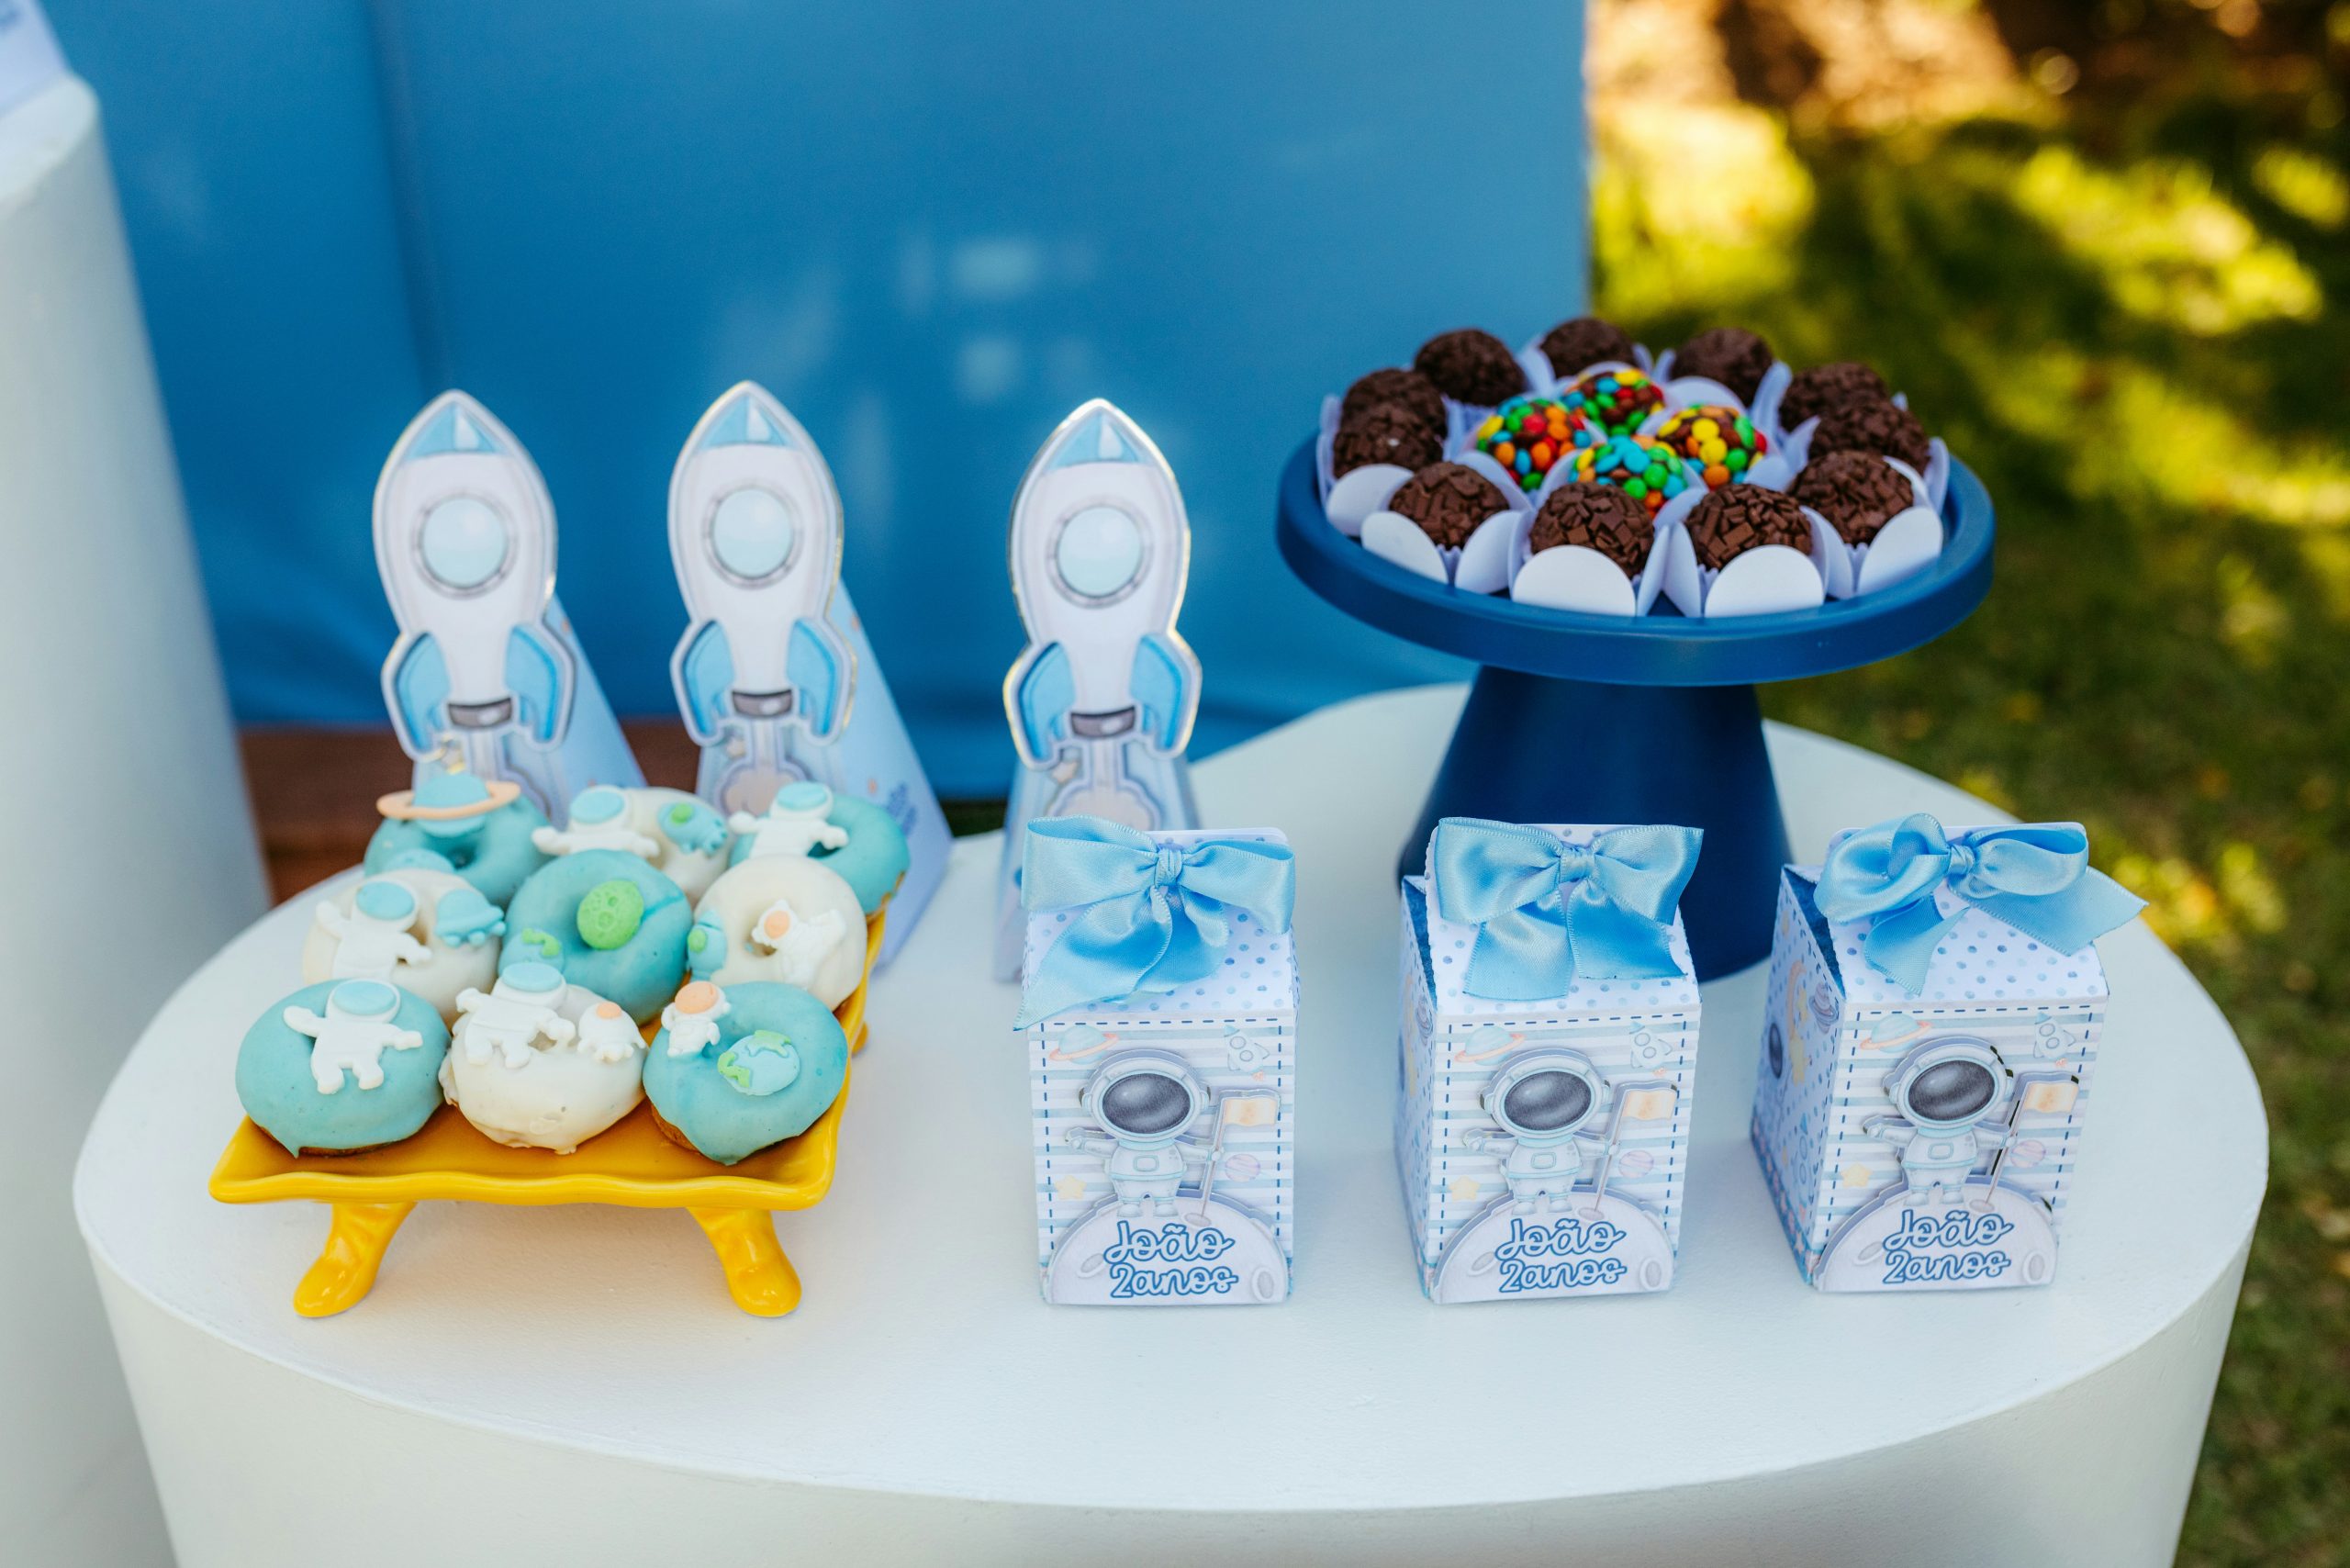
21. Playful Space-Themed Table with Rocket Cutouts
The single element that makes this theme instantly recognizable and fun is the simple cardboard rocket cutouts. They are inexpensive, easy to make or buy, and immediately establish the space theme without needing over-the-top decorations. They provide height and a graphic element that frames the desserts perfectly. Even if the treats themselves were less decorated, the rockets alone would carry the theme. It’s a brilliant example of how a few well-placed, on-theme props can do all the heavy lifting for a child’s party display. The playful nature here is a great contrast to the more whimsical approach in Idea #5.
💸 Get This Look For Less
This is a perfect example of a small-scale, high-impact design. The entire setup is contained on a single round pedestal table, likely no more than 30-36 inches in diameter. This makes it ideal for smaller rooms, apartment living, or as a dedicated kids’ table at a larger event. It doesn’t require a long wall or a huge amount of floor space. To make it feel substantial, ensure it’s placed in a well-lit area where it can be a clear focal point, rather than pushed into a corner.
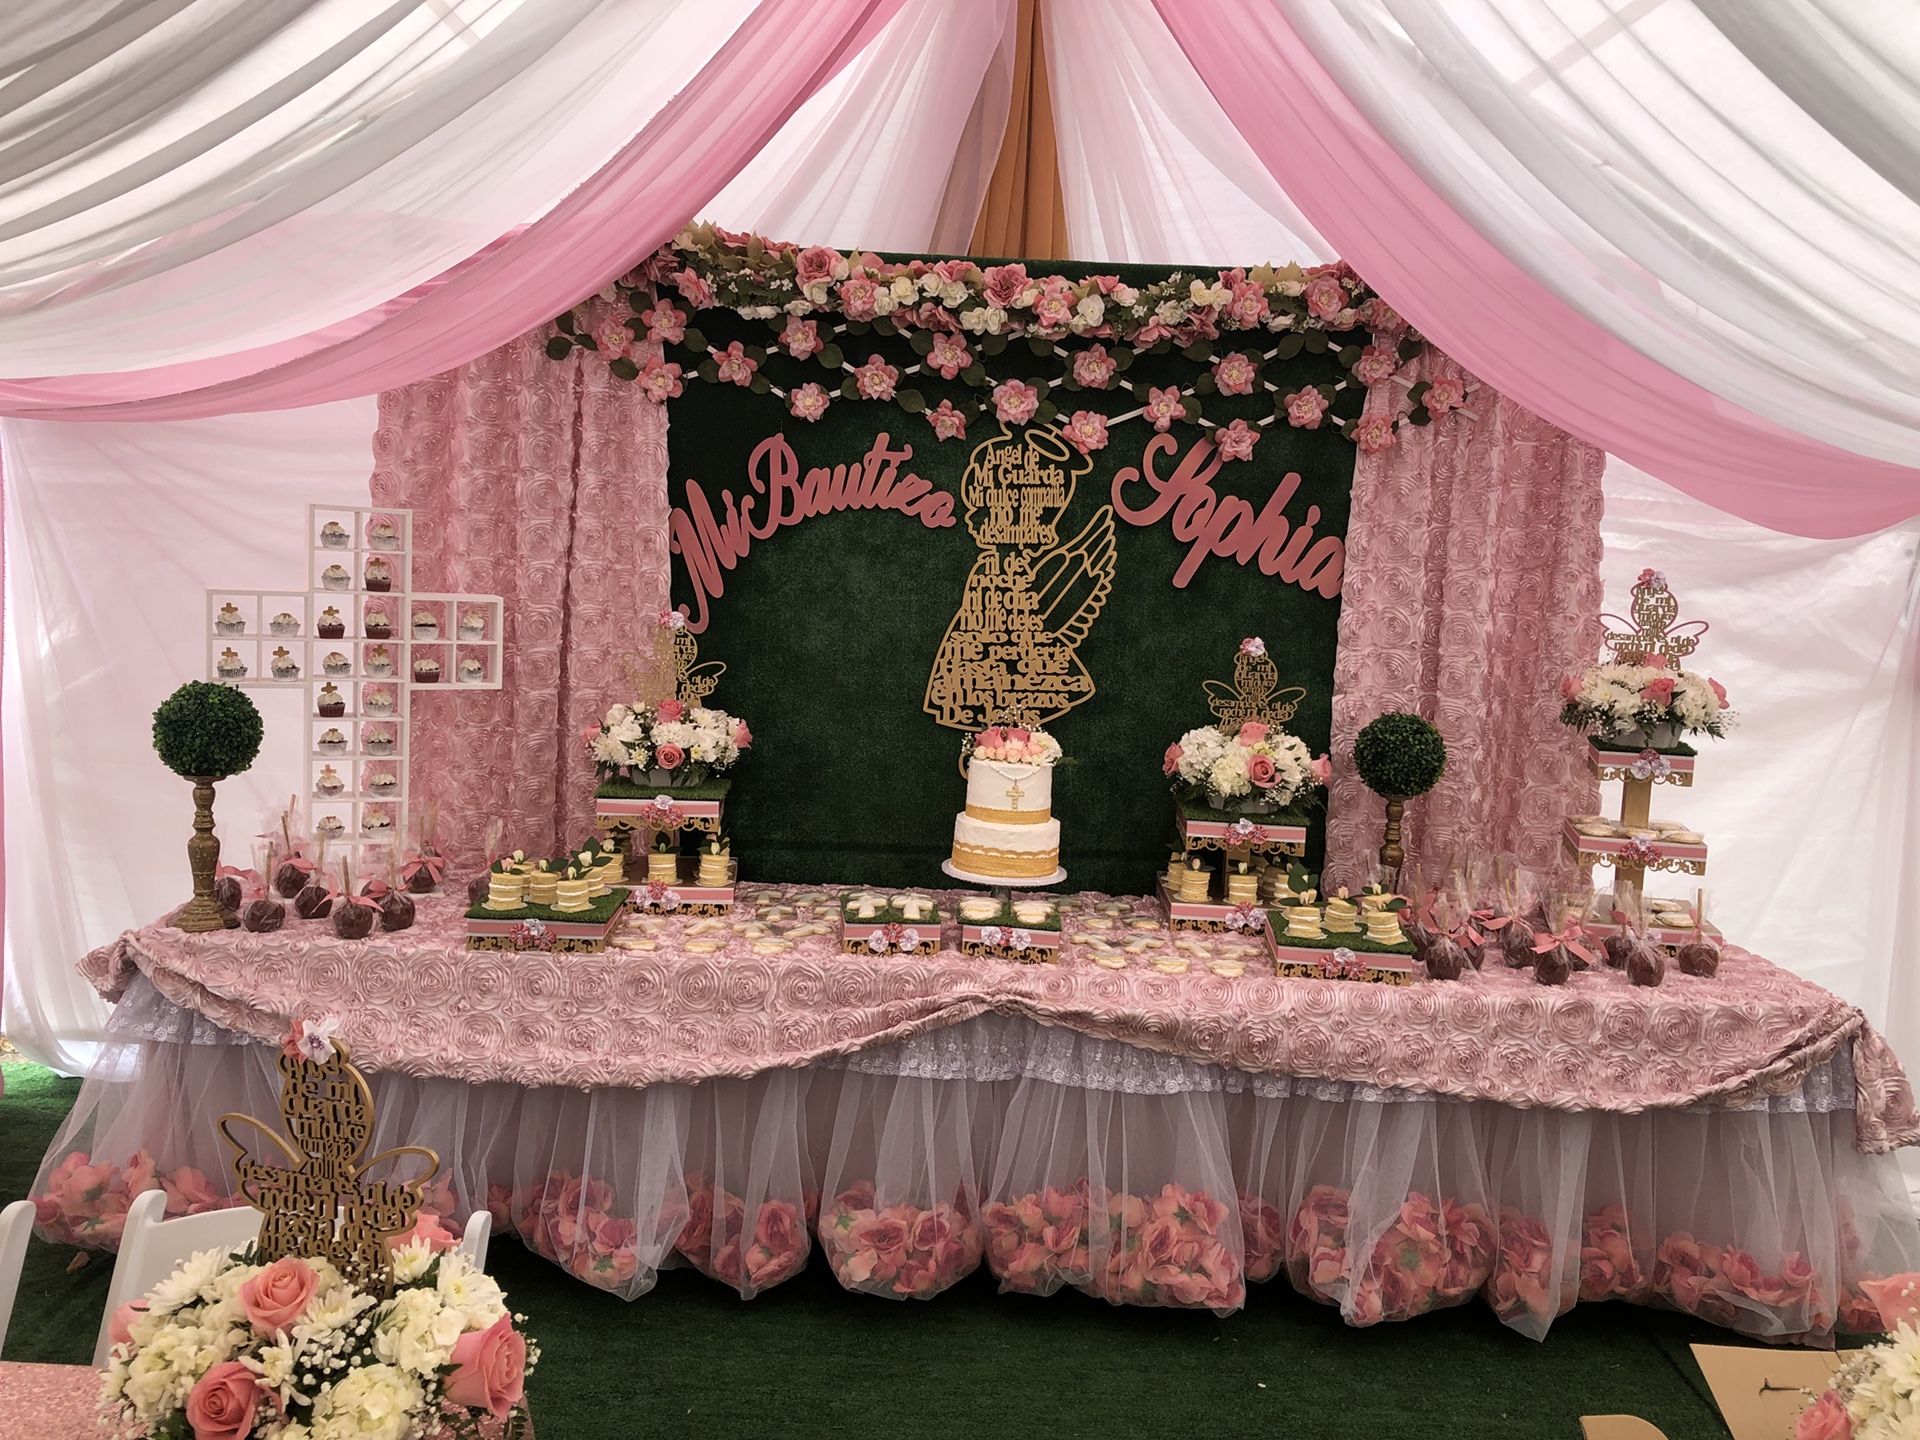
22. Affordable and Adaptable Occasion Dessert Table
When you’re starting with a basic concept, the easiest way to create a professional look is through a unified color palette. Choose two or three main colors and ensure every element, from the tablecloth to the frosting to any decorative ribbons, fits within that scheme. This simple discipline will make even the most budget-friendly setup look cohesive and thoughtfully designed. Use cake stands and platters of varying heights to add dimension and prevent the table from looking flat and uninspired.
💰 Budget Breakdown
This is the perfect starting point for any occasion because of its flexibility. You can find all the necessary components at incredibly affordable prices. Start with a basic folding table ($40 at Walmart or Target) and a simple fabric tablecloth ($15). Build a collection of white ceramic serving platters and cake stands from places like IKEA or thrift stores—they are timeless and will work for any theme. The key is to then add pops of theme-specific color with inexpensive items like paper napkins, balloons, or custom-printed cupcake toppers from Etsy.
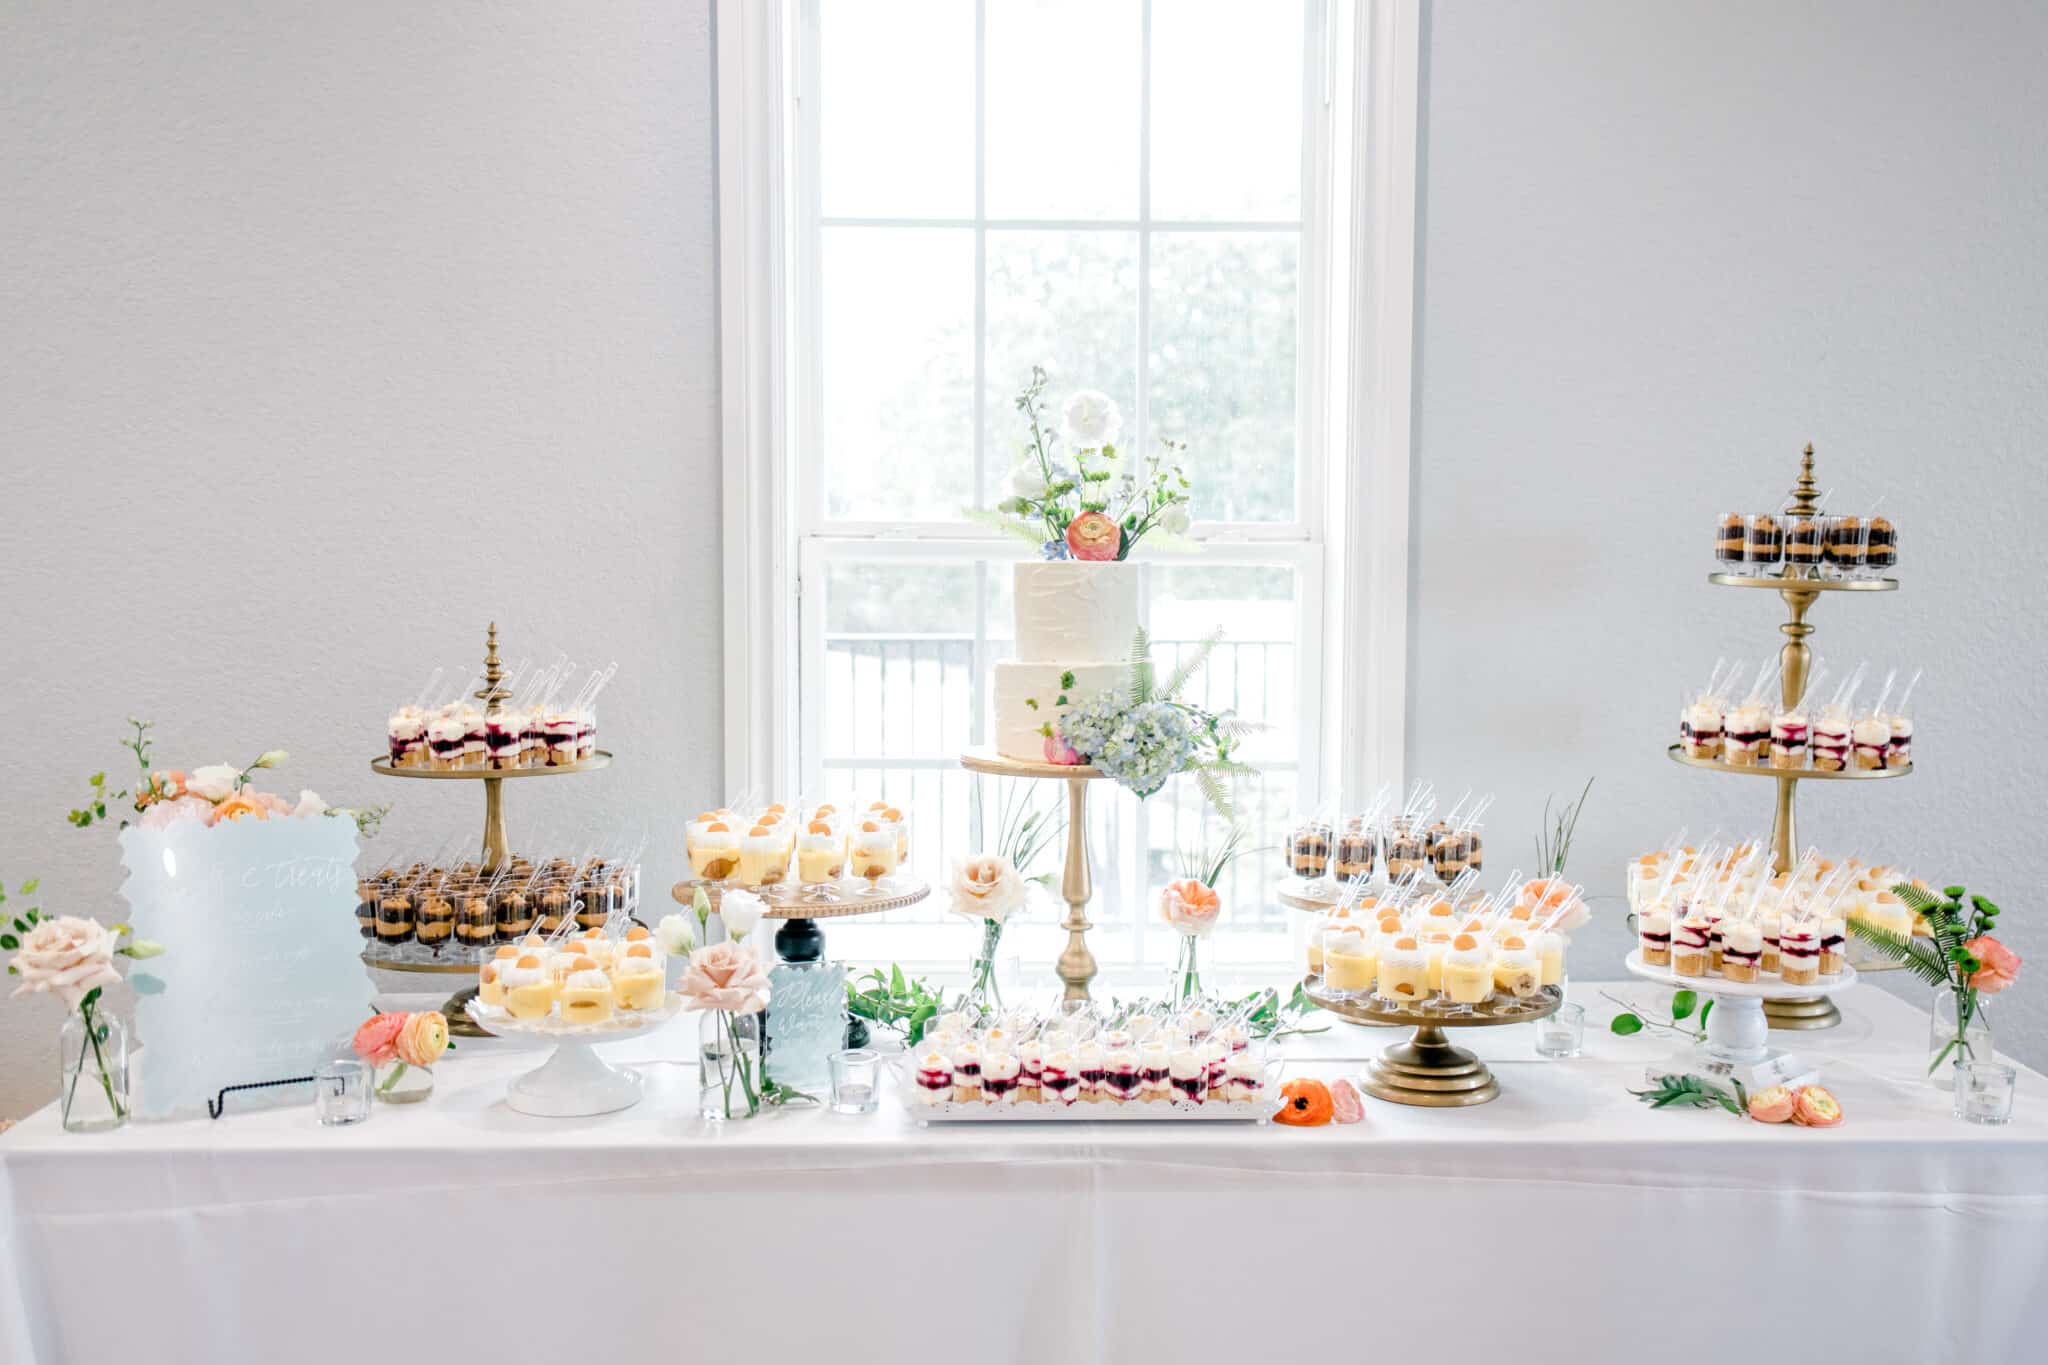
23. Bright and Airy Dessert Table with Gold Tiered Stands
This setup achieves an airy, elegant feel with a simple formula: 70% Bright White + 20% Metallic Sheen + 10% Soft Color. The bright white comes from the tablecloth, cake, and stone stand, creating a clean canvas that reflects the natural light from the window. The metallic sheen from the gold tiered stands adds a touch of warmth and luxury. The final 10% is the subtle color from the small floral arrangements and the parfaits, providing just enough visual interest without overwhelming the serene, bright aesthetic.
🧹 Maintenance Reality
A table placed directly in front of a large, bright window can create a beautiful, ethereal glow for photos. However, it can also be a nightmare for your guests. They will have to look directly into the bright light to see the desserts, causing them to squint. It also puts the front of your desserts in shadow, making them less appealing in person. A better approach is to have the light source hitting the table from the front or the side, so both the guests and the food are beautifully illuminated.
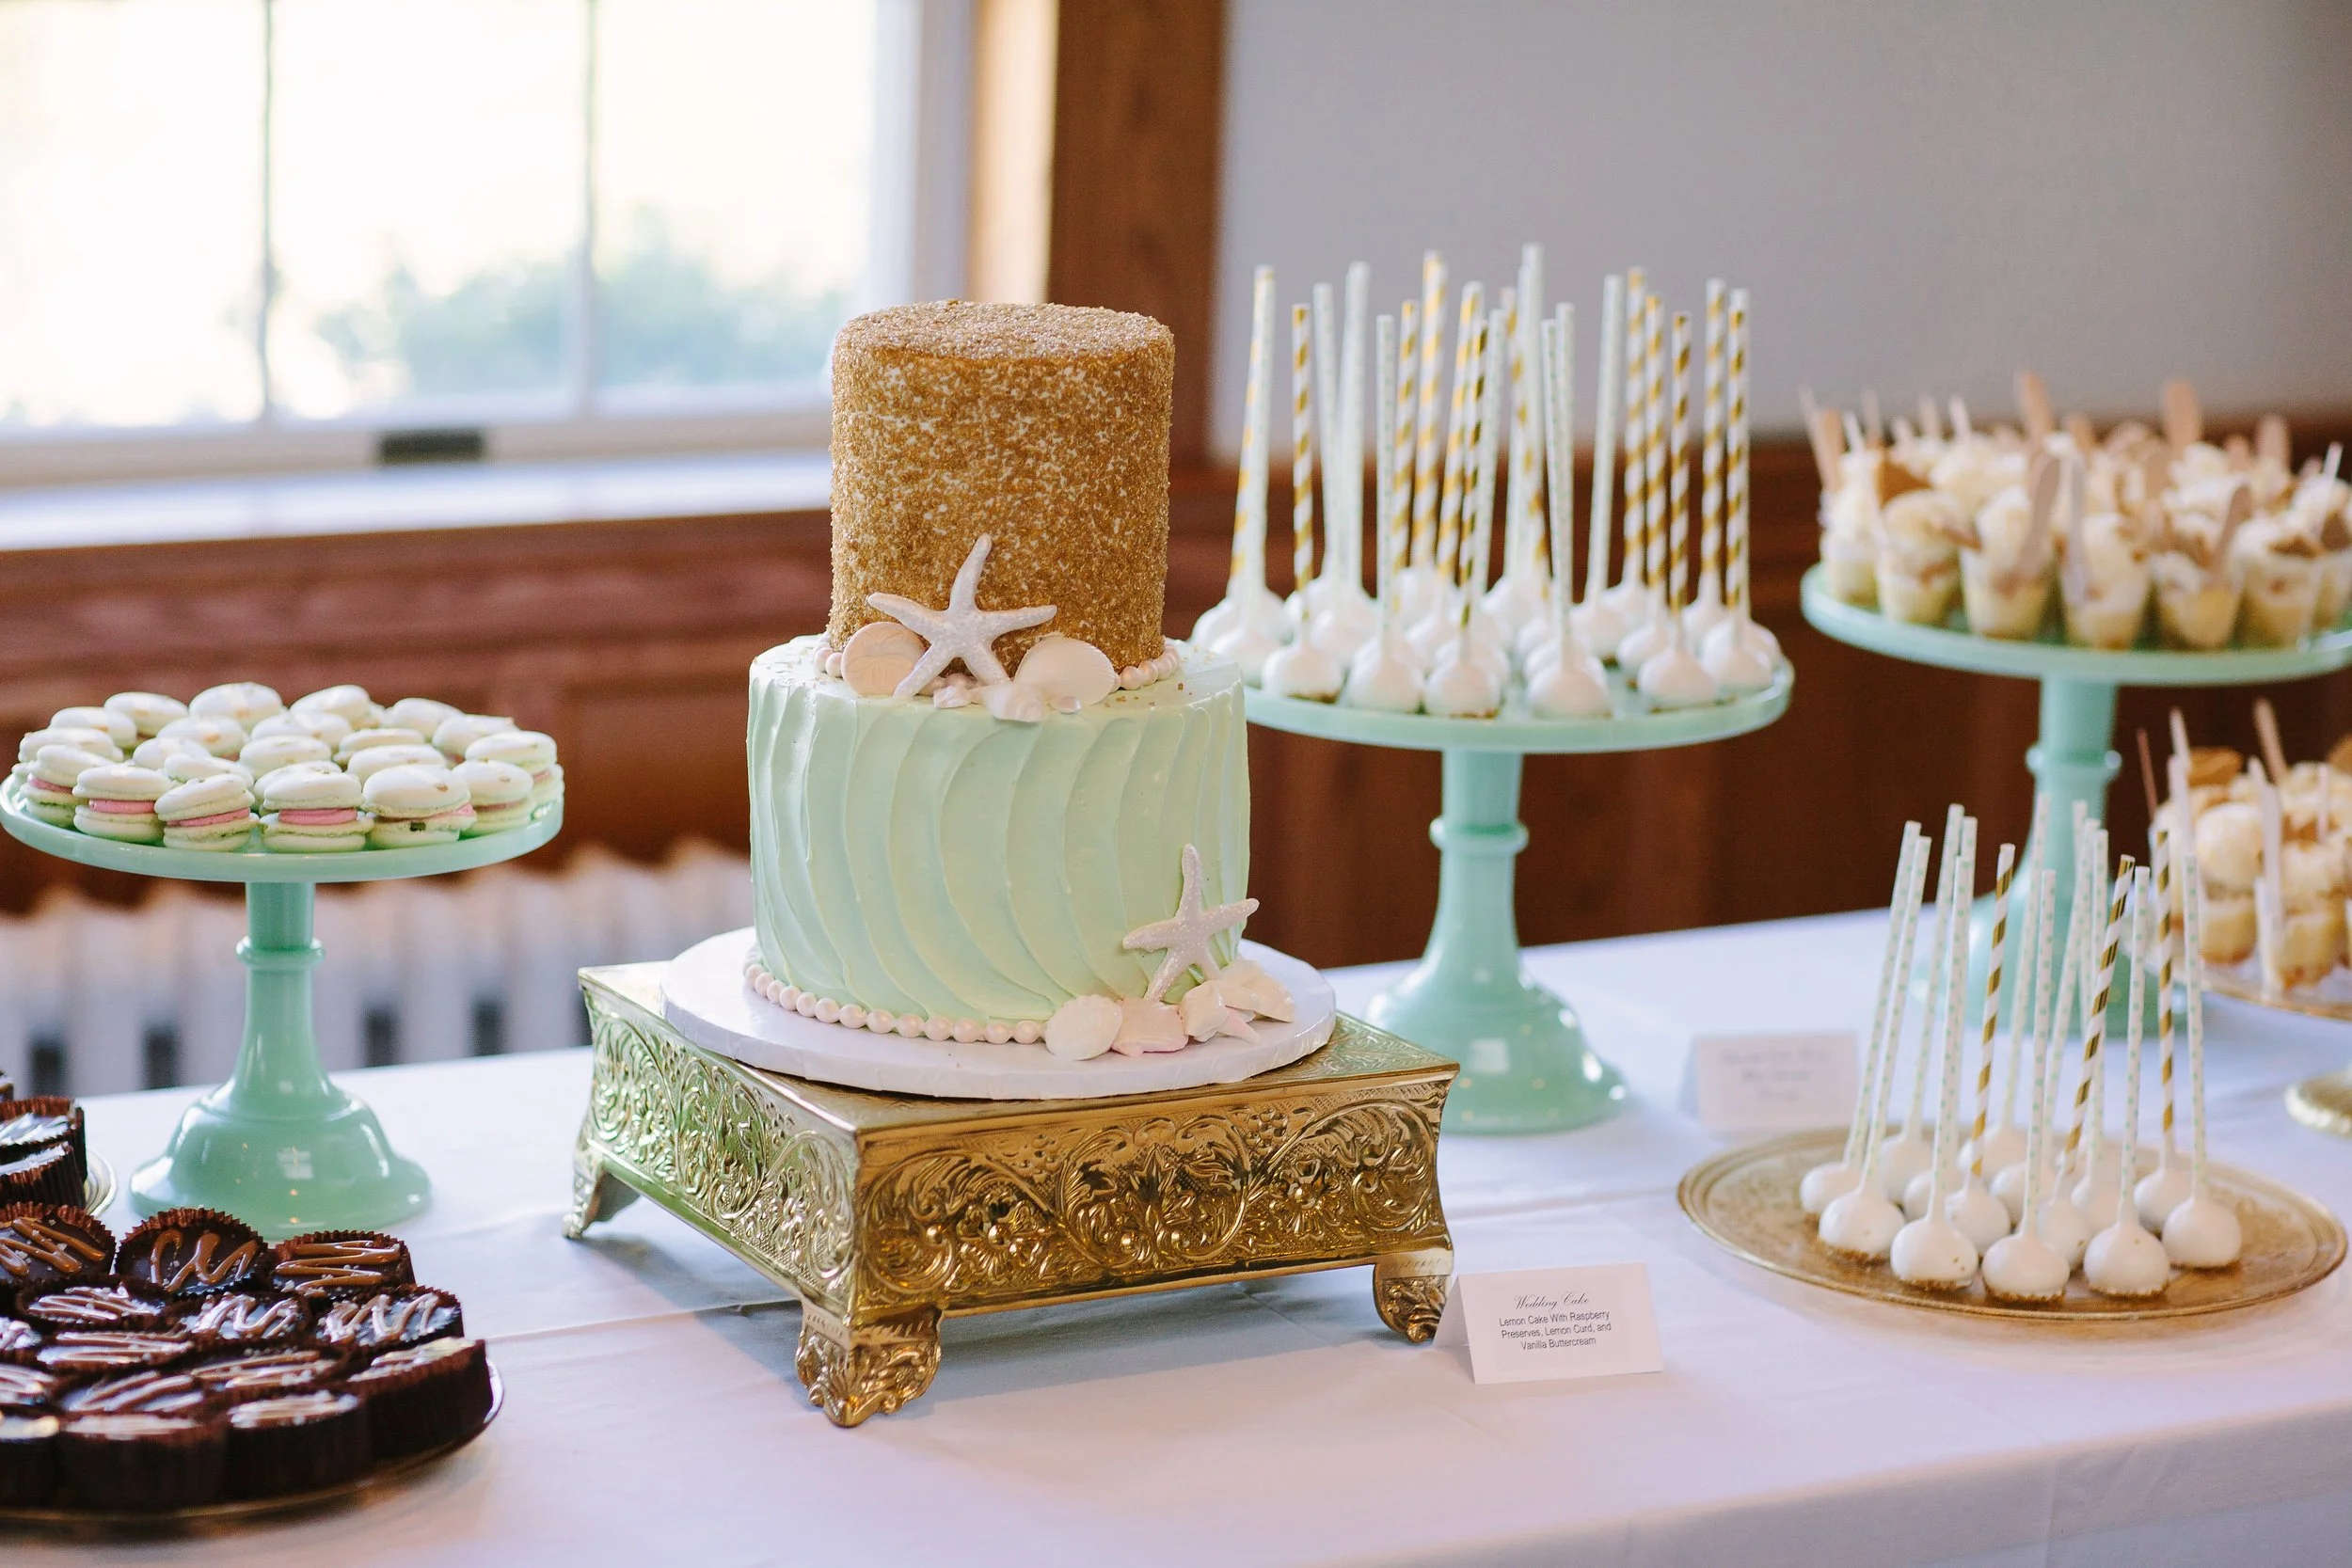
24. Nautical-Themed Dessert Table with Gold and Mint Green
This design is successful because it interprets the ‘nautical’ theme in a sophisticated way. Instead of the typical navy blue and white, it uses a fresh palette of light green, gold, and white. The theme is communicated through subtle details—the shell and starfish decorations on the cake, the texture on the gold tier—rather than overt props. The repetition of the light green across multiple cake pedestals creates a strong visual rhythm, while the single ornate gold stand acts as a luxurious focal point. This is a great example of ‘theme, not costumey’. The pastel palette is a more modern take compared to the classic pastels in Idea #7.
🔥 Trending Context
When working with a strong color like this light green, repetition is key to making it look intentional. Don’t just have one green cake stand. Having three, five, or even seven items in the same accent color, distributed across the length of the table, makes the design feel balanced and professional. Odd numbers almost always look better than even numbers in design. This creates a visual path for the eye to follow and makes the accent color feel like an integral part of the design, not an afterthought.
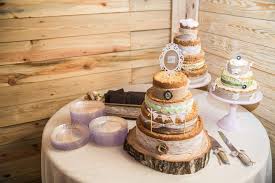
25. Rustic Dessert Table with Cookie Cake and Wooden Chargers
Before opting for a rustic theme centered on natural wood, consider these key points:
- Food Safety: Are your wooden chargers and serving pieces sealed with a food-safe finish? Raw or craft-store wood can harbor bacteria and is not suitable for direct food contact. Look for products specifically sold for culinary use or use parchment paper liners.
- Theme Consistency: A rustic theme works best when it’s carried through. Do your other party decorations have natural or rustic elements? Placing a rustic table in a very modern or glamorous room can feel disjointed.
- Lighting: Dark wood can look heavy and somber in a dimly lit room. Ensure your display is in a well-lit area, preferably with natural light, to bring out the warmth and texture of the wood grain.
💡 Designer Tip
Creating a giant cookie cake is a fun and easy centerpiece. Here’s a quick guide:
- Use any store-bought chocolate chip cookie dough recipe or tube.
- Press the dough evenly into a 12-inch pizza pan or a large cast-iron skillet. Don’t press it all the way to the edge, as it will spread.
- Bake according to the package directions, adding 5-10 minutes to the baking time to account for the larger size. Look for golden-brown edges.
- Let the cookie cool completely in the pan before attempting to move it.
- Once cool, decorate the edges with frosting using a piping bag and a star tip, and write a message in the center.
Total Time: 45 minutes. Material Cost: $10-$15.
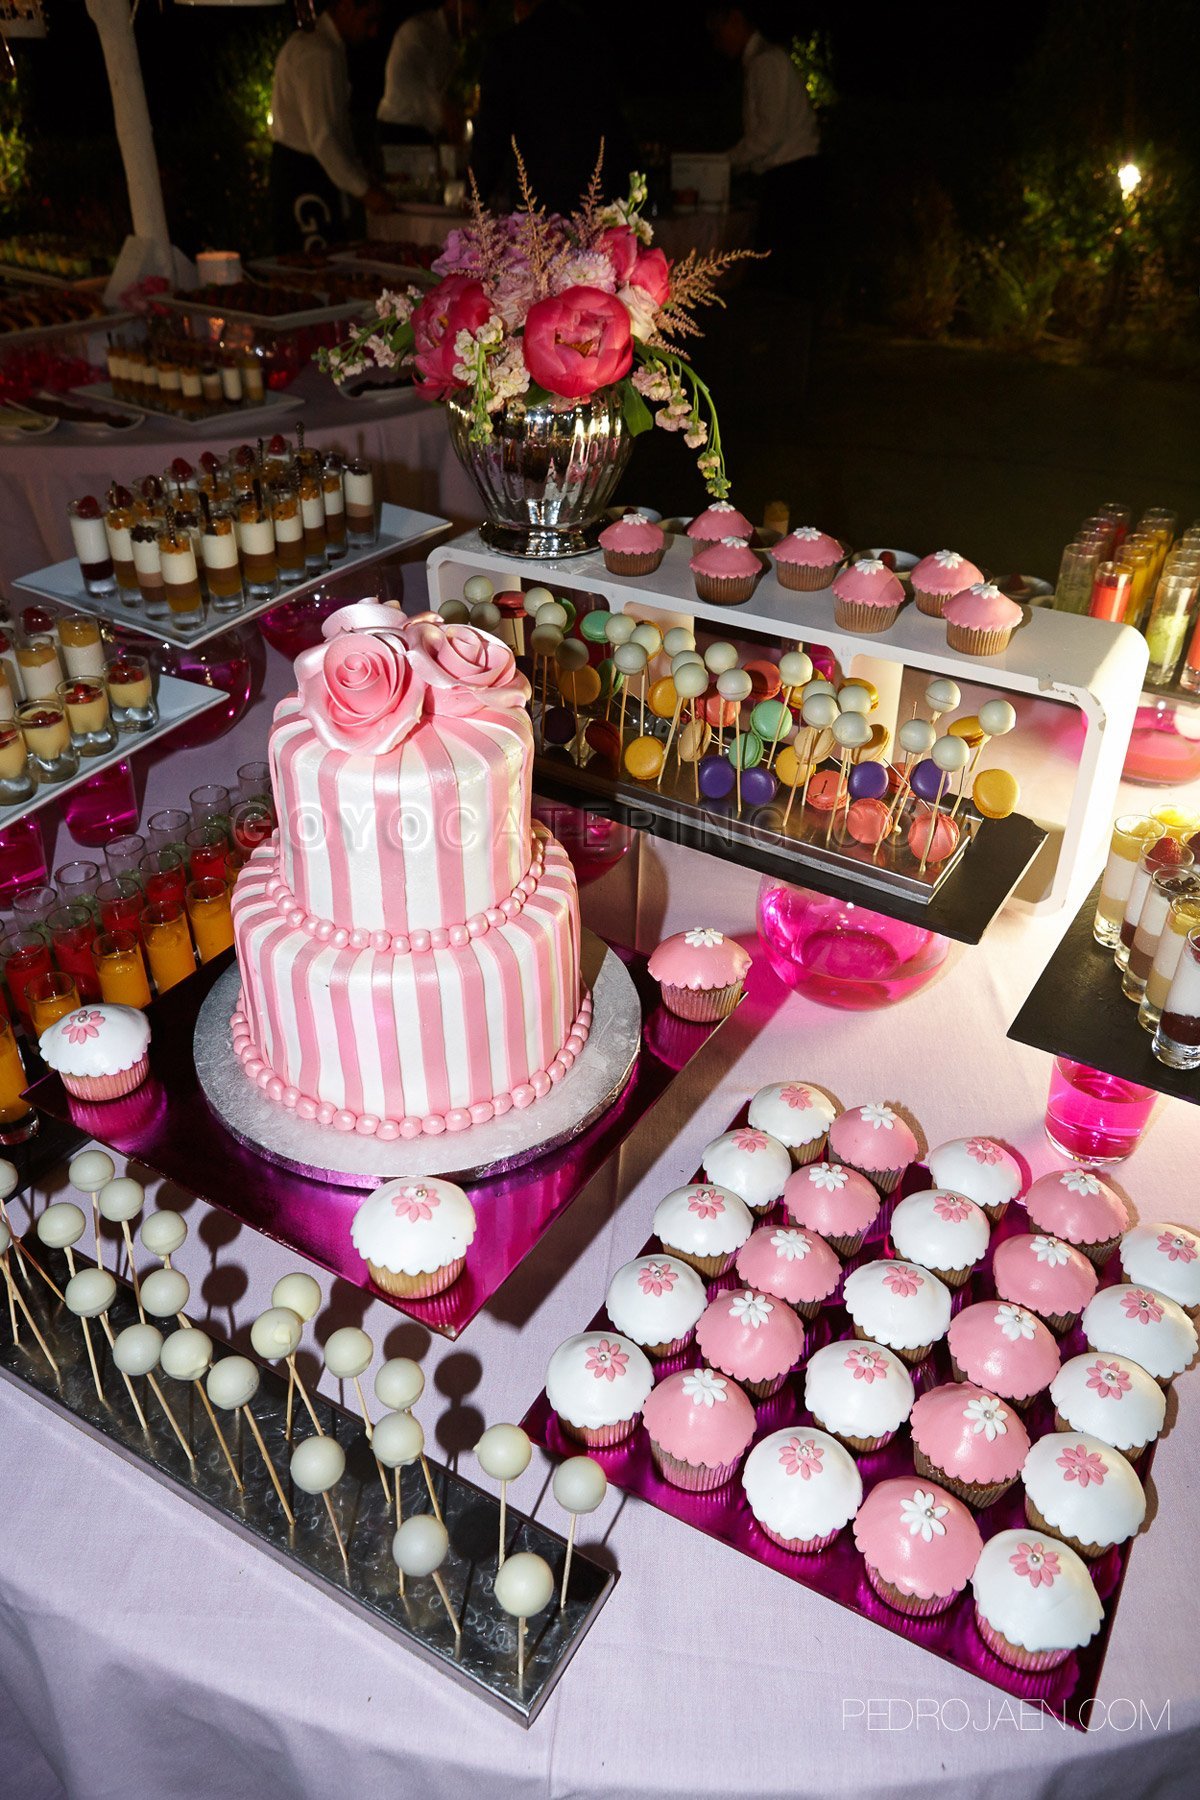
26. Feminine Pink and White Striped Cake Display
This polished, feminine look is heavily reliant on custom baked goods, which drives the cost. The coordination is key.
- Central Cake (two-tiered, custom striped): $175 – $300
- Custom Cupcakes (2 dozen): $80 – $150
- Cake Pops / Macarons: $60 – $120
- Serveware (stands, silver vase, trays): $100 – $200
- Floral Centerpiece: $50 – $100
- TOTAL: $465 – $870
Budget alternative: Buy a plain white two-tiered cake from a grocery store and add pink ribbon around the base of each tier to mimic stripes. Make your own pink and white cupcakes and arrange them on simple white platters to get a similar feel for under $150.
⚠️ Real Talk
The striped cake is, without a doubt, the element that makes this table sing. It’s the visual anchor and the primary statement piece. The bold, graphic stripes provide a modern, playful contrast to the soft, traditional floral decorations on the cupcakes. Without the striped cake, the table would be a pretty but generic collection of pink and white desserts. With it, the table has a clear point of view and a memorable, high-impact centerpiece that ties everything together.
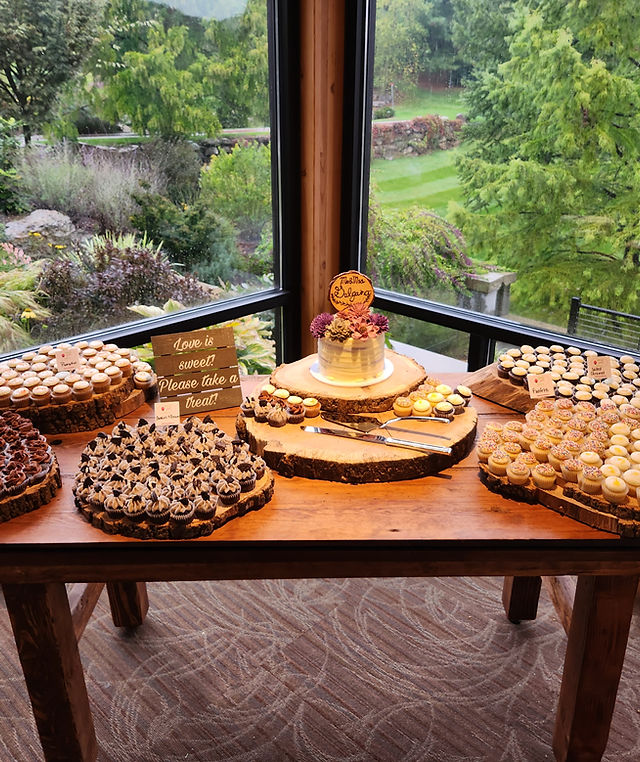
27. Rustic Cupcake Display with Tree Trunk Stands and a Scenic View
This setup’s success is all about embracing the ‘bringing the outdoors in’ concept. The use of actual tree trunk slices as dessert stands creates a direct, literal connection to the stunning natural landscape visible through the windows. This repetition of natural wood—from the dark table to the light-colored stands to the trees outside—makes the entire scene feel harmonious and deeply connected to its environment. It’s simple, authentic, and lets the beauty of the natural materials (and the view!) do the talking. This is a more rugged take on the rustic vibe seen in Idea #18.
⭐ The One Thing
Using real wood slices is a fantastic rustic touch, but they require specific care. They are prone to cracking if they dry out too quickly or are exposed to drastic temperature changes. Store them in a cool, dry place, and lightly oil them with a food-safe mineral oil once a year to keep them from splitting. For cleaning, never submerge them in water. Wipe them down with a damp cloth and a mild soap, and dry them immediately. Any spills should be wiped up right away to prevent staining the raw wood.
Your Sweetest Celebration Awaits
That’s a wrap on our favorite dessert table ideas for 2026! Whether you’re drawn to rustic charm, modern glamour, or playful whimsy, the key is to choose a look that tells your story. Don’t be afraid to mix and match details to create a display that’s uniquely you. Now, get to planning and have fun creating a sweet focal point for your next celebration. Don’t forget to check out your favorite ideas on Pinterest for even more inspiration!