
30 Jaw-Dropping Modern Bathroom Decoration Ideas for 2026 That Will Wow Your Guests

You know that feeling when you finally find the perfect modern bathroom idea that looks exactly right for your space? The one you can’t stop thinking about? We know that feeling well. After filtering through hundreds of designs, we narrowed it down to the 30 ideas that truly deliver on style and function for 2026. Inside, you’ll find 30 distinct takes on the modern bathroom, covering everything from warm organic styles and clean mid-century lines to minimalist statements and laid-back boho vibes. For 2026, it’s all about creating a personal sanctuary, and the biggest trend we’re seeing on Pinterest is the move away from sterile, all-white bathrooms toward spaces with personality, warmth, and texture. And stay until the end — we break down the most common mistakes that can ruin these looks. 📌 Save this to Pinterest for later — you’ll want to revisit these ideas.
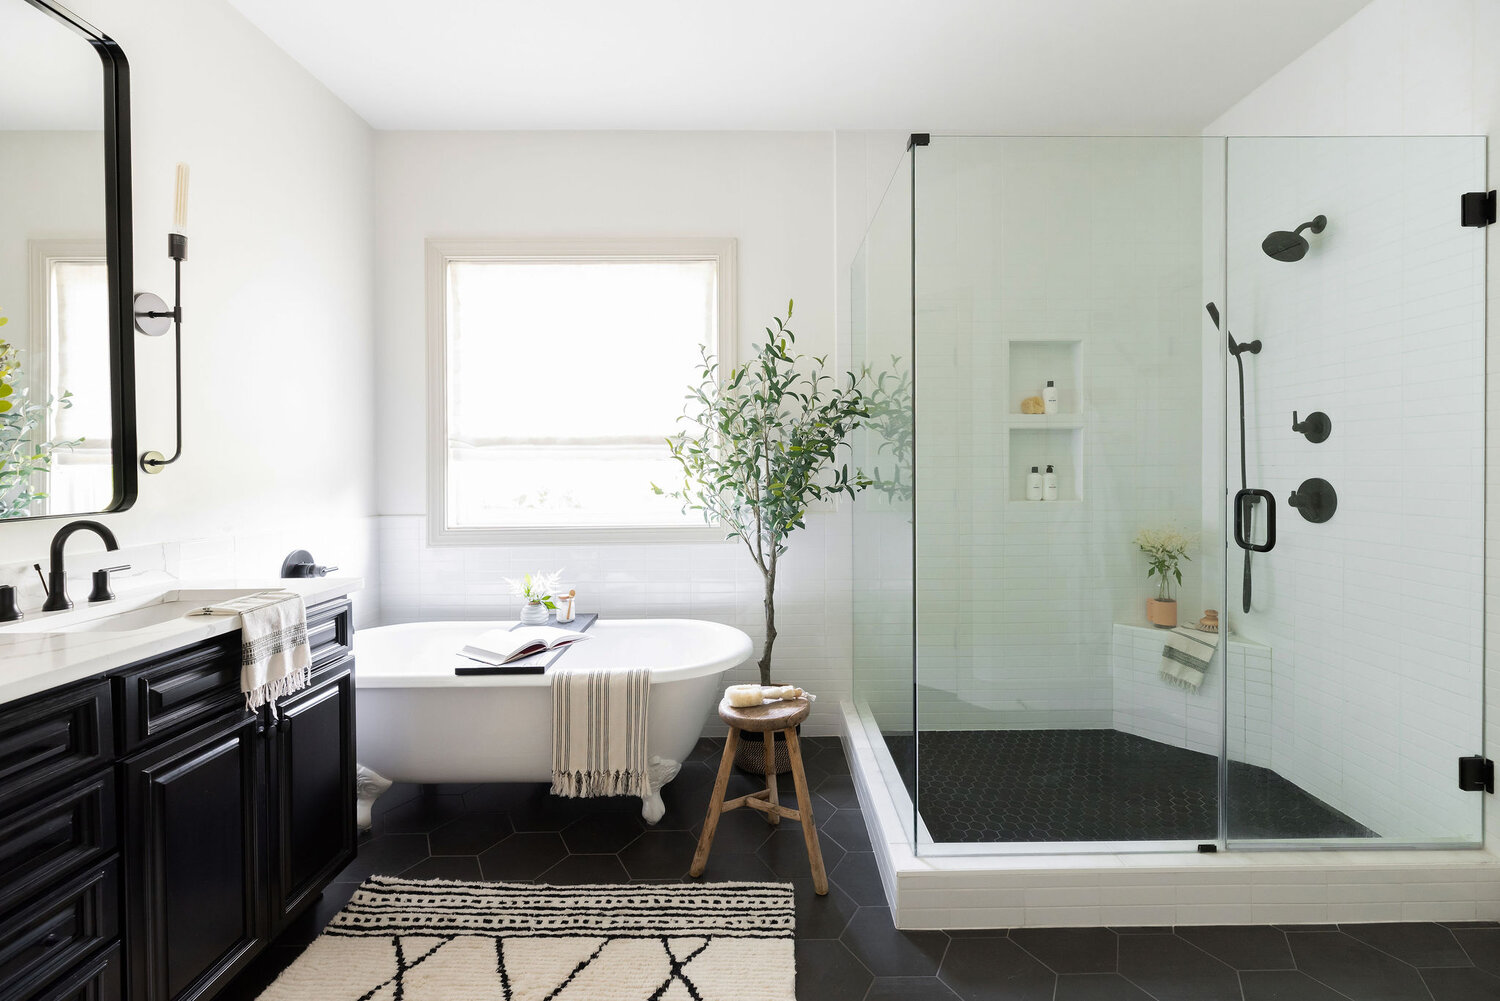
1. High-Contrast Serenity: The Black & White Freestanding Tub
To recreate this sophisticated look, expect a moderate to high investment, primarily driven by the fixtures and tile work. A quality freestanding tub is the centerpiece and the biggest line item.
💰 Budget Breakdown
- Main Furniture (Vanity, Tub): $2,000 – $5,500
- Lighting (Sconces, Mirror): $300 – $800
- Textiles (Rug, Towels): $150 – $400
- Decor/Accessories (Plant, Soap Dispenser): $100 – $250
- Tile & Wall Treatment (Subway & Hexagonal): $1,500 – $4,000
- TOTAL: $4,050 – $10,950
Budget alternative: Get a similar vibe for about 40% less by opting for a quality built-in alcove tub, more affordable ceramic floor tiles, and a vanity from a big-box store.
This design succeeds because of its masterful use of contrast and shape. The sharp, clean lines of the black vanity and glass shower enclosure are softened by the gentle curves of the clawfoot tub. This juxtaposition creates visual interest without feeling chaotic. Furthermore, the repetition of black—in the floor tiles, rug pattern, window frame, and fixtures—creates a cohesive rhythm that guides the eye through the space, making it feel intentional and pulled-together.
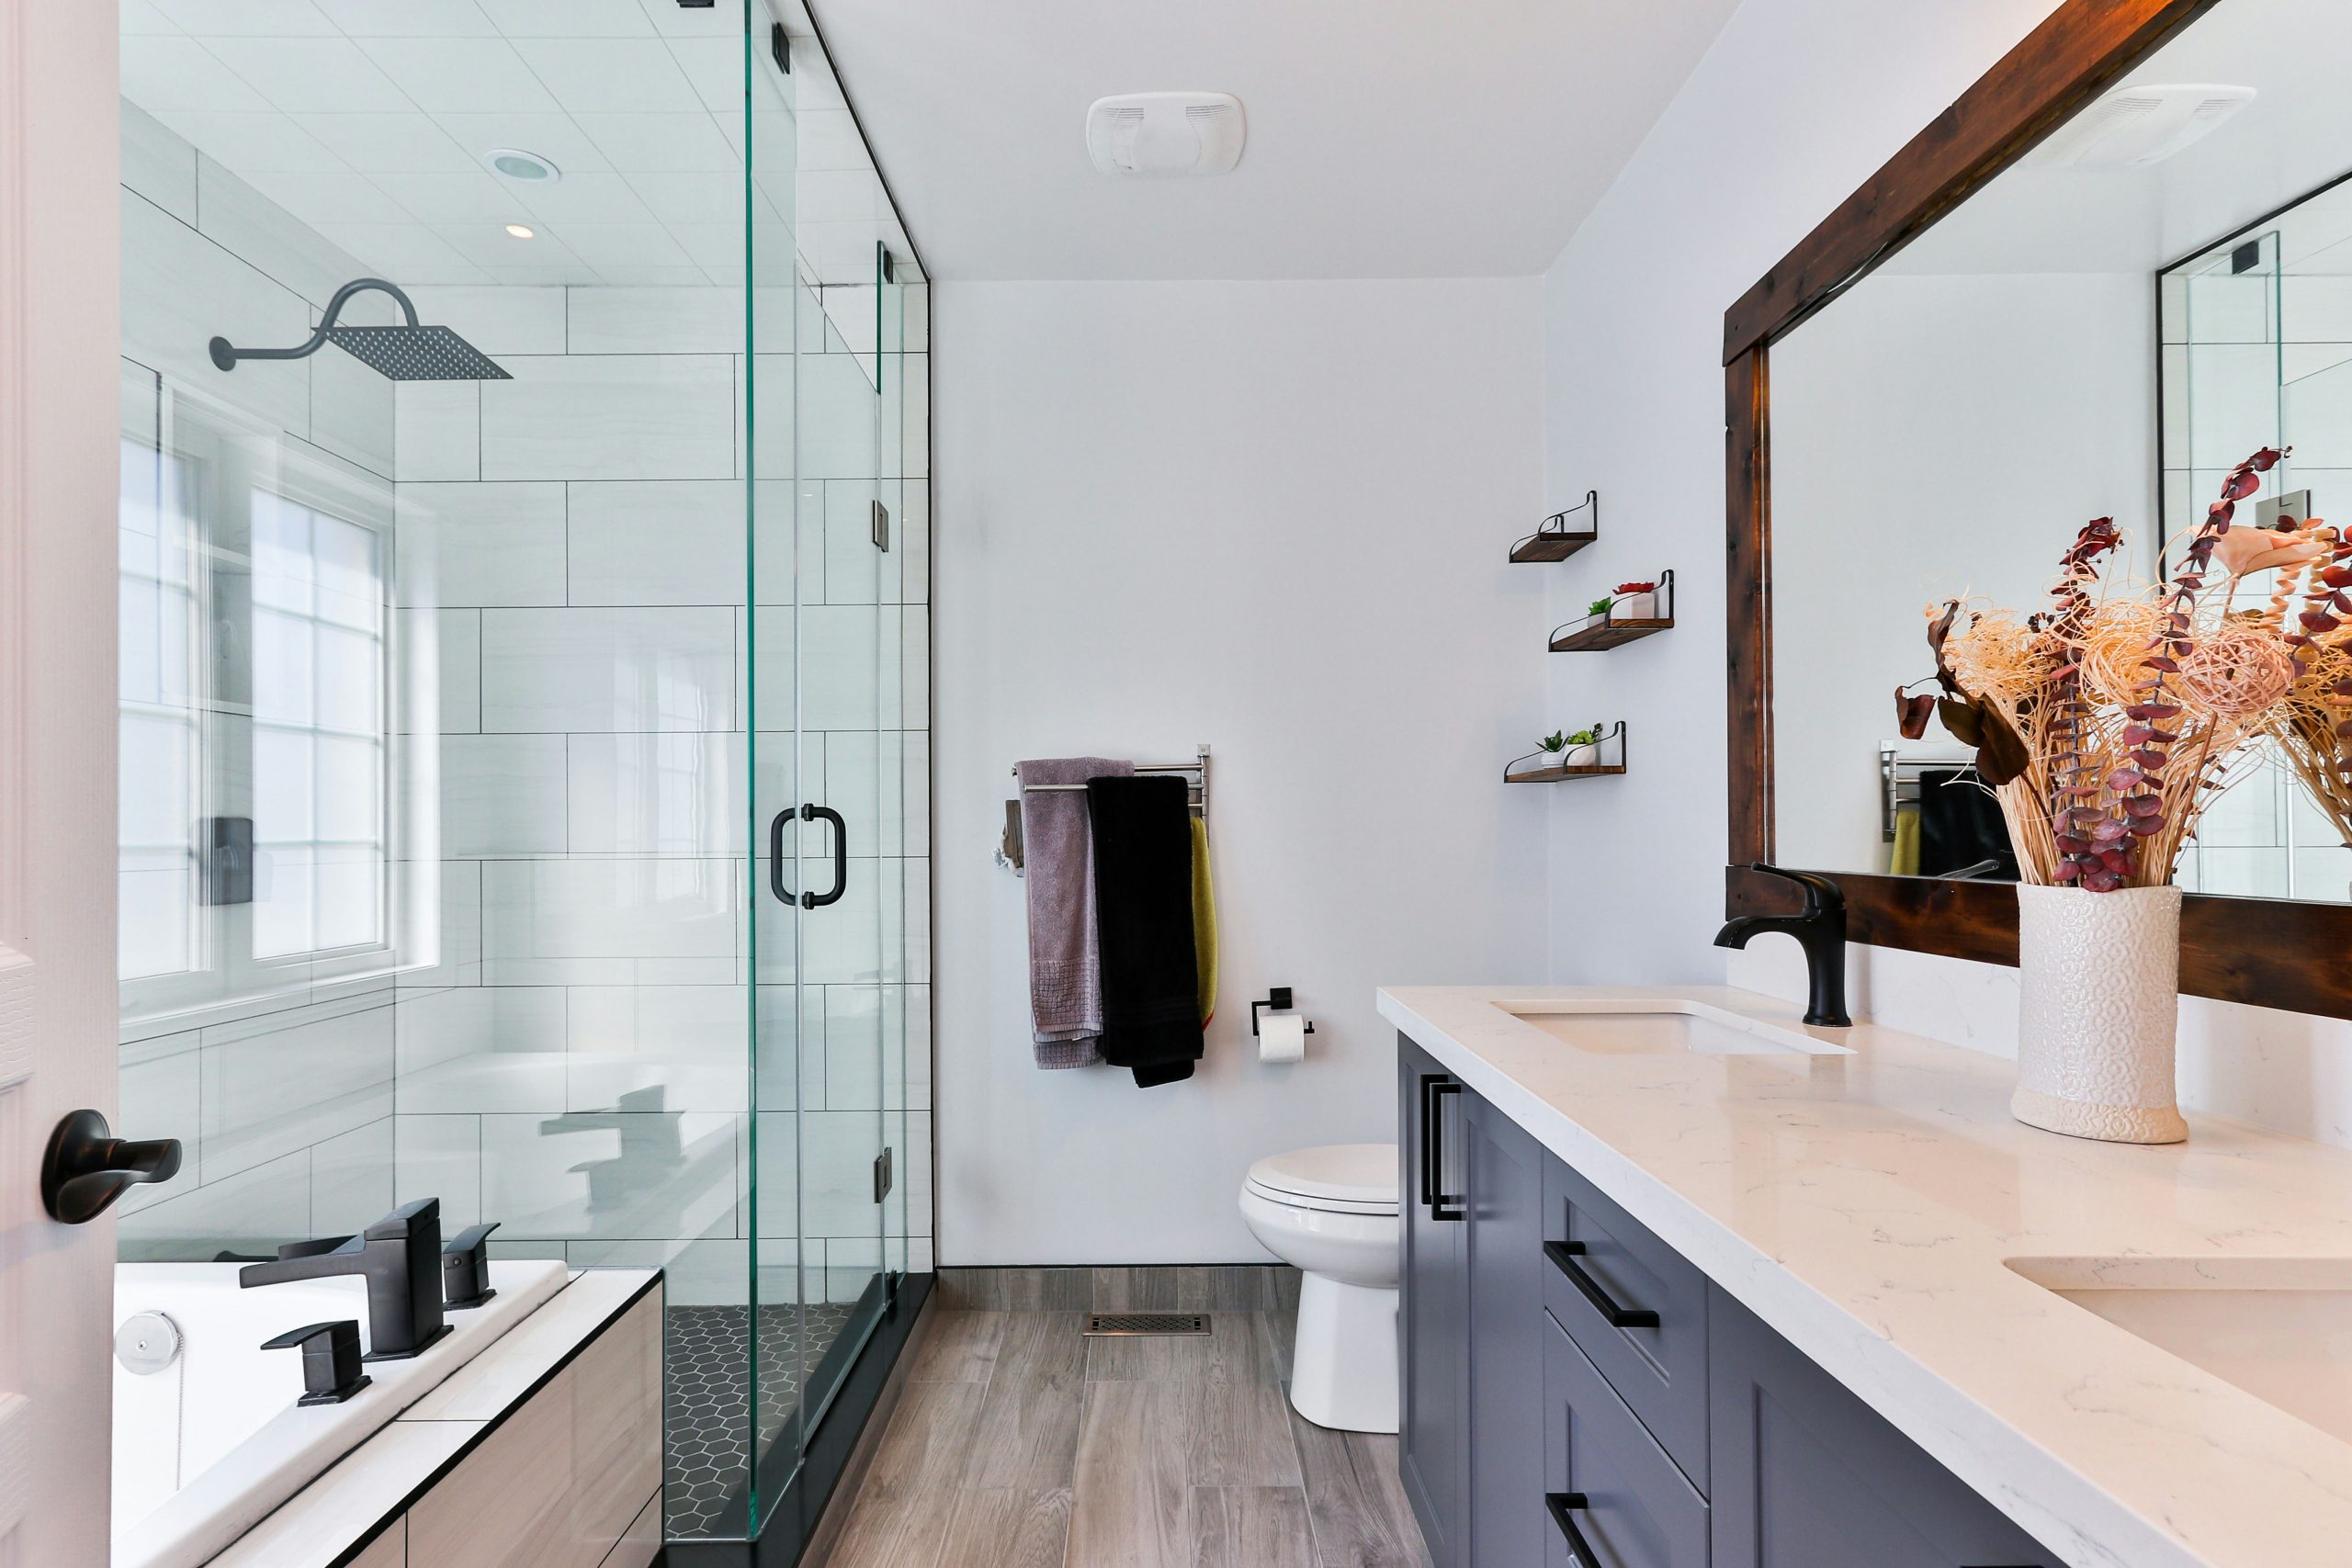
2. Warm Woods Meet Cool Grays in a Contemporary Layout
When using wood in a bathroom, especially near a shower, ventilation is non-negotiable. To prevent warping or mildew on a wood-framed mirror or wood-look flooring, ensure your exhaust fan is properly rated for your bathroom’s square footage. The formula is simple: you need at least 1 CFM (cubic feet per minute) for every square foot of floor area. For a bathroom over 100 sq. ft., you should also add 50 CFM for each additional fixture (toilet, shower, tub). This ensures moisture is wicked away efficiently, preserving those beautiful finishes.
📐 Style Math
This layout is ideal for a master or large secondary bathroom, requiring a minimum width of 10 feet to comfortably accommodate the dual vanity and separate tub and shower. The total space should be at least 100-120 square feet to avoid feeling cramped. For smaller spaces, you could adapt this look by choosing a single vanity and a combined tub/shower. See how Idea #16 handles a more compact footprint with a similar warmth.
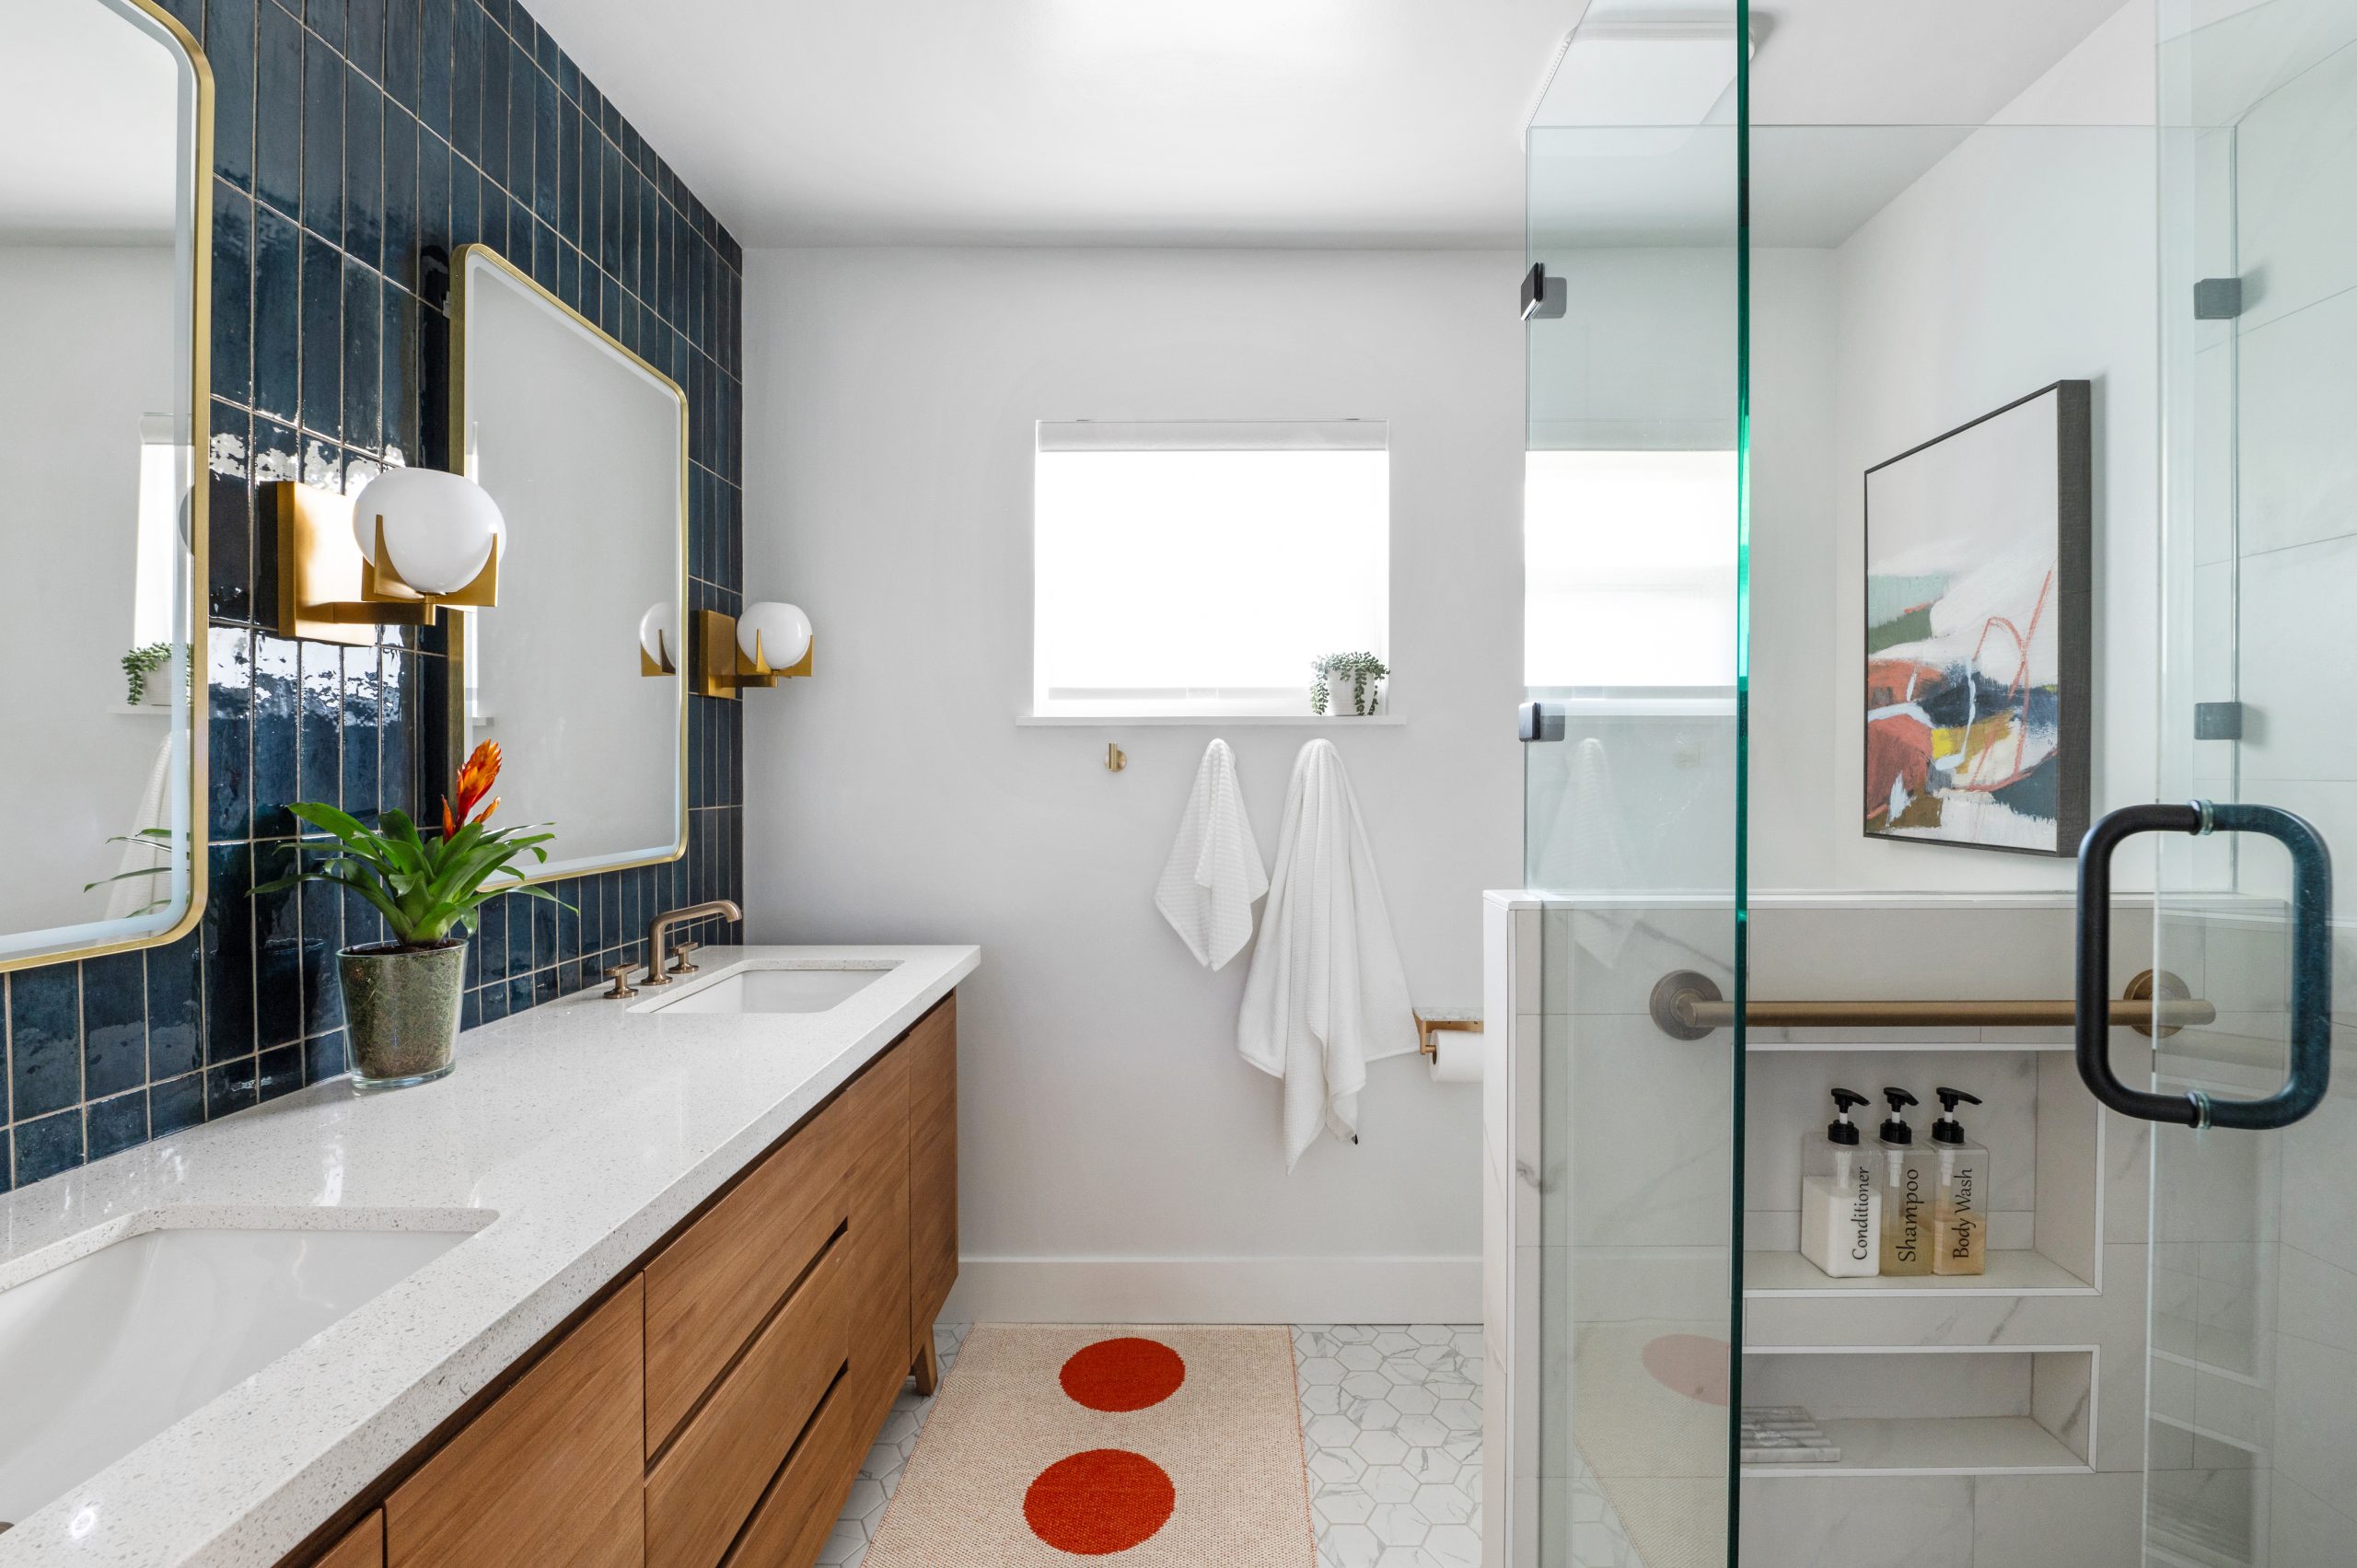
3. A Pop of Navy Blue Backs a Sleek Wooden Vanity
The visual success of this bathroom is a lesson in balanced composition. Think of it as a formula: 50% neutral foundation (white walls, white floor tiles), 30% statement color (the bold navy subway tile accent wall), and 20% warming element (the wooden vanity and gold/brass hardware). This ratio ensures the room feels vibrant but not overwhelmed by color. You could easily swap the navy for a deep forest green or a rich burgundy and the gold for matte black to achieve a different mood while keeping the same winning formula.
📏 Scale Guide
Want to install a similar wooden vanity? Here’s a quick guide:
- Locate Studs: Use a stud finder to mark the location of wall studs where you plan to hang the vanity. A floating vanity needs secure anchoring.
- Mark Height: Standard vanity height is 32-36 inches from the floor. Use a level to draw a straight line for the top of the vanity.
- Attach a Ledger Board: Screw a temporary 2×4 board into the studs just below your height line. This will hold the vanity in place while you work.
- Secure the Vanity: Lift the vanity onto the ledger board. Drill through the back support rail of the vanity and into the wall studs using lag bolts.
- Install Plumbing & Countertop: Once secure, you can connect the plumbing and install the countertop and sink per the manufacturer’s instructions.
Time estimate: 2-4 hours. Material cost (screws, ledger board): $20.
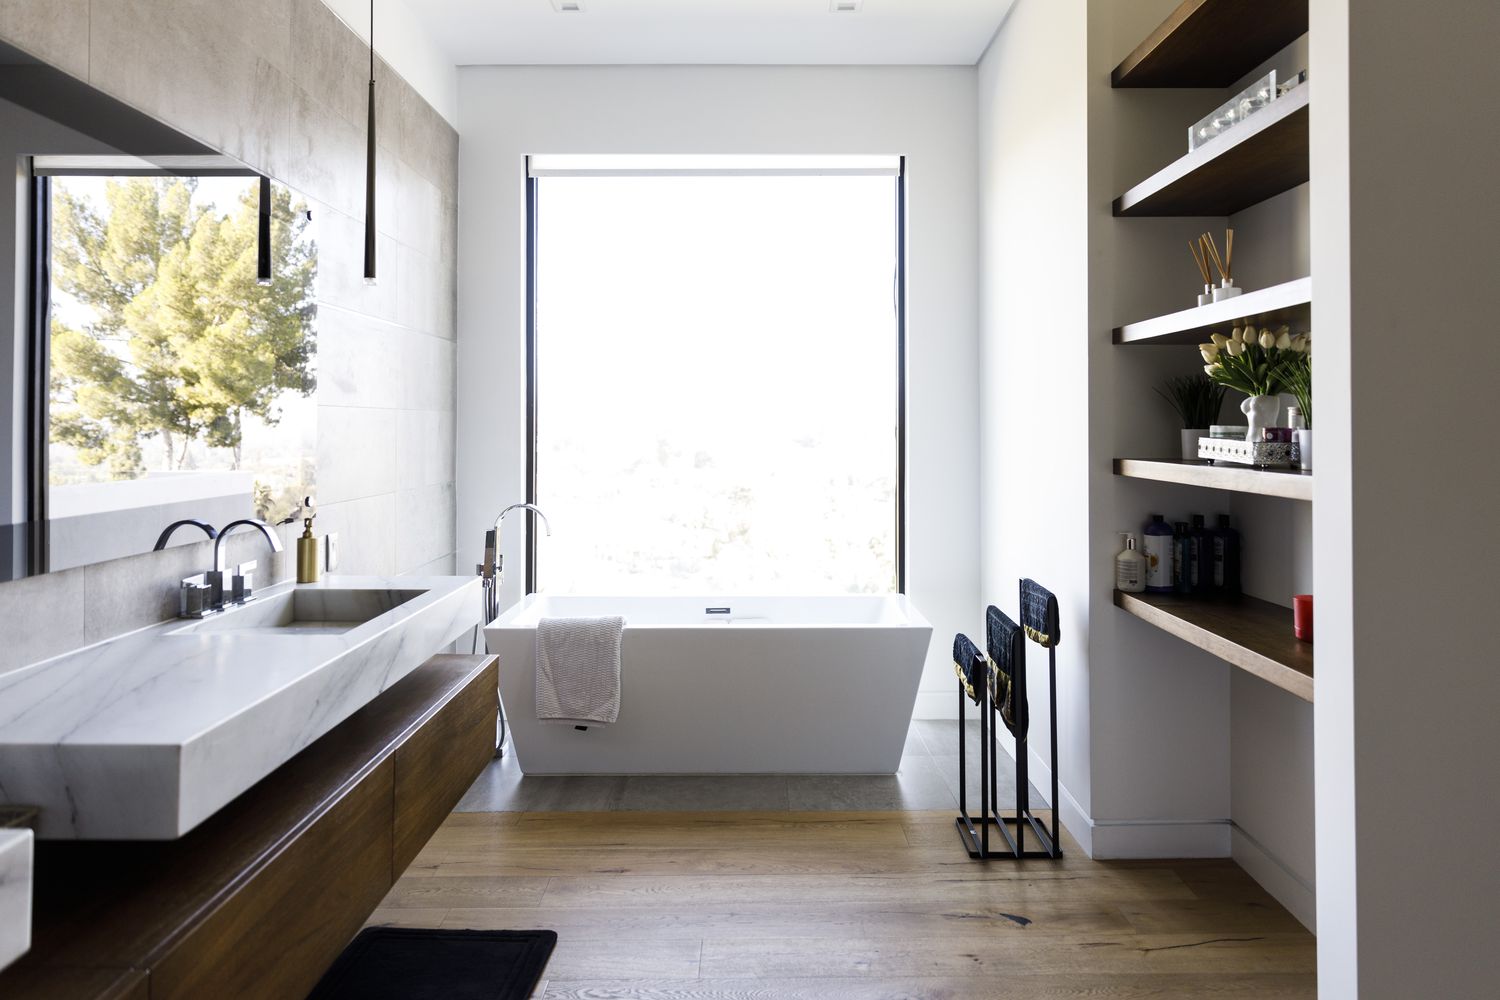
4. Minimalist Luxury: Floating Marble and a Window-side Tub
The single most impactful element here is the expansive, frameless window behind the bathtub. It does more than just provide light; it completely merges the indoor bathing experience with the outdoors. Removing it would fundamentally change the room’s atmosphere, taking it from a serene, nature-connected retreat to a much more standard, enclosed bathroom. The window elevates the simple act of taking a bath into a moment of mindful escape. All other elements—the marble, the wood—are beautiful, but they support the statement made by the view.
🔥 Trending Context
While stunning, a floating marble vanity and extensive use of natural wood require mindful upkeep. Marble is porous and can stain or etch if acidic products (like some cleansers or even citrus) are left on the surface. It needs to be sealed upon installation and resealed every 6-12 months. The wood flooring near the tub is also susceptible to water damage. A high-quality marine varnish is essential, and you must be diligent about wiping up splashes immediately. If that sounds like too much work, a porcelain tile that mimics marble and wood can offer a similar aesthetic with far less worry.
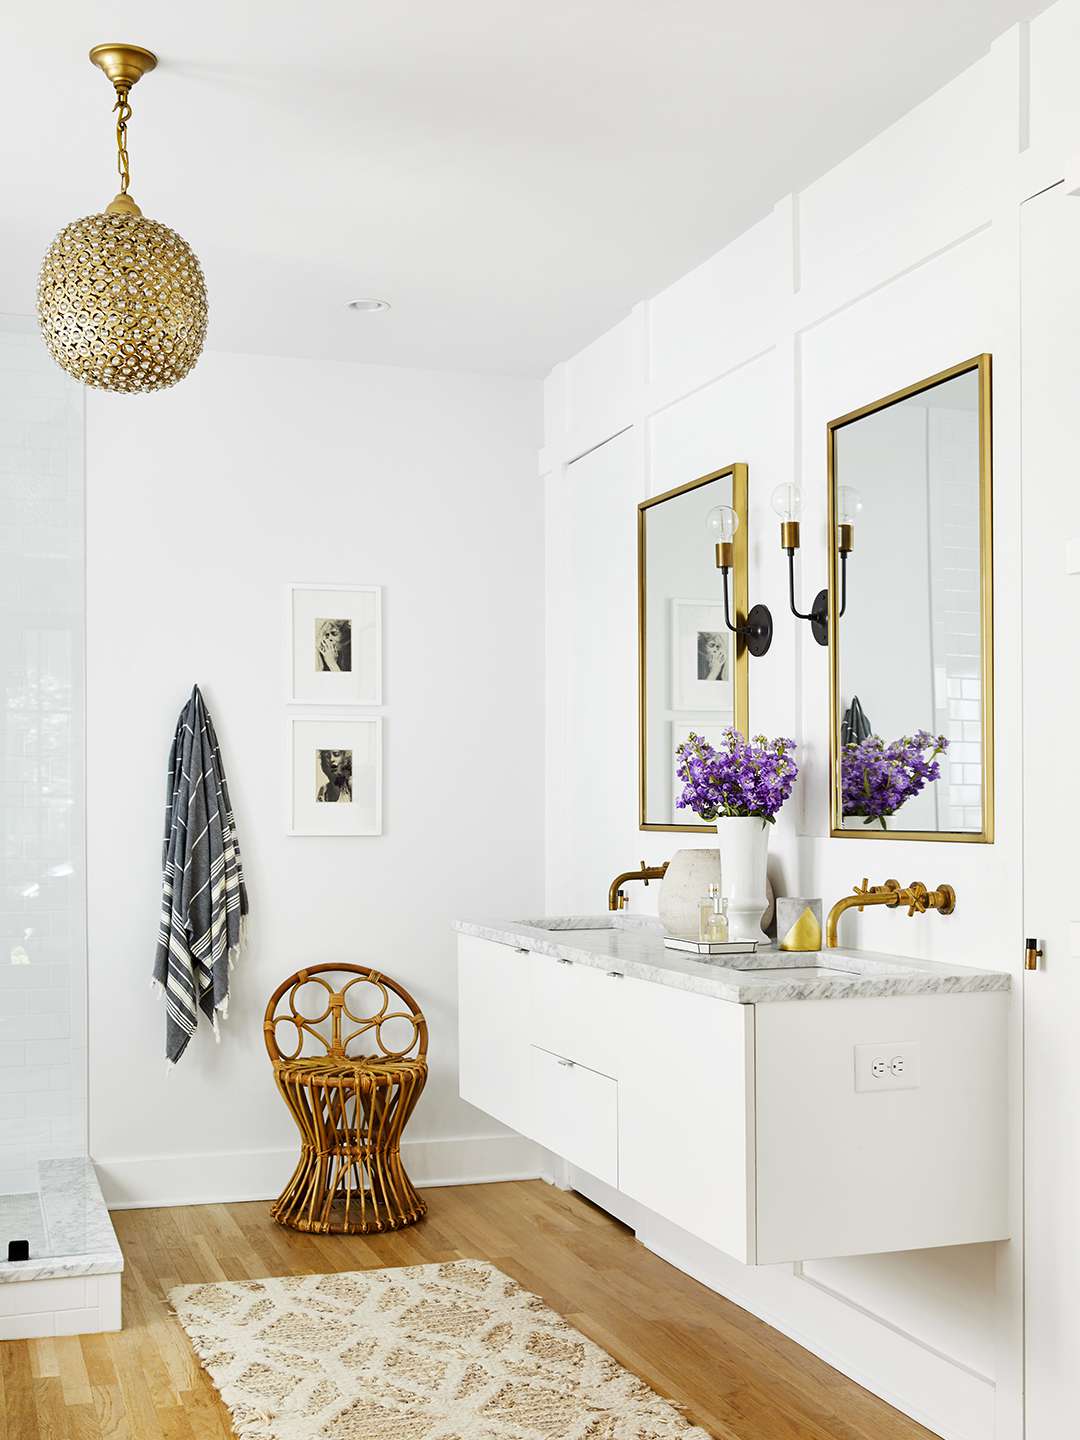
5. Bright and Chic with a Brass Pendant and Woven Chair
This bathroom feels so inviting because it expertly mixes textures while maintaining a tight color palette. The smooth, cool marble countertop, the warm grain of the wood floor, the intricate weave of the rattan chair, and the metallic shimmer of the brass pendant all provide distinct tactile sensations. However, because they all exist within a clean framework of white, cream, and beige, the result is rich and layered, not busy. The strategic use of curves—in the pendant, mirrors, and chair back—softens the room’s rectangular lines.
✅ Before You Start
The “soft modern” or “organic modern” look has been gaining momentum on Pinterest for a reason. After years of cooler, more sterile minimalism, there’s a collective desire for homes that feel warm, personal, and calming. This style answers that call by blending clean modern lines with natural materials, handcrafted textures, and warm metallic tones. It’s less about a showroom and more about a sanctuary. This trend has staying power because it’s rooted in comfort and livability, not just a fleeting aesthetic.
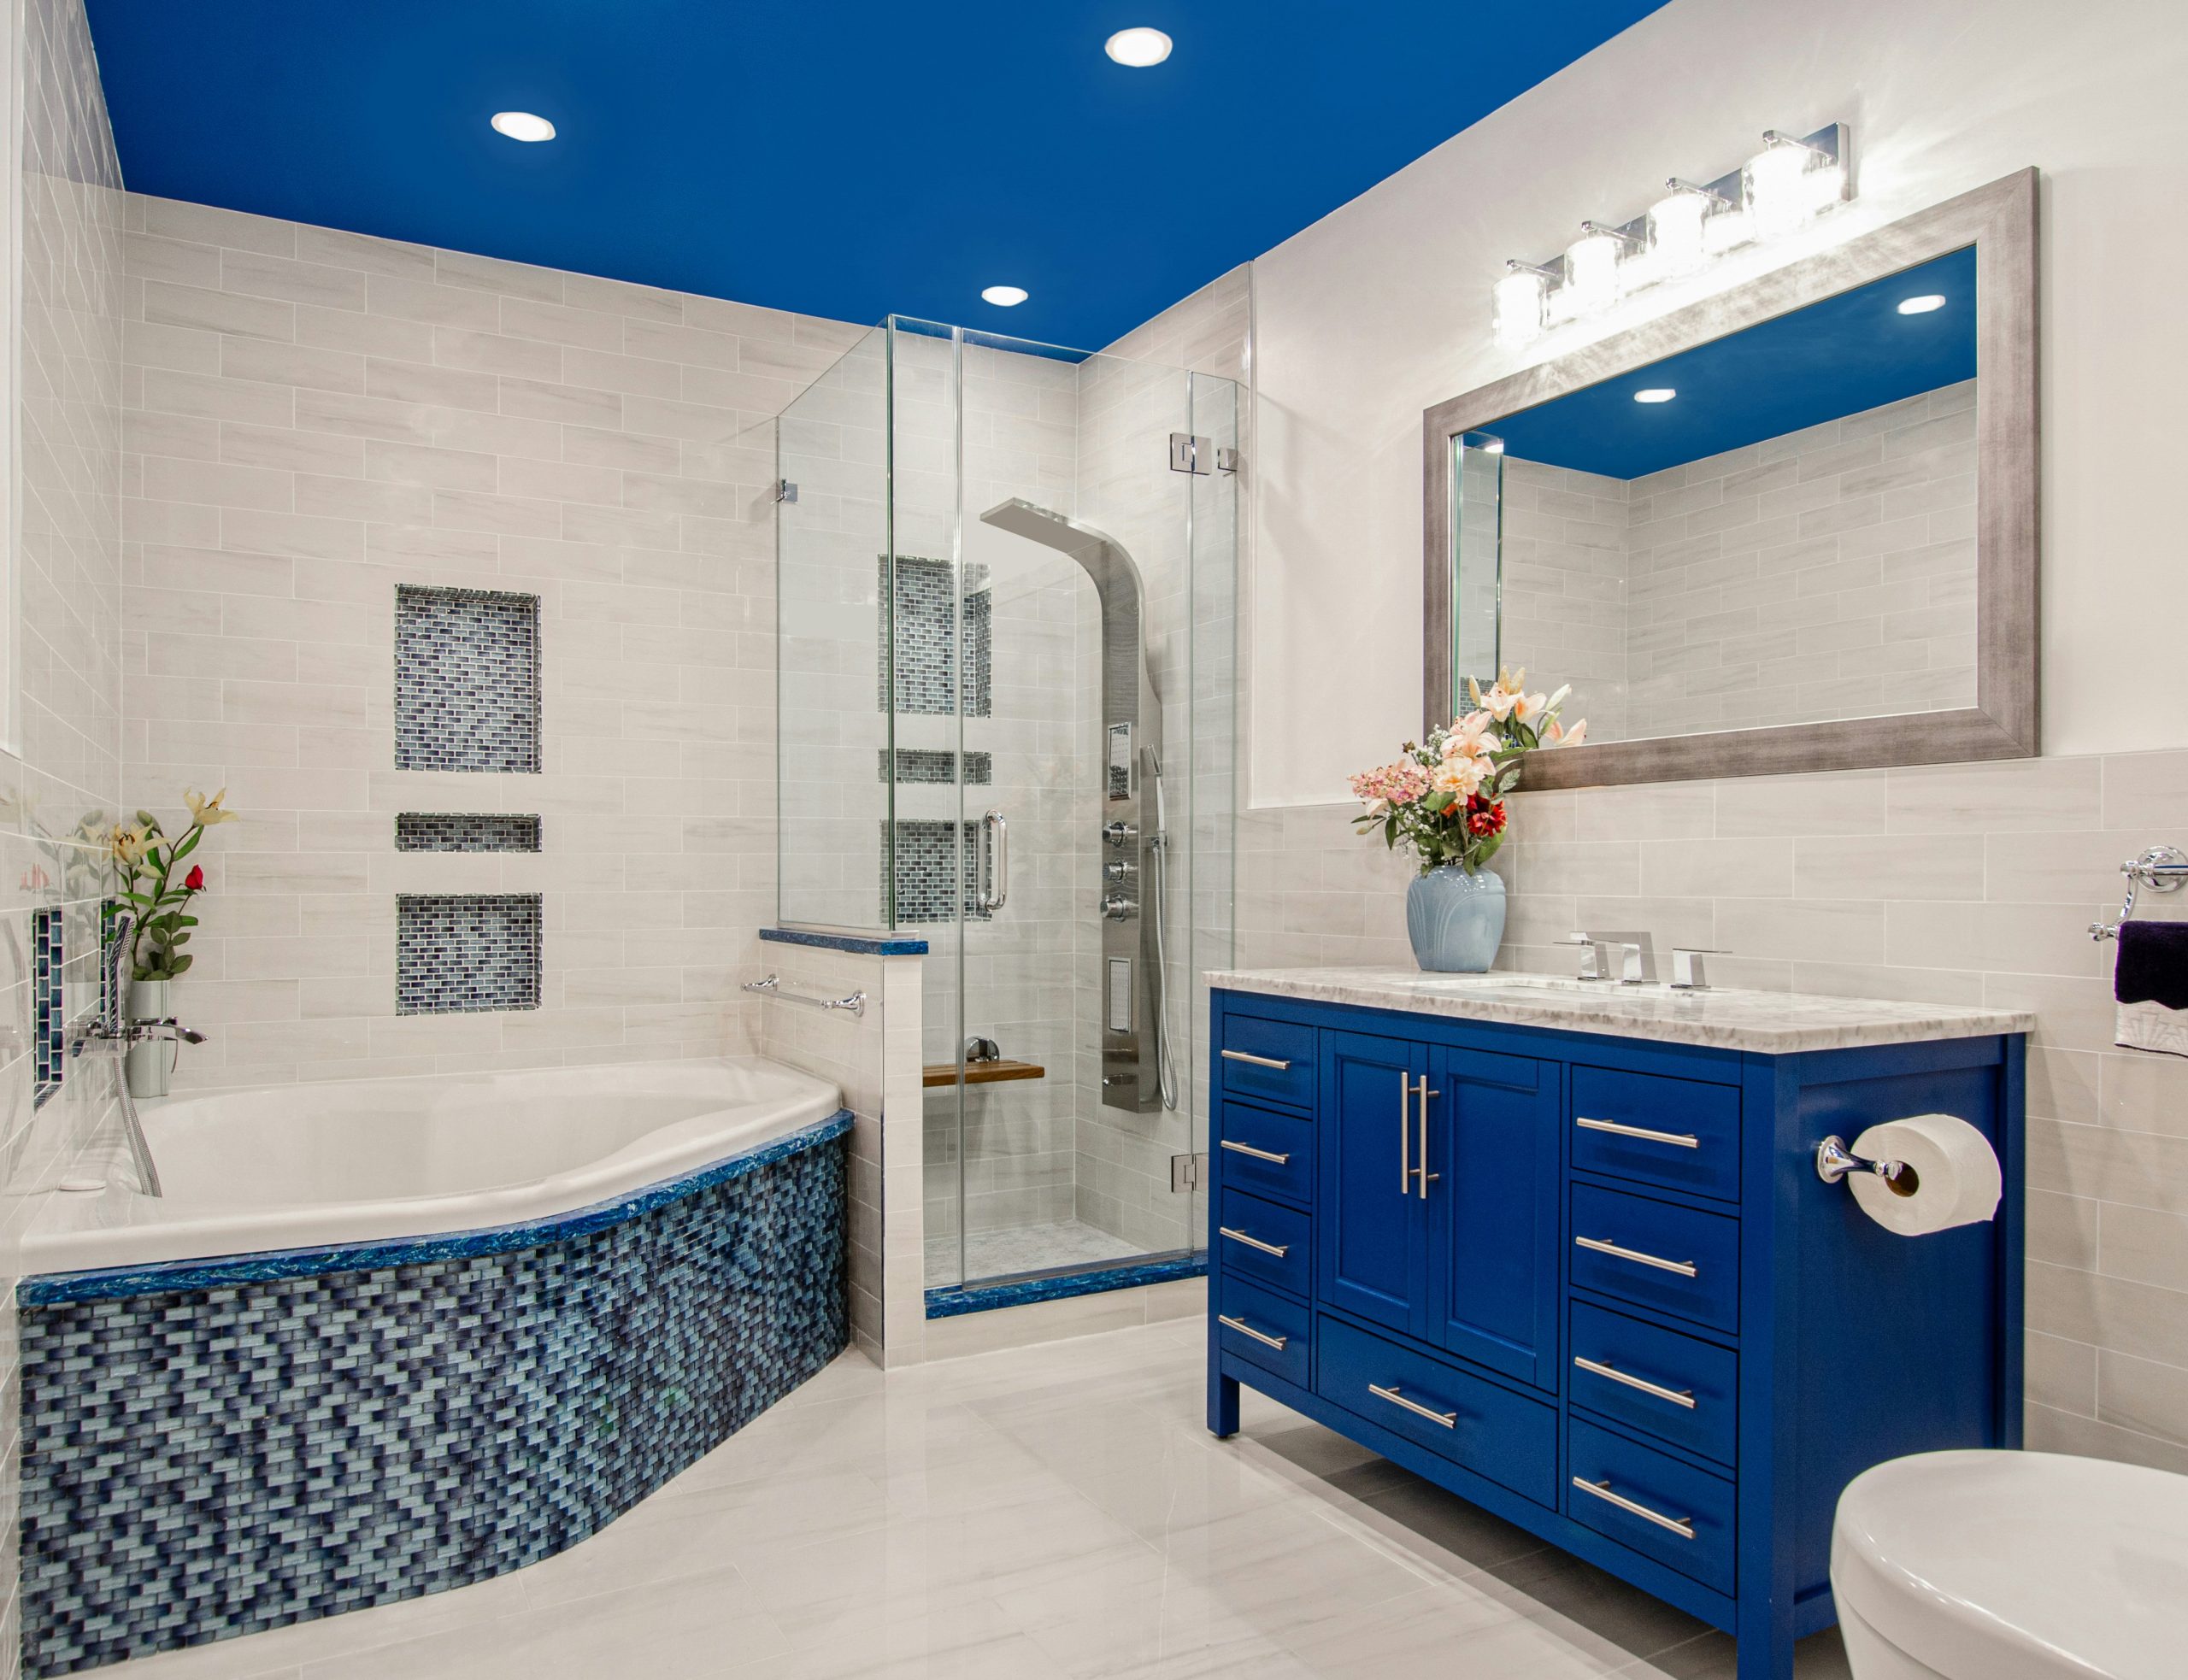
6. Vibrant Royal Blue Accents in a Marble-Tiled Room
A bold color choice like this royal blue is fantastic, but be warned: it’s a commitment. While paint is easy to change, tile is not. Before you invest in vibrant blue mosaic tiles and a matching vanity, be absolutely sure you will love this color for years to come. Also, consider your home’s overall color story. If the rest of your house is decorated in warm, earthy tones, a vibrant, cool blue bathroom might feel disconnected. It works best when it complements adjacent spaces, even as a bold counterpoint.
💸 Get This Look For Less
You don’t need custom tile work to get this look. You can capture the same energy on a much smaller budget. Start with a standard white vanity from a big-box store and paint it a high-gloss royal blue (a quality cabinet paint is about $60). Use the blue mosaic tile sparingly, perhaps just in the shower niche, which costs significantly less than tiling a whole tub surround. For the walls, opt for a classic, affordable ceramic subway tile instead of a marble-effect porcelain. A similar vibe can be achieved for under $1,500 in materials.
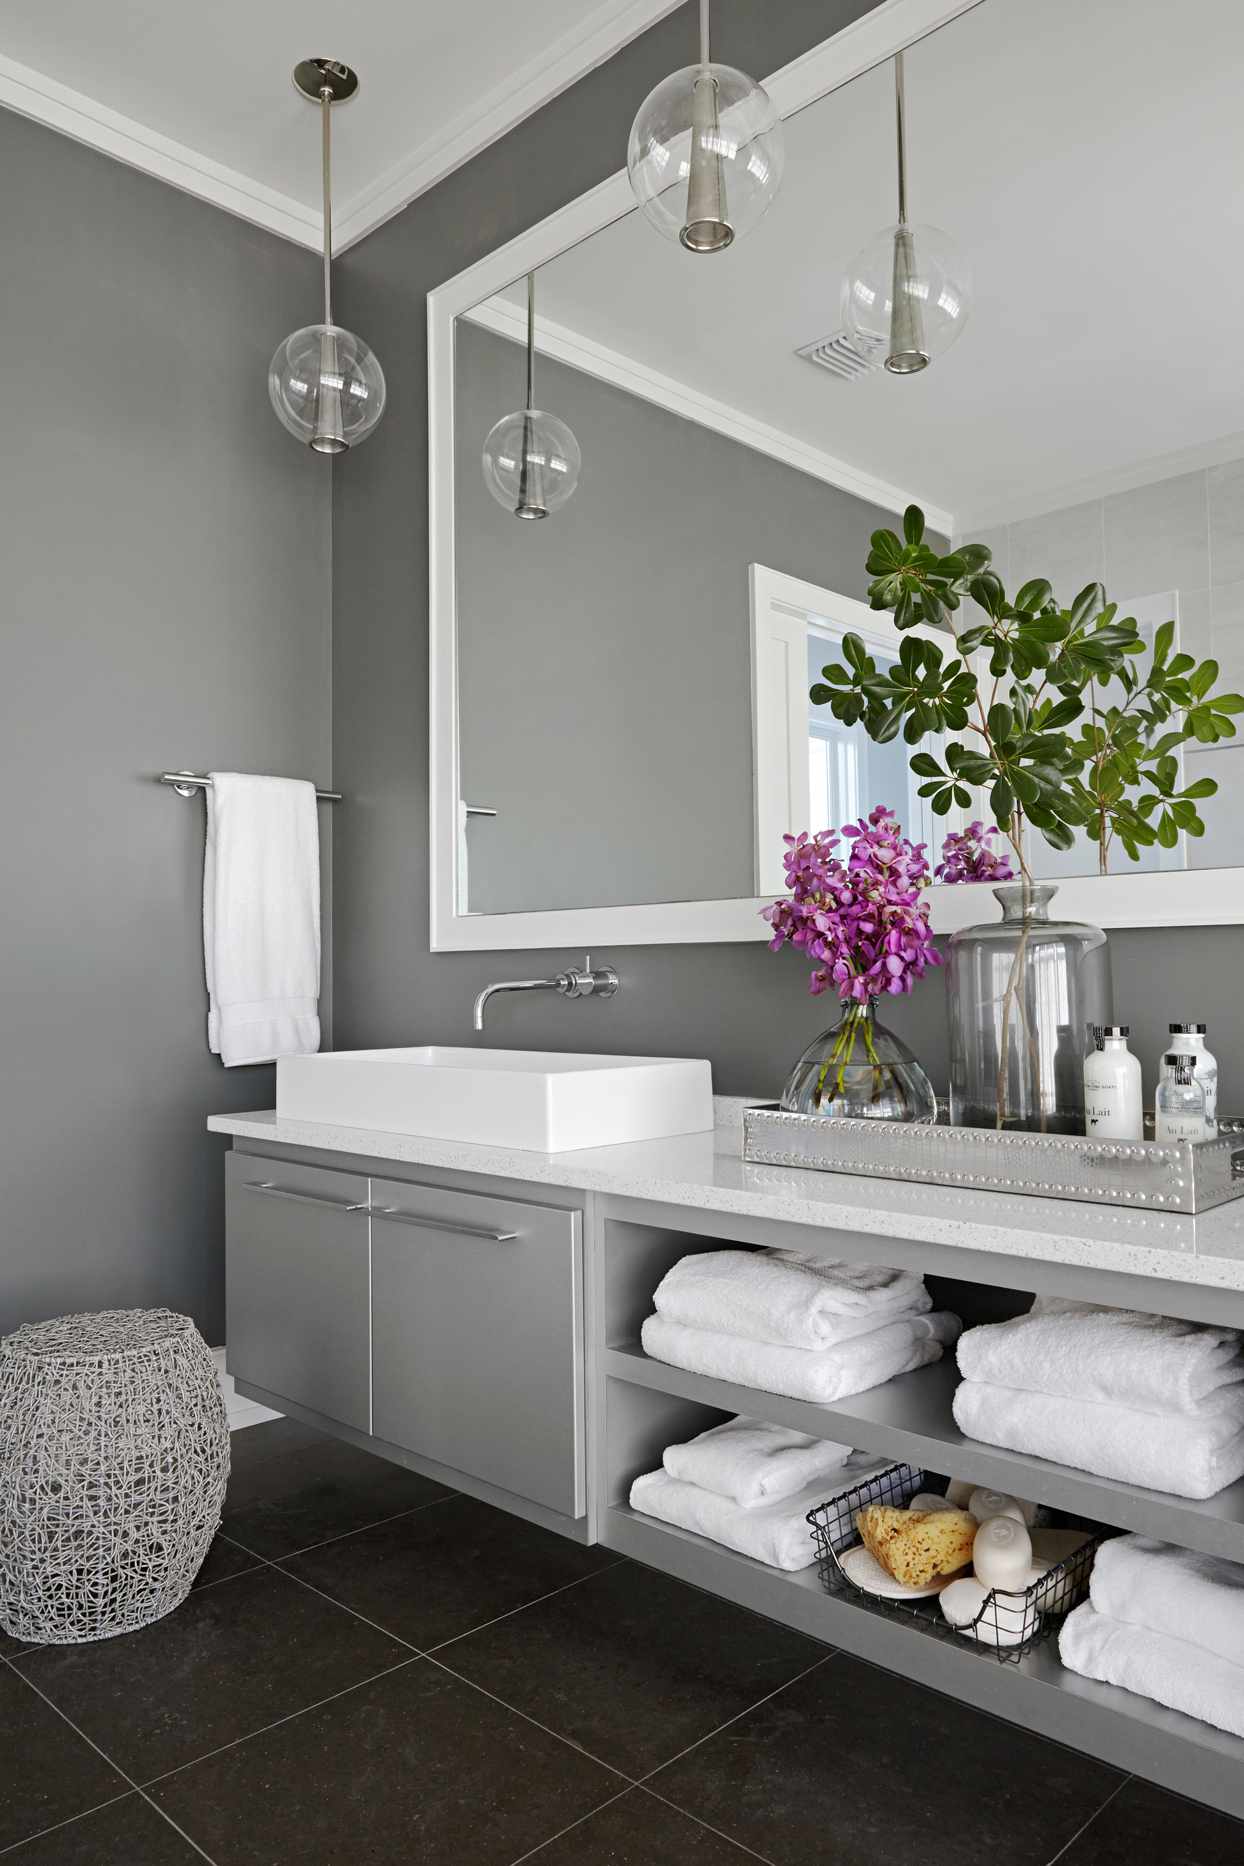
7. Serene and Spa-Like with a Grey Floating Vanity
To achieve that clean, uncluttered look with a floating vanity, planning the plumbing is key. For a wall-mounted faucet, the water supply lines and drain (the “rough-in”) must be positioned correctly within the wall before any tile or drywall goes up. The center of the faucet is typically installed 4-6 inches above the top rim of the vessel sink. The vanity itself should be mounted so its surface is 32-36 inches from the floor. Meticulous measurement at the framing stage prevents costly plumbing adjustments later.
🧹 Maintenance Reality
While the floating vanity and vessel sink are chic, the one thing that truly brings this bathroom to life is the intentional use of fresh greenery. The vibrant purple of the orchids and the deep green of the foliage provide the only saturated color in the otherwise neutral space. They add an organic, lively element that prevents the grey and white from feeling sterile. Remove the plants, and you lose the room’s soul; it becomes just a clean, functional bathroom. With them, it feels like a personal spa.
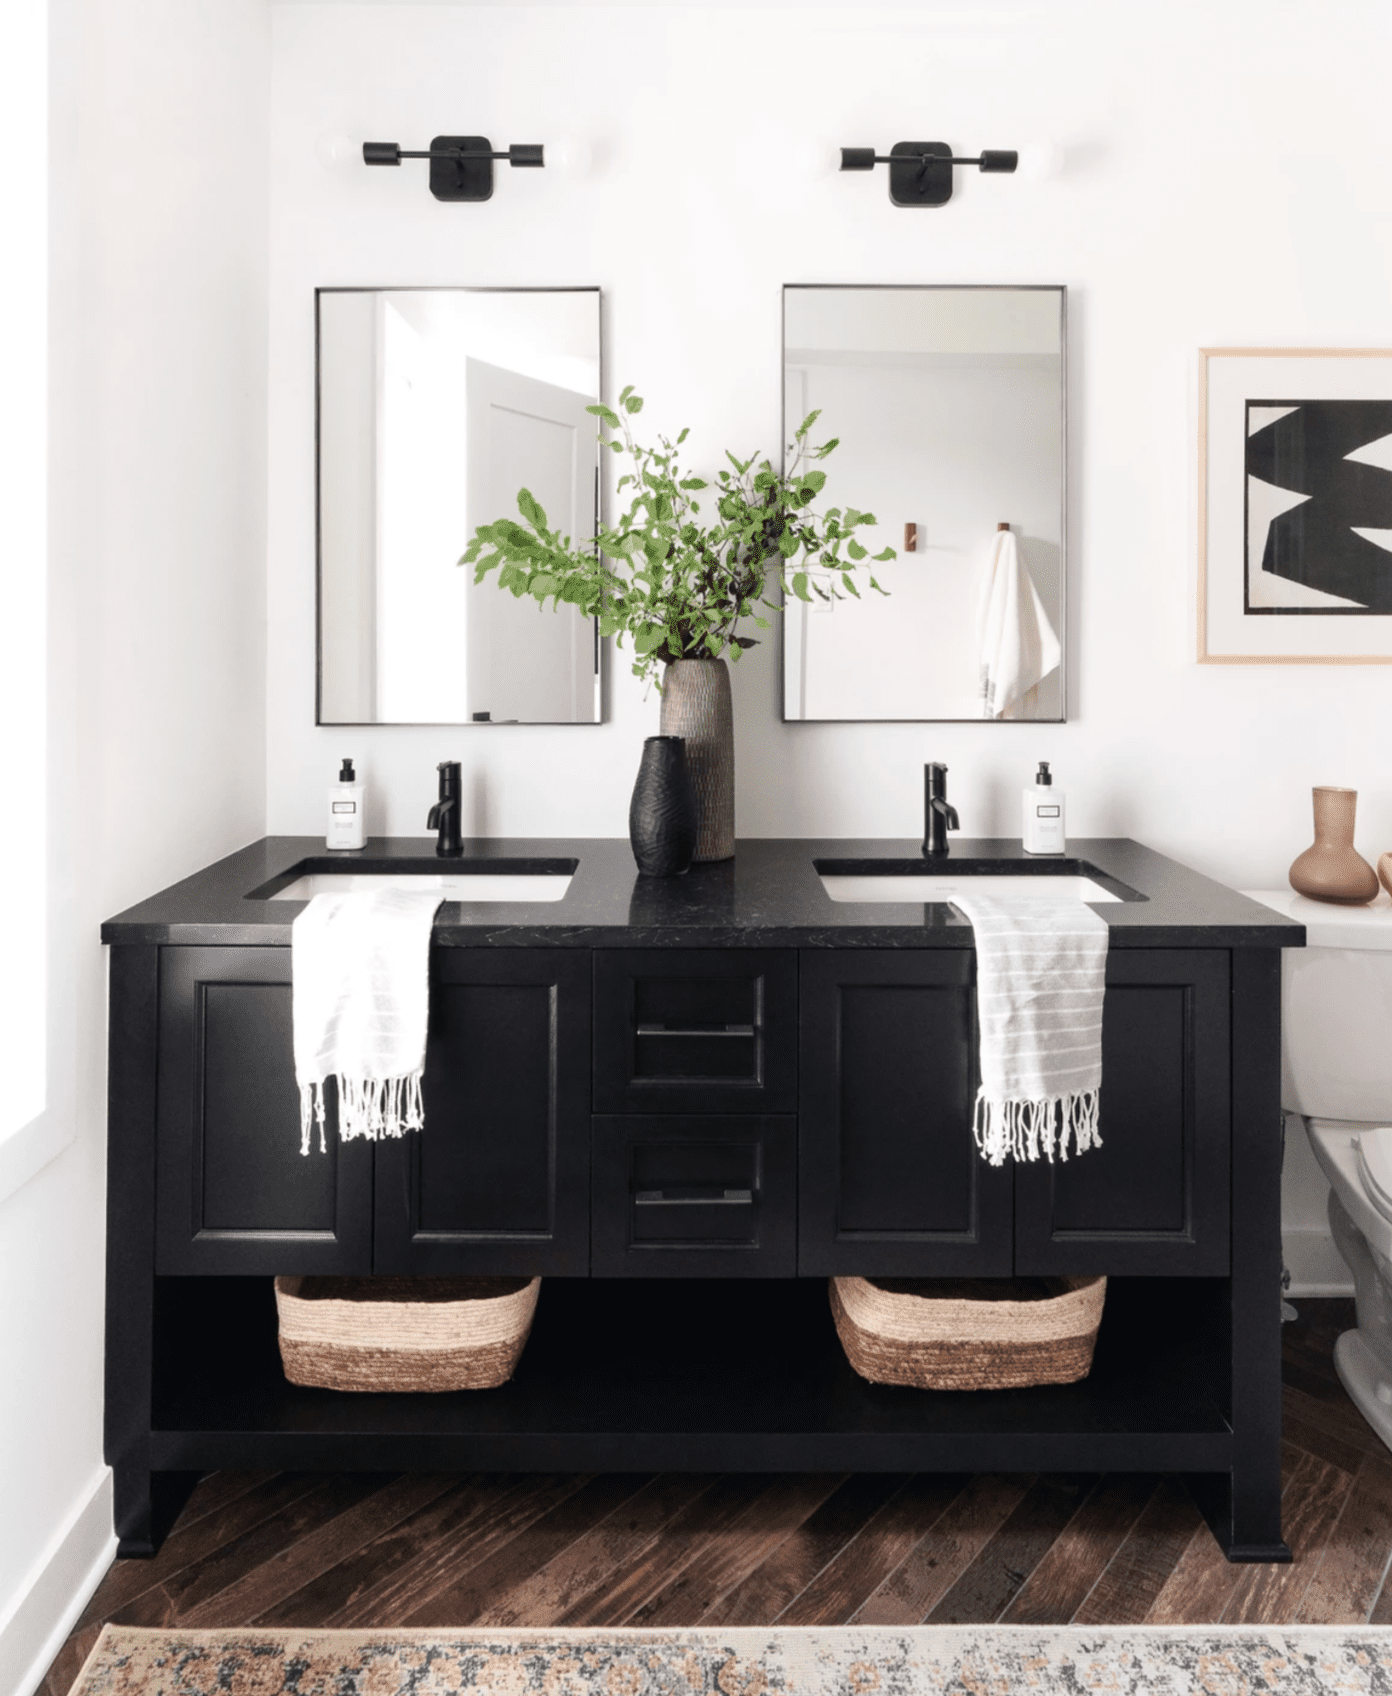
8. Minimalist High-Contrast With a Black Double Vanity
This space is a masterclass in the power of the “Rule of Three.” Notice how the design repeats elements in threes to create a sense of balance and intentionality. There are three key materials: black metal, white walls, and dark wood. There are three points of light above the vanity. There are even three pieces of simple greenery. This repetition creates a visual rhythm that is satisfying and calming, reinforcing the minimalist aesthetic. The strong vertical lines of the mirrors and lights also draw the eye upward, making the ceiling feel higher.
⭐ The One Thing
A double vanity of this scale works best in a primary bathroom with a width of at least 8 feet, and preferably 10-12 feet, to allow for comfortable movement for two people. You need a minimum of 60 inches for the vanity itself, plus clearance on either side. The ceiling should be at least 8 feet high to accommodate the vertical mirrors and bar lighting without feeling compressed. For a smaller space, you can get a similar high-contrast feel by using a single black vanity, as seen in Idea #1.
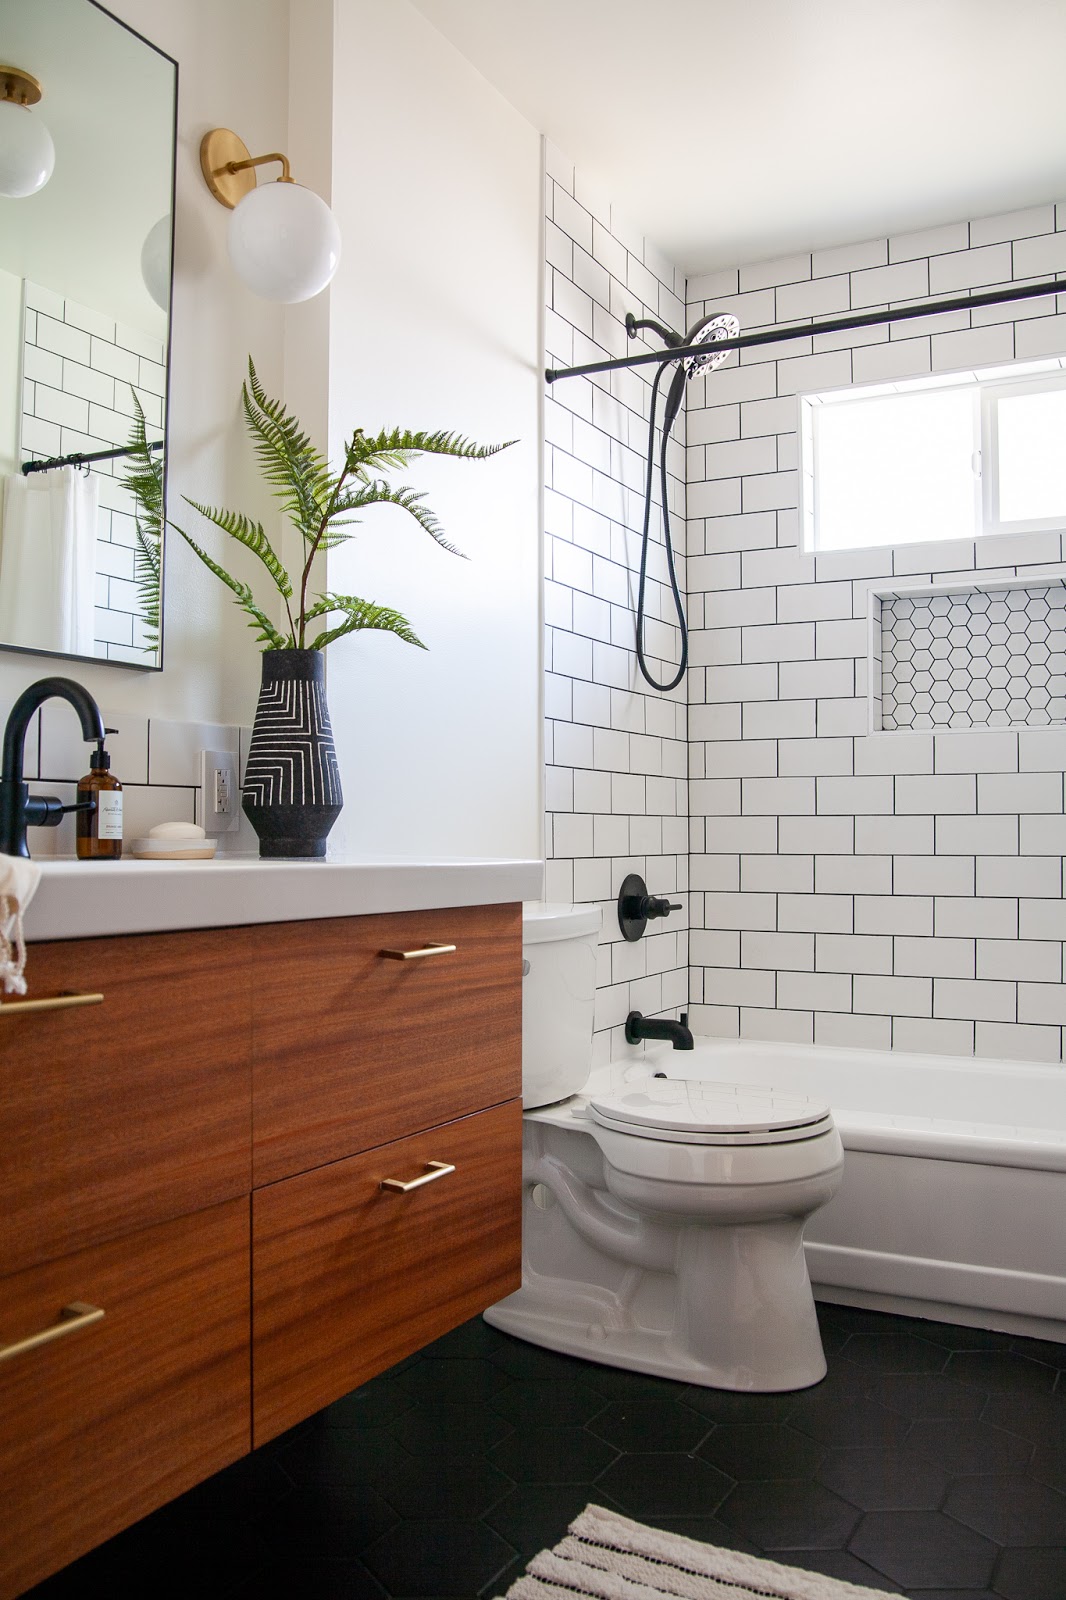
9. A Modern Mix: Black Hex Floors, Subway Tile, and Warm Wood
Before you commit to this stylishly contrasting look, run through this quick checklist:
⚠️ Real Talk
- Grout Color Test: The black grout with white subway tile is a key feature. Test your chosen grout on a few spare tiles to ensure it gives the crisp, graphic look you want and doesn’t stain the white tile.
- Lighting Plan: With black floors and dark grout, the space can get visually heavy. Do you have enough natural or artificial light? A combination of overhead and task lighting (like the sconce here) is crucial.
- Vanity Sourcing: A solid wood vanity can be an investment. Have you sourced one that fits your budget and dimensions? Check vintage stores and Facebook Marketplace for unique pieces that can be retrofitted.
You can get this high-end look for less. Instead of a custom wood vanity, look for a stock vanity from IKEA or Home Depot and upgrade the hardware with brass pulls from an online retailer (around $5-$10 each). Classic white ceramic subway tiles and black porcelain hexagon tiles are among the most affordable tile options on the market. Spend your money on the fixtures—a quality matte black showerhead and faucet—as they provide the biggest visual bang for your buck and are handled daily. You can achieve this entire look for under $2,000 in materials if you shop smart.
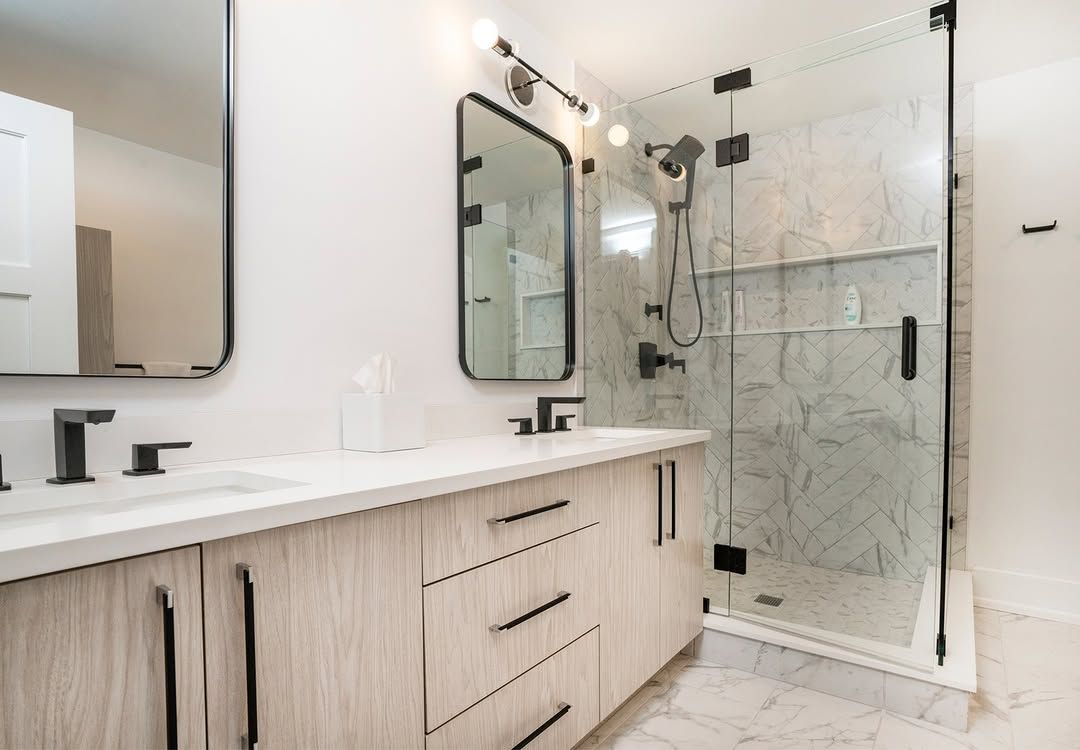
10. Clean Lines: A Light Wood Vanity with Matte Black Fixtures
This bathroom’s serene vibe comes from a simple, repeatable formula: 70% light/white space (white walls, light-toned vanity, marble-look tile), 20% matte black accents (faucets, mirrors, hardware), and 10% natural texture (the wood grain). This high percentage of lightness makes the room feel bright and expansive, while the black accents provide a graphic punch that defines the space. The wood element is crucial—it keeps the black and white from feeling too cold and clinical, adding necessary warmth.
💡 Designer Tip
Matte black fixtures are undeniably chic, but they can be higher maintenance than their chrome counterparts. In areas with hard water, water spots and mineral buildup are much more visible on a matte black finish. To keep them looking sharp, you’ll need to wipe them down with a soft, dry cloth after each use. Avoid harsh, abrasive cleaners, which can scratch or strip the finish. A simple solution of water and mild dish soap is usually all that is needed for regular cleaning.
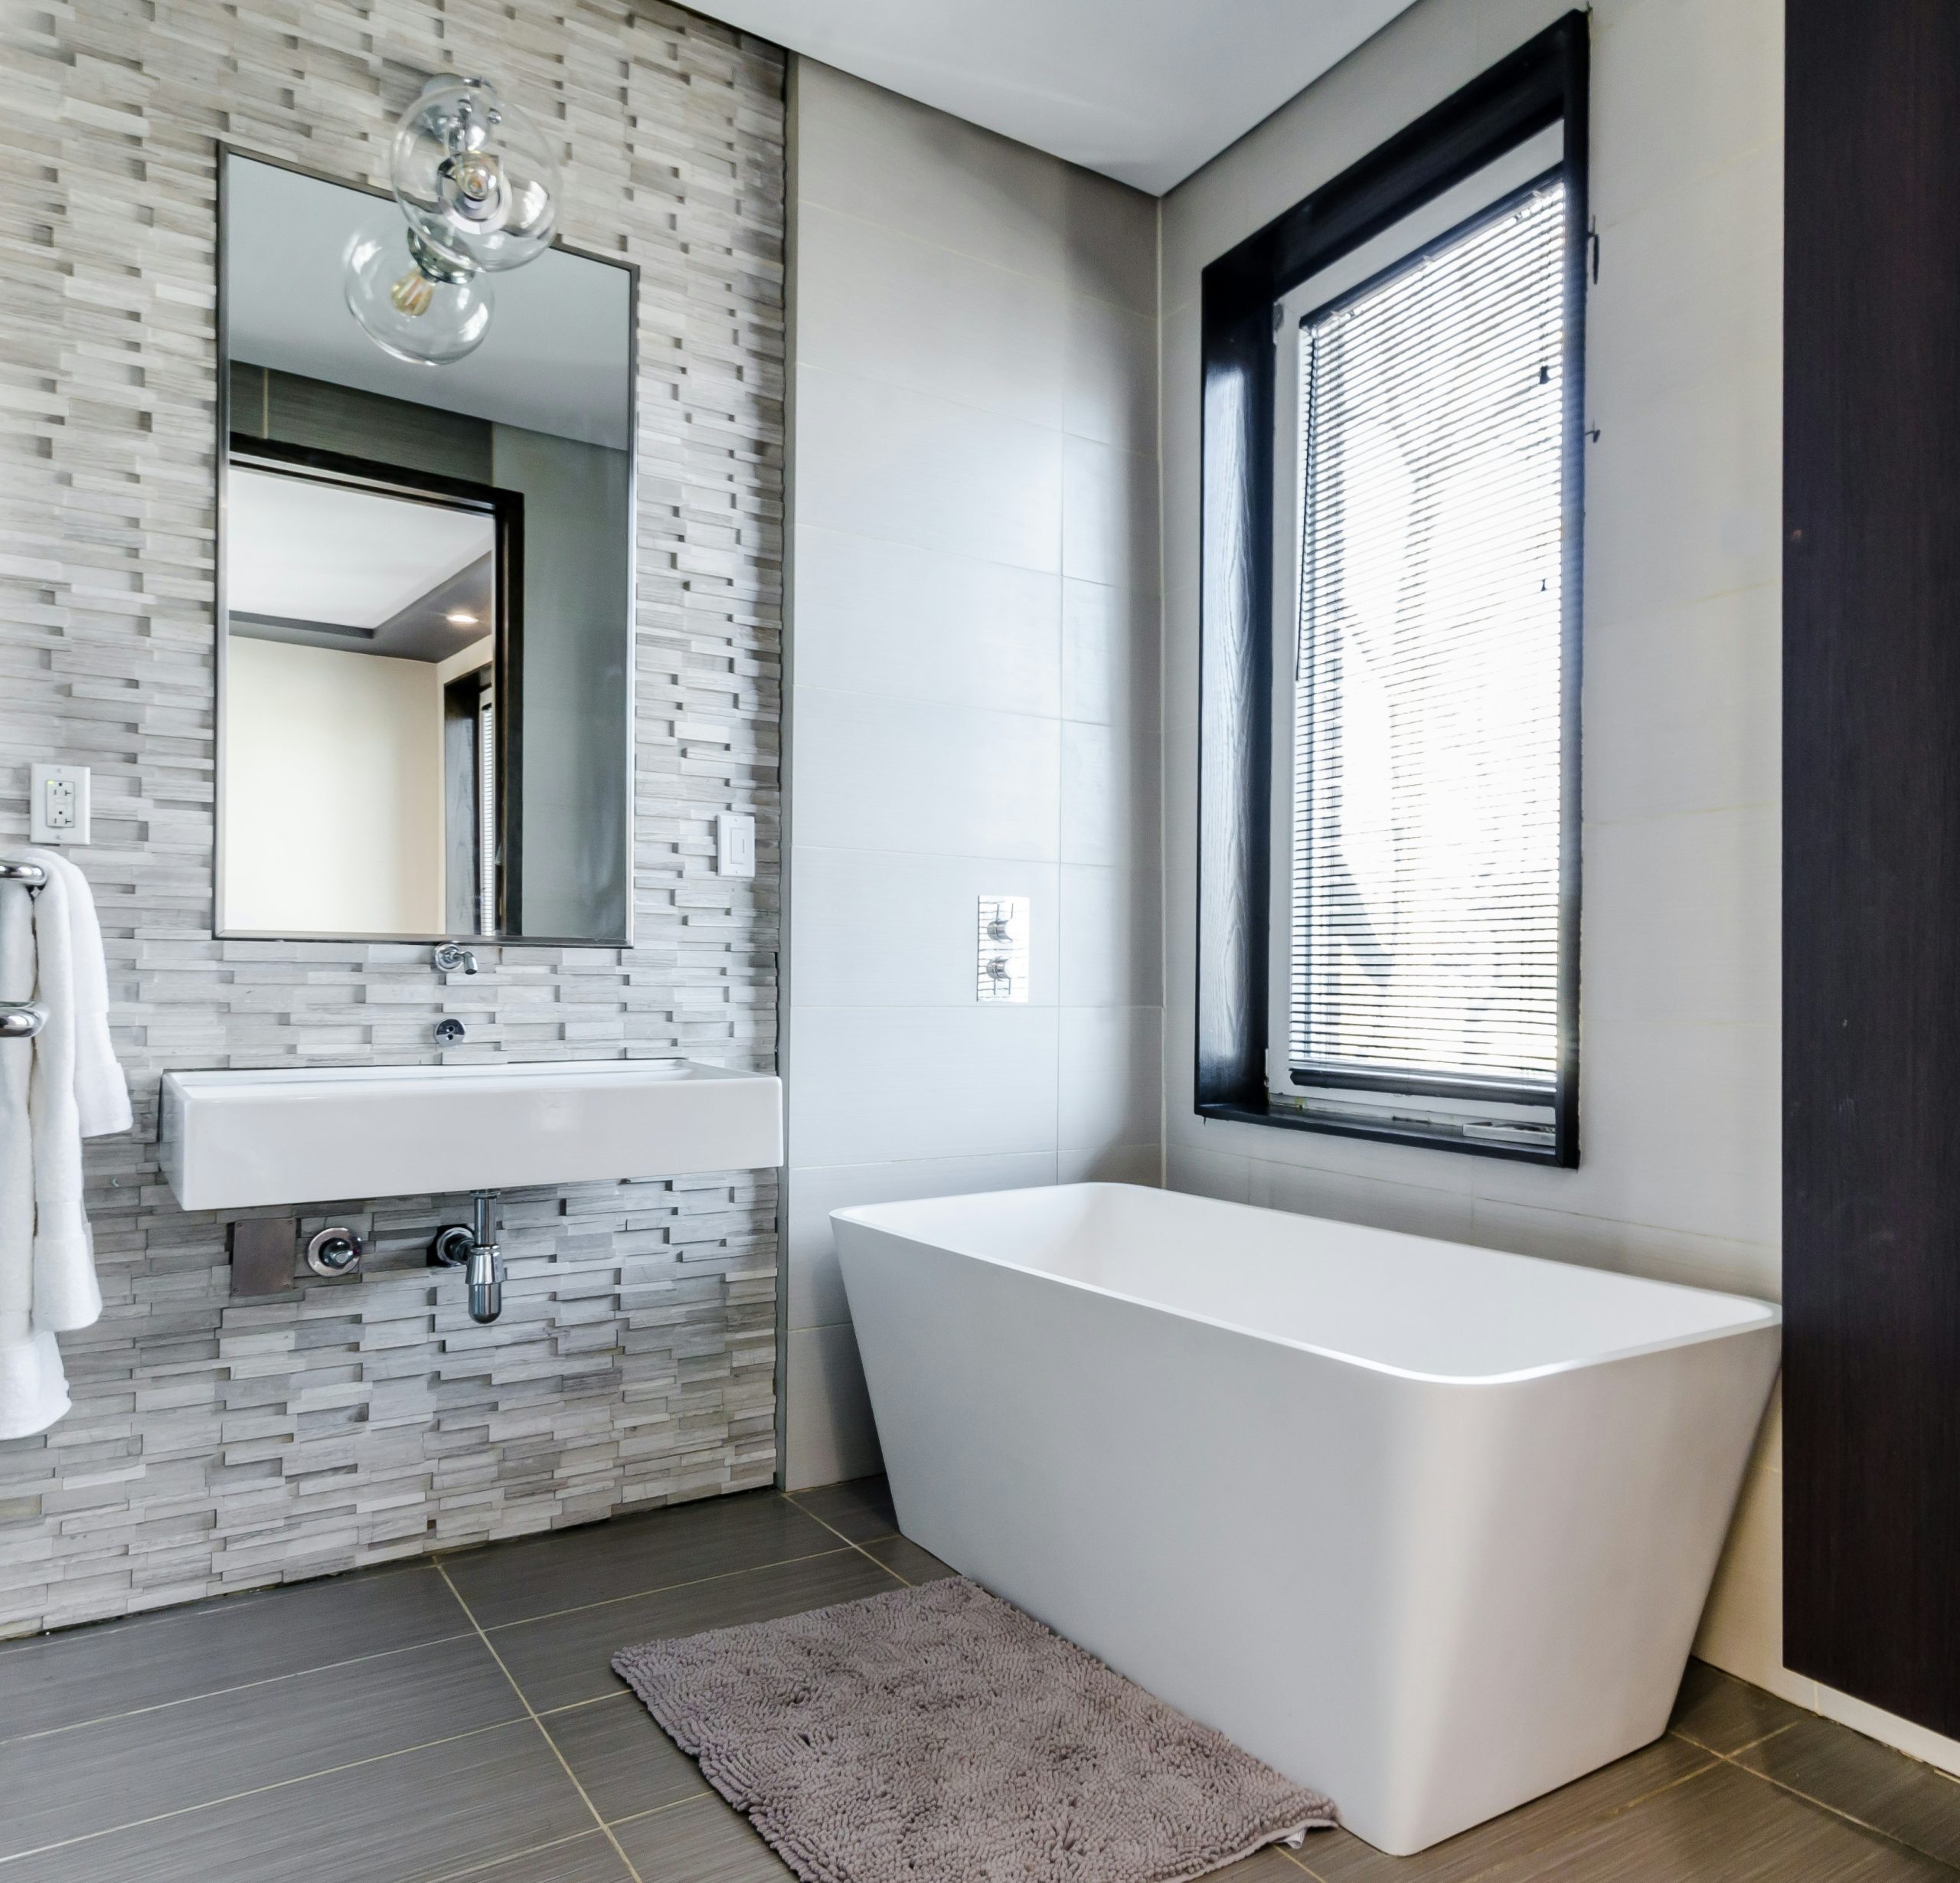
11. Stacked Mosaic Tile in a Modern Grey and White Scheme
The single element that makes this bathroom work is the wall of stacked light grey mosaic tile behind the sink. It provides a subtle, yet critical, layer of texture that prevents the room from feeling flat. Without it, you would have large white tiles, a white tub, and a white sink, which could easily feel sterile. The small scale of the mosaic tiles creates a tactile focal point, adding depth and a touch of handcrafted detail to the otherwise sleek, modern space. It proves that texture can be just as important as color.
🔧 How-To Brief
When using a dark floor tile with lighter wall tiles, grout choice is critical for a cohesive look. Here, the grout on the dark grey floor should be a matching dark grey. Using a light grout would create a grid-like pattern that could look busy and fight for attention with the mosaic wall. For the light grey wall mosaic, a slightly lighter grey or off-white grout enhances the texture without being distracting. Always ask your tiler for a grout sample board to see how it looks when dry.
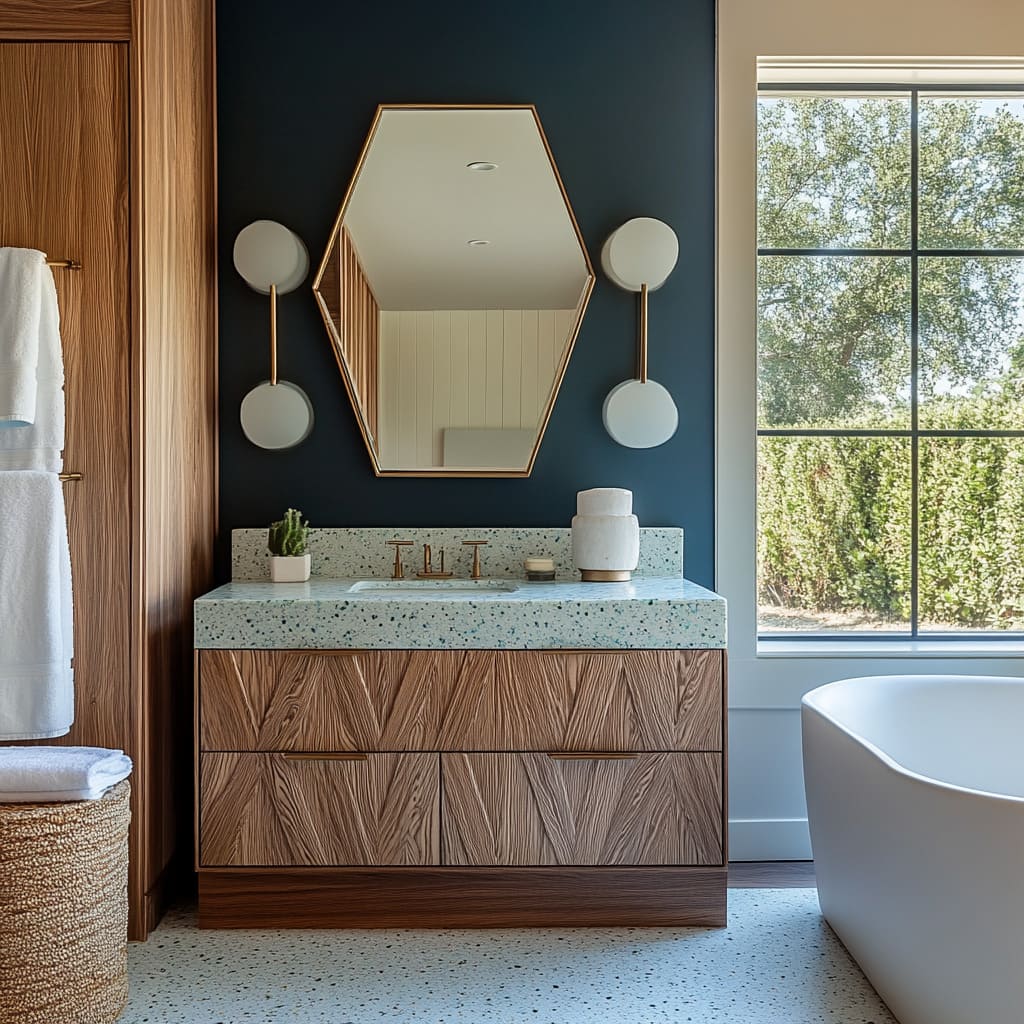
12. Deep Navy and Wood with a Speckled Green Terrazzo Counter
This design is a masterclass in mixing color, pattern, and shape. It works because it balances bold choices with simple forms. The deep navy wall provides a dramatic, moody backdrop, but the clean lines of the freestanding tub and simple spherical sconces keep it feeling modern, not heavy. The speckled green terrazzo, textured wood vanity, and hexagonal mirror add layers of interest, but they are all unified by a shared “earthy elegance.” The gold accents are like jewelry, adding a final touch of warmth and luxury.
🎯 What Makes It Work
Ready to try a bold, beautiful look like this? Check these items off your list first:
- Natural Light Source: A dark wall color like navy needs to be balanced with plenty of light. This room has a large window. Ensure your space has adequate natural or layered artificial light to avoid feeling like a cave.
- Sample the Terrazzo: Terrazzo patterns can vary wildly. Get a physical sample of your chosen slab to see it in your room’s light next to your navy paint swatch and wood sample.
- Fixture Finish Consistency: The gold/brass hardware is key to the warmth. Have you sourced your mirror, sconces, and faucets to ensure their finishes match or are complementary?
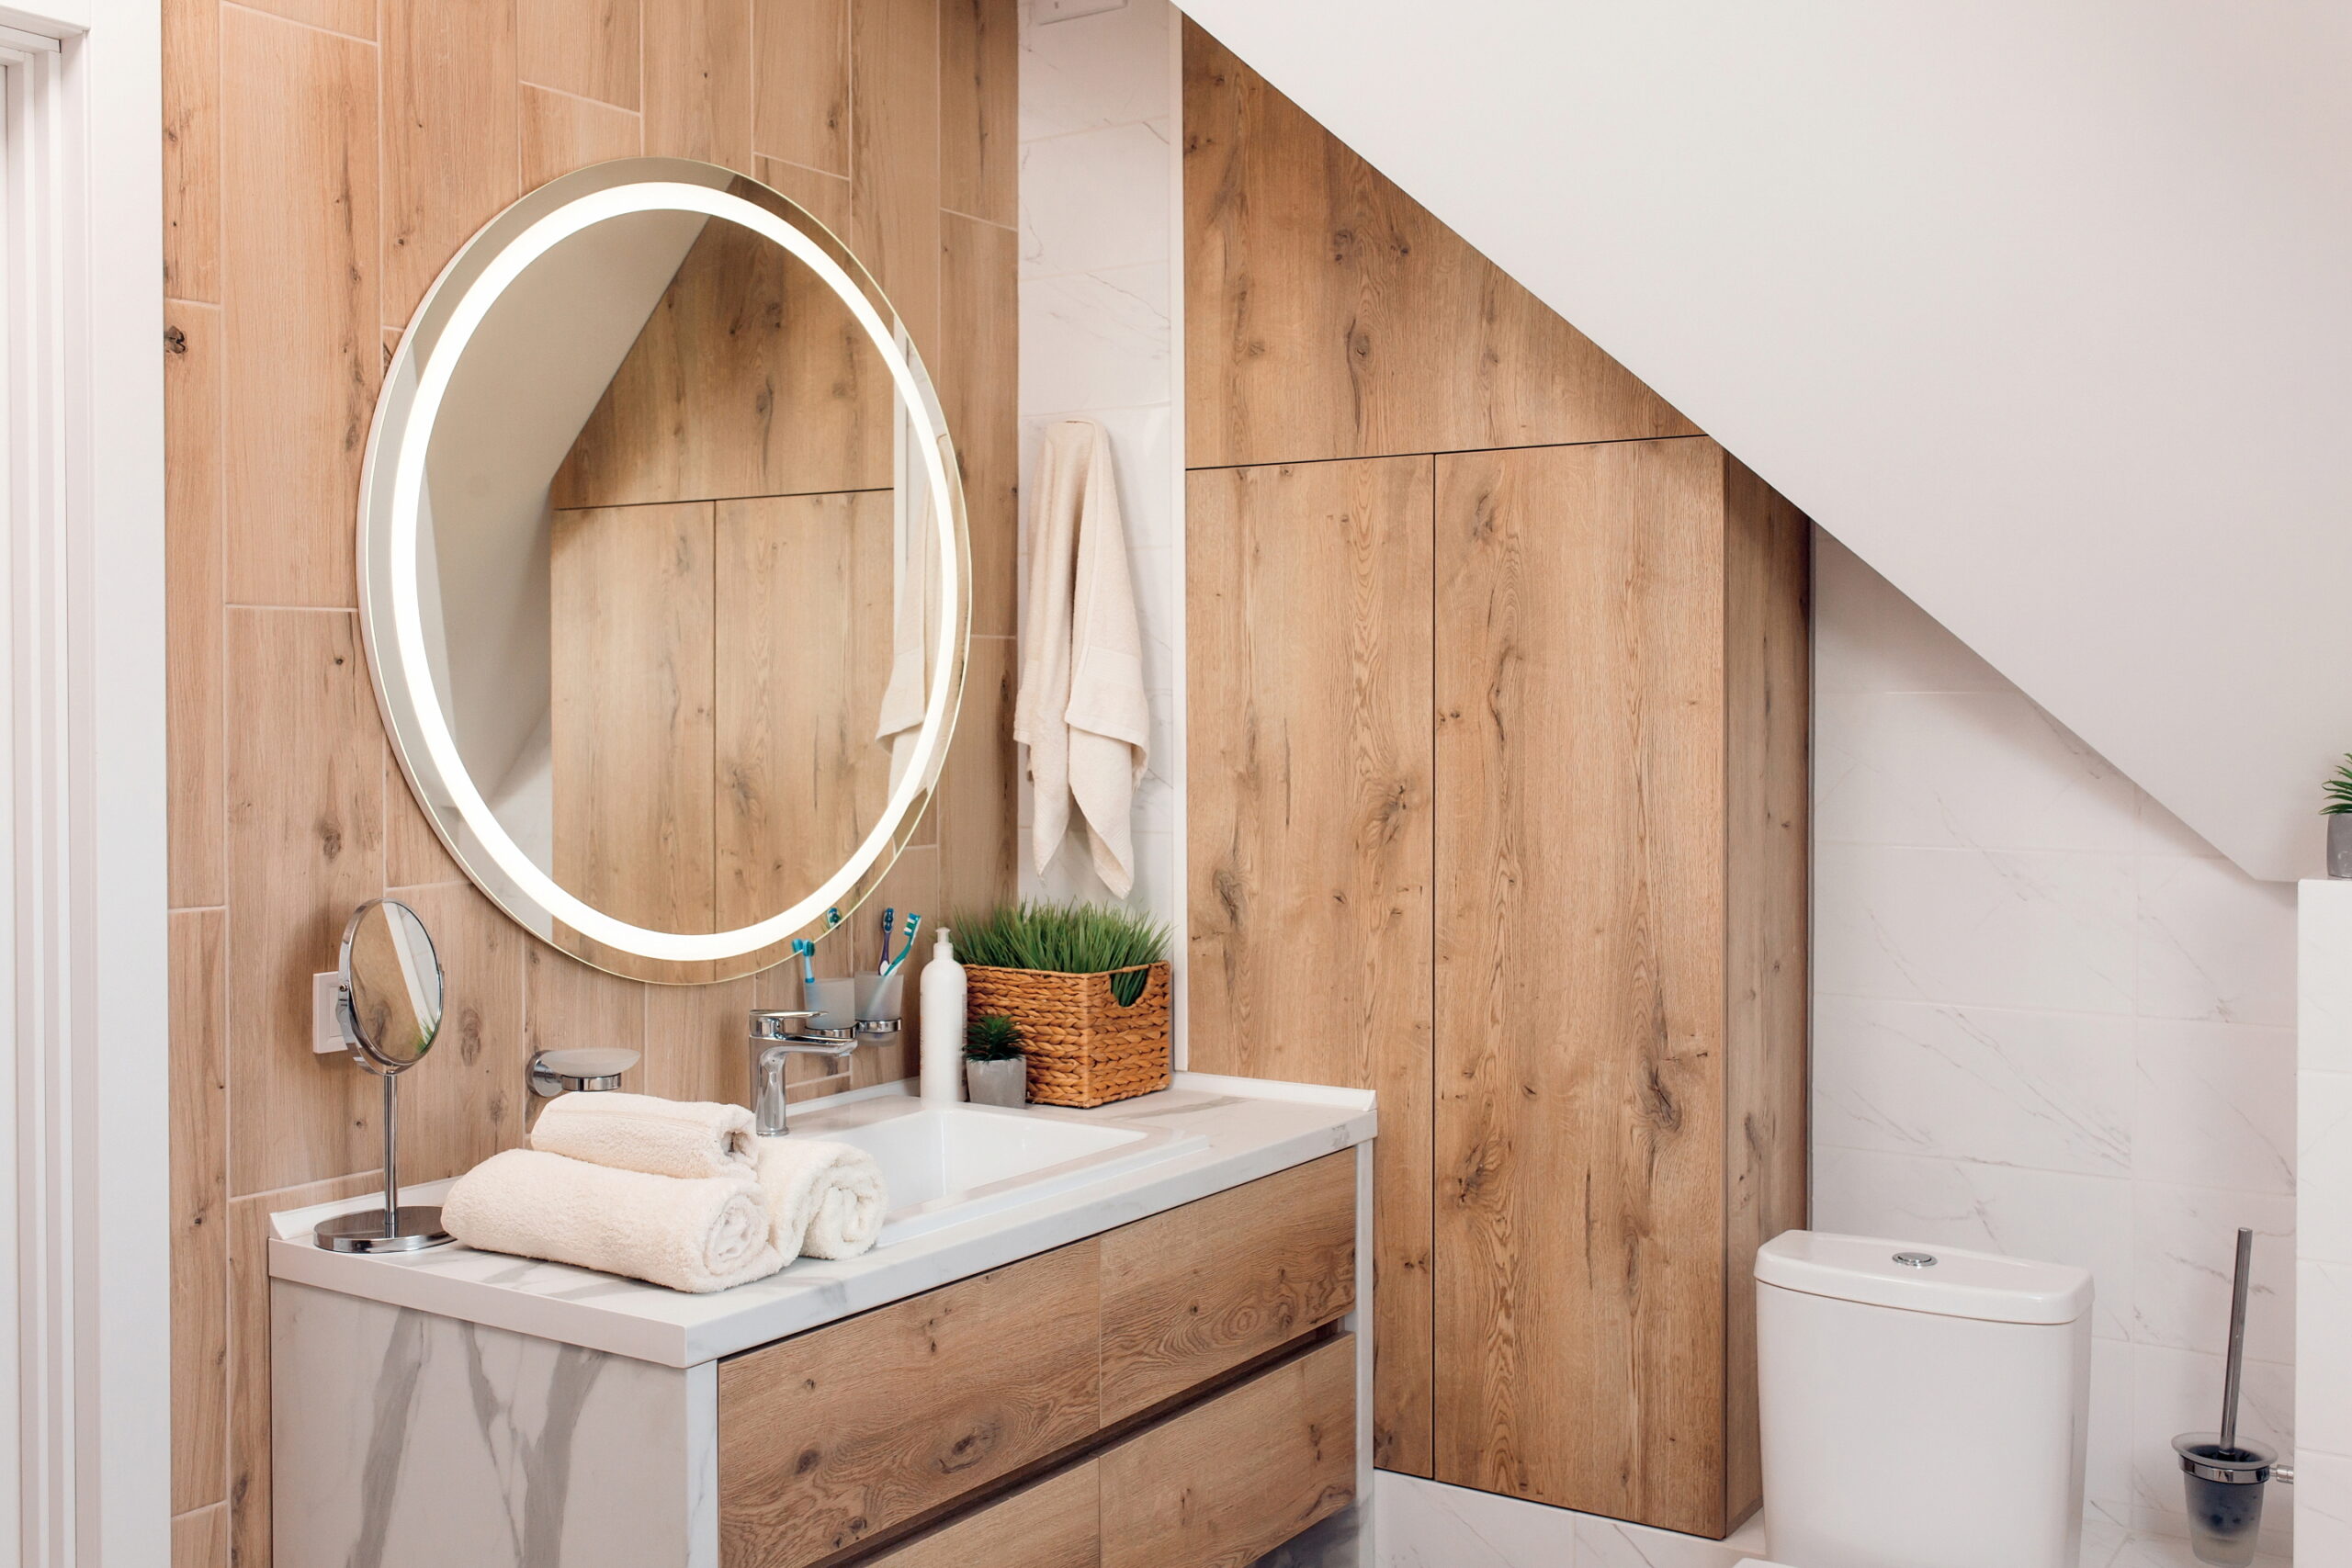
13. An Attic Bathroom with a Wood Slat Wall and Backlit Mirror
This design is a brilliant solution for a room with challenging architecture, like an attic or a space with a slanted ceiling. It’s ideal for a compact footprint, roughly 60-80 square feet. The vertical wood-look tiles draw the eye upward, creating an illusion of height, while the large backlit mirror makes the space feel wider and brighter. A floating vanity or custom-built cabinetry like this is perfect for awkward corners. The key is to embrace the unique shapes of the room rather than fight them.
💰 Budget Breakdown
Installing a backlit mirror is a weekend project that adds a huge impact. Here’s how:
- Turn Off Power: Safety first! Go to your breaker box and turn off the power to the bathroom circuit where you’ll be working.
- Install Electrical Box: If you don’t already have one, you’ll need an electrician to install a junction box in the wall where you want to hang the mirror.
- Mount the Bracket: Most backlit mirrors come with a simple mounting cleat or bracket. Secure this to the wall, making sure it’s level.
- Connect Wires: Connect the mirror’s wires to your home’s wiring in the junction box (usually black to black, white to white, and green/copper to ground).
- Hang and Test: Hang the mirror on its bracket, turn the power back on, and test the light.
Time estimate: 1-3 hours (plus electrician time). Cost: $0 if you have a box, $150-300 if you need one installed.
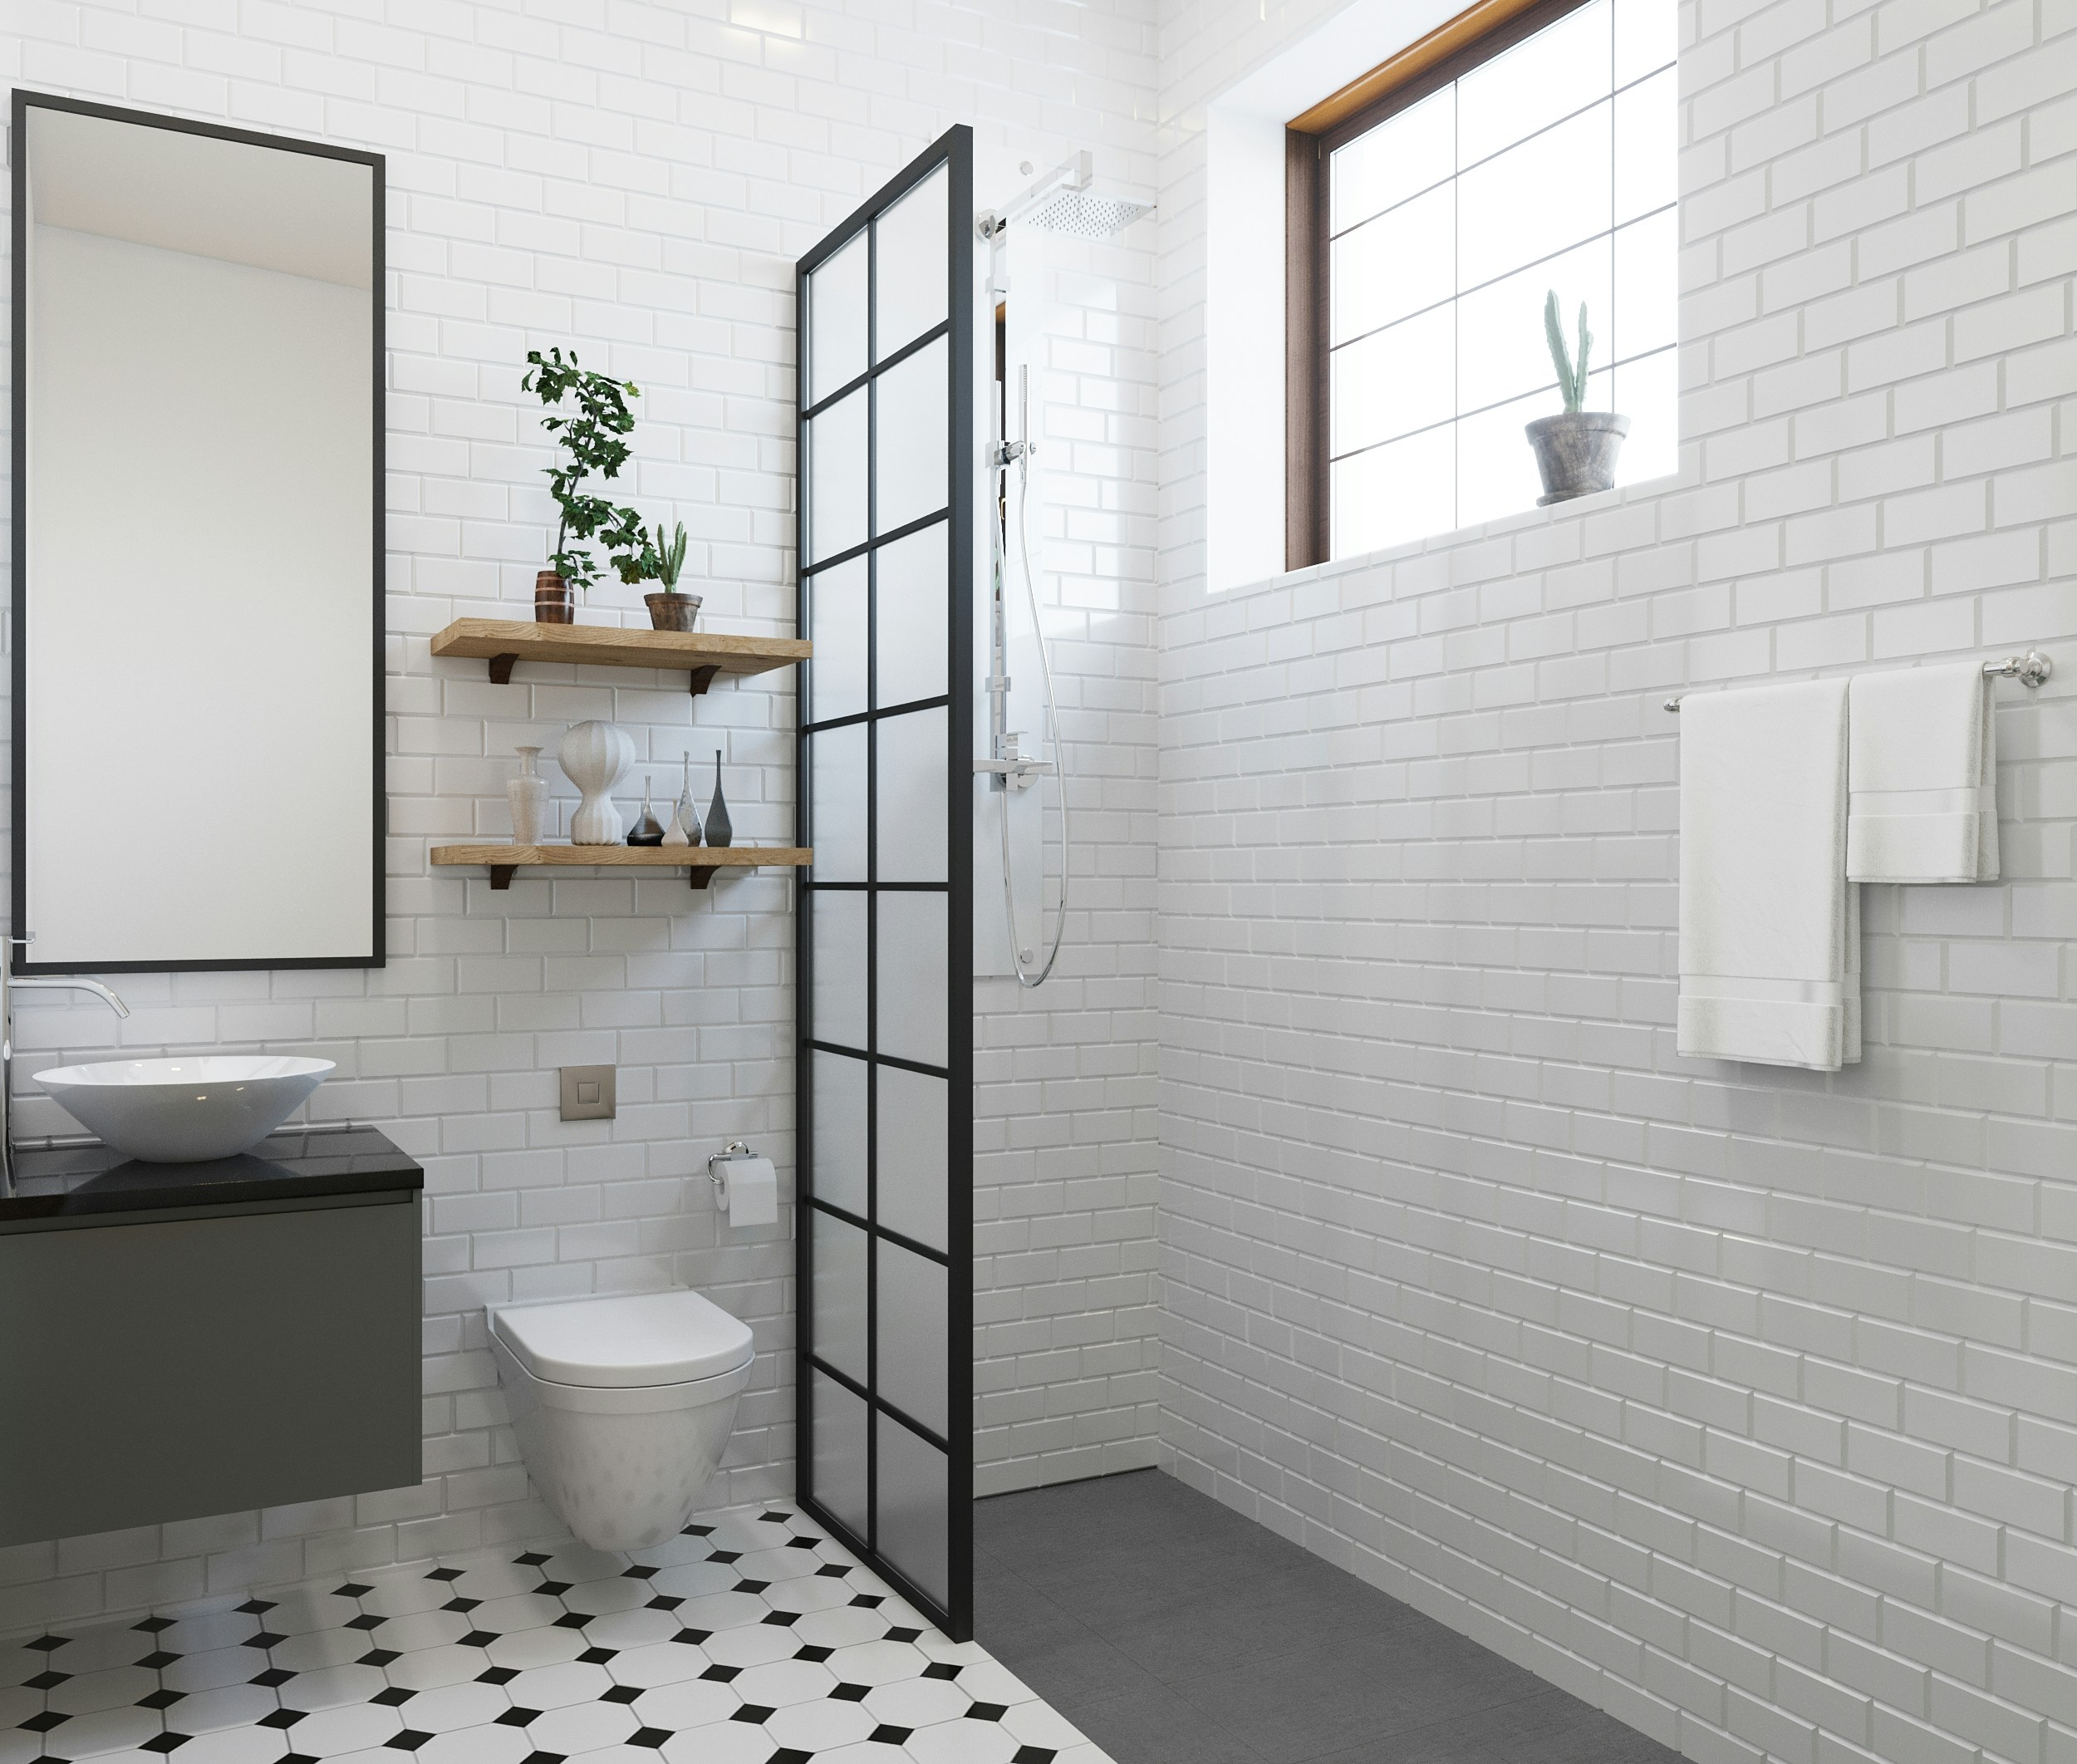
14. Patterned Floors Meet Subway Tile with a Glass Partition
When mixing floor tiles in a small space, creating a visual “zone” is key to making it feel intentional. Here, the bold patterned tile is used only in the dry area (vanity and toilet), while a simple, solid dark grey tile is used in the wet shower area. The black-framed glass partition acts as a perfect transition point. This technique defines the different functional areas of the bathroom, adding character without making the whole room feel dizzyingly busy. Always use a proper waterproofing membrane under shower floor tiles.
📐 Style Math
Be honest about your cleaning habits before committing to a glass shower partition. While they look sleek and open up a space, they are magnets for soap scum and hard water spots. To keep it looking crystal clear, you’ll need to squeegee the glass after every single shower. Forgetting for even a week can lead to buildup that requires serious scrubbing. If low maintenance is your top priority, a high-quality shower curtain that you can throw in the wash is a much more practical choice.
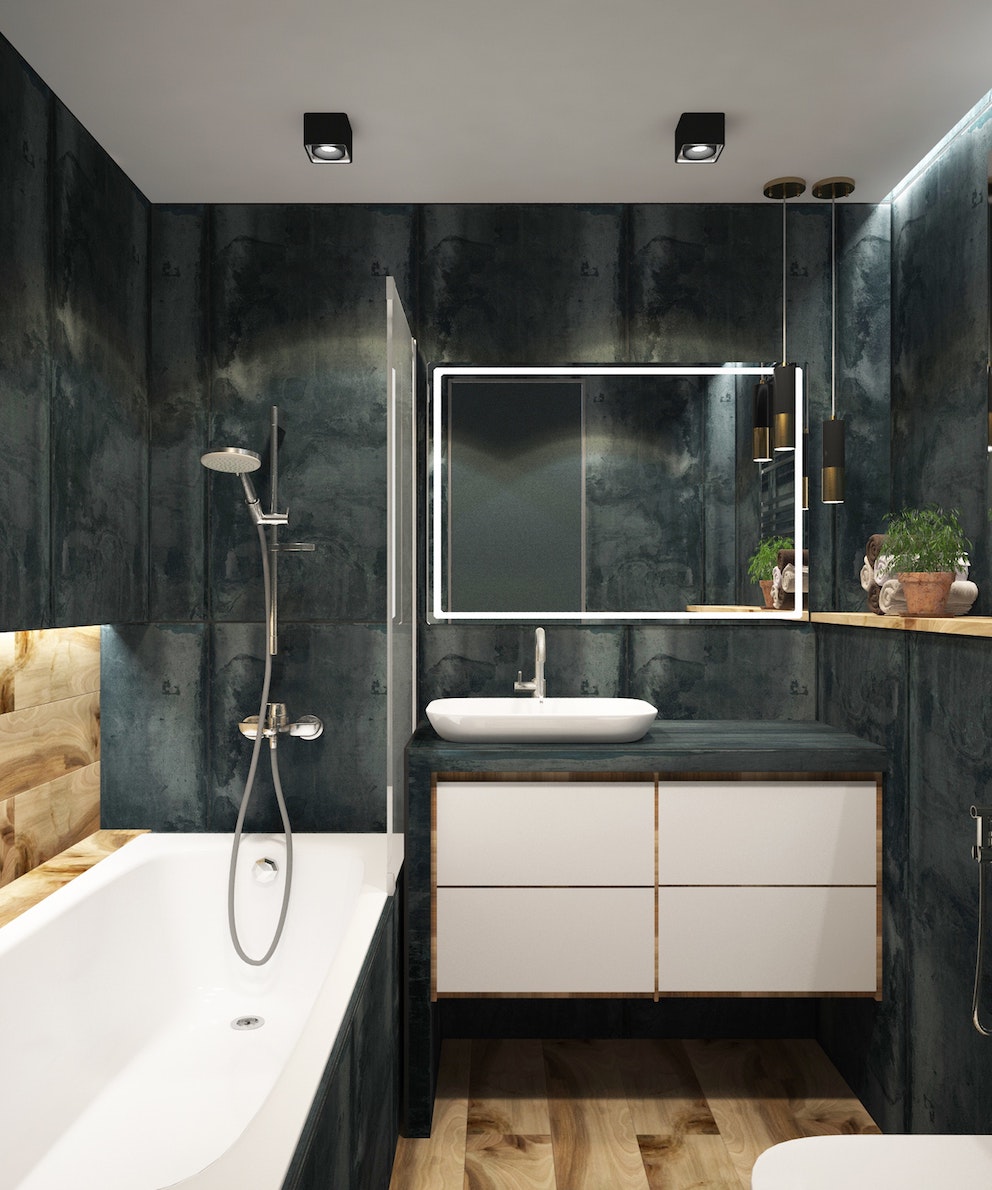
15. Dark Industrial Tiles with Warm Wood Shelving
This bathroom successfully balances two seemingly opposite aesthetics: dark, industrial minimalism and warm, organic comfort. It works because of the strategic placement of light and texture. The dark, textured wall tiles create a moody, sophisticated shell. However, the warmth of the wood-look floor, the illuminated wooden shelf, and the soft glow from the mirror prevent the space from feeling cold. The glossy white of the tub and vanity reflect this light, creating bright points of contrast that pop against the dark background.
📏 Scale Guide
The “Industrial Spa” is a micro-trend we’re seeing emerge as an evolution of the stark industrial look. People still love the raw, urban feel of materials like concrete and dark tile, but they also crave the comfort and warmth of a spa. This look blends the two. By introducing natural wood, soft lighting, and clean white fixtures, the style becomes more livable and relaxing. It’s a direct response to our desire for homes that are both chic and genuinely restorative.
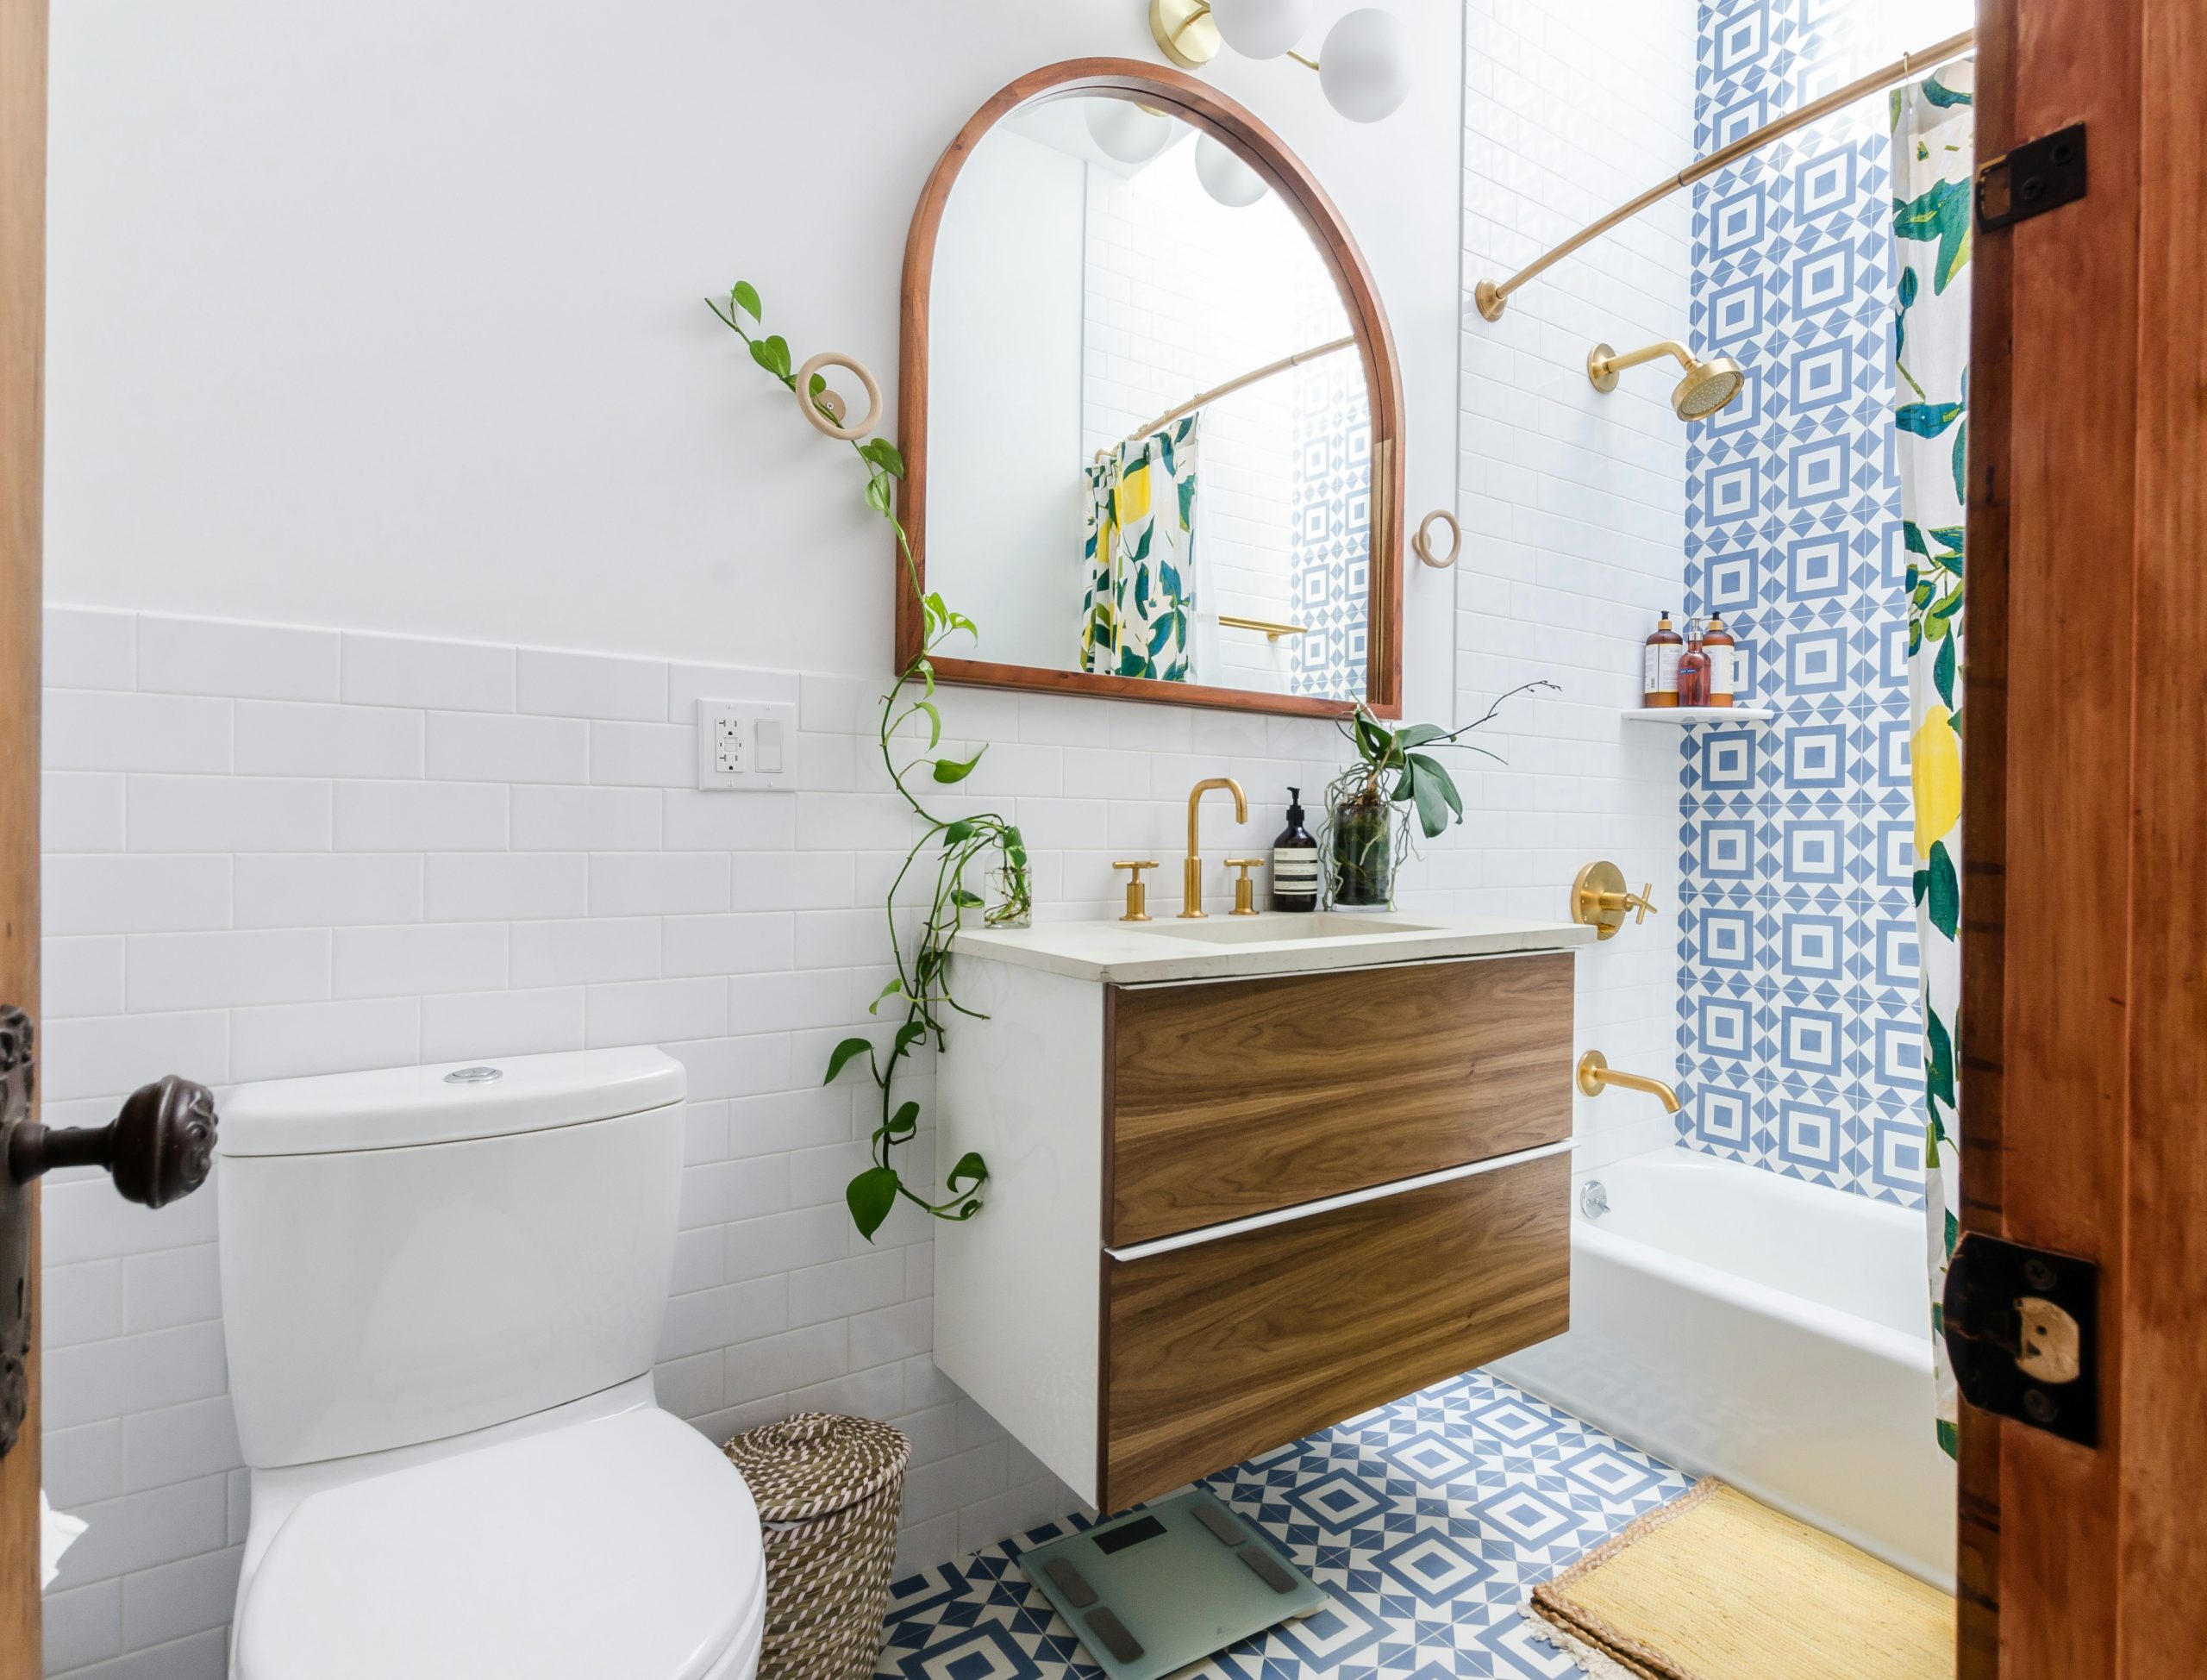
16. Blue and White Geometric Tiles with a Wood Arched Mirror
This bathroom’s eclectic charm comes from a playful formula: 40% classic foundation (the white subway tile), 40% bold pattern (the blue and white geometric floor), and 20% warm, natural accents (the wood vanity, arched mirror, and brass fixtures). The classic subway tile provides a quiet, clean canvas that allows the floor to be the star without overwhelming the small space. The wood and brass elements are essential; they inject warmth and a touch of mid-century character, keeping the blue and white from feeling too stark or coastal.
🔥 Trending Context
A bold, graphic floor tile like this is a major statement. While it looks fantastic now, ask yourself if you’ll love it in five or ten years. Tile is a pain to replace. If you’re hesitant, consider a compromise: use a more neutral, classic floor tile and bring in the bold pattern with a shower curtain and bath mat. The lemon-patterned curtain here is a great example of adding personality that can be easily and affordably swapped out when you’re ready for a change. Let permanent finishes be timeless and accessories be trendy.
17. Earthy Textures: A Stone Sink on a Light Wood Vanity
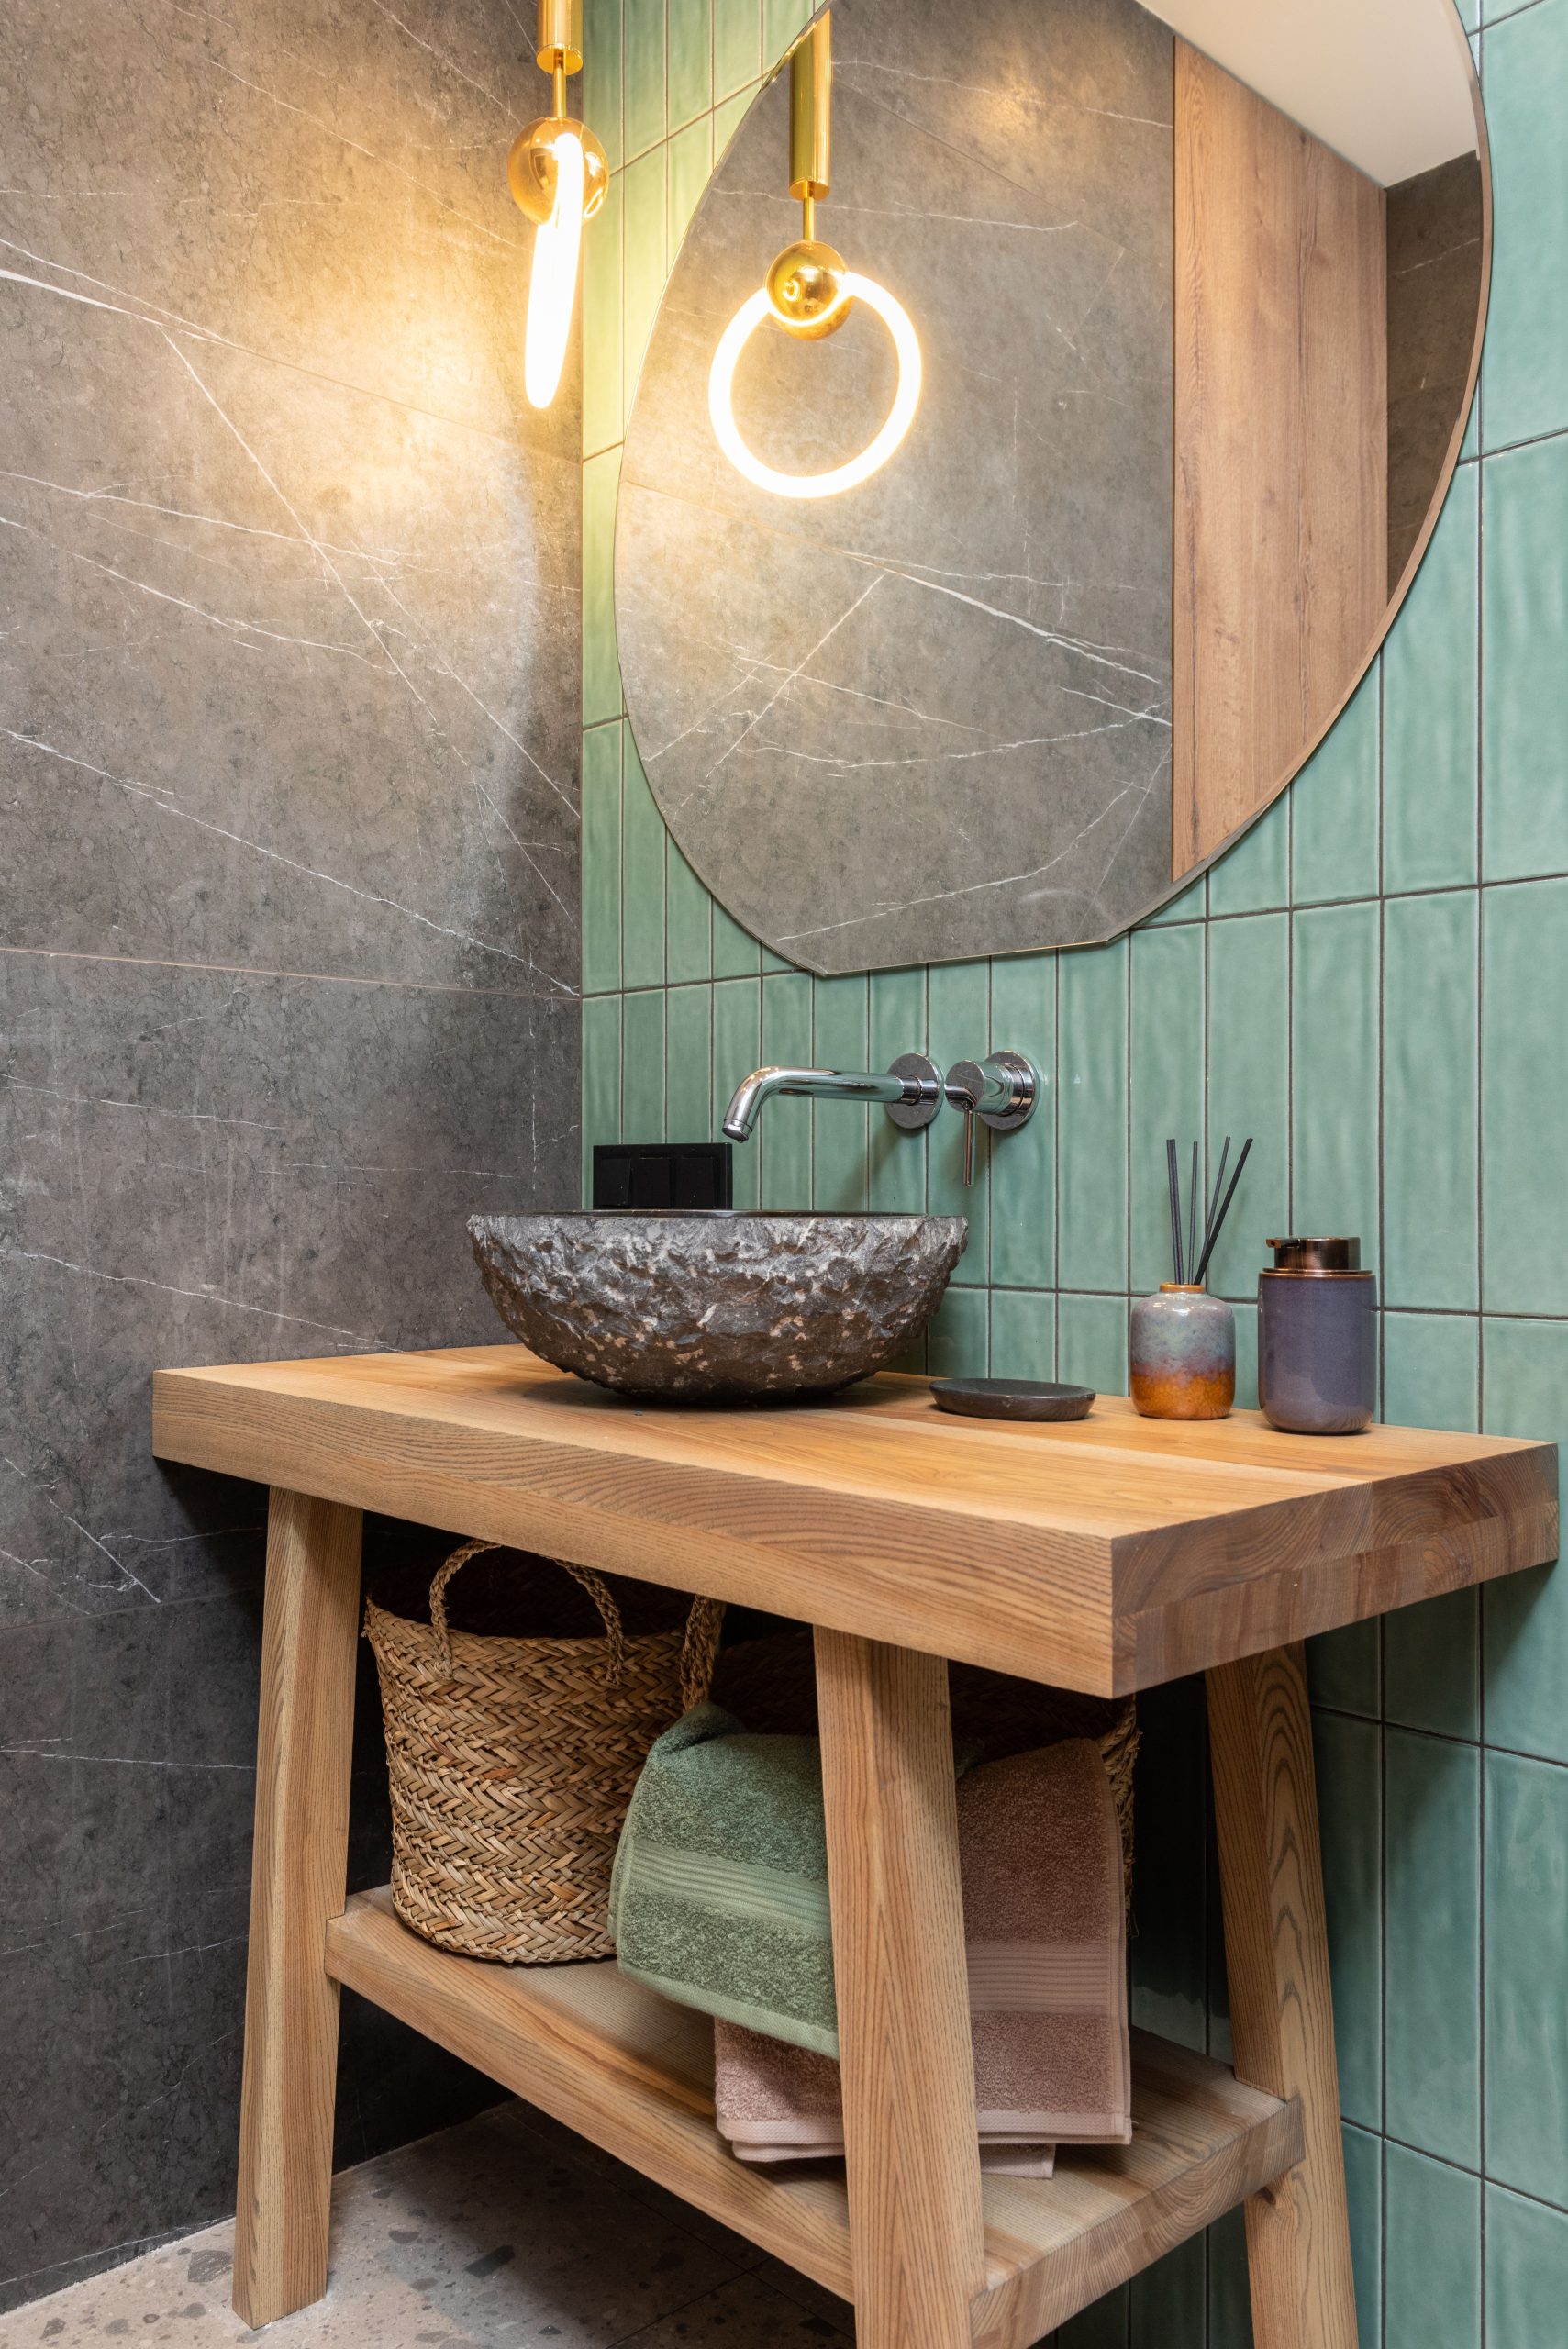
The single element that defines this bathroom is, without a doubt, the rough-hewn stone vessel sink. It’s a sculptural, organic piece that stands in beautiful contrast to the clean lines of the green subway tile and the smooth wood of the vanity. If you replaced it with a standard white ceramic sink, the room would still be lovely, but it would lose its unique, earthy soul. The sink acts as an anchor, grounding the entire design in natural, raw texture and making the space feel curated and special.
✅ Before You Start
That gorgeous stone sink requires specific care. Natural stone is porous and can be susceptible to staining from makeup, oils, or colored soaps. It must be sealed regularly (at least twice a year) with a high-quality stone sealer. For cleaning, avoid all acidic or abrasive cleaners (no vinegar, no bleach, no powdered scrubs). Use only a pH-neutral cleaner specifically designed for natural stone. It’s a commitment, but one that pays off in character. For a similar look with less work, look for concrete or composite sinks.
18. Fresh and Tranquil with Sage Green Paneling
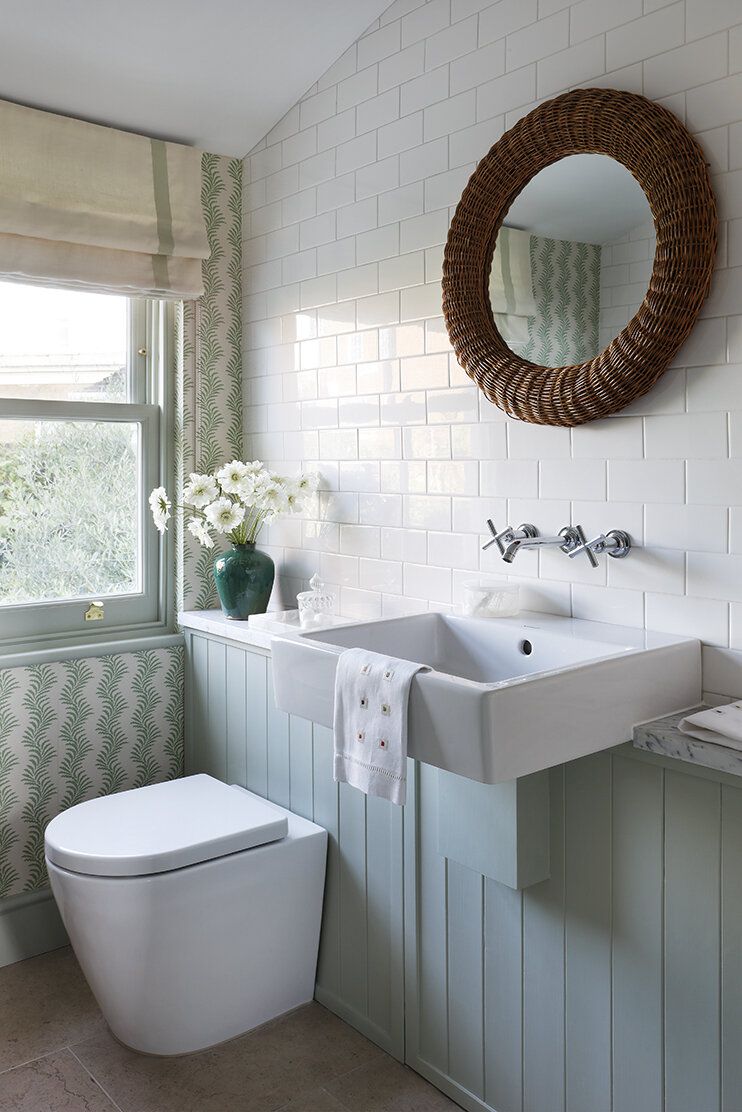
This charming look is surprisingly budget-friendly to achieve. The key materials—white subway tile and vertical wood paneling (or beadboard)—are some of the most affordable options available. A gallon of high-quality, mildew-resistant paint in a trendy sage green is under $100. The wicker-framed mirror can often be found at stores like Target, HomeGoods, or even a local thrift store for a great price. By combining these inexpensive elements in a thoughtful way, you can create a bathroom that looks custom and expensive for a fraction of the cost.
💸 Get This Look For Less
Installing vertical wall paneling is a great DIY project. Here’s the brief:
- Measure & Cut: Measure the height from your baseboard to your desired endpoint (often 36-48 inches high). Cut your paneling sheets to this height.
- Apply Adhesive: Apply construction adhesive to the back of the first panel in a wavy pattern.
- Position & Nail: Press the panel onto the wall, ensuring it’s level. Use a nail gun to secure it to the studs.
- Repeat: Continue with the next panels, locking the tongue-and-groove edges together.
- Finish with Trim: Install a chair rail or other decorative trim along the top edge to create a clean, finished look. Caulk all seams before painting.
Time estimate: 4-6 hours for a small bathroom. Material cost: $100 – $300.
19. A Floating Wood Vanity With a Marble Countertop
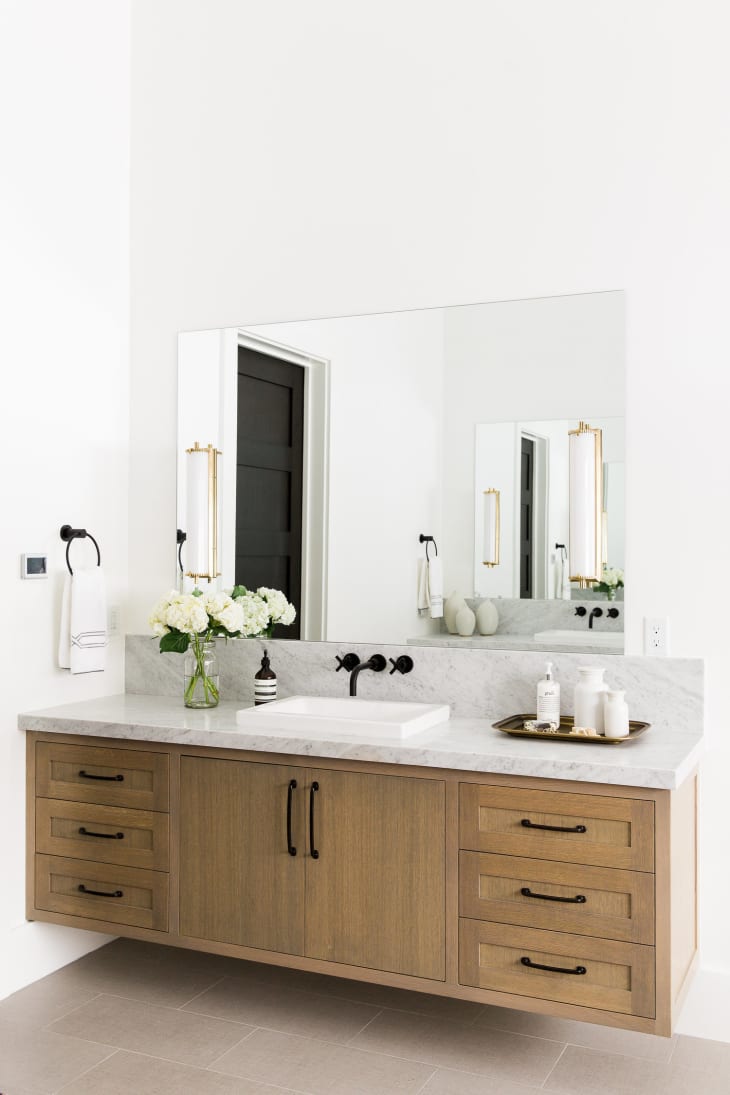
This design feels both modern and timeless by expertly blending warm and cool tones. The natural wood of the floating vanity provides organic warmth and texture. This is balanced by the cool, elegant grey veining in the white marble countertop and backsplash. The matte black faucets act as a grounding element, a bold neutral that bridges the gap between the warm wood and cool stone. Finally, the gold and white sconces add a touch of glamour, elevating the whole composition and proving that you can, and should, mix metals.
🧹 Maintenance Reality
When installing a floating vanity, the height is crucial not just for aesthetics but for ergonomics. The standard height for the top of a bathroom counter is 32 to 36 inches off the finished floor. If you have vessel sinks that sit on top, you may want to mount the vanity lower. However, for an integrated sink like this one, aiming for a finished counter height of 34-36 inches is ideal for most adults. Always measure from the floor you will be standing on, not the subfloor.
20. A Textured Gray Bathroom with Sculptural Lighting
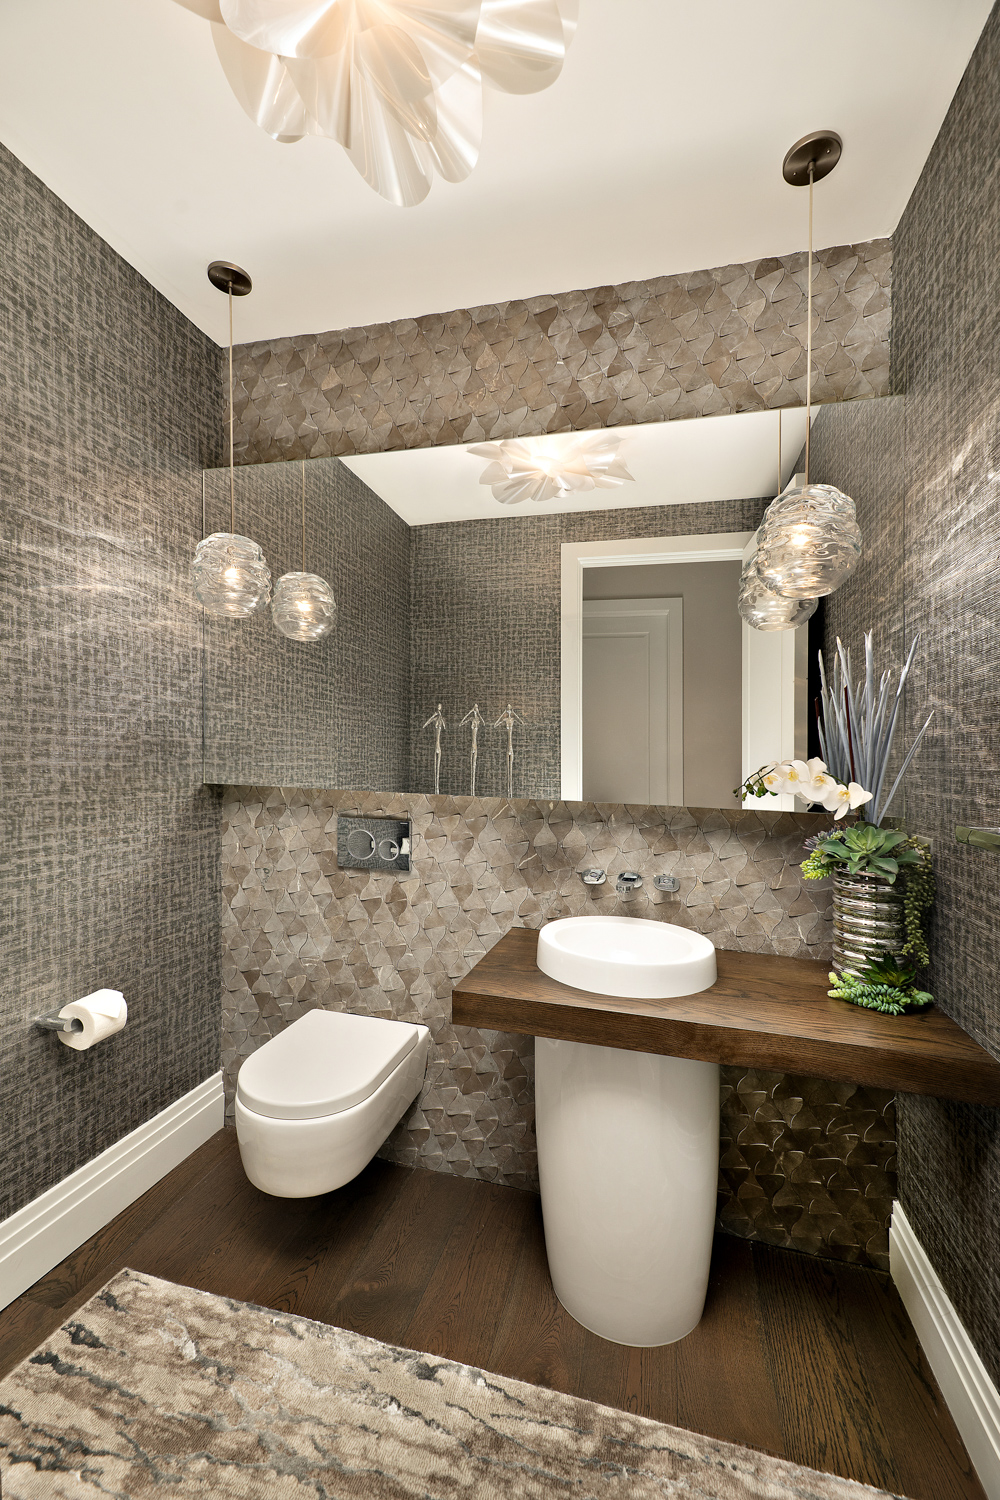
In this bathroom, the lighting is not just functional; it is the main event. While the textured wallpaper and tile are beautiful, it’s the sculptural pendant lights that elevate the space from a nice bathroom to a piece of design. They act as jewelry, adding a layer of artistry and unexpected form. The way the light interacts with the textured glass creates a soft, dappled effect that enhances the texture on the walls. Replace them with standard sconces, and the room loses its most dynamic and memorable feature.
⭐ The One Thing
This approach is perfect for a powder room or a small guest bath, typically ranging from 20 to 40 square feet. In a compact space, you have less room for decorative furniture or objects, so making the essential elements—like lighting—do the decorative work is a brilliant strategy. The large, wall-to-wall mirror also helps make the small room feel significantly larger. Using a floating vanity, as shown here, frees up floor space, which further enhances the feeling of openness in a tight footprint.
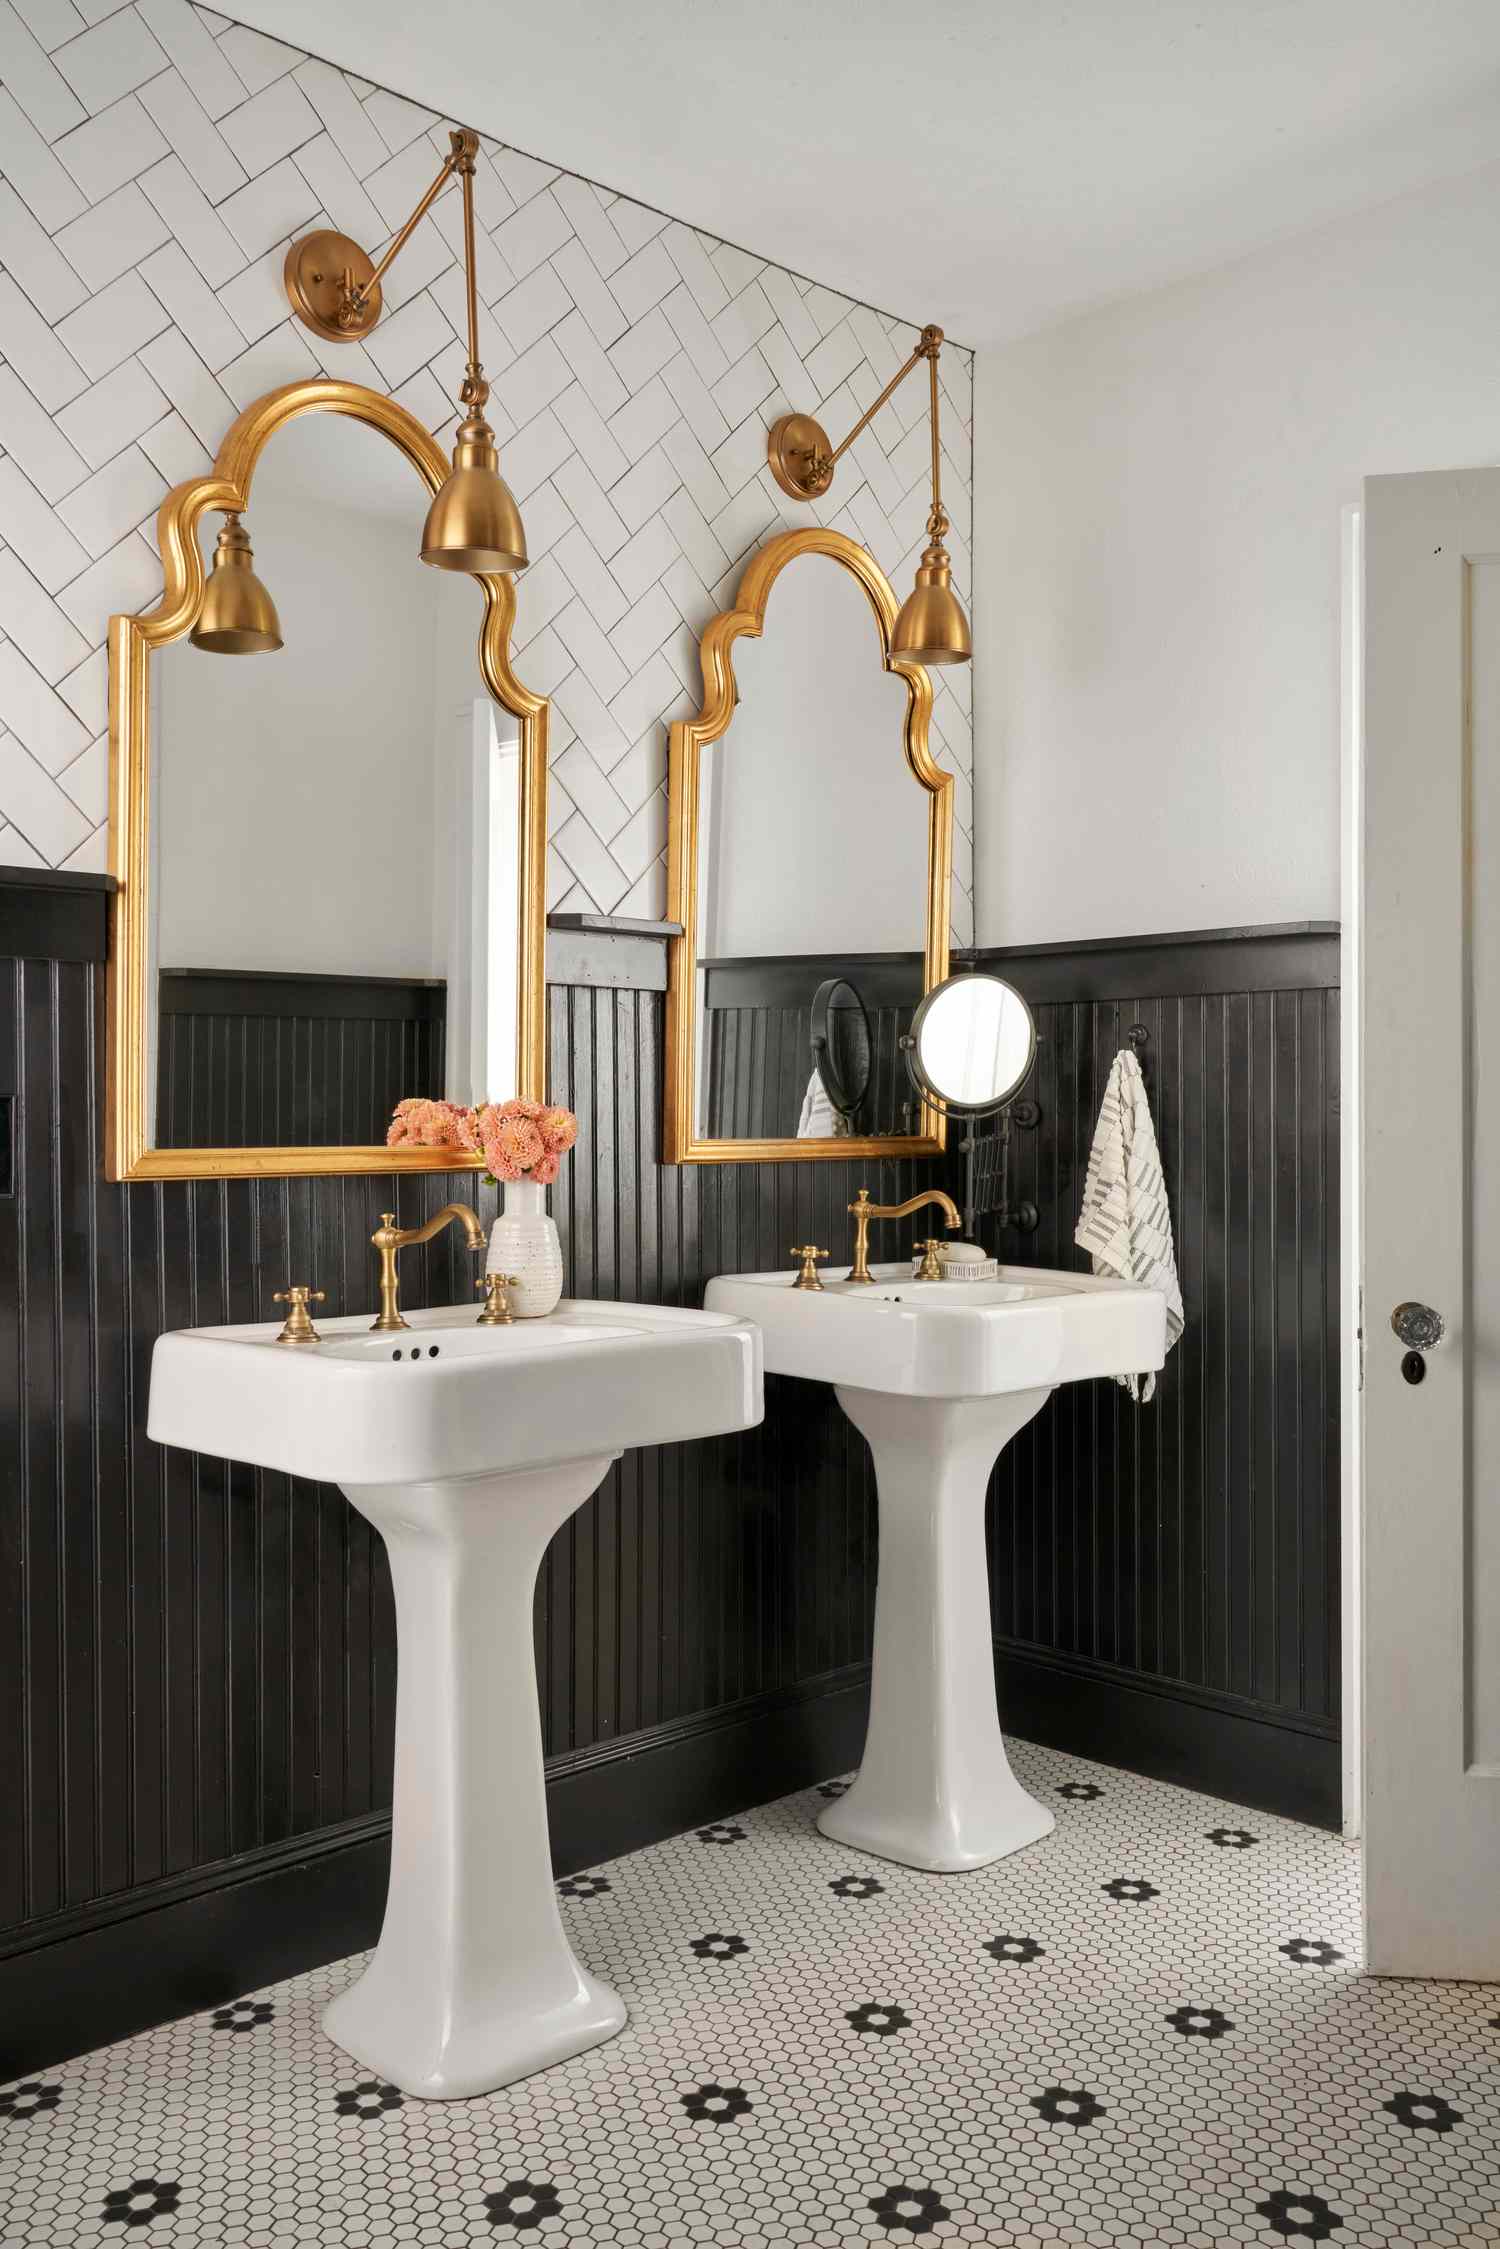
21. Classic Drama: Black Wainscoting with Gold Mirrors
Achieving this elegant, high-drama look involves several distinct layers, with the tile work and finish details driving the cost.
⚠️ Real Talk
- Main Furniture (2 Pedestal Sinks): $500 – $1,500
- Lighting (Sconces): $250 – $700
- Mirrors (2 Ornate Gold Frames): $300 – $800
- Wall Treatment (Herringbone Tile & Wood Panels): $2,000 – $5,000
- Floor Tile (Patterned Hexagon): $800 – $2,000
- Fixtures (Faucets): $400 – $1,200
- TOTAL: $4,250 – $11,200
Budget alternative: Use a stencil kit to paint the hexagon flower pattern on a cheaper plain tile floor. Opt for beadboard panels instead of custom wood wainscoting and find ornate mirrors at flea markets.
While undeniably stunning, this look has practical considerations. Pedestal sinks offer zero counter space and no concealed storage. This makes the style best suited for a powder room or a guest bath where storage needs are minimal. In a primary bathroom used daily, the lack of space for toiletries, makeup, and styling tools would quickly become a frustrating reality. Before committing, be honest about whether you value high style over everyday function and storage capacity.
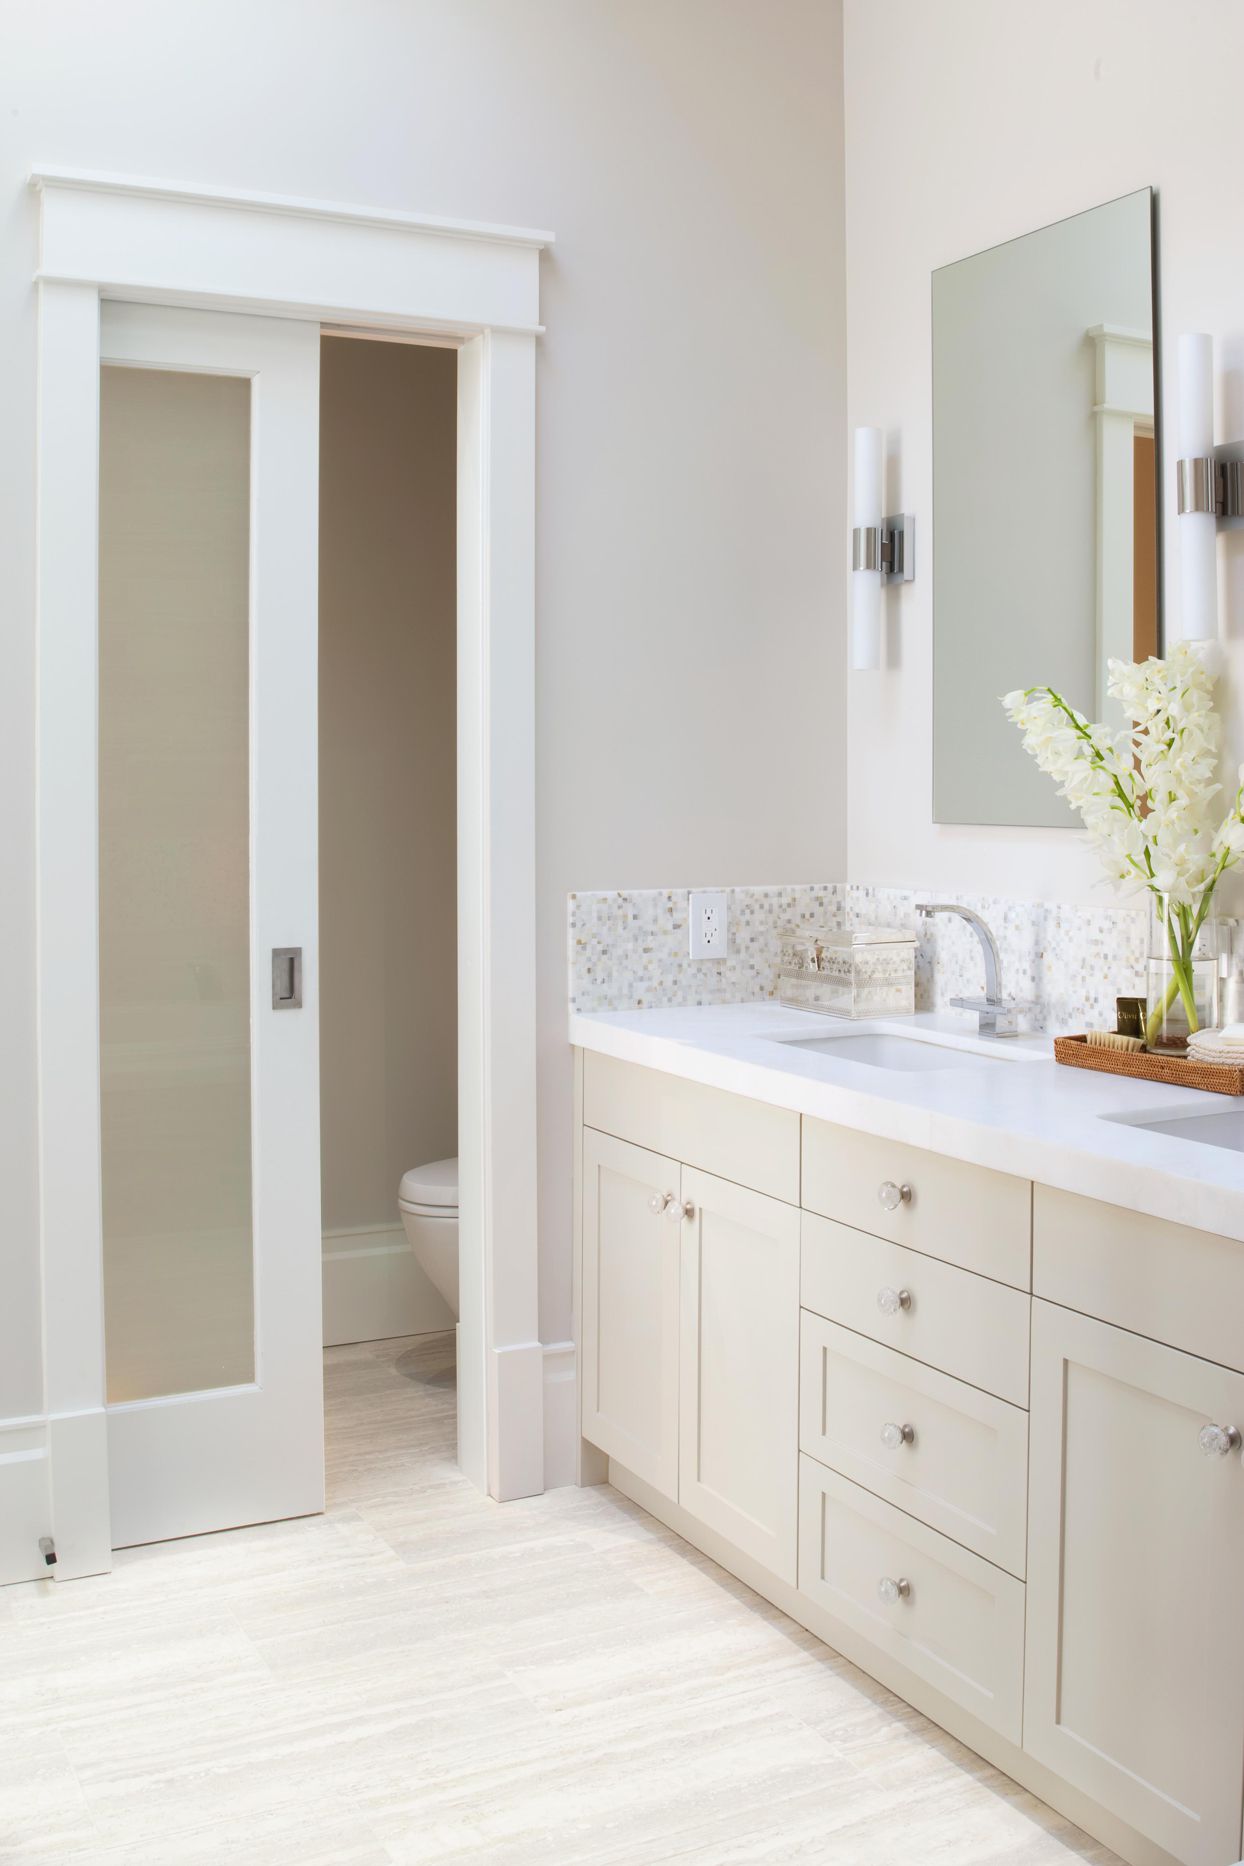
22. A Luminous Neutral Bathroom with a Frosted Glass Pocket Door
A pocket door is an excellent space-saver in a bathroom, eliminating the “swing space” a traditional door requires. For a toilet a “water closet,” using a frosted glass pocket door is a brilliant move. It provides the necessary visual privacy while still allowing light to pass between the two zones. This makes both the main bathroom and the toilet area feel brighter and more open than if you had used a solid door. Ensure you choose high-quality pocket door hardware; cheap rollers can be noisy and prone to jumping off the track.
💡 Designer Tip
This bathroom feels so serene because of its commitment to a monochromatic, warm neutral palette. The cabinetry, countertop, backsplash, and floor tiles are all slightly different shades of beige, cream, and off-white. This subtle variation in tone and texture (from the smooth counter to the mosaic tile) creates a layered, sophisticated look that is incredibly calming. The polished chrome fixtures and clear glass knobs add just enough sparkle to keep the space from feeling flat, like jewelry on a simple cashmere sweater.
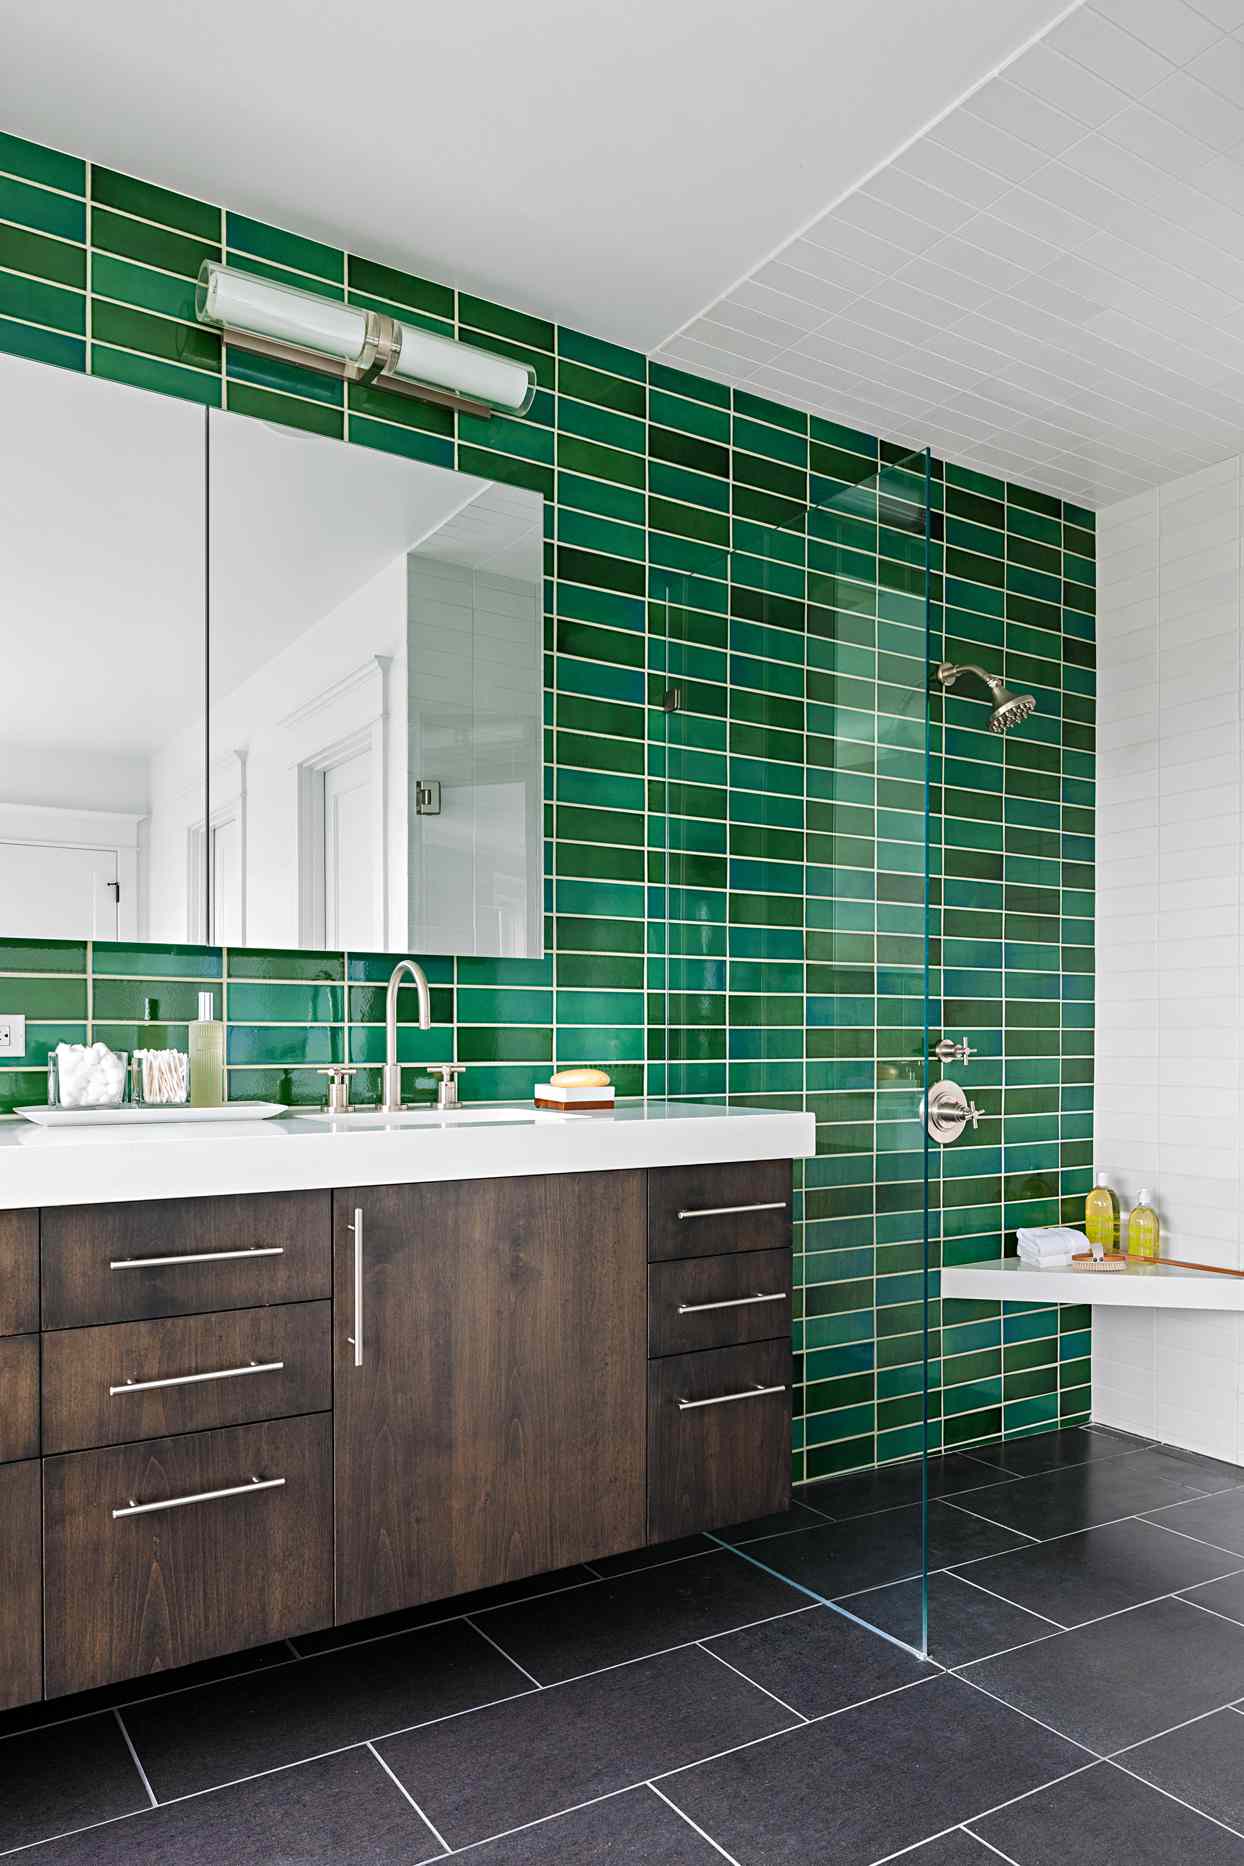
23. A Bold Green Tile Wall with a Dark Wood Floating Vanity
The hero of this bathroom is unquestionably the wall of deep green subway tiles. It’s a bold, confident choice that immediately sets a sophisticated and moody tone. If you were to change that wall to a standard white subway tile, the bathroom would still be functional and modern, but it would lose all of its personality and drama. The green wall is the core concept around which all other elements—the dark wood, the white counter, the chrome fixtures—are chosen to complement and enhance. It’s a perfect example of how a single, strong color choice can define a room.
🔧 How-To Brief
This bathroom design follows a powerful 60/30/10 rule variation. Here, it’s 60% statement color (the green tile), 30% grounding neutral (the dark wood vanity and dark floor), and 10% bright contrast (the white countertop and chrome fixtures). This formula ensures the bold green feels purposeful and balanced, not chaotic. The dark elements provide a solid base, while the white and chrome accents add a necessary touch of brightness and polish, highlighting the richness of the green.
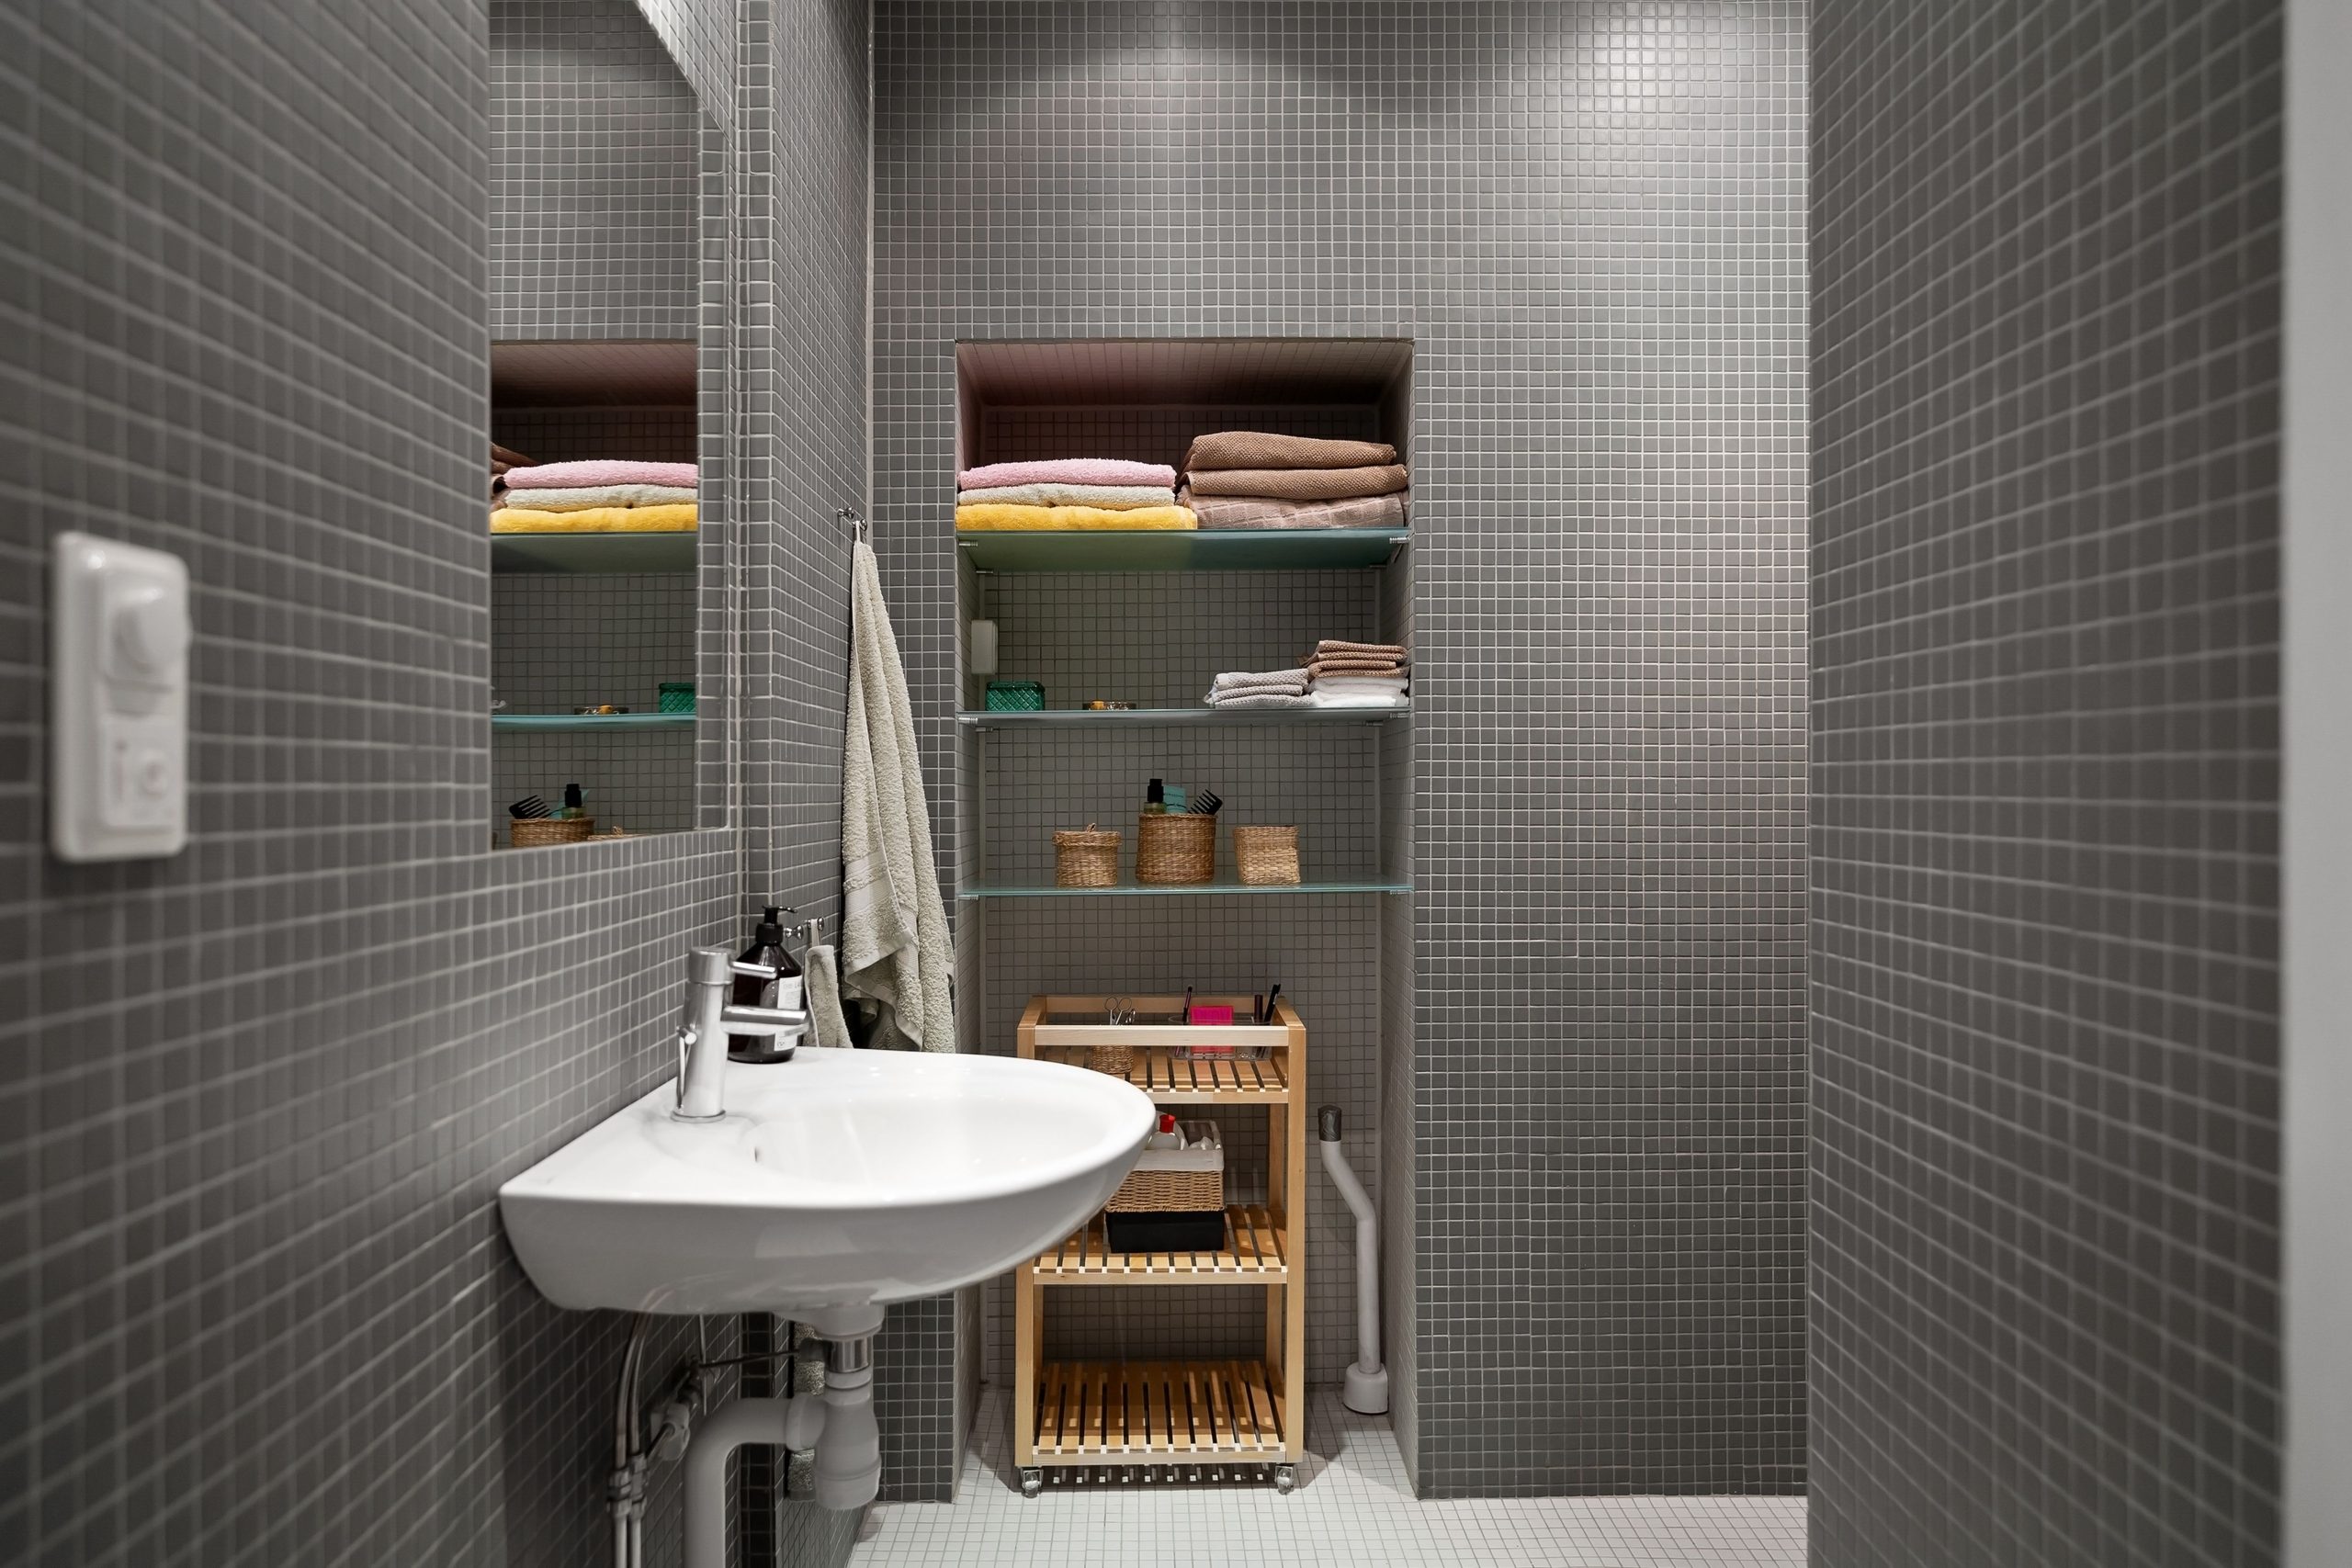
24. A Compact Grey Mosaic Bathroom with Smart Storage
This design is a masterclass in maximizing a very small space. It’s perfectly suited for a tiny powder room or a small ensuite, likely no more than 30-40 square feet. Using the same small grey mosaic tile on all walls creates a continuous, seamless surface, which can trick the eye into seeing a larger, more unified space. The wall-mounted corner sink is a classic space-saving trick, and the built-in niche with glass shelves provides vertical storage without taking up any floor space. Every choice is geared towards function in a tight footprint.
🎯 What Makes It Work
This is already a budget-conscious design, but you can be even more resourceful. Grey mosaic tiles are widely available and affordable. Look for overstock deals at large tile retailers. Instead of custom-built glass shelves for a niche, you can find pre-made niche inserts online or at home improvement stores. The rolling wooden storage cart can be sourced from IKEA, Target, or even thrift stores, providing flexible, low-cost storage that can be moved as needed. The pops of color from the towels add personality without costing a thing.
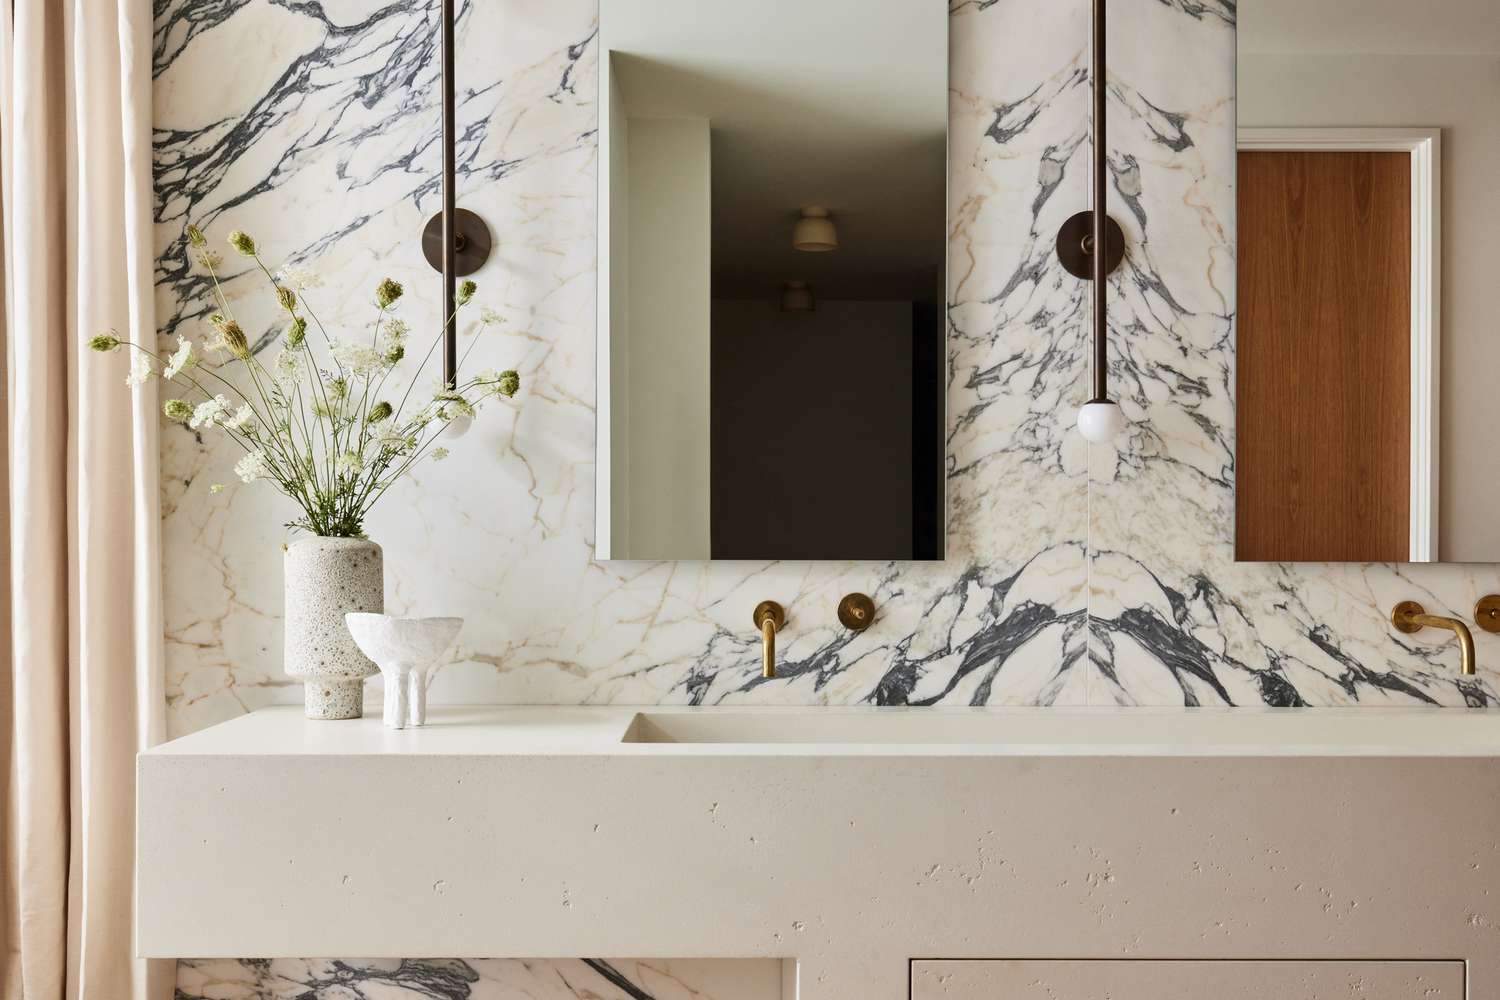
25. Sophisticated Materials: Calacatta Gold Marble and Concrete
This bathroom design feels incredibly luxurious because it confidently pairs two very different but equally strong materials. The Calacatta Gold marble is classic, elegant, and full of dramatic, organic movement in its veining. The concrete vanity, in contrast, is modern, minimalist, and monolithic. This “high/low” material pairing creates a fascinating tension. The warmth of the brass fixtures and soft beige drapes bridge the gap between the two, tying the entire look together into a cohesive, earthy, and sophisticated palette.
💰 Budget Breakdown
A concrete vanity is a stunning and durable choice, but it requires specific care. Concrete is naturally porous, so it must be sealed with a food-grade, stain-resistant sealer to prevent it from absorbing water, oils, and makeup. This sealing process typically needs to be repeated annually. For daily cleaning, use only gentle, pH-neutral cleaners and soft cloths. Avoid letting acidic substances or harsh chemicals sit on the surface, as they can etch or damage the sealer. It’s tougher than marble but not indestructible.
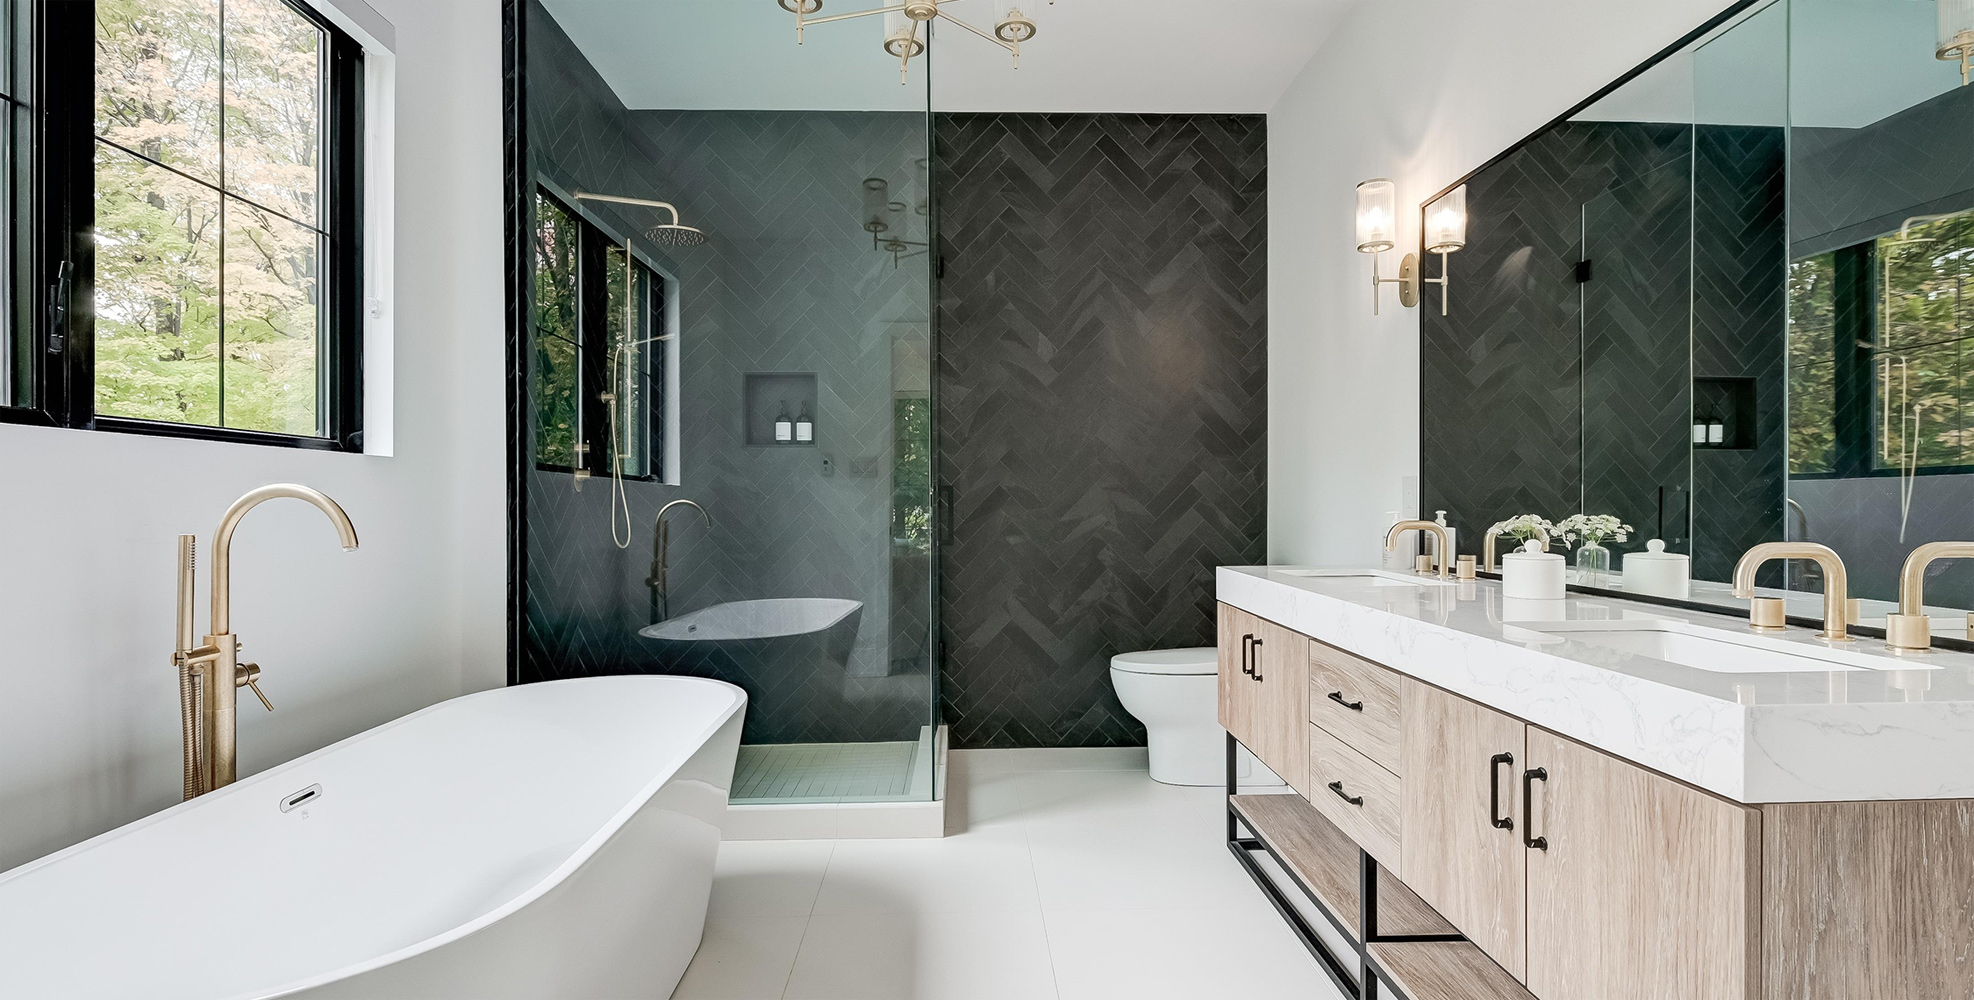
26. Dark Grey Herringbone Tile with a Light Wood Double Vanity
When using a dark, dramatic tile like this grey herringbone, lighting is your most important tool. You must layer your light sources to prevent the room from feeling dark and somber. This bathroom does it perfectly: it has recessed ceiling lights for general ambient light, and dedicated sconces flanking the mirror for bright, shadow-free task lighting for grooming. The large frameless mirror also plays a huge role, reflecting all that light and making the entire space feel brighter and larger than it would otherwise. Never rely on a single overhead light in a dark bathroom.
📐 Style Math
The dark grey herringbone tiled wall is the undeniable showstopper in this bathroom. It provides texture, pattern, and a deep, moody backdrop that makes all the other elements pop. The light wood vanity appears warmer, the white tub and countertop look brighter, and the gold fixtures gleam with more intensity against the dark grey canvas. If that wall were plain white paint, the bathroom would be nice, but it would be generic. The tile is what gives the room its luxurious, custom-designed character. Compare this with the brighter feel of Idea #28.
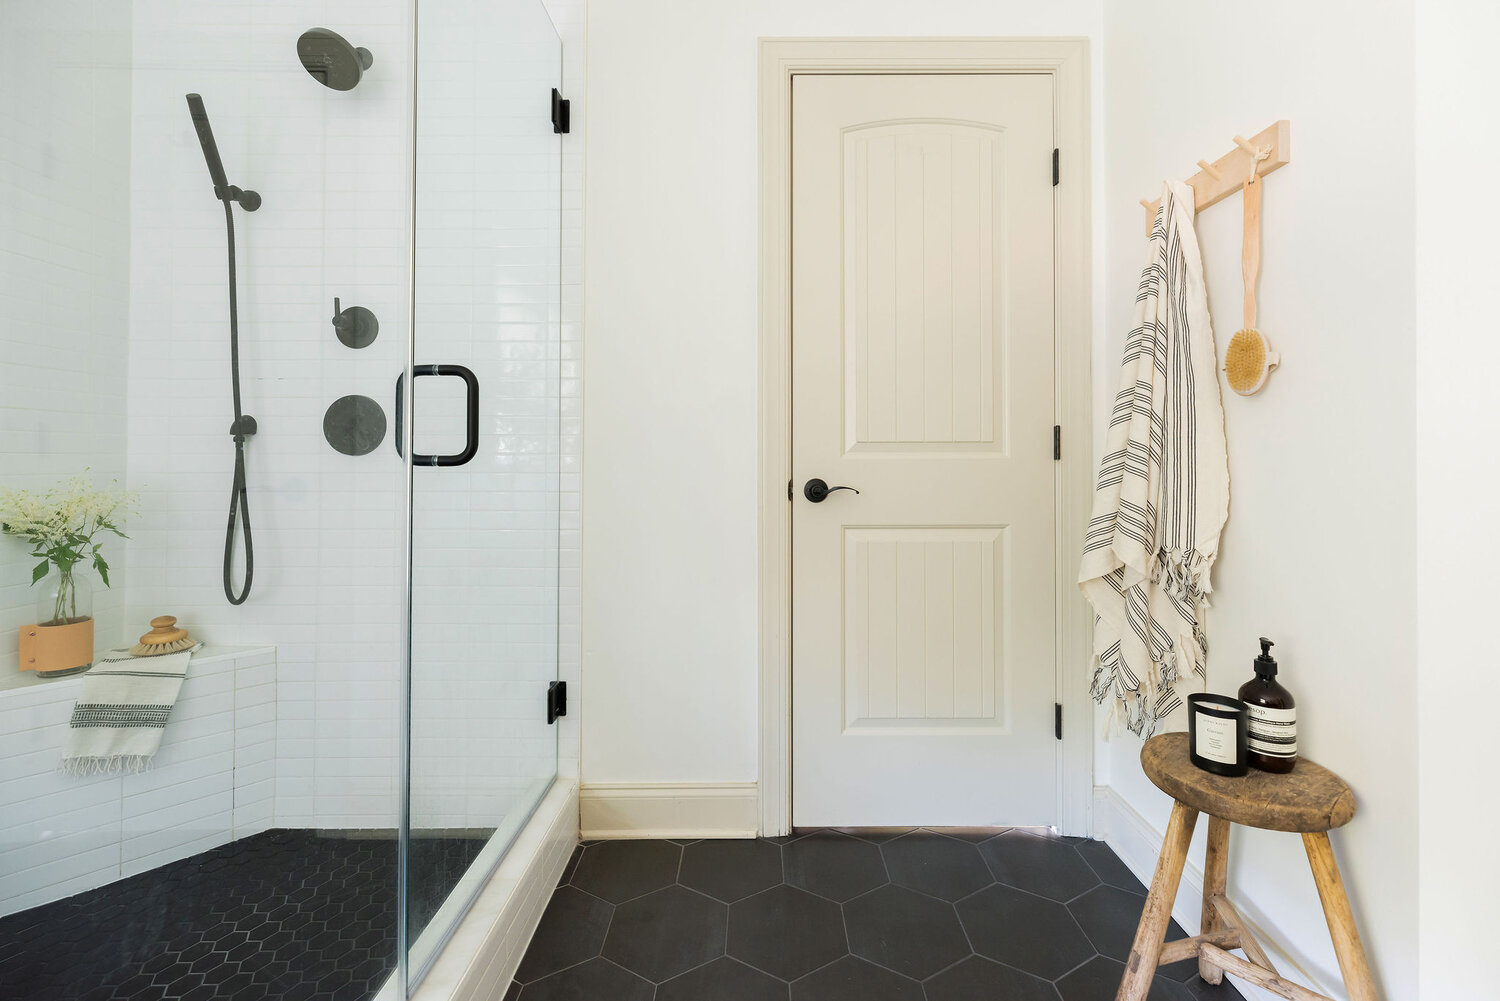
27. Minimalist High-Contrast Shower with a Wooden Stool Accent
This room proves that minimalism doesn’t have to be cold. The design works because of its strict adherence to a simple palette and the strategic introduction of a single, powerful accent. The black hex floor, white subway tile, and black fixtures create a clean, graphic, and high-contrast base. This could easily feel stark, but the introduction of the rough wooden stool and the light wood peg rack completely changes the mood. These natural, textured elements add a crucial layer of warmth and organic character, making the space feel human and inviting.
📏 Scale Guide
A wooden stool inside a shower looks fantastic in photos, but it requires the right wood and finish to survive. You need a stool made from a water-resistant wood like teak, cypress, or cedar. Even then, it should be treated with a marine-grade oil or varnish and will need to be re-oiled periodically. It should also be placed just outside the main water stream if possible. If you love the look but not the upkeep, consider a shower-safe stool made from composite material or plastic that is designed to look like wood.
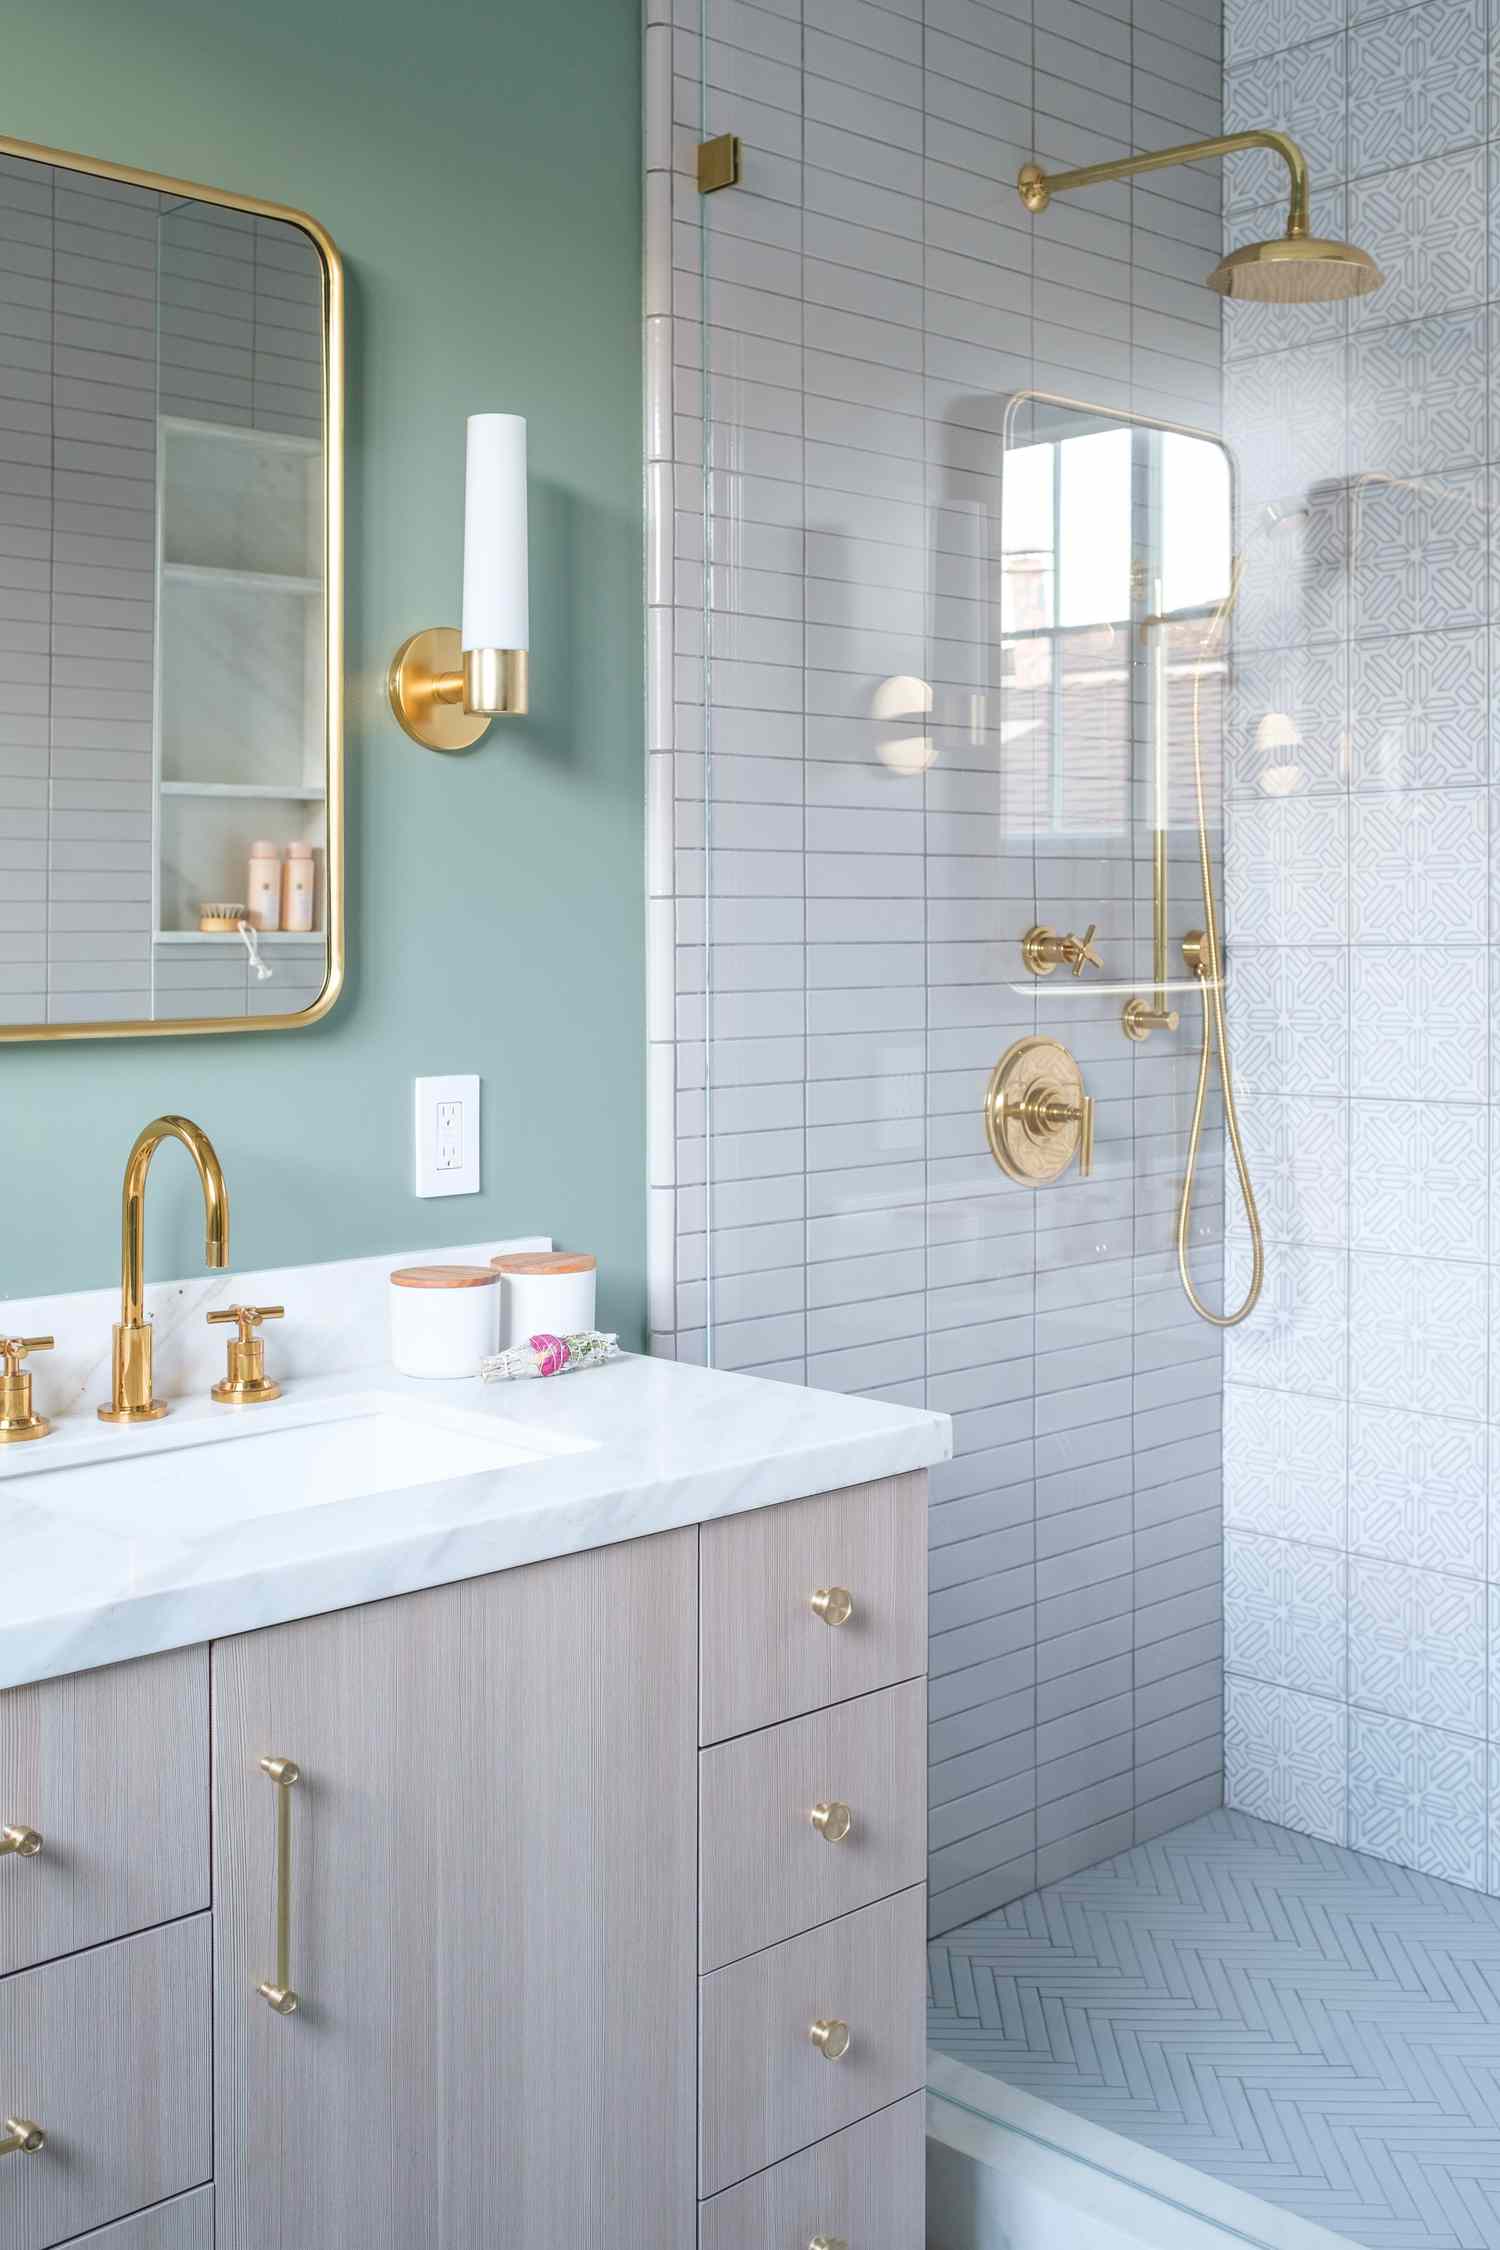
28. A Mix of Sage Green, Brass, and Geometric Shower Tile
Planning to mix multiple tiles and a bold paint color? A checklist is your best friend:
🔥 Trending Context
- Order Tile Samples: You must see the sage green paint swatch, the light gray subway tile, and the patterned geometric tile together in your bathroom’s actual light. Colors can look dramatically different online versus in person.
- Finalize Your Brass: “Brushed brass” can vary significantly between brands. Some are more yellow, some more muted. Choose your faucet, shower trim, and mirror from the same brand if possible, or get samples to ensure they match.
- Plan Your Transitions: Decide exactly where one tile will end and another will begin. Using a simple metal tile trim, like a Schluter strip, can create a clean, intentional edge between the different patterns and the painted wall.
This bathroom’s chic formula is about balancing color, pattern, and shine. Consider it 50% calming solid color (the sage green wall), 30% subtle pattern and texture (the light gray and geometric tiles combined), and 20% luxe accent (the brushed brass fixtures and marble countertop). This ratio ensures the room feels fresh and interesting without being chaotic. The sage green acts as a serene backdrop, allowing the brass and patterned tile to be the stars of the show.
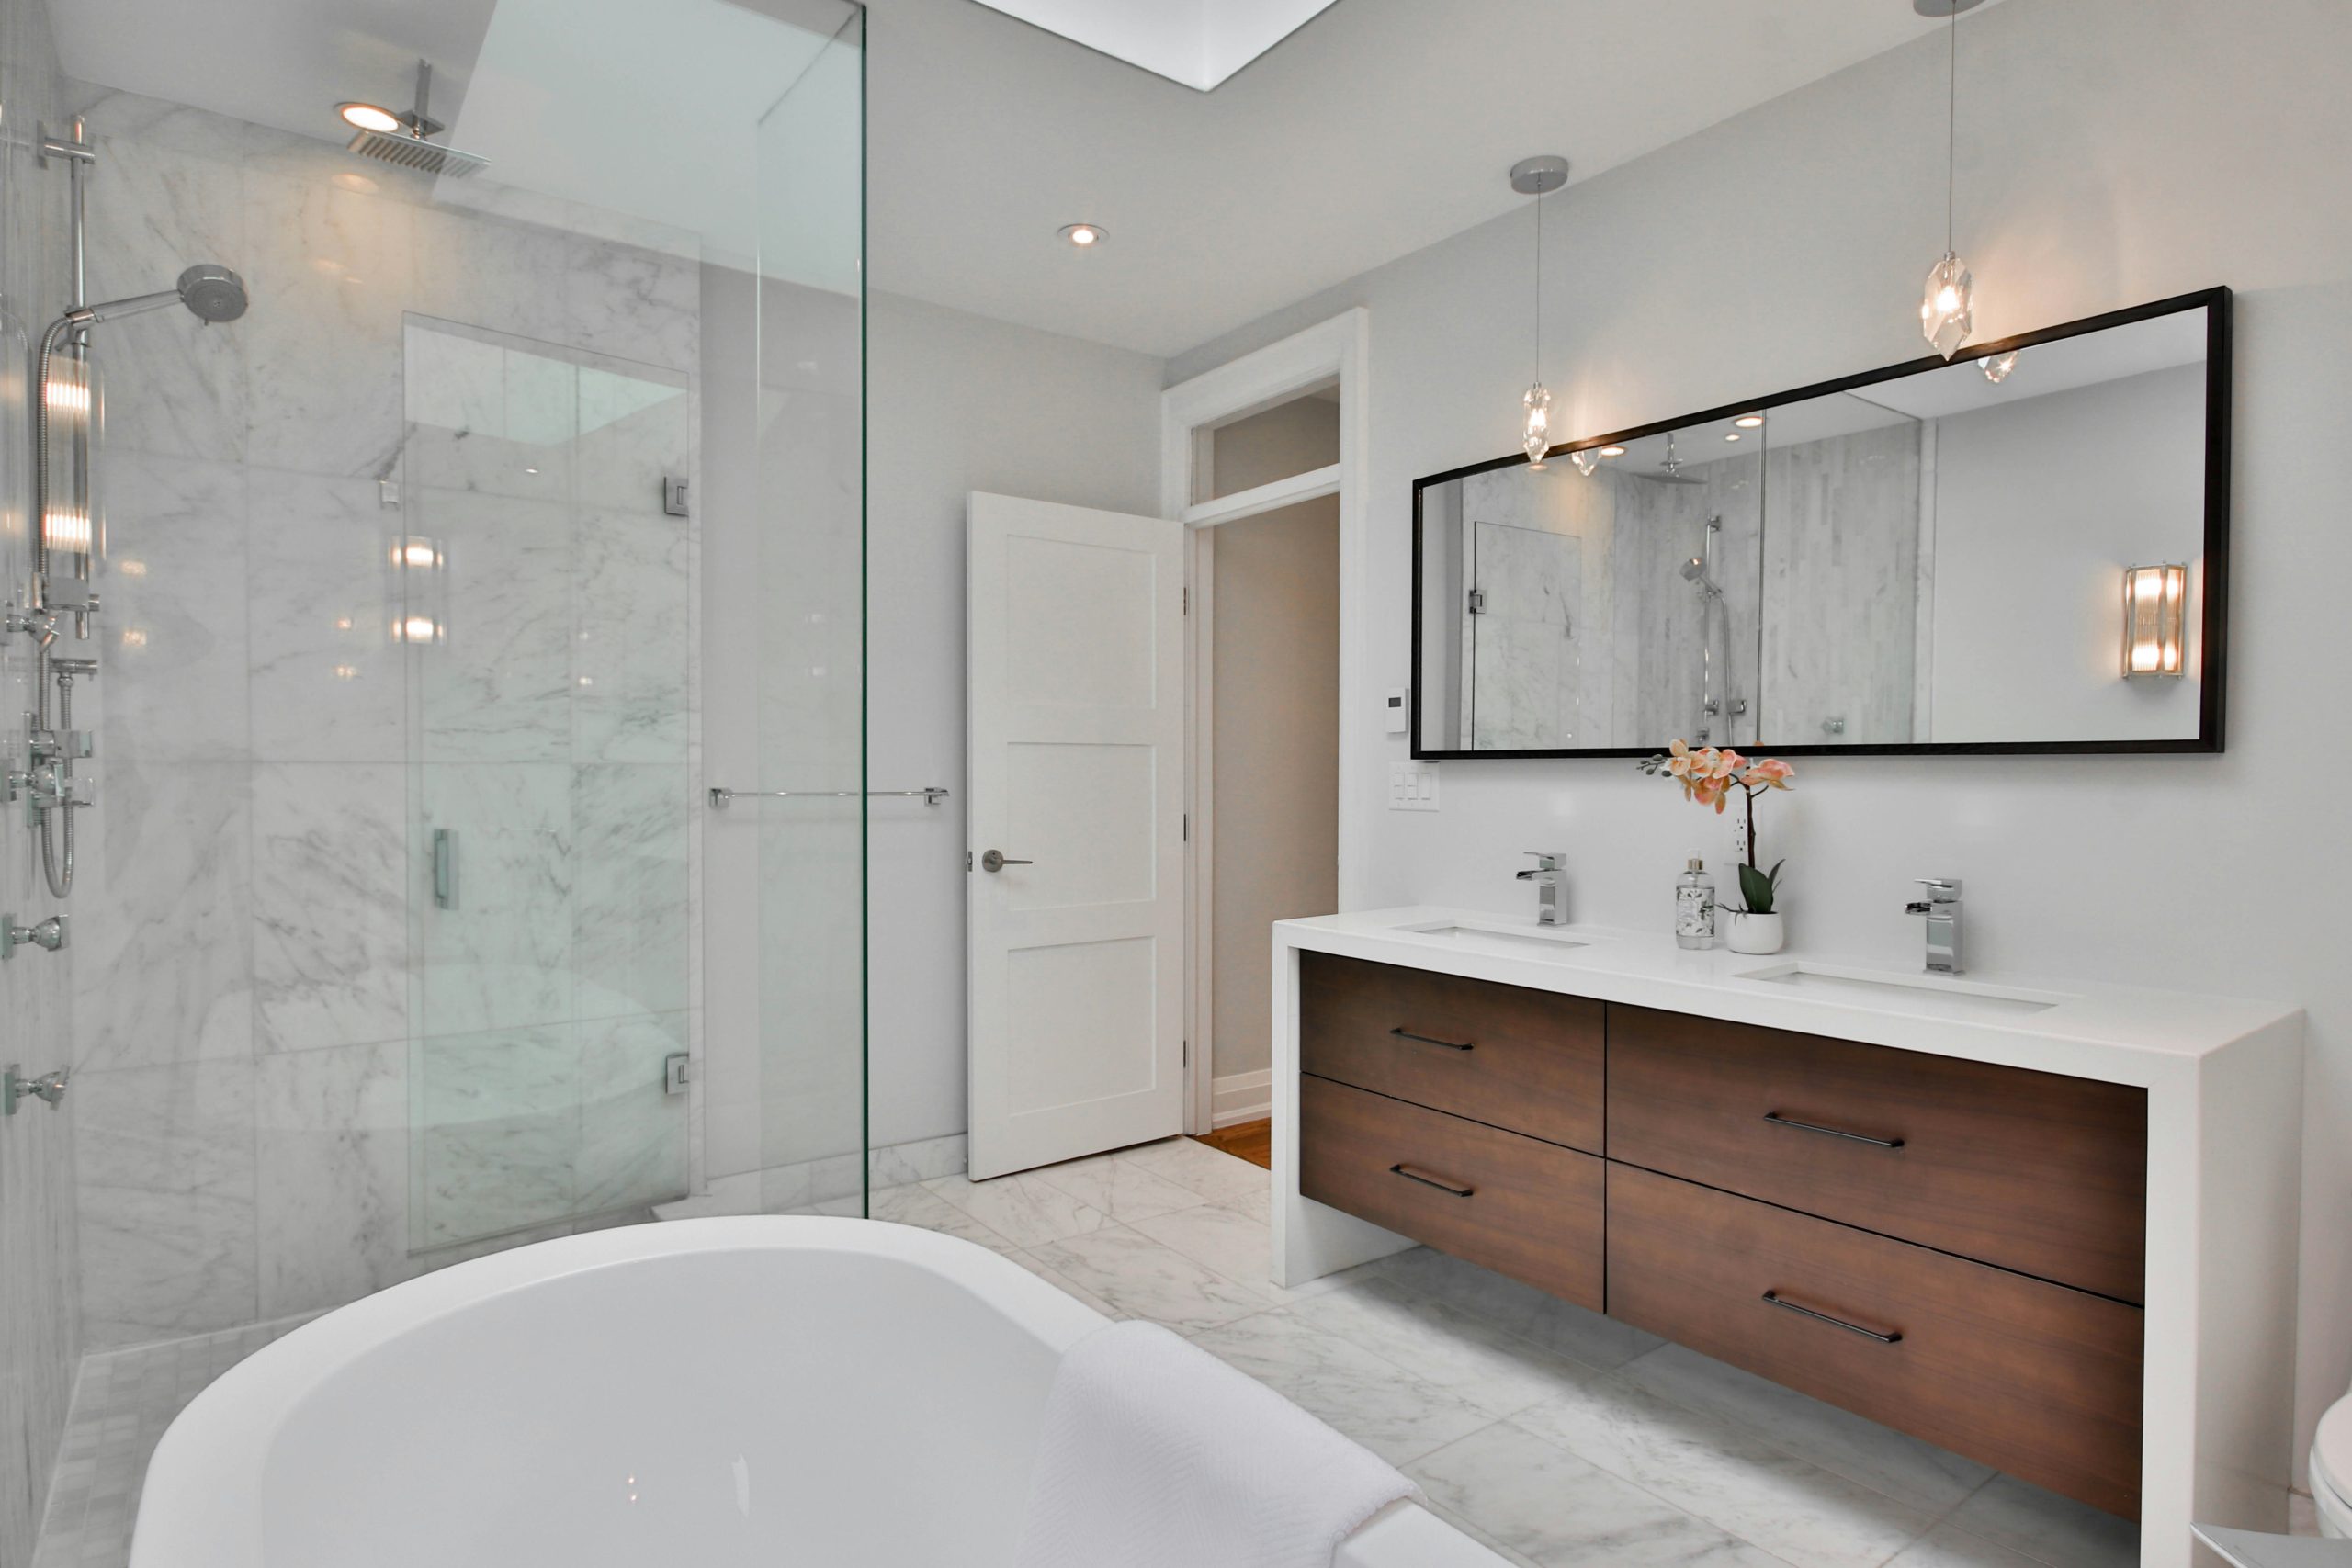
29. Bright and Polished: Marble Tile with a Dark Wood Vanity
This expansive layout, featuring a separate freestanding tub and a large walk-in shower, is best suited for a spacious primary bathroom. You’ll need a room that is at least 150 square feet, and ideally closer to 200, to accommodate all these elements without feeling crowded. A minimum width of 12 feet is recommended to allow for comfortable walkways around the vanity, tub, and shower entrance. The high ceilings in this example also help to enhance the open, airy feeling, so this look is especially effective with ceilings of 9 feet or higher.
✅ Before You Start
The cost for this bright, luxurious bathroom is significant, with the extensive marble tile and high-end fixtures being the main drivers. A similar project would break down as follows:
- Main Furniture (Vanity, Tub): $3,000 – $7,000
- Lighting (Pendants, Mirror): $500 – $1,500
- Fixtures (Faucets, 3 Showerheads): $1,500 – $4,000
- Wall & Floor Treatment (Marble Tile): $4,000 – $10,000+
- Glass Shower Enclosure: $1,500 – $3,500
- TOTAL: $10,500 – $26,000+
Budget alternative: Use a high-quality marble-look porcelain tile, which can cut tile costs by 50-70%. Source a similar vanity from a mainstream retailer and opt for a single showerhead.
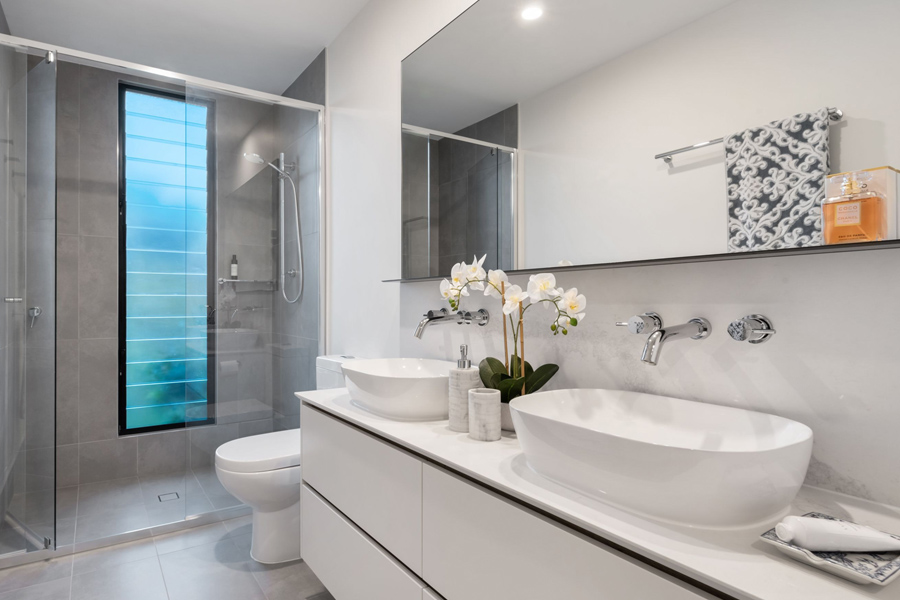
30. A Serene Gray and White Bathroom with Double Vessel Sinks
When pairing vessel sinks with wall-mounted faucets, the placement of both is absolutely critical for function. The spout of the faucet should extend far enough to be centered over the sink drain, and the height should be sufficient to comfortably wash your hands underneath—typically 6-8 inches above the sink rim. A common mistake is installing the faucets too low or the spouts too short, which results in constant splashing onto the counter behind the sink. mock up the sink and faucet placement before the plumber does the final installation.
💸 Get This Look For Less
Floating vanities look incredibly sleek, largely because they offer no visible storage. While this contributes to a minimalist aesthetic, it’s not always practical for a primary bathroom. Before you fall in love with this look, you need to have a clear plan for where you will store everything else: towels, extra toilet paper, cleaning supplies, toiletries, etc. This often means investing in a separate linen closet, built-in cabinetry, or other storage solutions, which should be factored into your overall budget and space plan.
Your Modern Bathroom Sanctuary Awaits
With these 30 ideas, you have the inspiration to move beyond the generic and create a modern bathroom that truly feels like you. Whether you’re drawn to bold color, natural textures, or high-contrast drama, the perfect design is within reach. Now, which one are you saving to your Pinterest board first?