
Have you pinned a hundred master bathroom ideas, only to feel more overwhelmed than when you started? You’re not alone. It’s easy to get lost in a sea of beautiful, but often unrealistic, inspiration photos. That’s why we did the hard work for you, filtering through countless designs to find what truly works for a modern home.
We’ve curated the top 30 master bathroom ideas that are setting the tone for 2026. These aren’t just pretty pictures; they are achievable looks that blend style with function. We’re covering everything from spa-like modern minimalist designs to cozy farmhouse aesthetics. And stay until the end — we break down the most common mistakes that can ruin these looks.
📌 Save this to Pinterest for later — you’ll want to revisit these ideas.
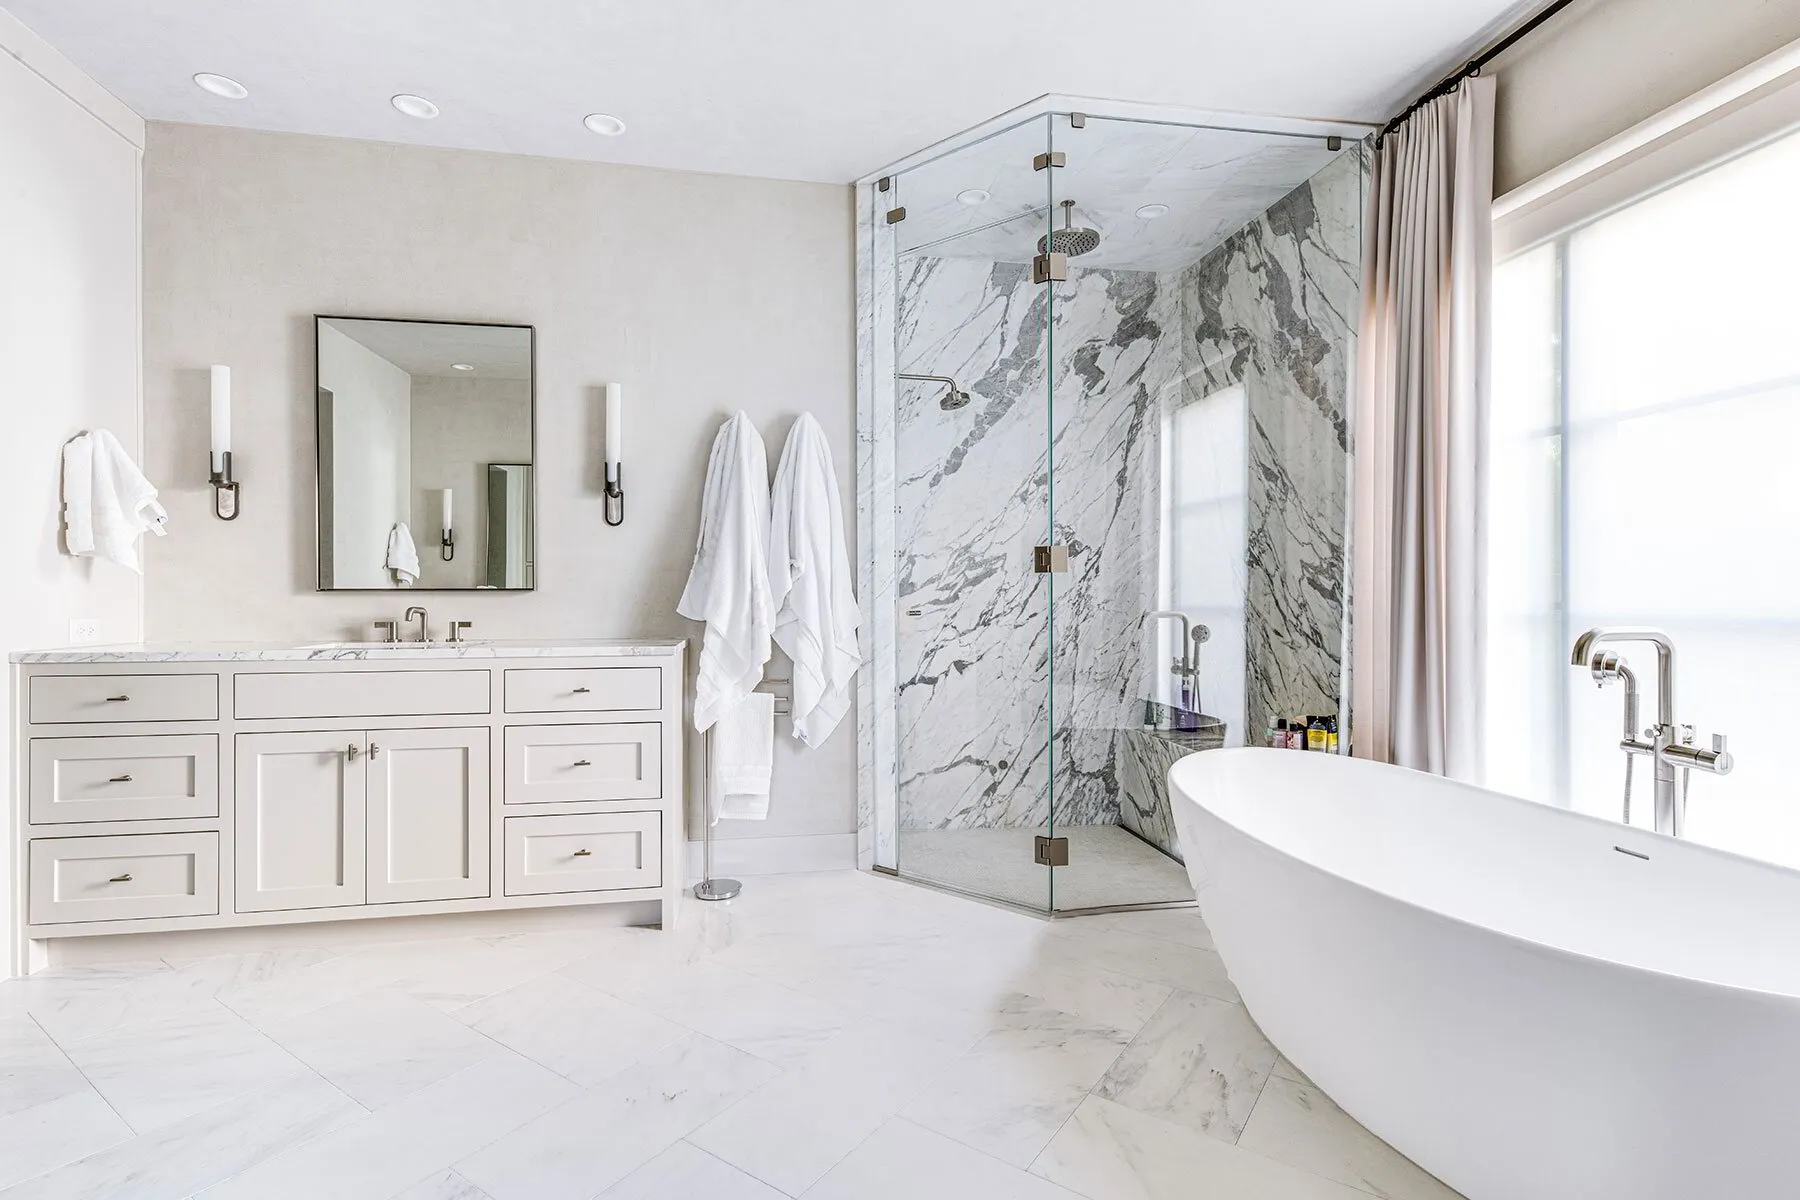
1. Create a Serene Escape with a Floating Vanity and Marble
This bathroom feels like a high-end hotel suite, and it all comes down to a few key design choices. The floating vanity is the star, creating an illusion of more floor space, which makes the whole room feel bigger and airier. Pairing large-format marble tiles on both the floor and walls creates a seamless, uninterrupted canvas. This visual continuity is what gives it that incredibly serene, cohesive, and luxurious feeling. The clean lines of the rectangular mirror and freestanding tub reinforce the modern, uncluttered vibe.
✅ Before You Start
To recreate this modern spa look, here’s a transparent look at the potential costs. Keep in mind that location and material choices can swing these numbers significantly.
- Main Furniture (Floating Vanity, Freestanding Tub): $3,000 – $7,500
- Lighting (Sconces, etc.): $400 – $1,200
- Textiles (Towels, Rugs): $200 – $500
- Decor & Accessories (Mirror, Faucets): $600 – $2,000
- Wall & Floor Treatment (Large Format Marble Tile): $5,000 – $15,000 (including installation)
- TOTAL: $9,200 – $26,200
- Budget Alternative: Achieve a similar aesthetic for 40-60% less using high-quality porcelain tile that mimics marble and sourcing a vanity from a big-box store.
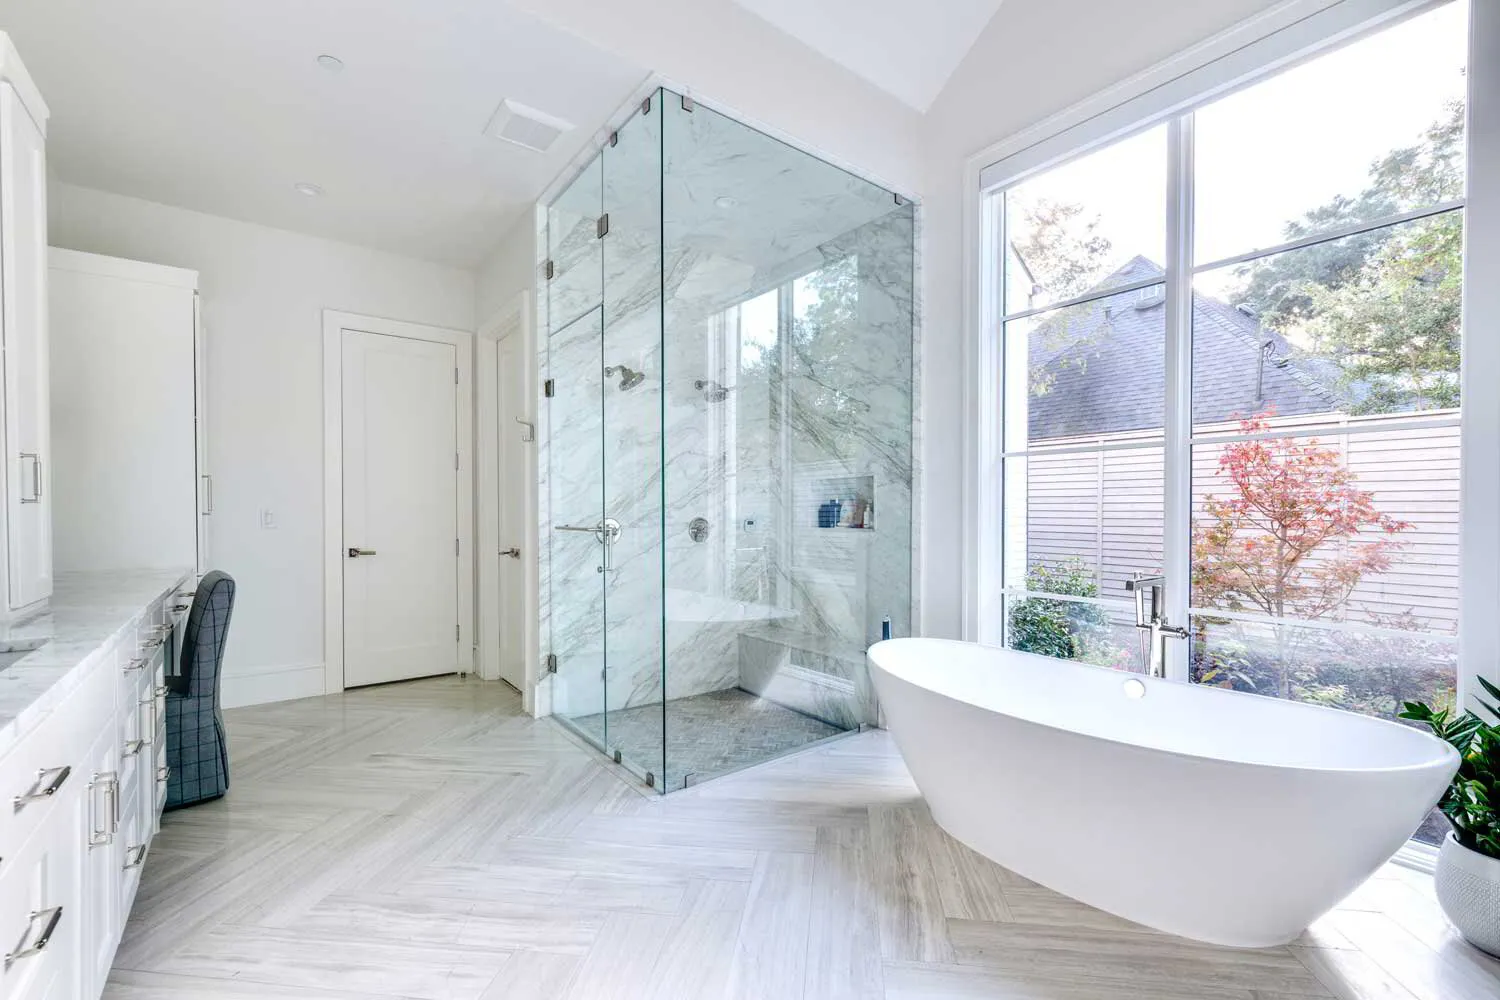
2. Maximize Natural Light with a Window-Side Bathtub
that truly defines this space is the placement of the freestanding bathtub directly next to the large window. It transforms the act of bathing from a simple routine into an experience. By positioning the tub here, the design prioritizes relaxation and a connection to the outdoors, making the room feel more like a personal retreat than just a functional bathroom. Without that window, the room would still be lovely and modern, but it would lose its soul—that specific moment of tranquil escape.
⭐ The One Thing
Let’s have some real talk about that gorgeous window next to the tub. If your bathroom window faces a neighbor or a public area, privacy is a major concern. You’ll need to invest in quality window treatments. Consider top-down/bottom-up cellular shades for flexible privacy, waterproof shutters, or smart glass that frosts over with the flick of a switch. Also, be mindful of the window material itself. A vinyl or fiberglass frame is essential to prevent warping and mold in such a high-moisture environment.
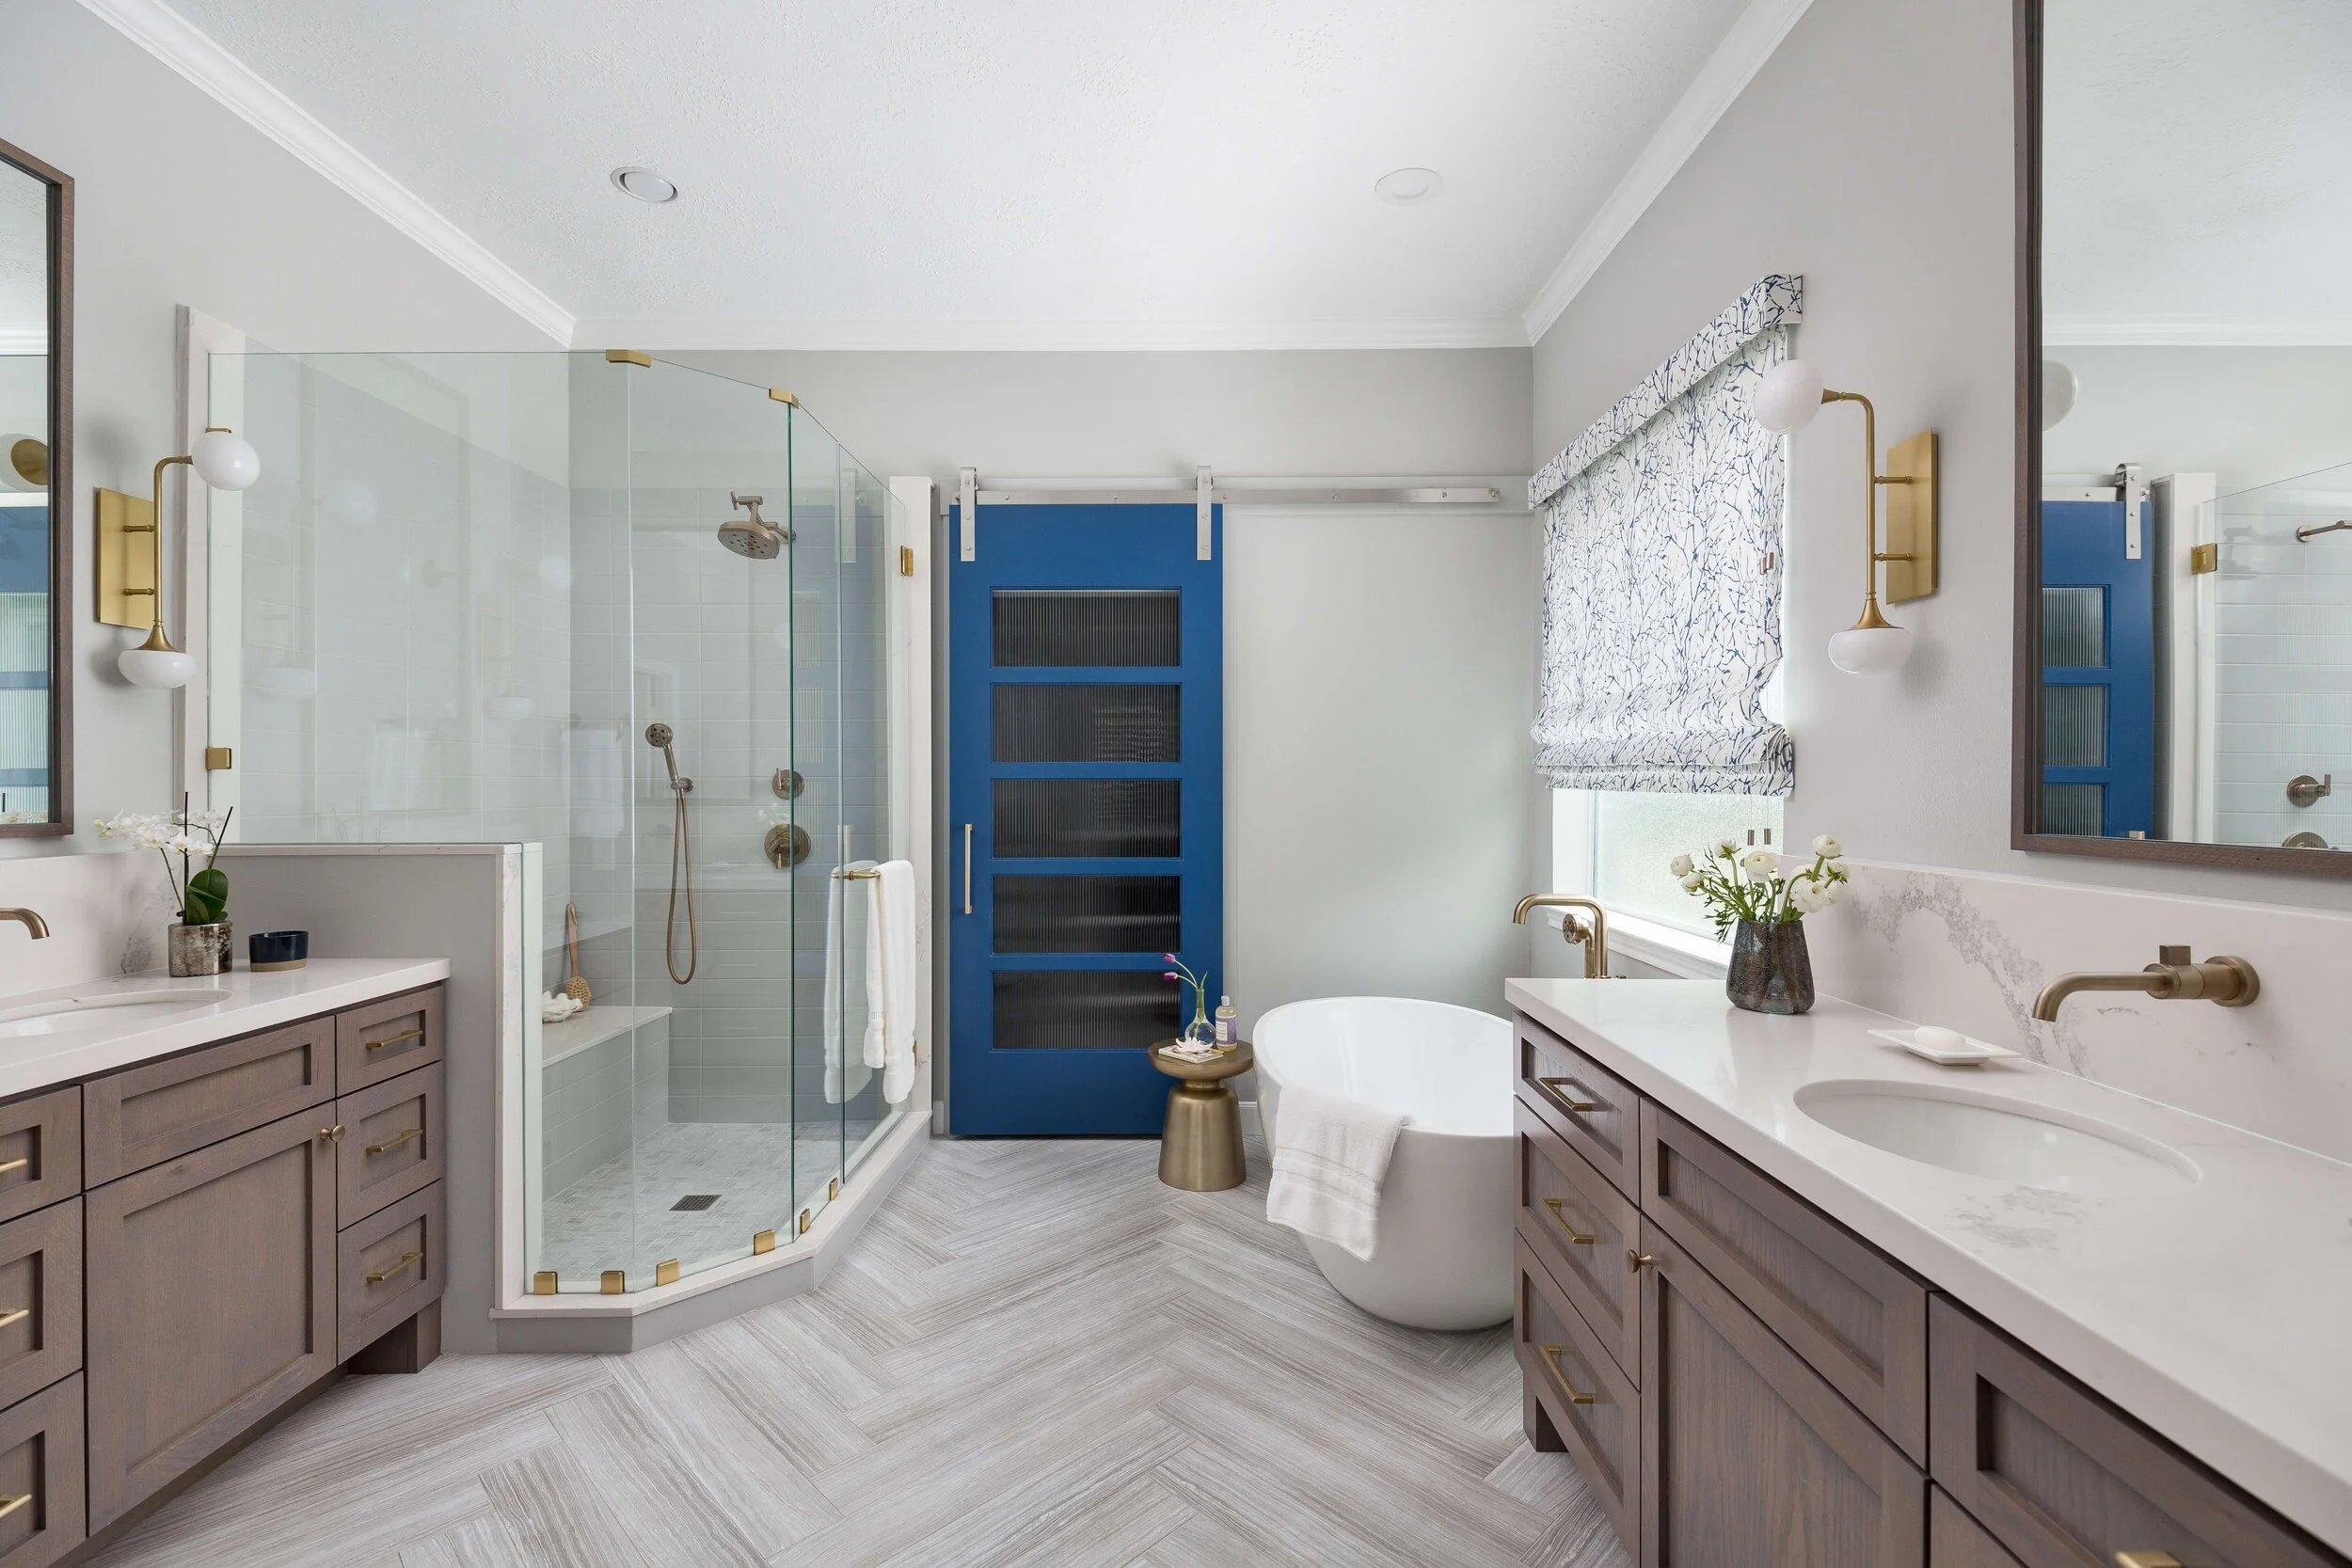
3. Use a Bold Blue Barn Door for a Pop of Color
This bathroom nails its welcoming energy by following a simple but effective design formula. It’s approximately 60% serene neutrals (light grey walls, white tub), 30% warm naturals (dark wood vanities, herringbone wood-look floor), and 10% a single, bold accent (that stunning blue barn door). The brass fixtures act as jewelry, tying the warm and cool tones together. You could easily swap the blue for a deep forest green or even a rich terracotta and the formula would still work, as long as you keep the proportions in balance.
📐 Style Math
When using a bold color like the blue on this barn door, the key is to ensure it doesn’t feel random. The designer here did this perfectly by keeping the other major elements neutral. If you decide to go for a statement door, pull a tiny hint of that color into the rest of the room. A hand towel, a soap dispenser, or a small piece of art with a touch of the same blue would make the choice feel intentional and cohesive, rather than jarring.
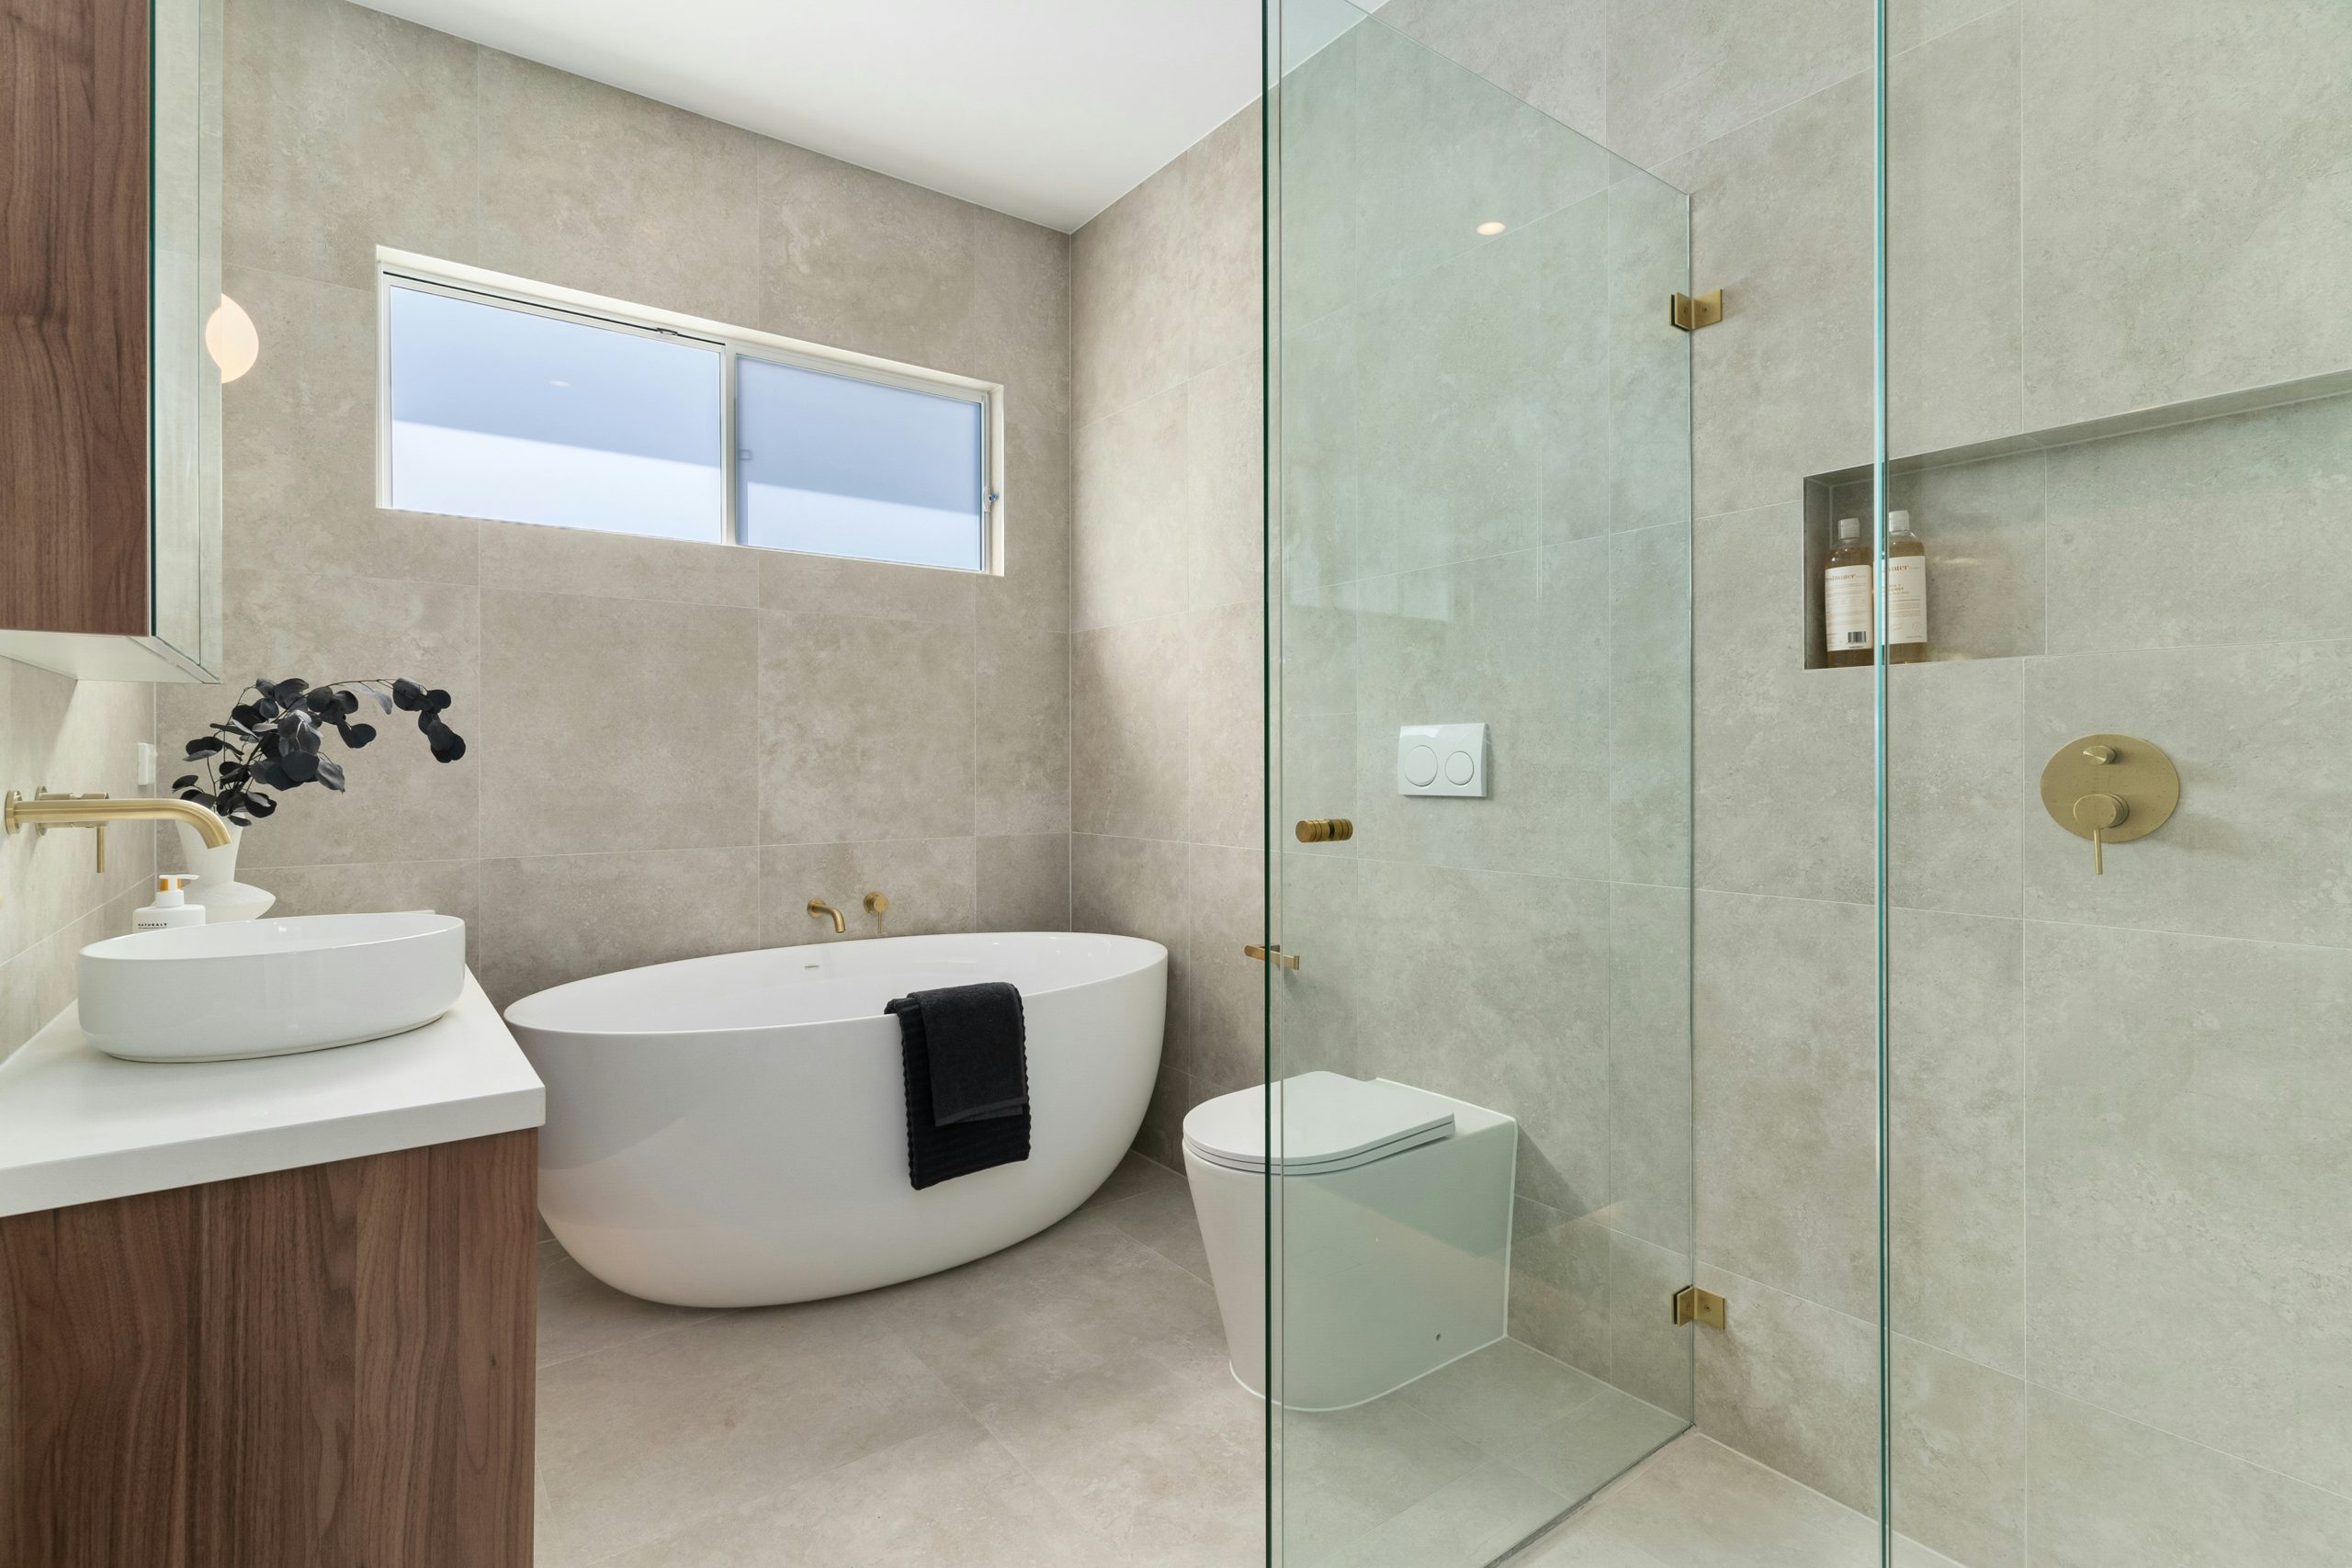
4. Embrace Tranquility with Greige Tile and Brass Fixtures
What makes this bathroom feel so incredibly calming? It’s the masterful use of a monochrome palette with varying textures. The large-format greige tiles on both the walls and floor create a nearly seamless, enveloping effect, which is incredibly soothing to the eye. The warmth of the wood vanity prevents the greige from feeling cold, while the brass fixtures add a touch of quiet luxury. This isn’t a room that shouts for attention; it whispers. The clean lines of the wall-mounted faucet and freestanding tub complete the minimalist, uncluttered feel.
🎯 What Makes It Work
While brass fixtures are stunning, they do require a bit of specific care to keep them looking their best. Unlacquered brass will develop a natural patina over time, which can be beautiful if you love a living finish. If you prefer a consistent shine, you’ll need to polish it every few months. For lacquered brass, simply wipe it down with a soft, damp cloth. Avoid harsh chemical cleaners, as they can strip the protective coating and cause spotting. This look is beautiful but requires a commitment to gentle cleaning.
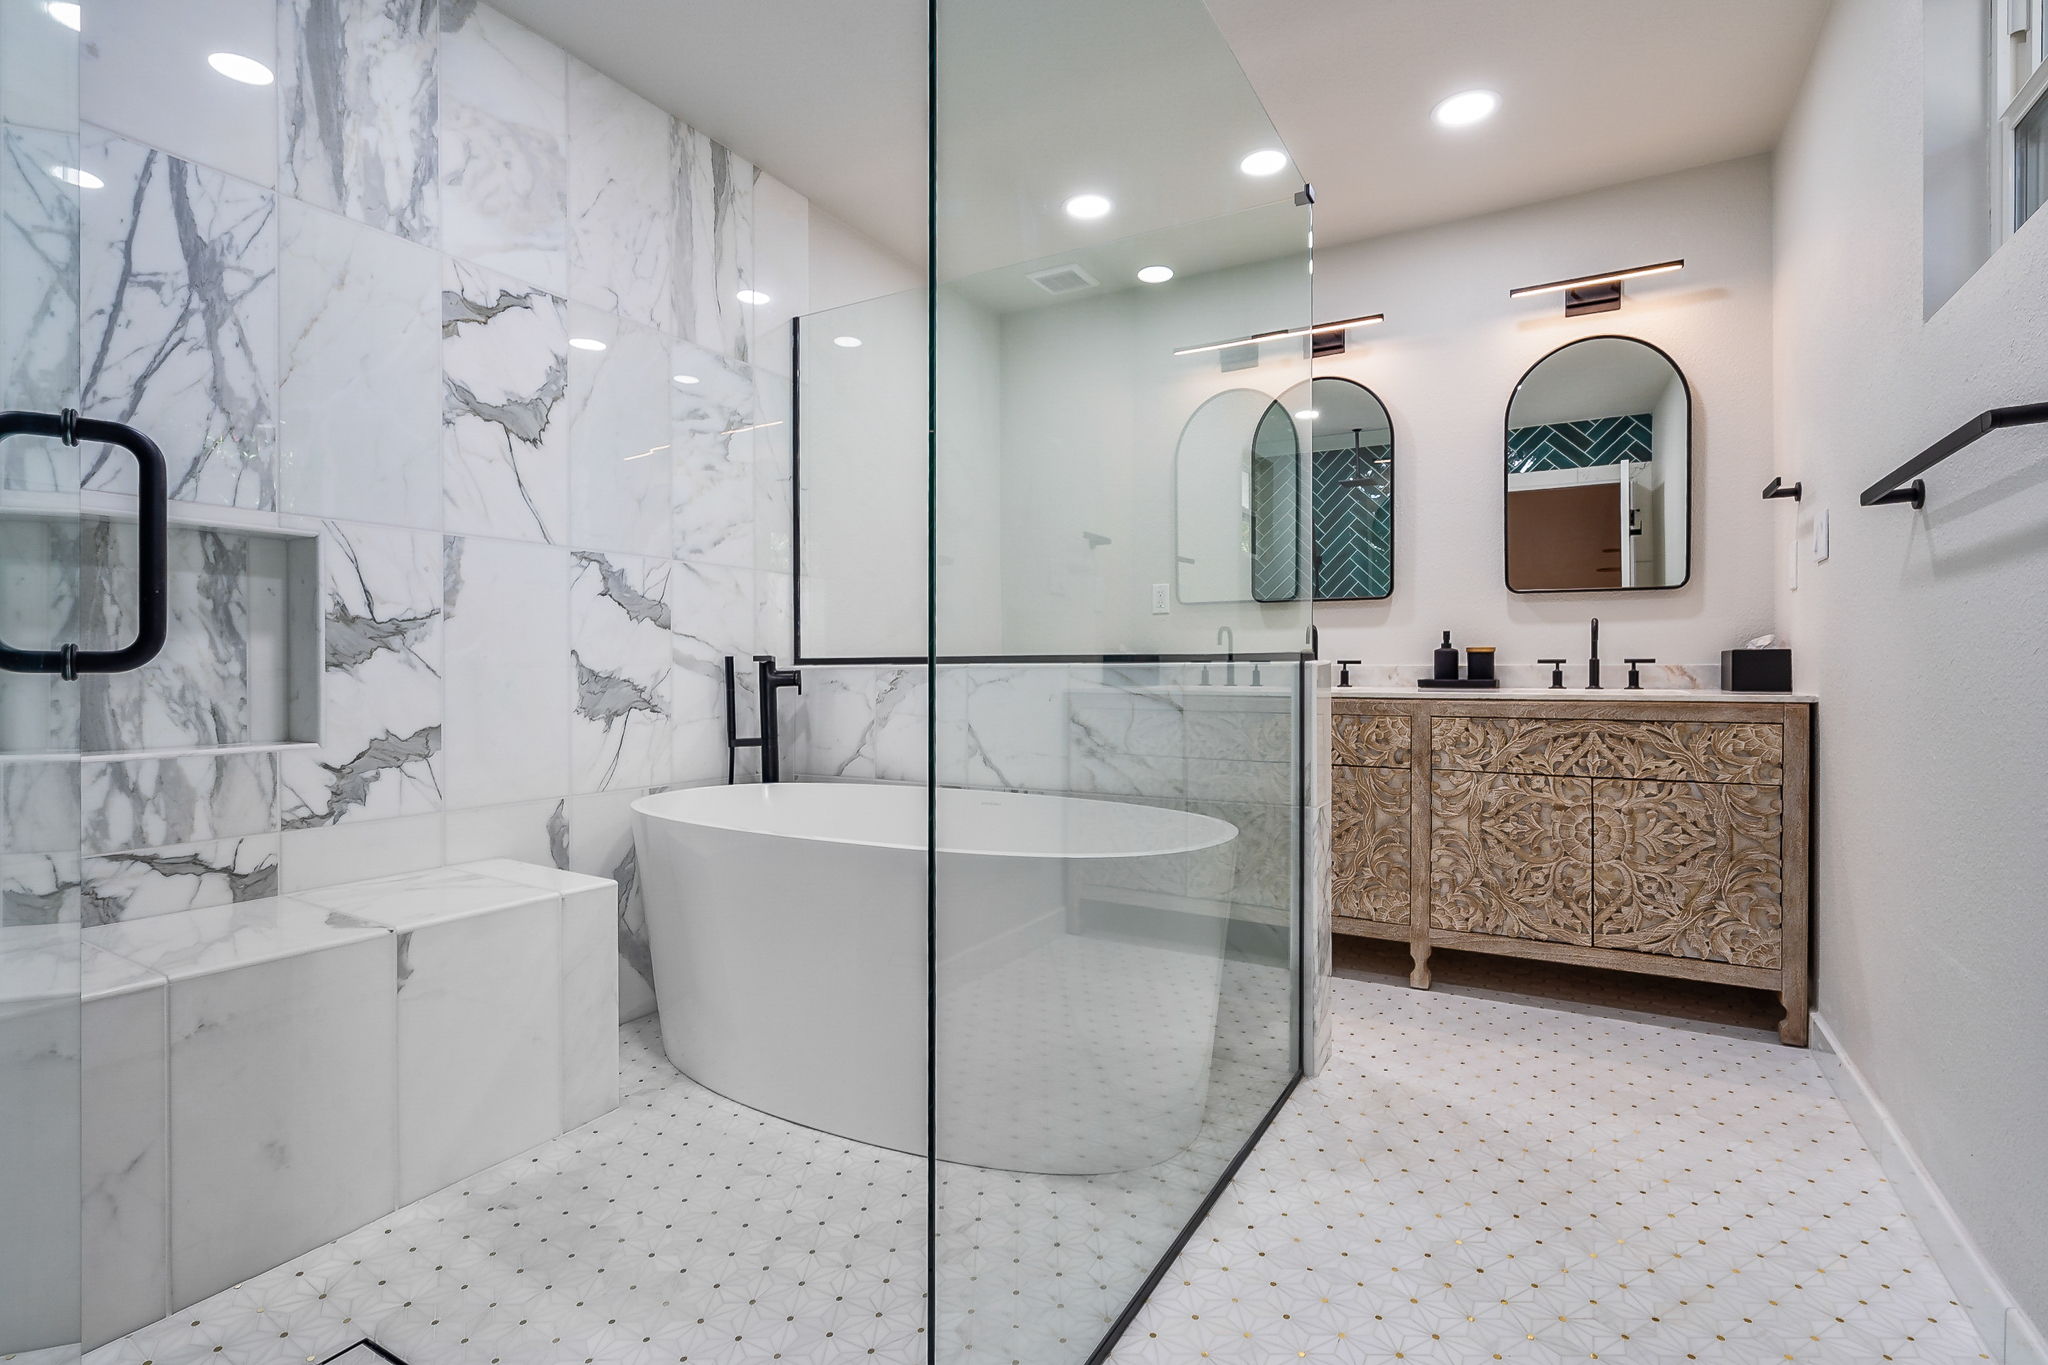
5. Layer Pattern and Texture with Carved Wood and Marble
The absolute showstopper in this bathroom is the carved wood double vanity. In a room filled with elegant choices—the marble-look tiles, the freestanding tub, the patterned floor—the vanity provides a necessary dose of organic texture and detailed craftsmanship. It’s the element that keeps the design from feeling too sleek or sterile. Remove it, and you have a pretty, modern bathroom. But with it, you have a room with personality, warmth, and a story. The intricate carving feels both timeless and personal.
🧹 Maintenance Reality
There’s a reason we’re seeing more “statement” vanities like this one. After years of minimalist, flat-front cabinets, there’s a collective desire for more texture, detail, and craftsmanship in our homes. This shift is about moving away from mass-produced looks towards pieces that feel unique and curated. A carved or fluted wood vanity, like the one here or in Idea #17, hits that mark perfectly, blending the clean lines of modern design with the warmth and detail of traditional furniture making.
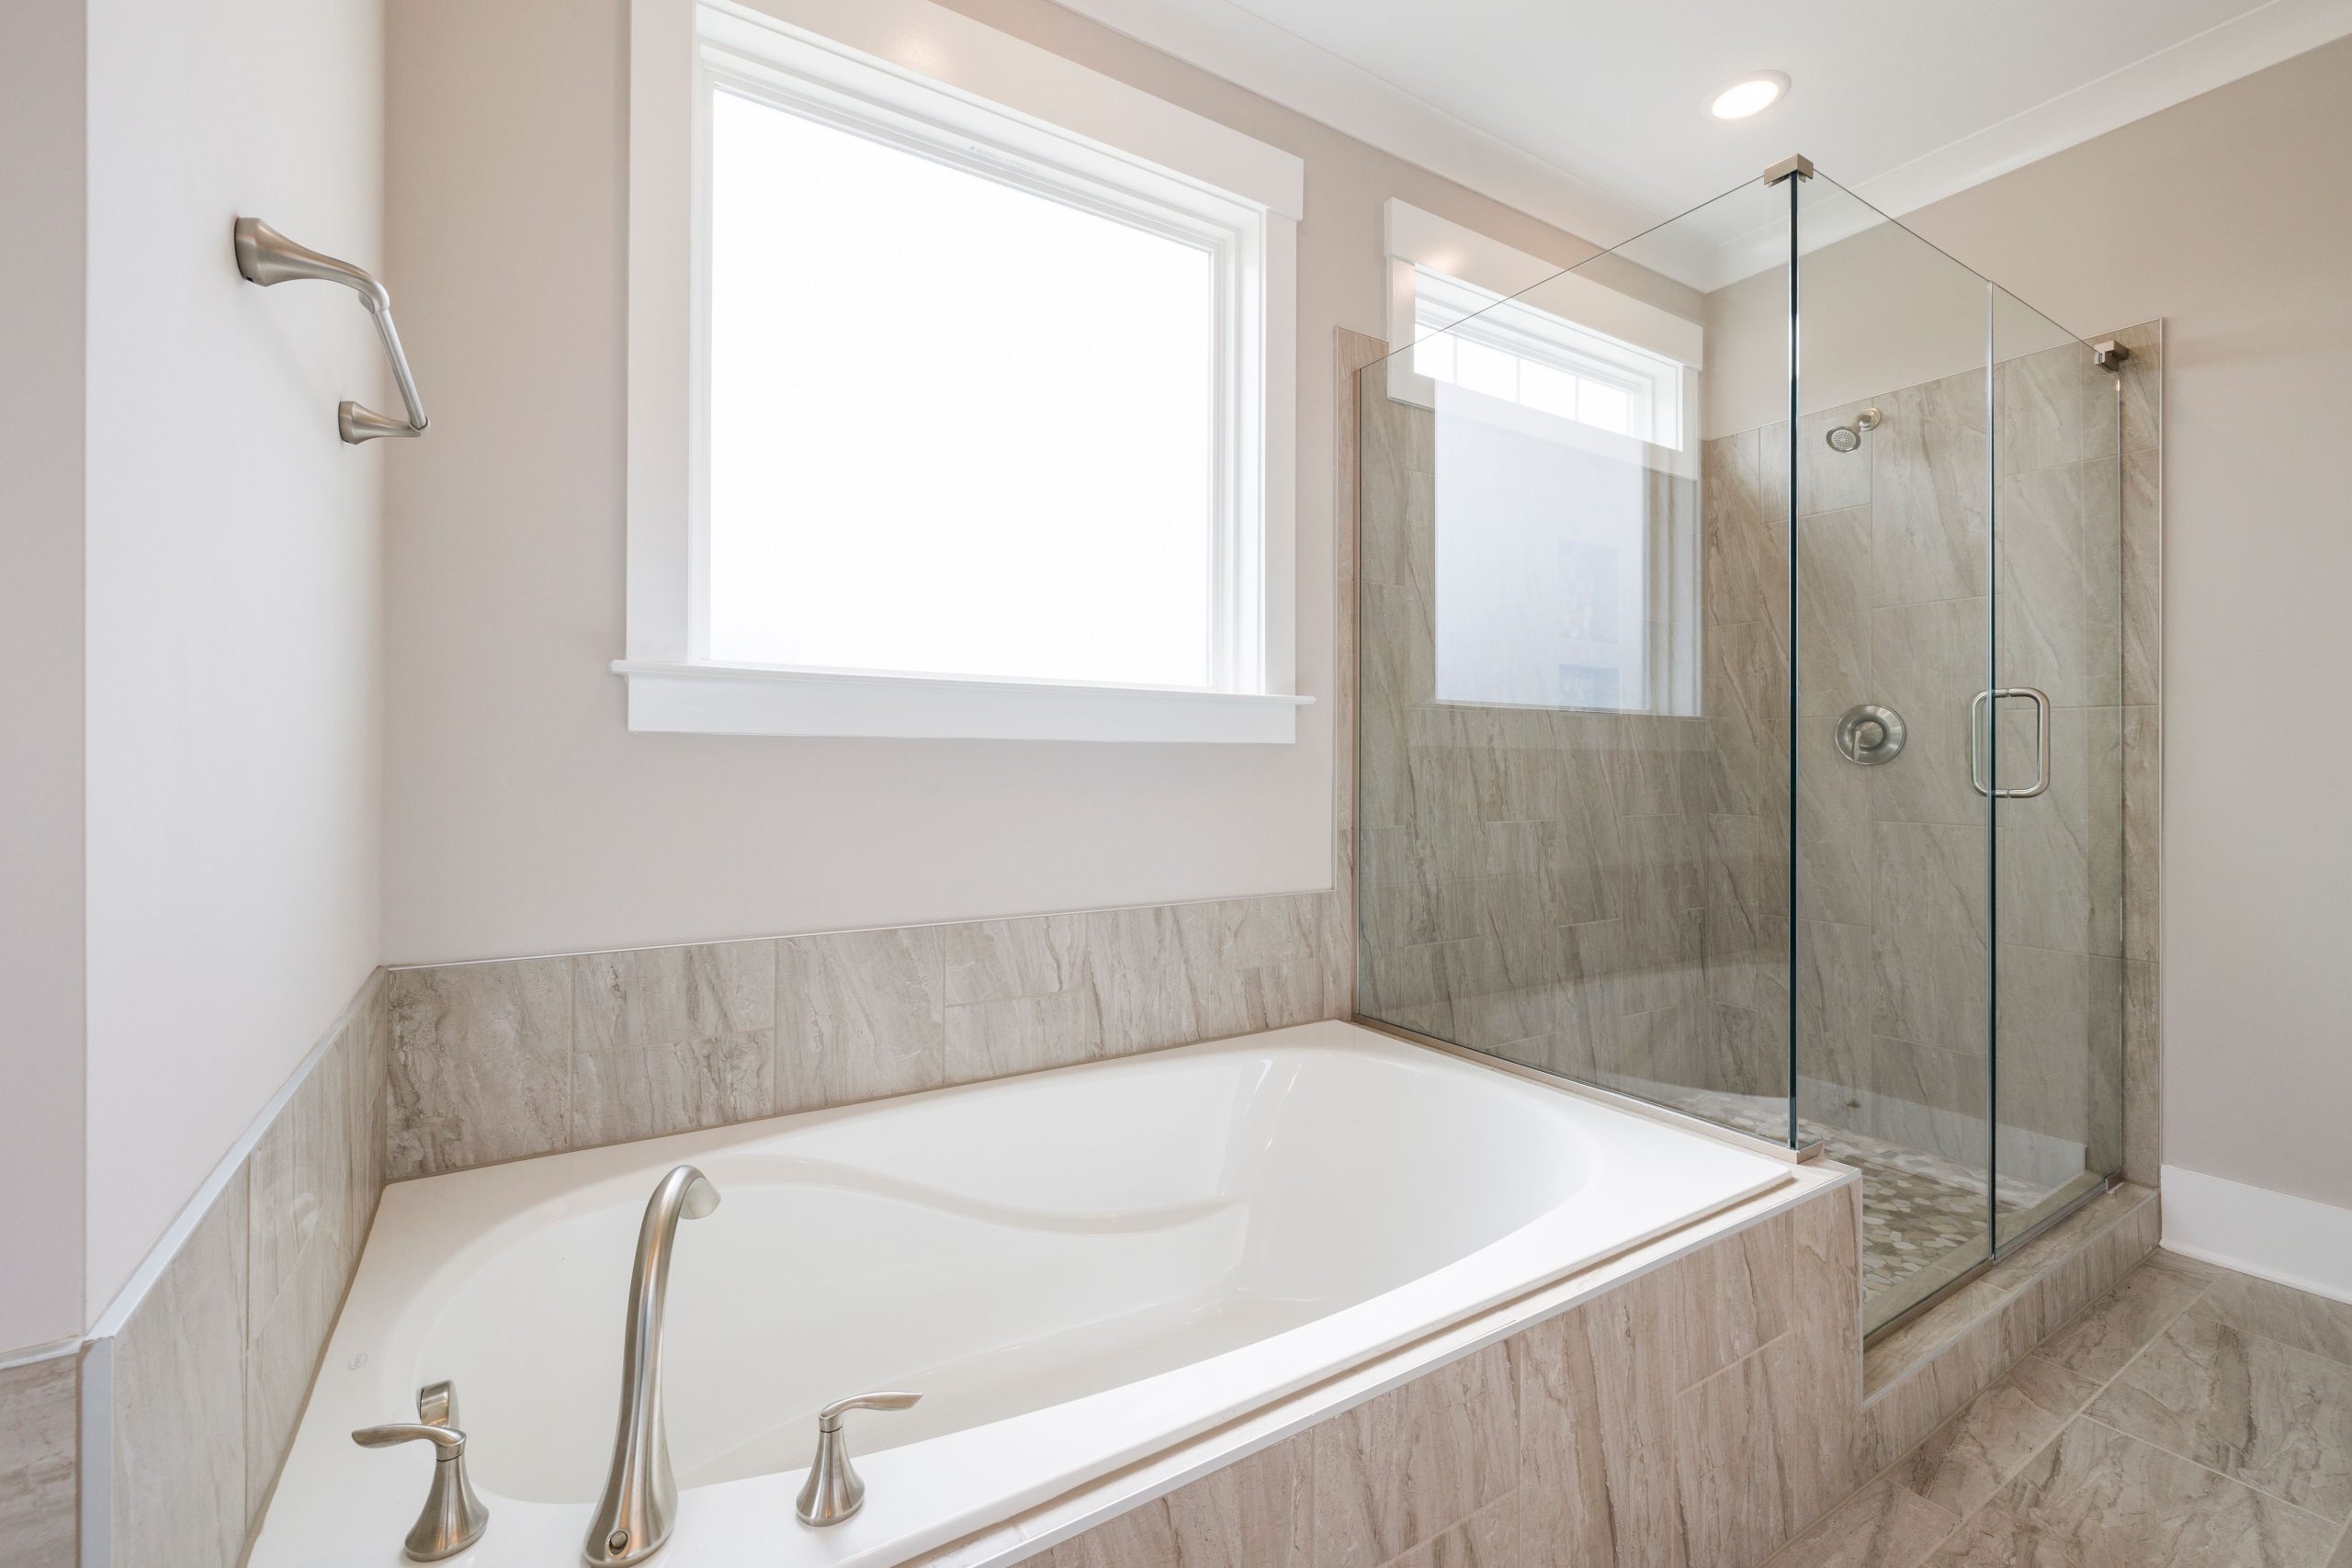
6. Achieve a Hotel Vibe with a Fully Tiled Tub Surround
This look, centered around a built-in tub and fully tiled surround, works best in bathrooms with at least 60-80 square feet of space. The continuous tiling from the floor, up the tub apron, and into the shower requires a certain visual runway to look expansive rather than cramped. A minimum ceiling height of 8 feet is recommended to avoid the tiled walls feeling overwhelming. For smaller spaces, consider using the same tile on the floor and just the tub apron, but switch to a lighter paint color for the walls to maintain a sense of openness.
🔧 How-To Brief
You don’t need a five-star budget to get this clean, built-in look. The key is the continuity of the tile. Look for affordable, large-format porcelain stone-look tile from places like Floor & Decor or The Home Depot—you can often find options for $3-$5 per square foot. Pair it with a simple alcove bathtub from a big-box retailer ($400-$800) instead of a freestanding model. Finishing with brushed nickel fixtures from a brand like Delta or Moen gives you the same cohesive, polished feel for a fraction of the custom cost.
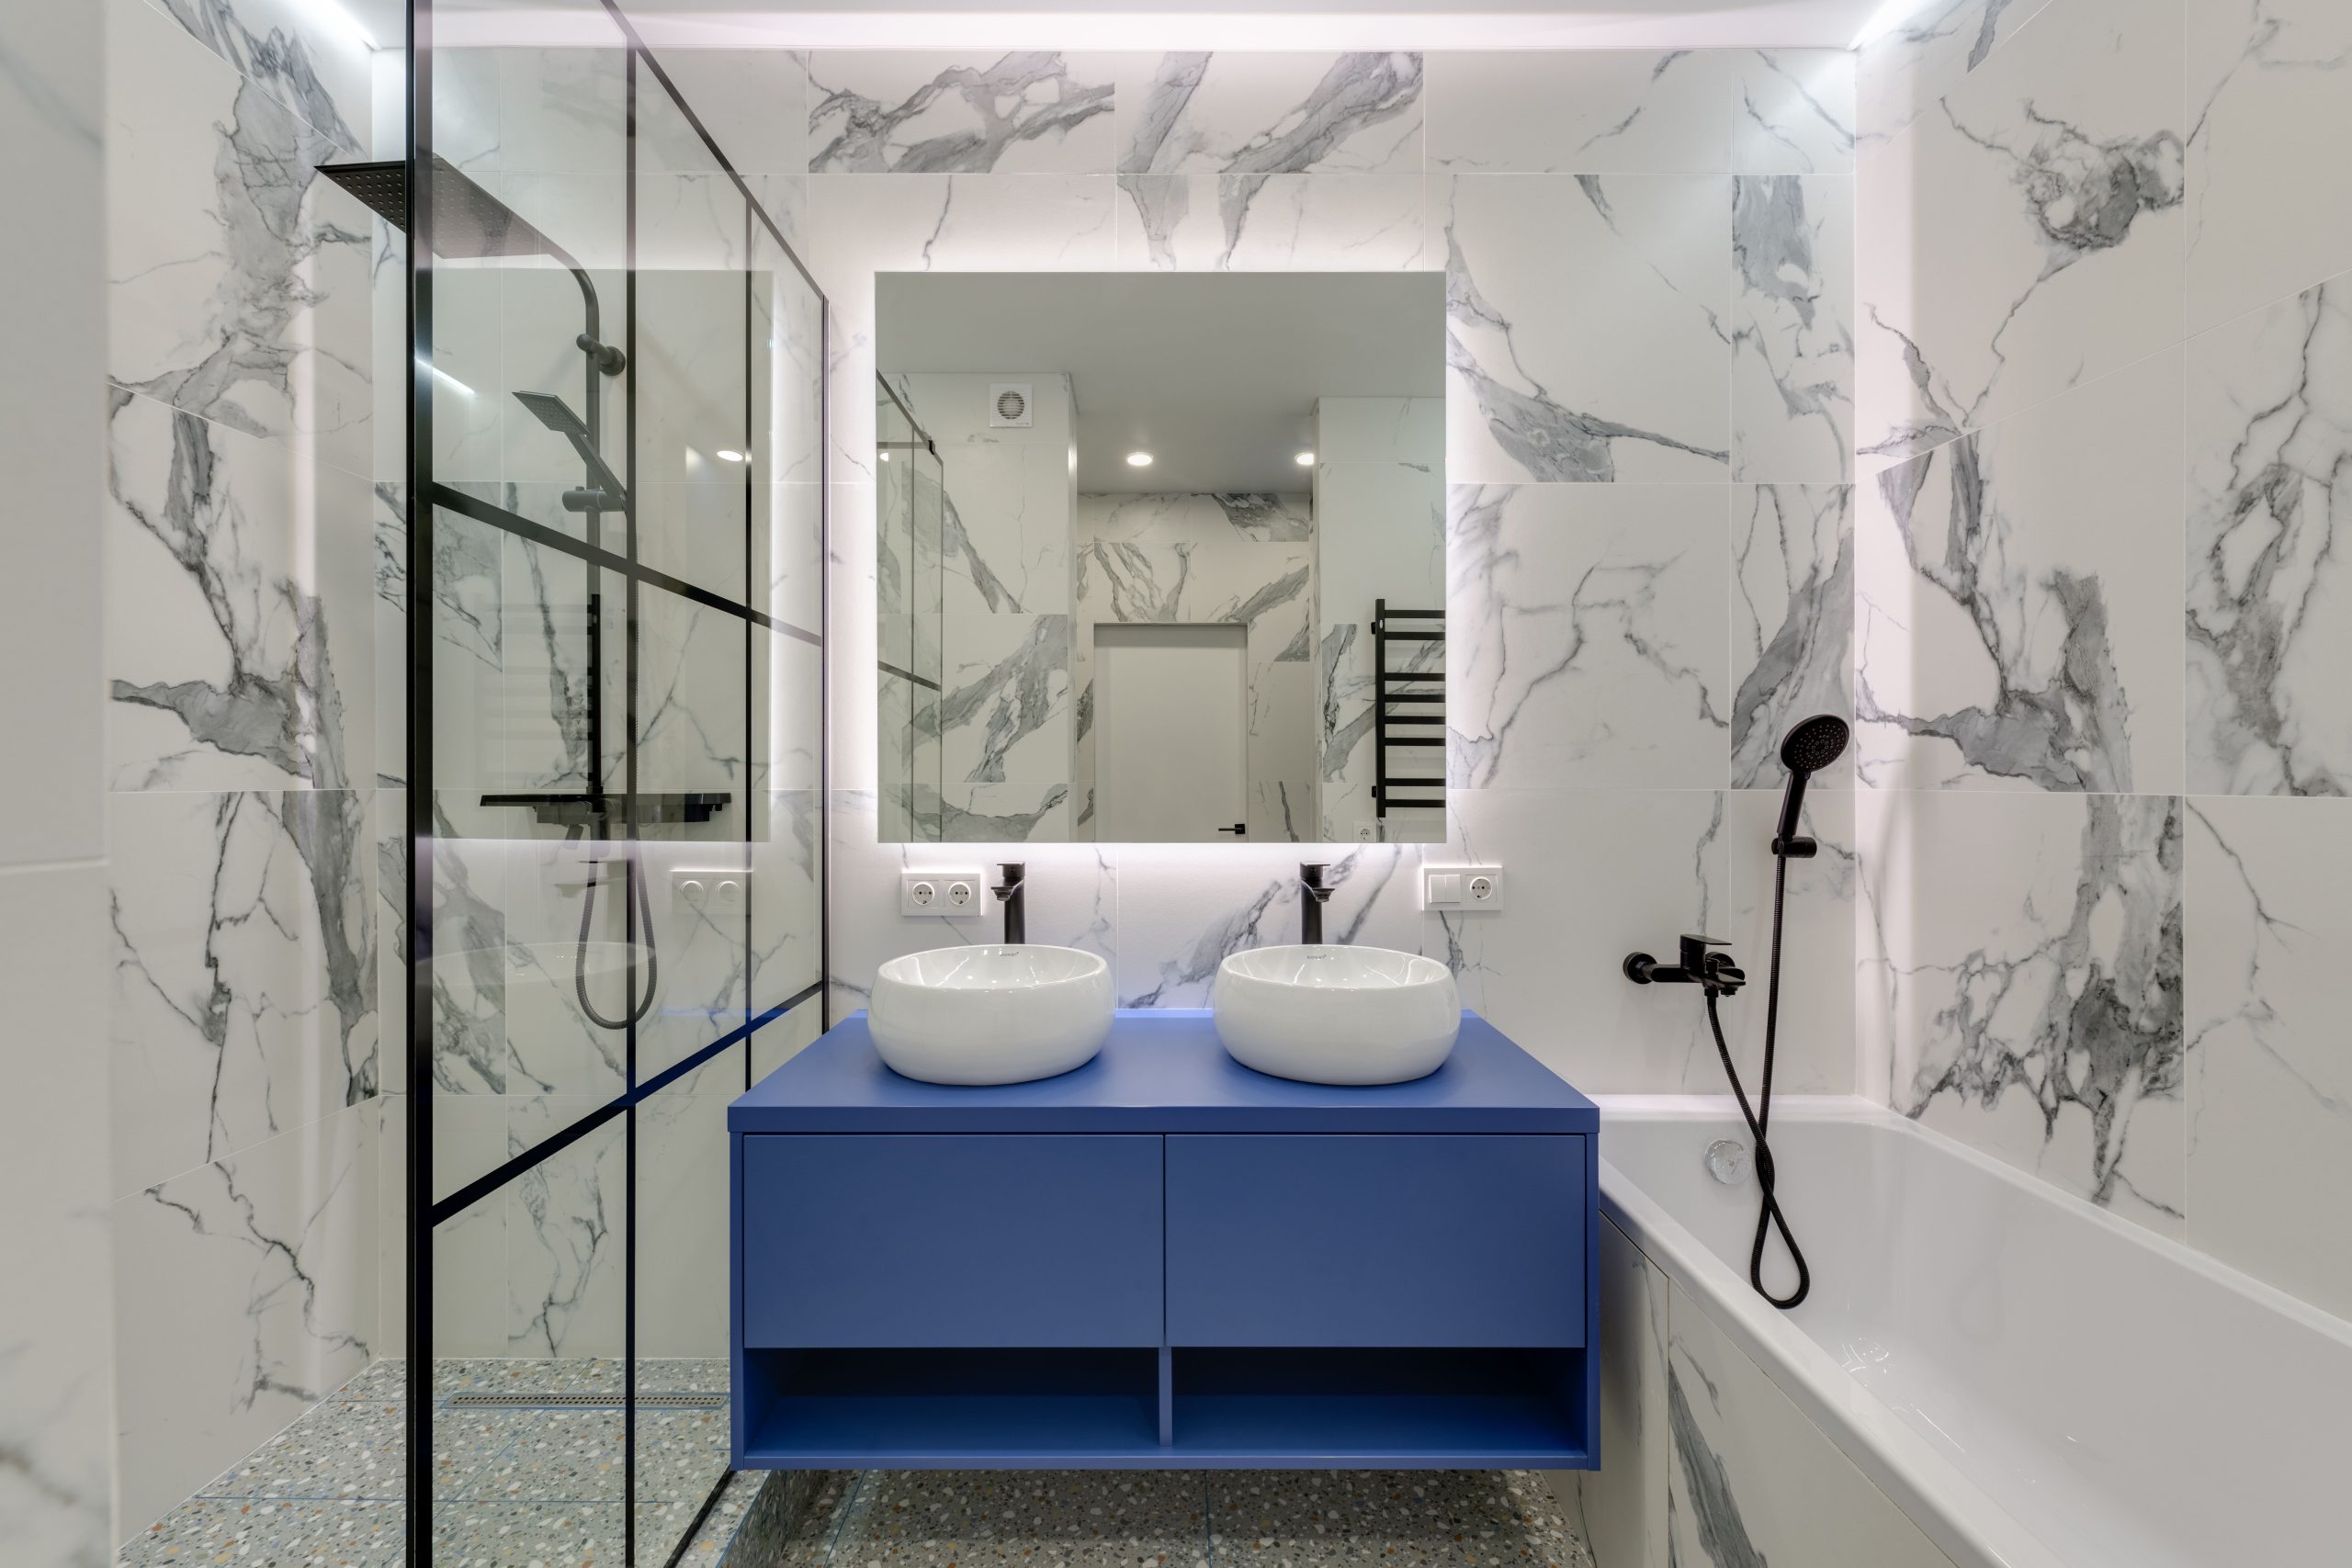
7. Contrast a Blue Vanity with Sleek Black Fixtures
If you’re installing vessel sinks on a floating vanity like this, pay close attention to the height. The standard bathroom countertop height is 32-36 inches. When you add a vessel sink, the rim of the sink should be at that height, not the countertop itself. This means the vanity will likely need to be mounted lower than you think, typically around 30 inches from the floor, depending on the height of your sinks. This ensures a comfortable, ergonomic height for washing your hands and face without splashing everywhere.
🔥 Trending Context
This bathroom design is a masterclass in contrast. The deep, cool blue of the vanity provides a bold splash of color that is beautifully anchored by the matte black fixtures. The crisp, white vessel sinks and the large-format marble-look tiles act as a neutral, bright canvas, allowing the blue and black elements to pop without overwhelming the space. The grid pattern on the shower enclosure adds another layer of geometric interest, echoing the clean lines of the floating vanity and creating a look that is modern and graphic.
8. Go for Full Drama with Floor-to-Ceiling Grey Marble Tile
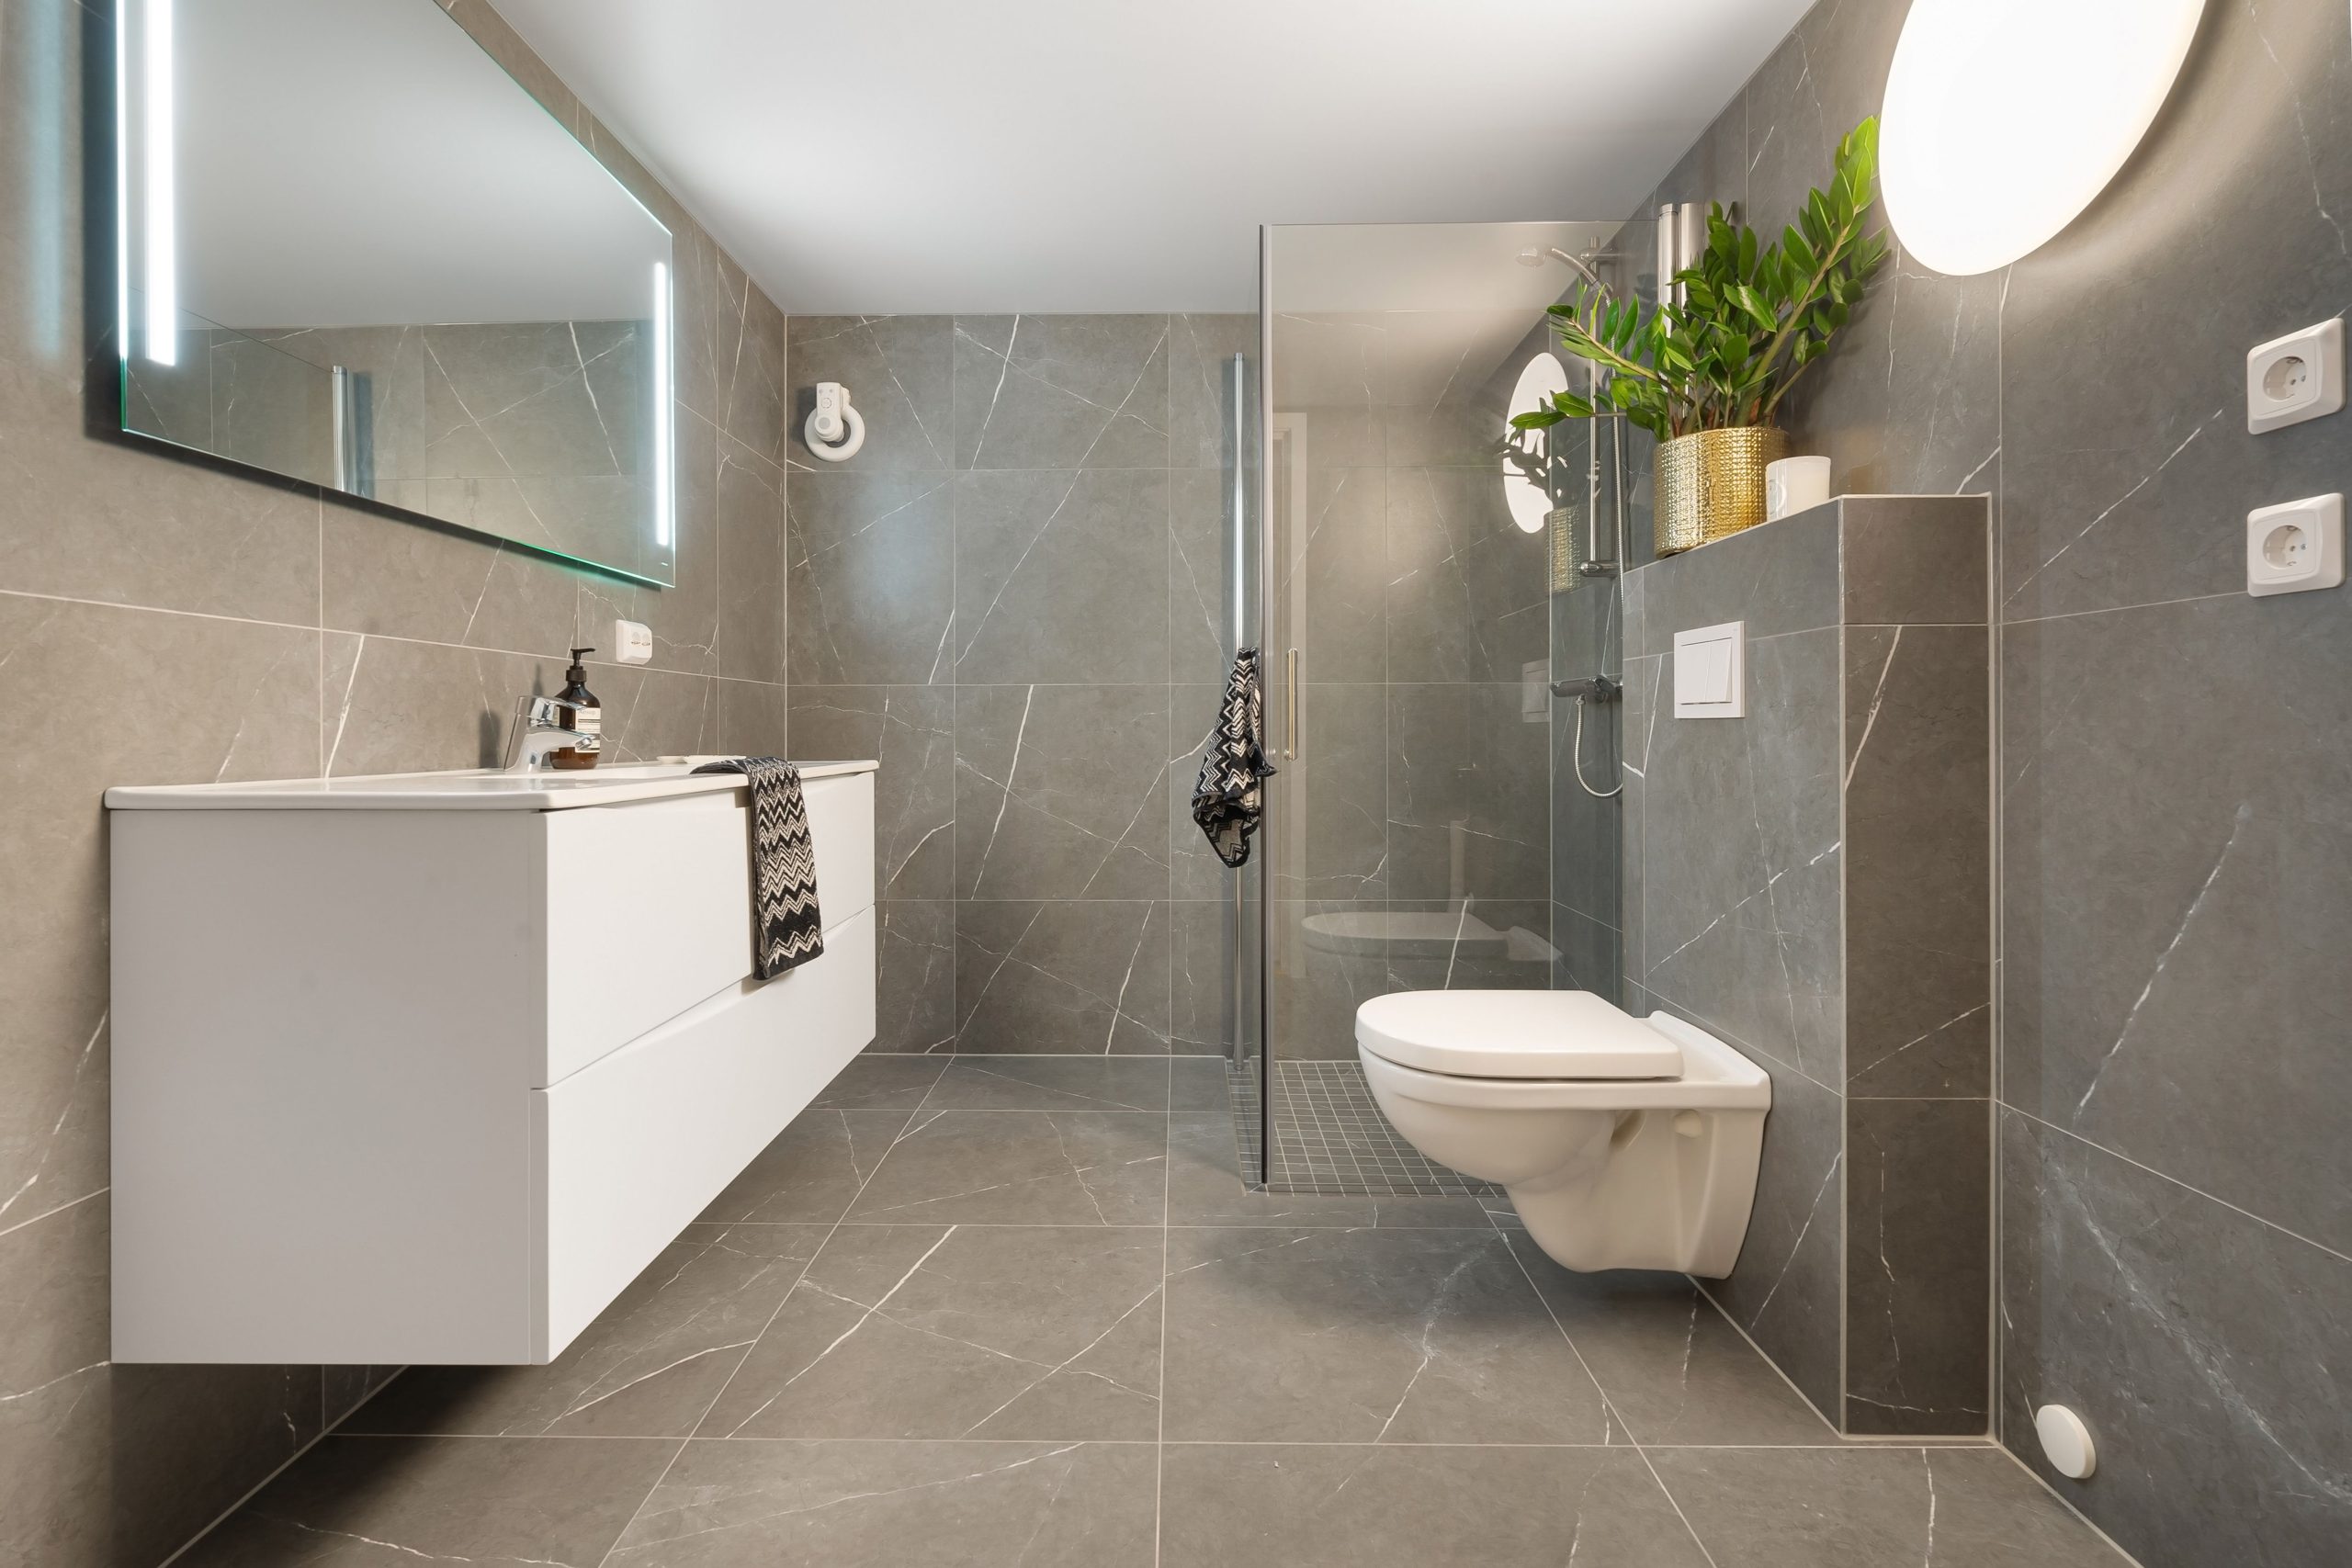
While wrapping a bathroom in large-format grey tile is undeniably chic and minimalist, it can easily feel cold or clinical if not balanced correctly. This design avoids that by incorporating an LED-backlit mirror, which casts a soft, warm glow. Without that warm light, the grey tile and white fixtures could feel stark and uninviting. Also, remember that dark grout on floors can be a lifesaver for hiding dirt, but on walls, any imperfections in the tile job will be highlighted, so a flawless installation is key.
💸 Get This Look For Less
Installing an LED-backlit mirror is a weekend project that makes a huge impact. Here’s a quick guide:
- Time: 2-3 hours. Cost: $200 – $600.
- Turn off power to the bathroom at the circuit breaker. Safety first!
- Carefully mark the mounting holes for your new mirror, ensuring it’s level. Use a stud finder to locate studs for a secure installation if possible.
- Connect the mirror’s electrical wires to the junction box in the wall (usually red to red, white to white, ground to ground).
- Mount the mirror securely to the wall using the provided hardware.
- Turn the power back on and test your new, beautifully illuminated mirror.
9. Mix Dark Grey Marble-Look Tile with Gold Hardware
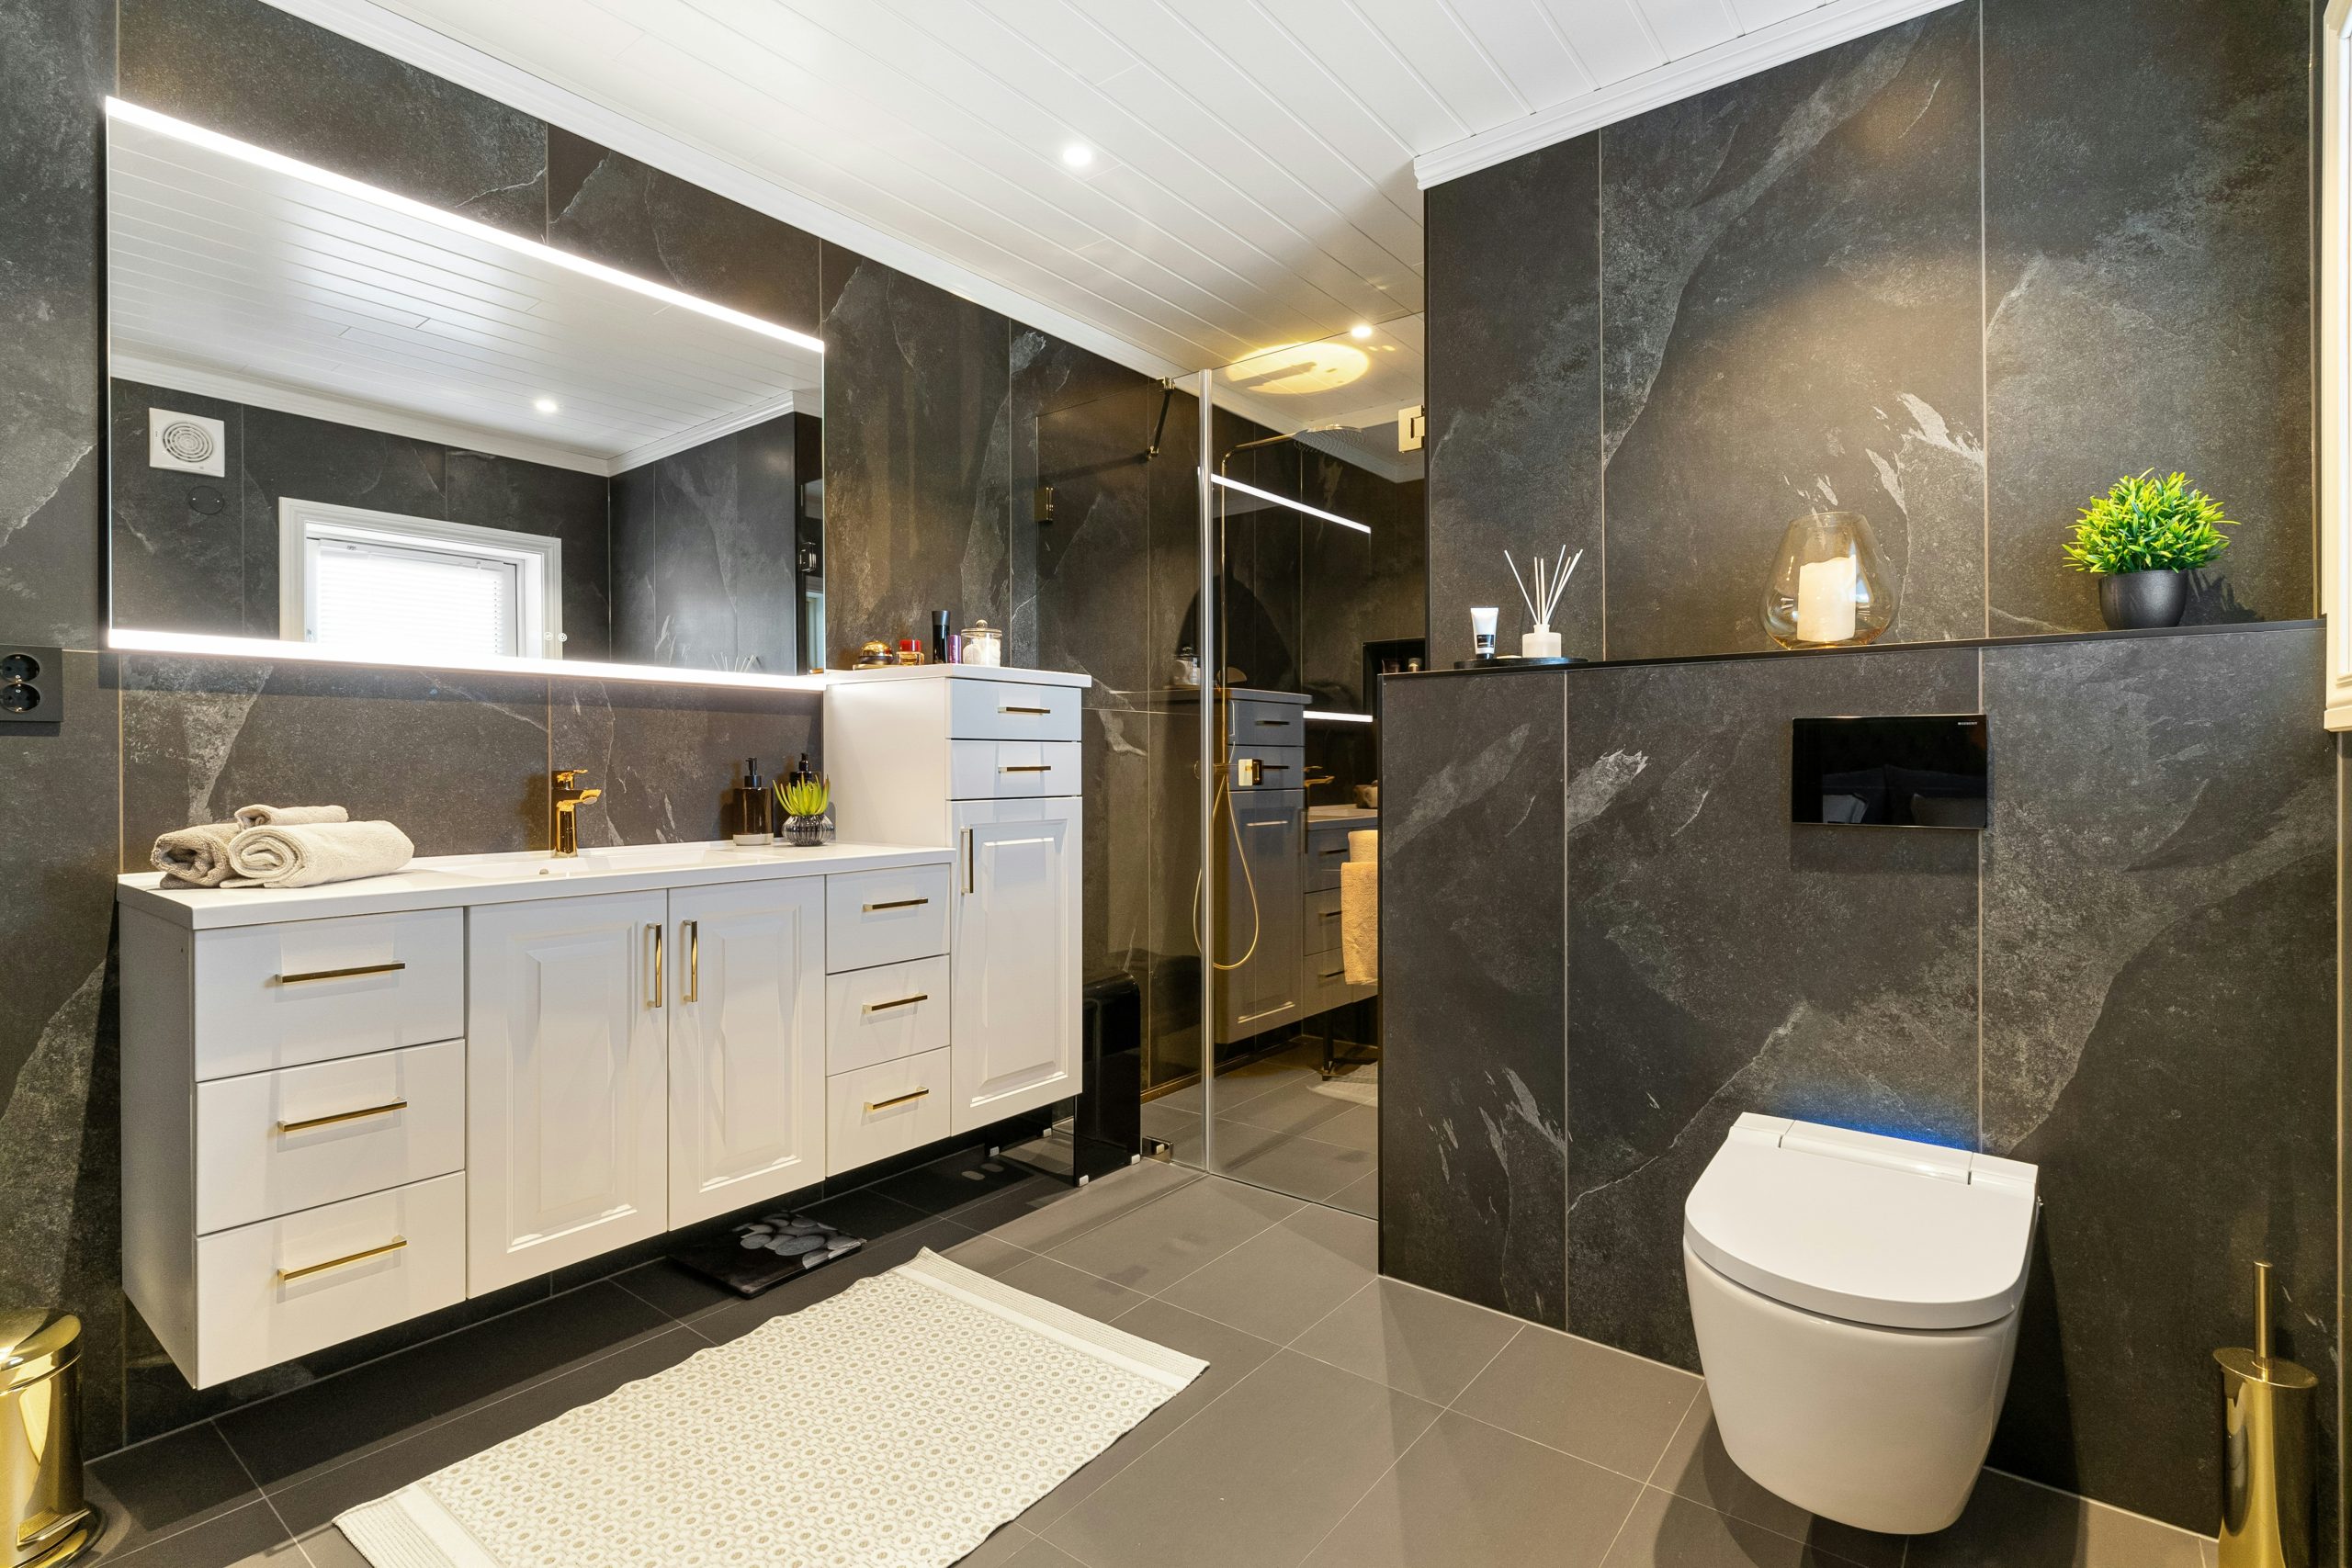
The formula here is all about sophisticated balance. It’s roughly 70% dramatic dark surfaces (the grey marble-veined walls), 20% crisp white elements (the vanity and toilet), and 10% warm metallic accents (the gold hardware). This high-contrast recipe creates a moody and luxurious atmosphere. The key is the 10% of gold; it acts as a crucial warming agent against the cool grey and white, preventing the room from feeling sterile. You could swap the gold for brushed brass or even copper to achieve a similar effect.
📏 Scale Guide
Before you commit to this high-drama look, run through this quick checklist:
- Check your lighting: Dark tiles absorb light. Do you have enough natural light or a plan for layered artificial lighting (like the backlit mirror here) to keep it from feeling like a cave?
- Measure your space: This look works best in a moderately sized to large bathroom. In a very small, windowless space, it can feel too intense.
- Get tile samples: View the dark grey tile in your actual bathroom at different times of day. The veining and color can look dramatically different depending on the light.
10. Balance White Subway Tile with Warm Wood Cabinetry
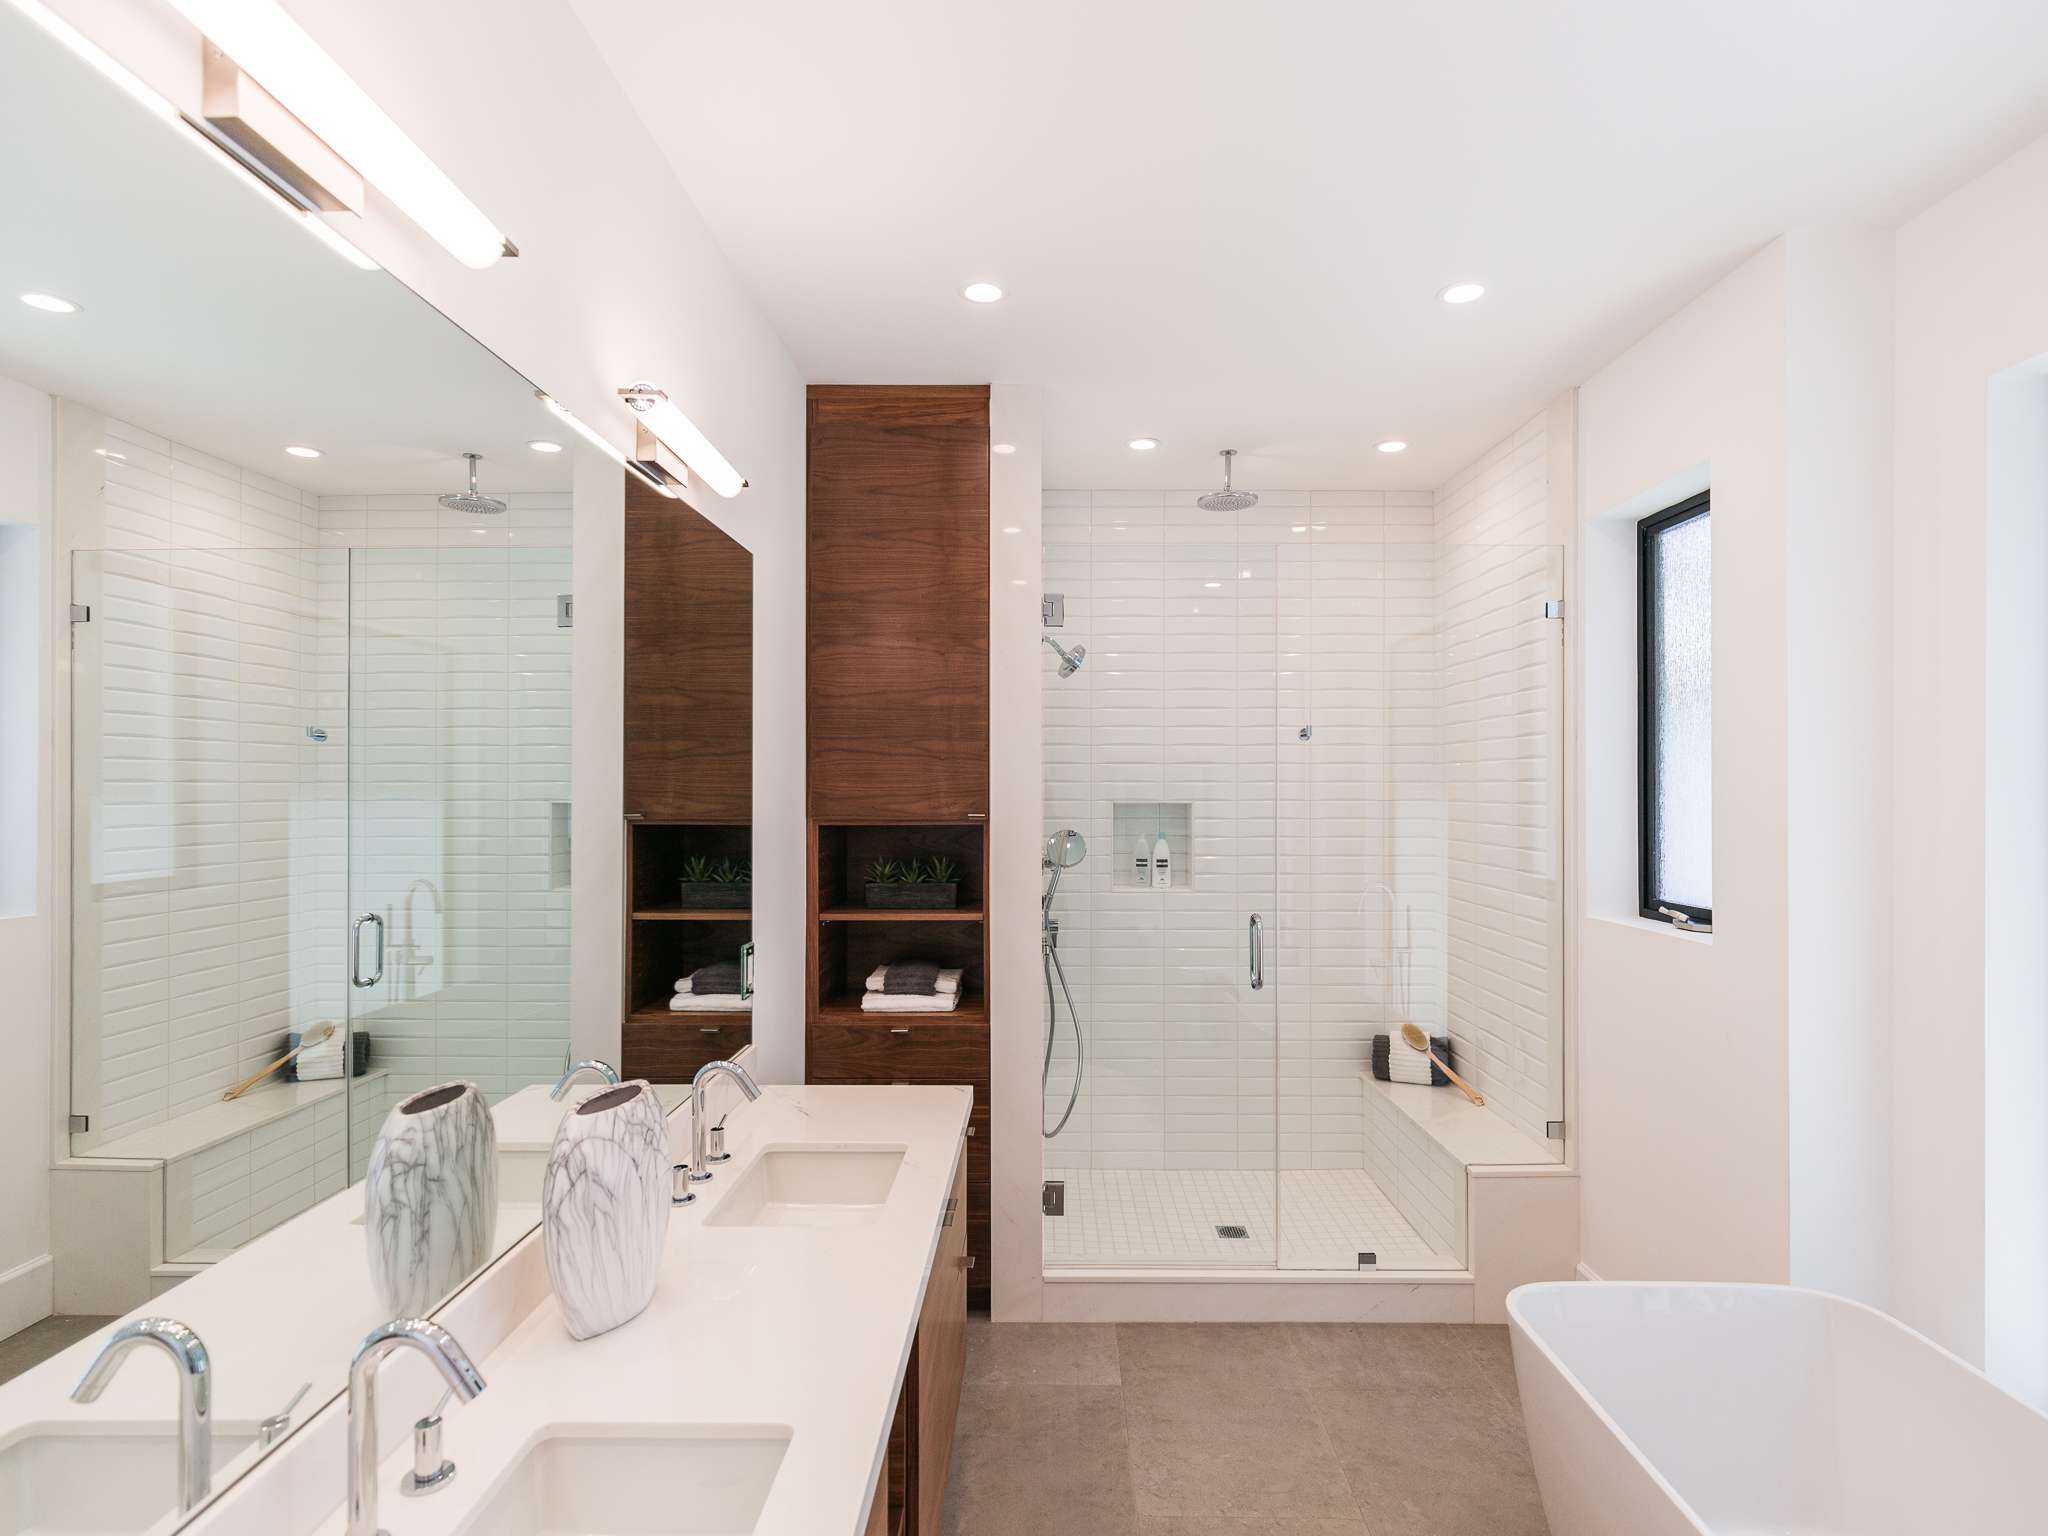
This bathroom feels so balanced because it pairs a cool, classic element with a warm, modern one. The white subway tile in the shower is a timeless, almost utilitarian choice that provides a bright, clean backdrop. By itself, it could feel a bit sterile. However, the rich, warm-toned wood of the vanity and wall cabinet introduces a necessary organic element. This contrast in temperature—cool tile vs. warm wood—is what creates visual interest and makes the space feel both fresh and inviting. The simple chrome fixtures bridge the two without competing.
💡 Designer Tip
Love this warm-meets-modern look but not the price tag? You can achieve this vibe on a serious budget. Classic white subway tile is one of the most affordable tile options, often under $3 per square foot. For the vanity, look to IKEA. Their GODMORGON series offers wood-effect floating vanities that give this exact look. Pair it with a simple white LAGTÅN countertop and affordable chrome faucets from a big-box store. You get the same clean lines and warm texture for a fraction of the cost of custom cabinetry.
11. Make a Statement with a Black Subway Tile Shower Wall
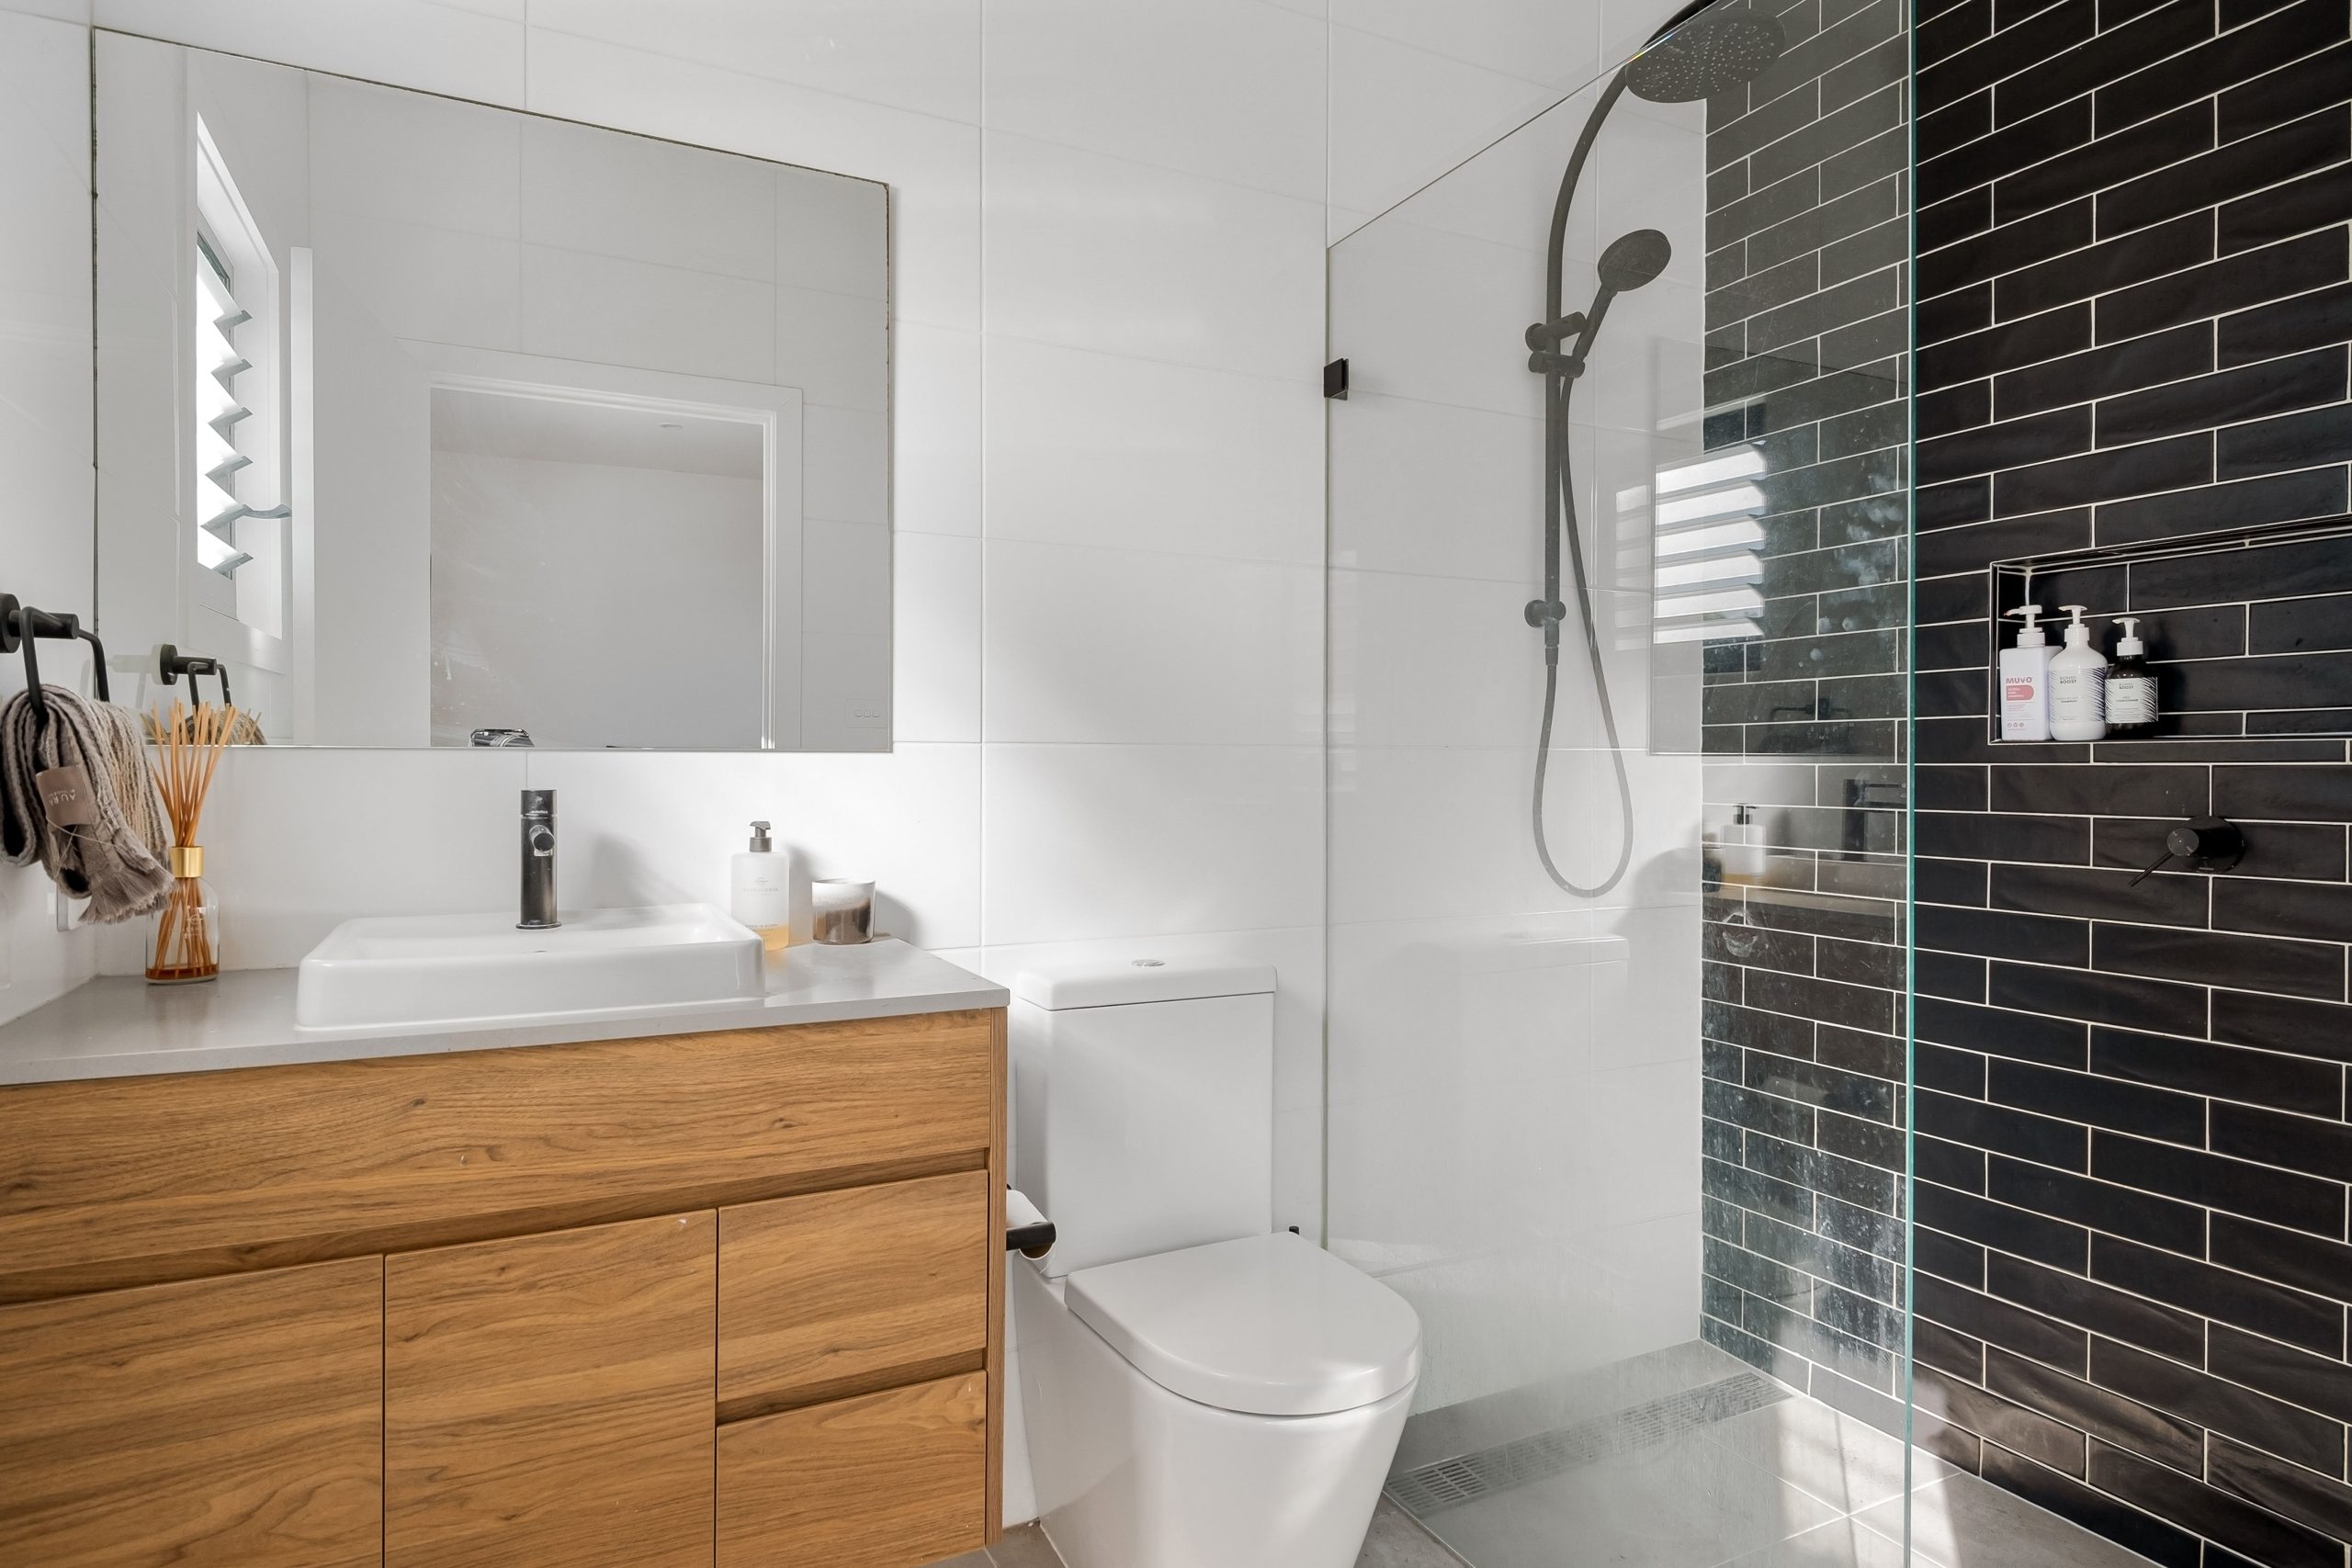
When using a dark tile like the black subway tile in this shower, grout color is everything. The decision to use white grout here is a deliberate and powerful choice. It creates a bold, graphic pattern that emphasizes the shape of each tile and turns the wall into an intentional feature. If the designer had used black or dark grey grout, the wall would have appeared as a solid black surface, losing all that beautiful, linear detail. For maximum impact with classic tile shapes, always think about contrast.
💰 Budget Breakdown
The single element that makes this bathroom memorable is the black subway tile accent wall. It’s a bold, confident move in an otherwise light and airy space. This single wall provides all the drama and contrast the room needs, creating a focal point that draws the eye immediately. Take it away and replace it with more white tile, and you have a perfectly nice, but forgettable, bathroom. The black tile wall is the design’s entire personality. Compared to the all-white subway tile in Idea #10, you can see how much attitude this one change brings.
12. Opt for a Clean, Minimalist Look with Wall-Mounted Fixtures
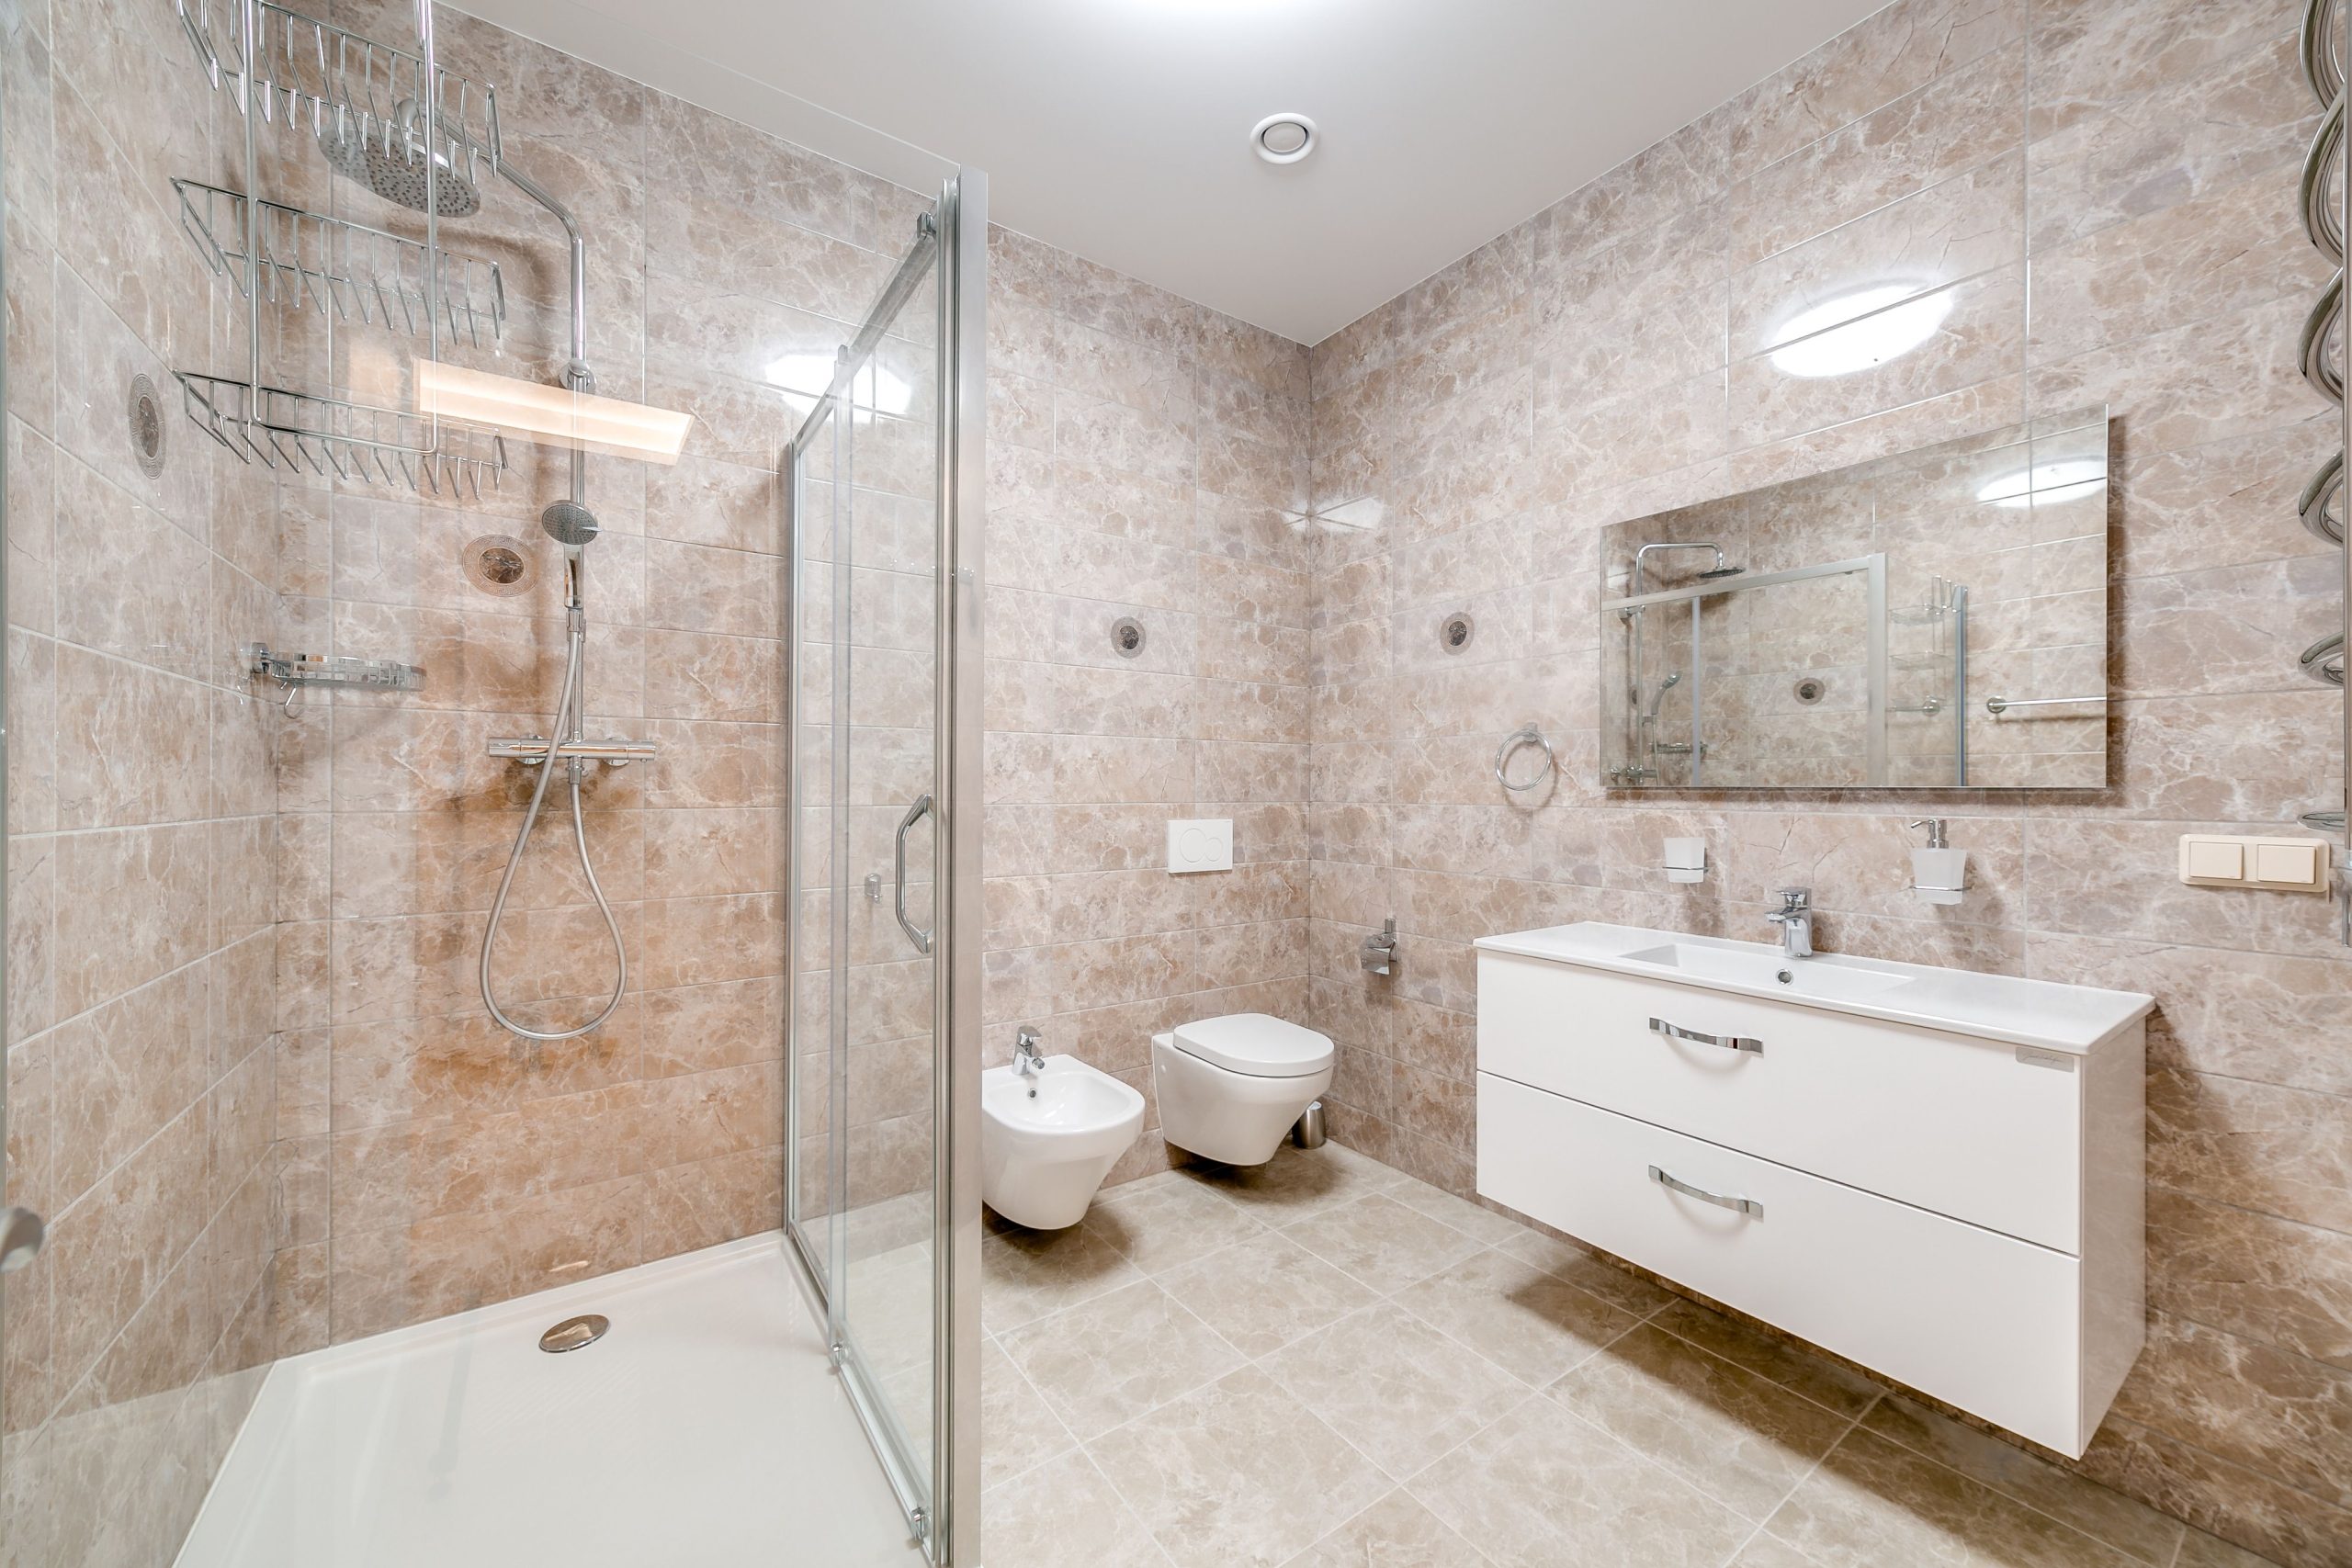
This minimalist design, featuring a wall-mounted vanity, toilet, and bidet, is a fantastic solution for small to medium-sized bathrooms, typically in the 40-70 square foot range. By lifting everything off the ground, you expose more floor space, which tricks the eye into seeing the room as larger and less cluttered. This approach is particularly effective in narrow bathrooms, where every inch of perceived width counts. The continuous flooring flowing under the fixtures enhances the sense of unbroken space, a key principle for making small rooms feel grander.
⚠️ Real Talk
Let’s get real about wall-mounted fixtures. They look incredibly sleek and make cleaning the floor a dream. However, the installation is significantly more complex and expensive than for standard floor-mounted options. The toilet and vanity require special in-wall carriers to support their weight, which means the wall needs to be opened up. This is a job for a professional plumber and contractor, not a casual DIY. Plan for higher installation costs and know that future repairs can also be more complicated as the functional parts are hidden in the wall.
13. Brighten Up with Teal Shower Tile and a Wood Plank Ceiling
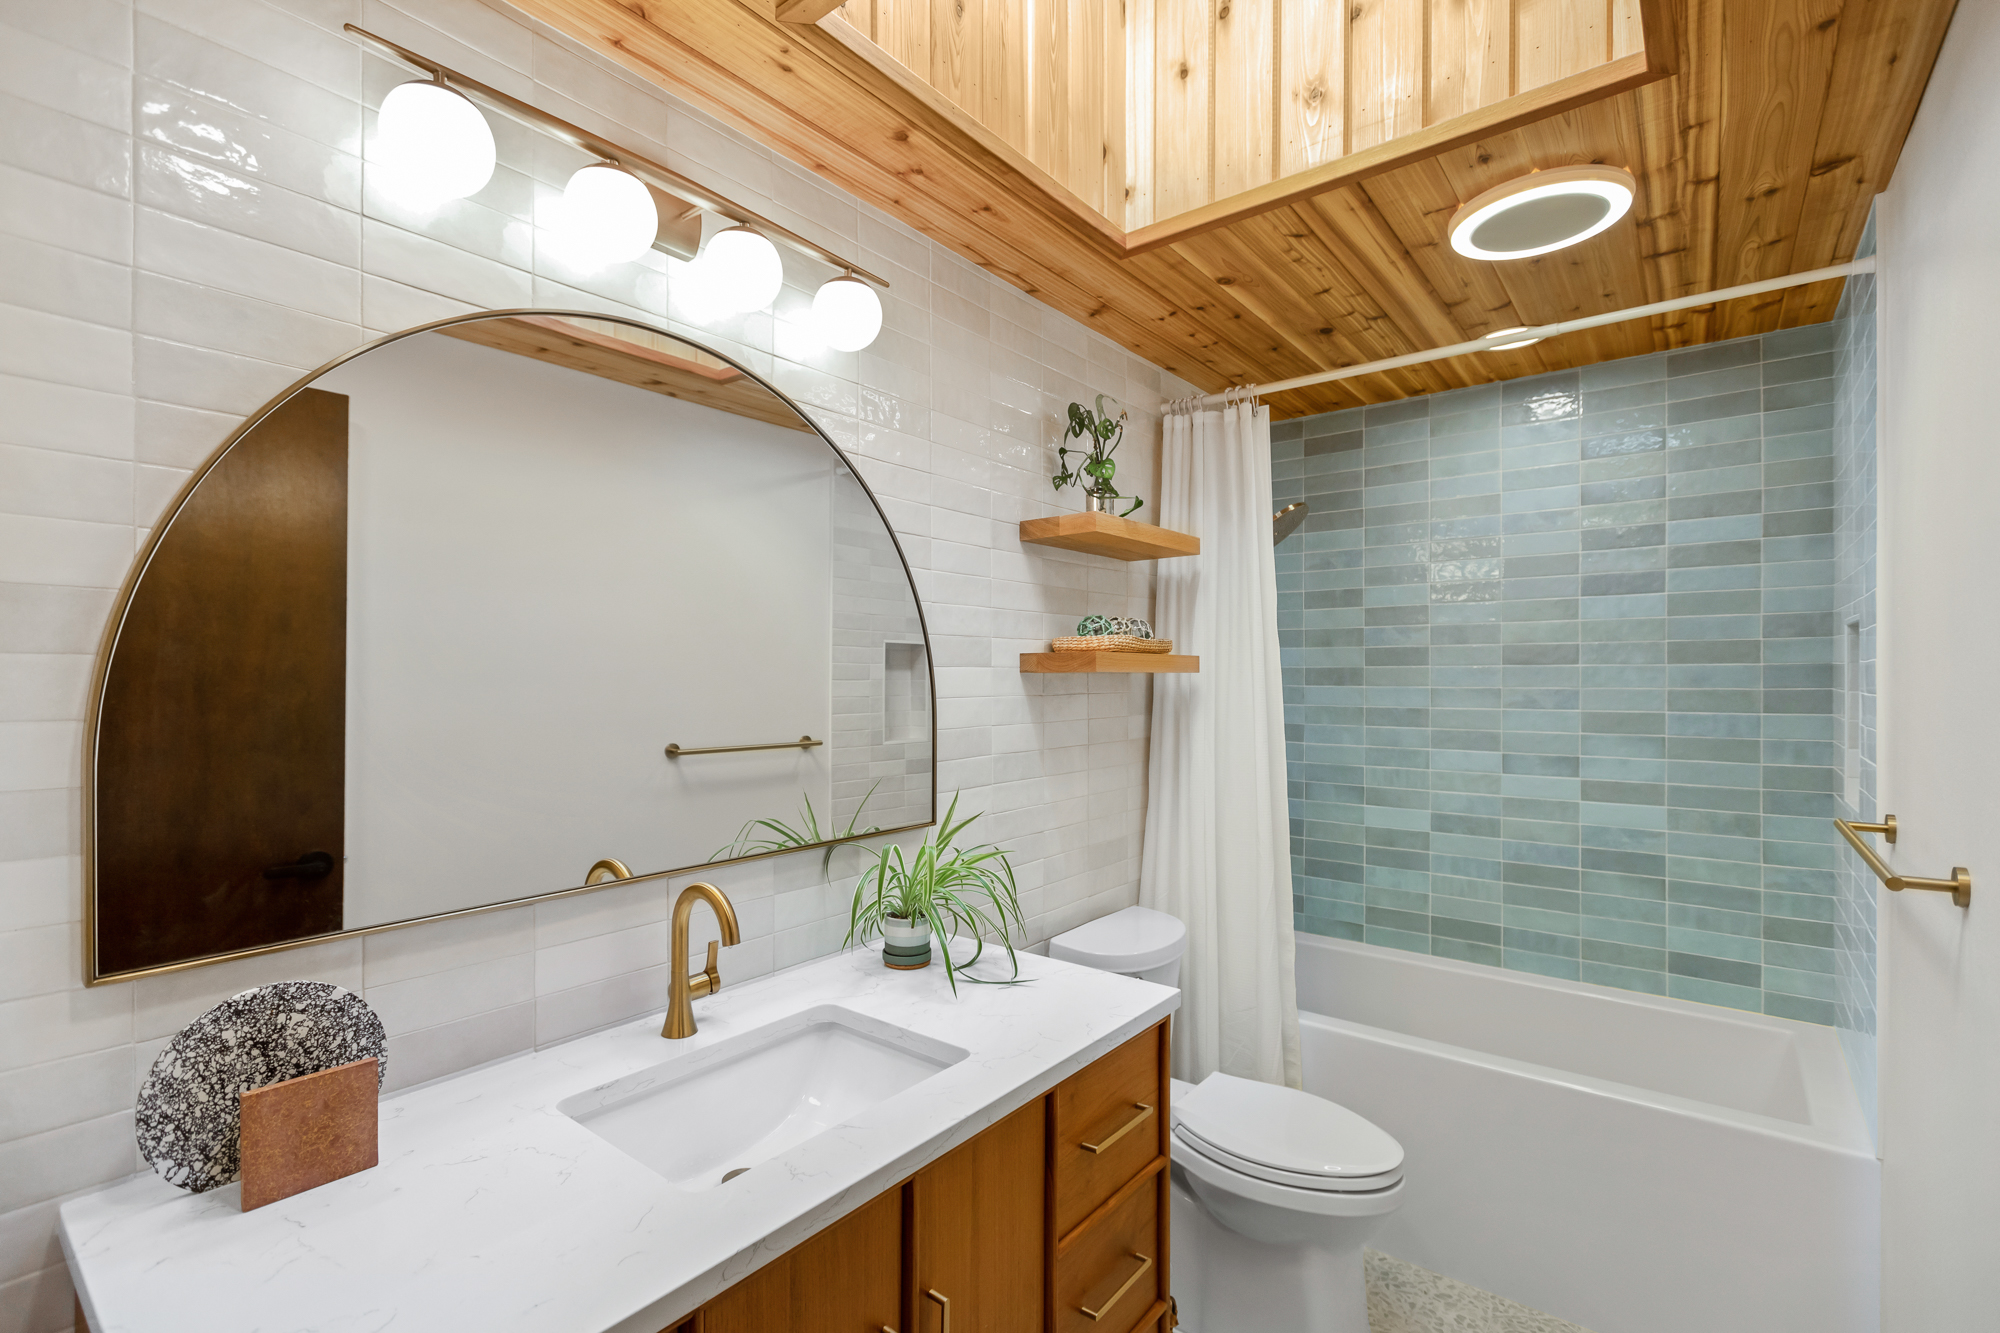
This bathroom is a masterclass in mixing materials to create a fresh, vibrant feel. The design succeeds by balancing three distinct textures: the glossy smoothness of the white and teal subway tiles, the organic warmth of the light wood ceiling planks, and the sleek metallic shine of the brass fixtures. The arched mirror softens the many straight lines of the tile and wood, while the wood on the ceiling draws the eye upward, making the room feel taller. It’s a playful yet sophisticated combination that feels custom and full of personality.
✅ Before You Start
A wood plank ceiling can completely change the character of a bathroom. Here’s how to approach it:
- Time: 1-2 weekends. Cost: $4-$10 per square foot.
- Choose the right material. Use tongue-and-groove boards rated for moisture, like cedar or specially treated pine. Alternatively, consider engineered wood or even luxury vinyl planks for a waterproof option.
- Acclimate the wood in the bathroom for at least 72 hours to prevent warping.
- Ensure your bathroom is well-ventilated with a powerful exhaust fan to manage humidity.
- Stain and seal all sides of the boards *before* installation to protect against moisture.
- Install the planks perpendicular to the ceiling joists for secure nailing.
14. Add Subtle Texture with a Wavy White Tiled Shower
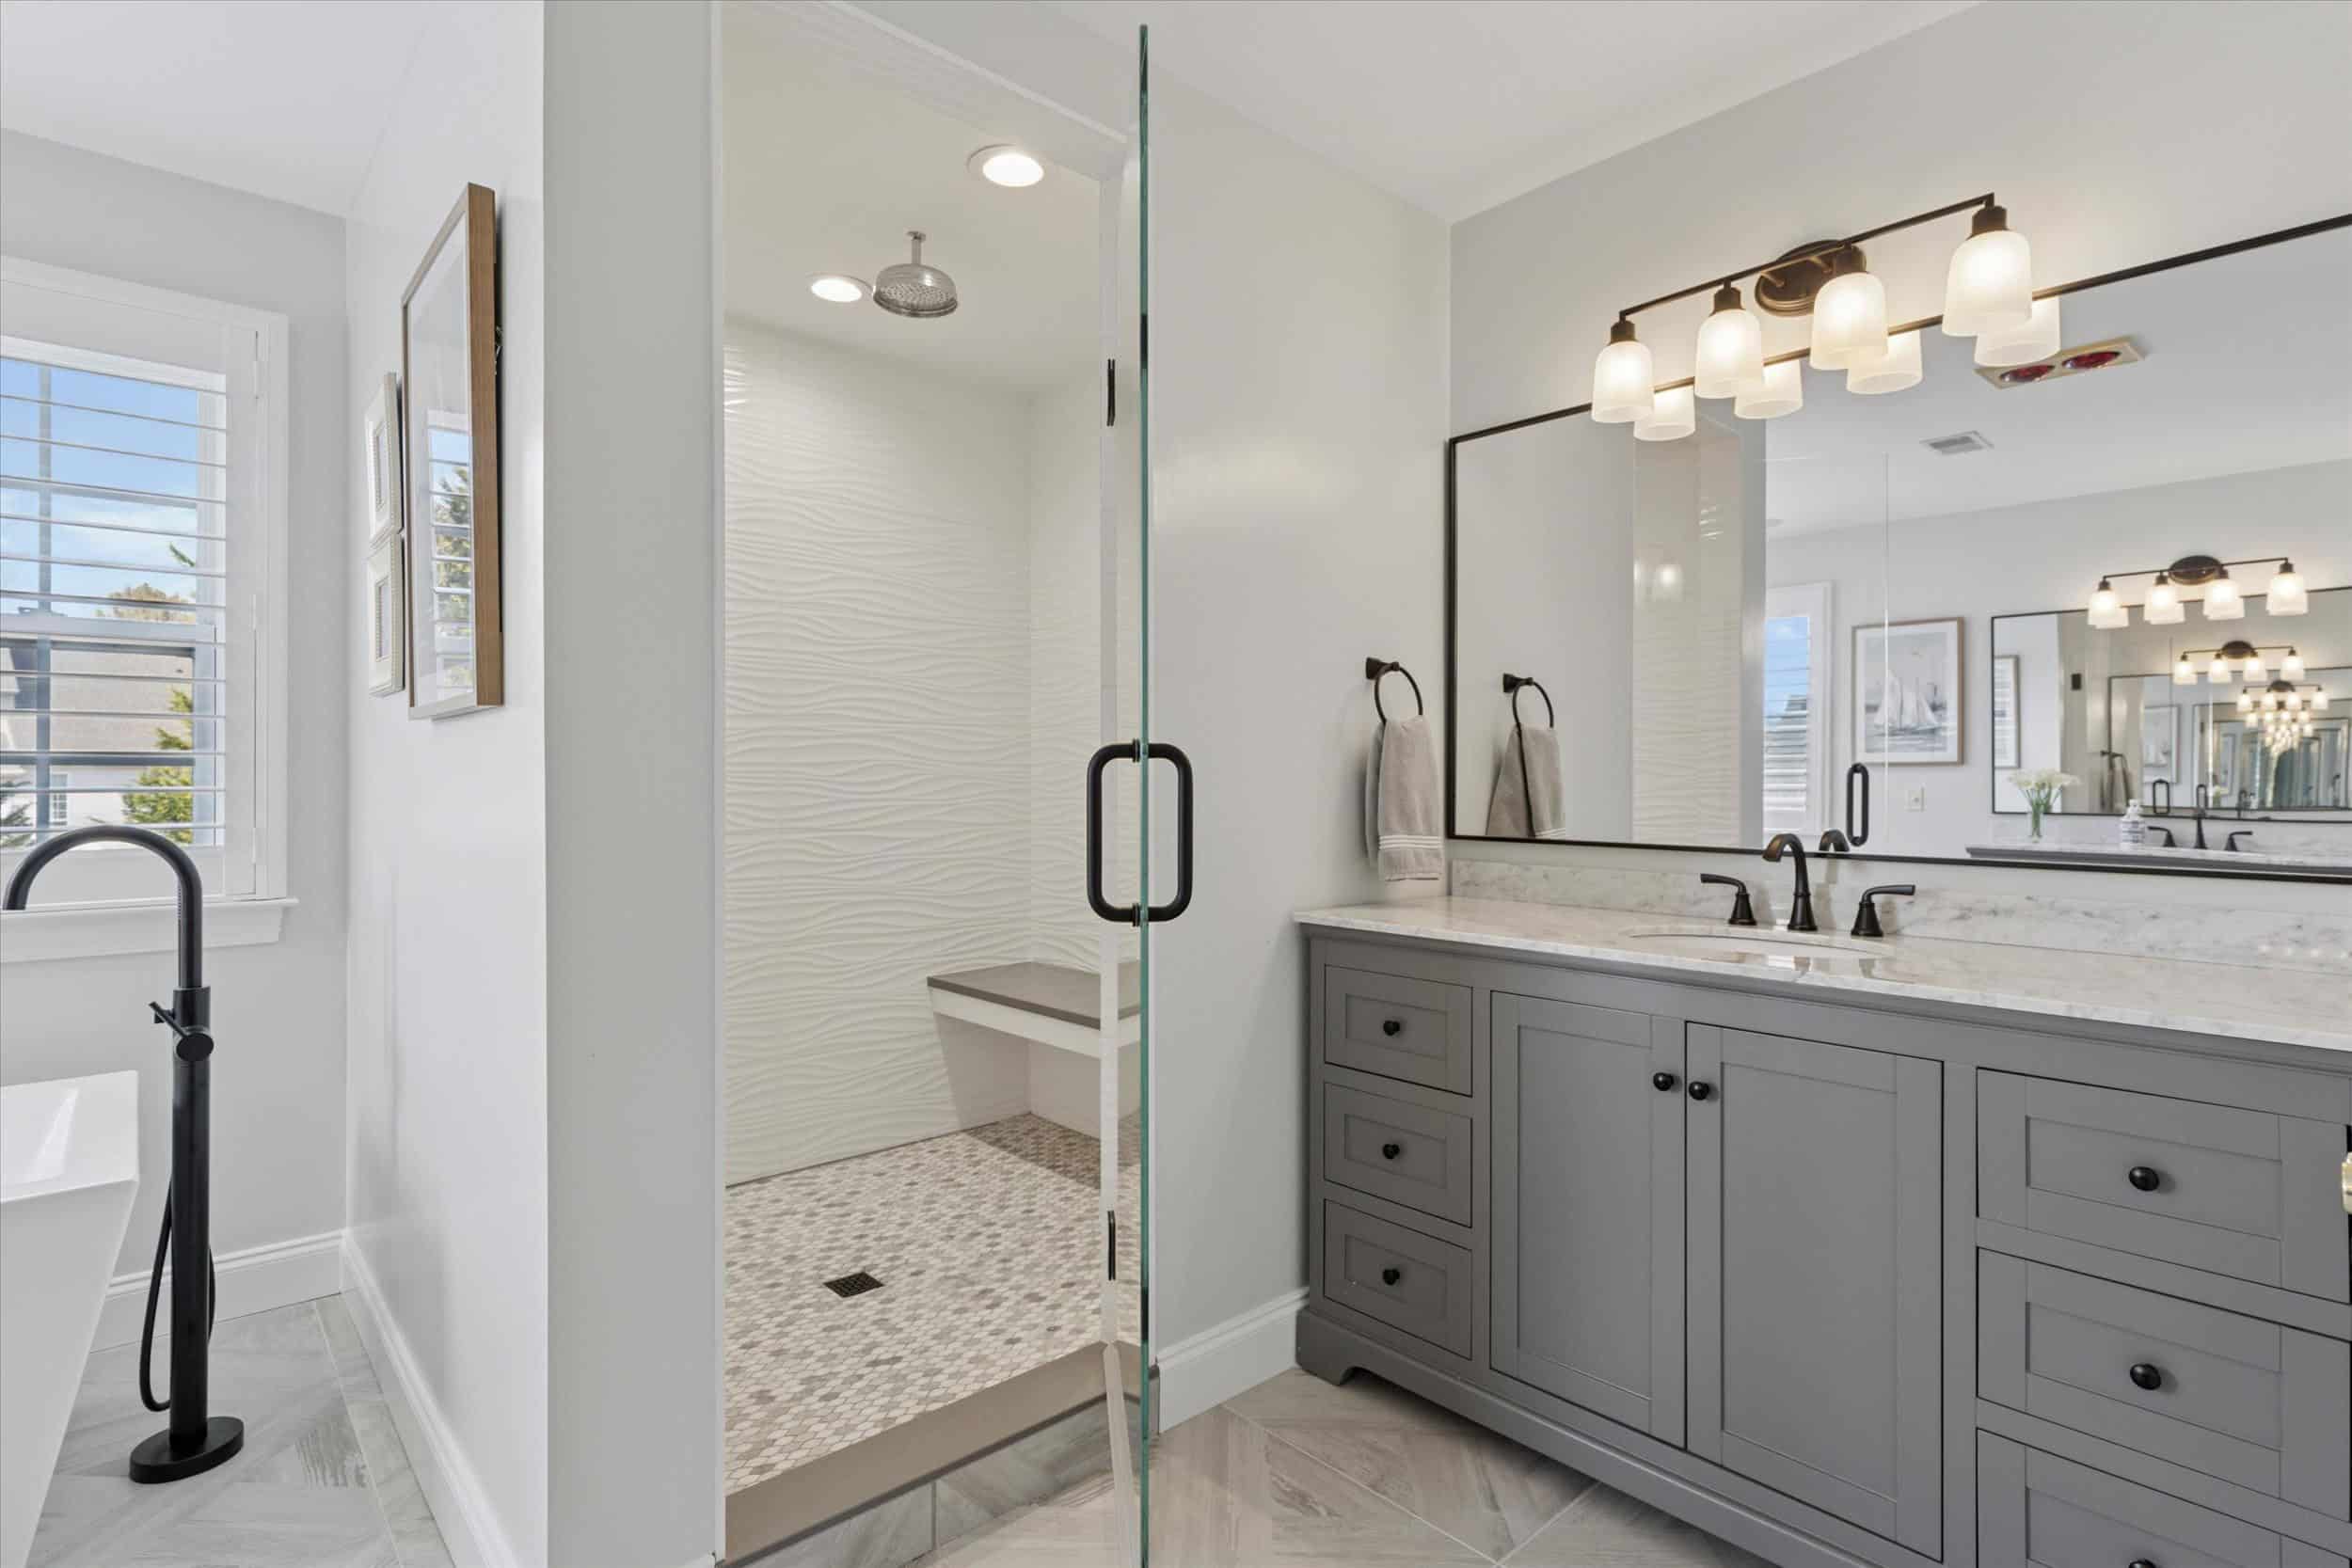
The single most important element in this bathroom is the textured, wavy white wall tile in the shower. In a space dominated by smooth, flat surfaces—the grey vanity, the sleek tub, the marble countertop—this tile introduces a layer of subtle, organic movement. It catches the light in a dynamic way, creating soft shadows and highlights that prevent the room from feeling flat. It’s a tactile detail that elevates the entire design from standard modern to something far more interesting and sensory.
⭐ The One Thing
That beautiful wavy tile does have a cleaning consideration. The undulating surface, while stunning, can be a place for soap scum and water deposits to collect more easily than on flat tile. You’ll want to use a squeegee on the walls after every shower to prevent buildup. For regular cleaning, a soft brush and a non-abrasive cleaner are your best friends. It’s not a high-maintenance choice, but it requires a bit more diligence than a completely smooth surface to keep it looking pristine.
15. Mix Metals: A Warm Wood Vanity with Gold and Chrome
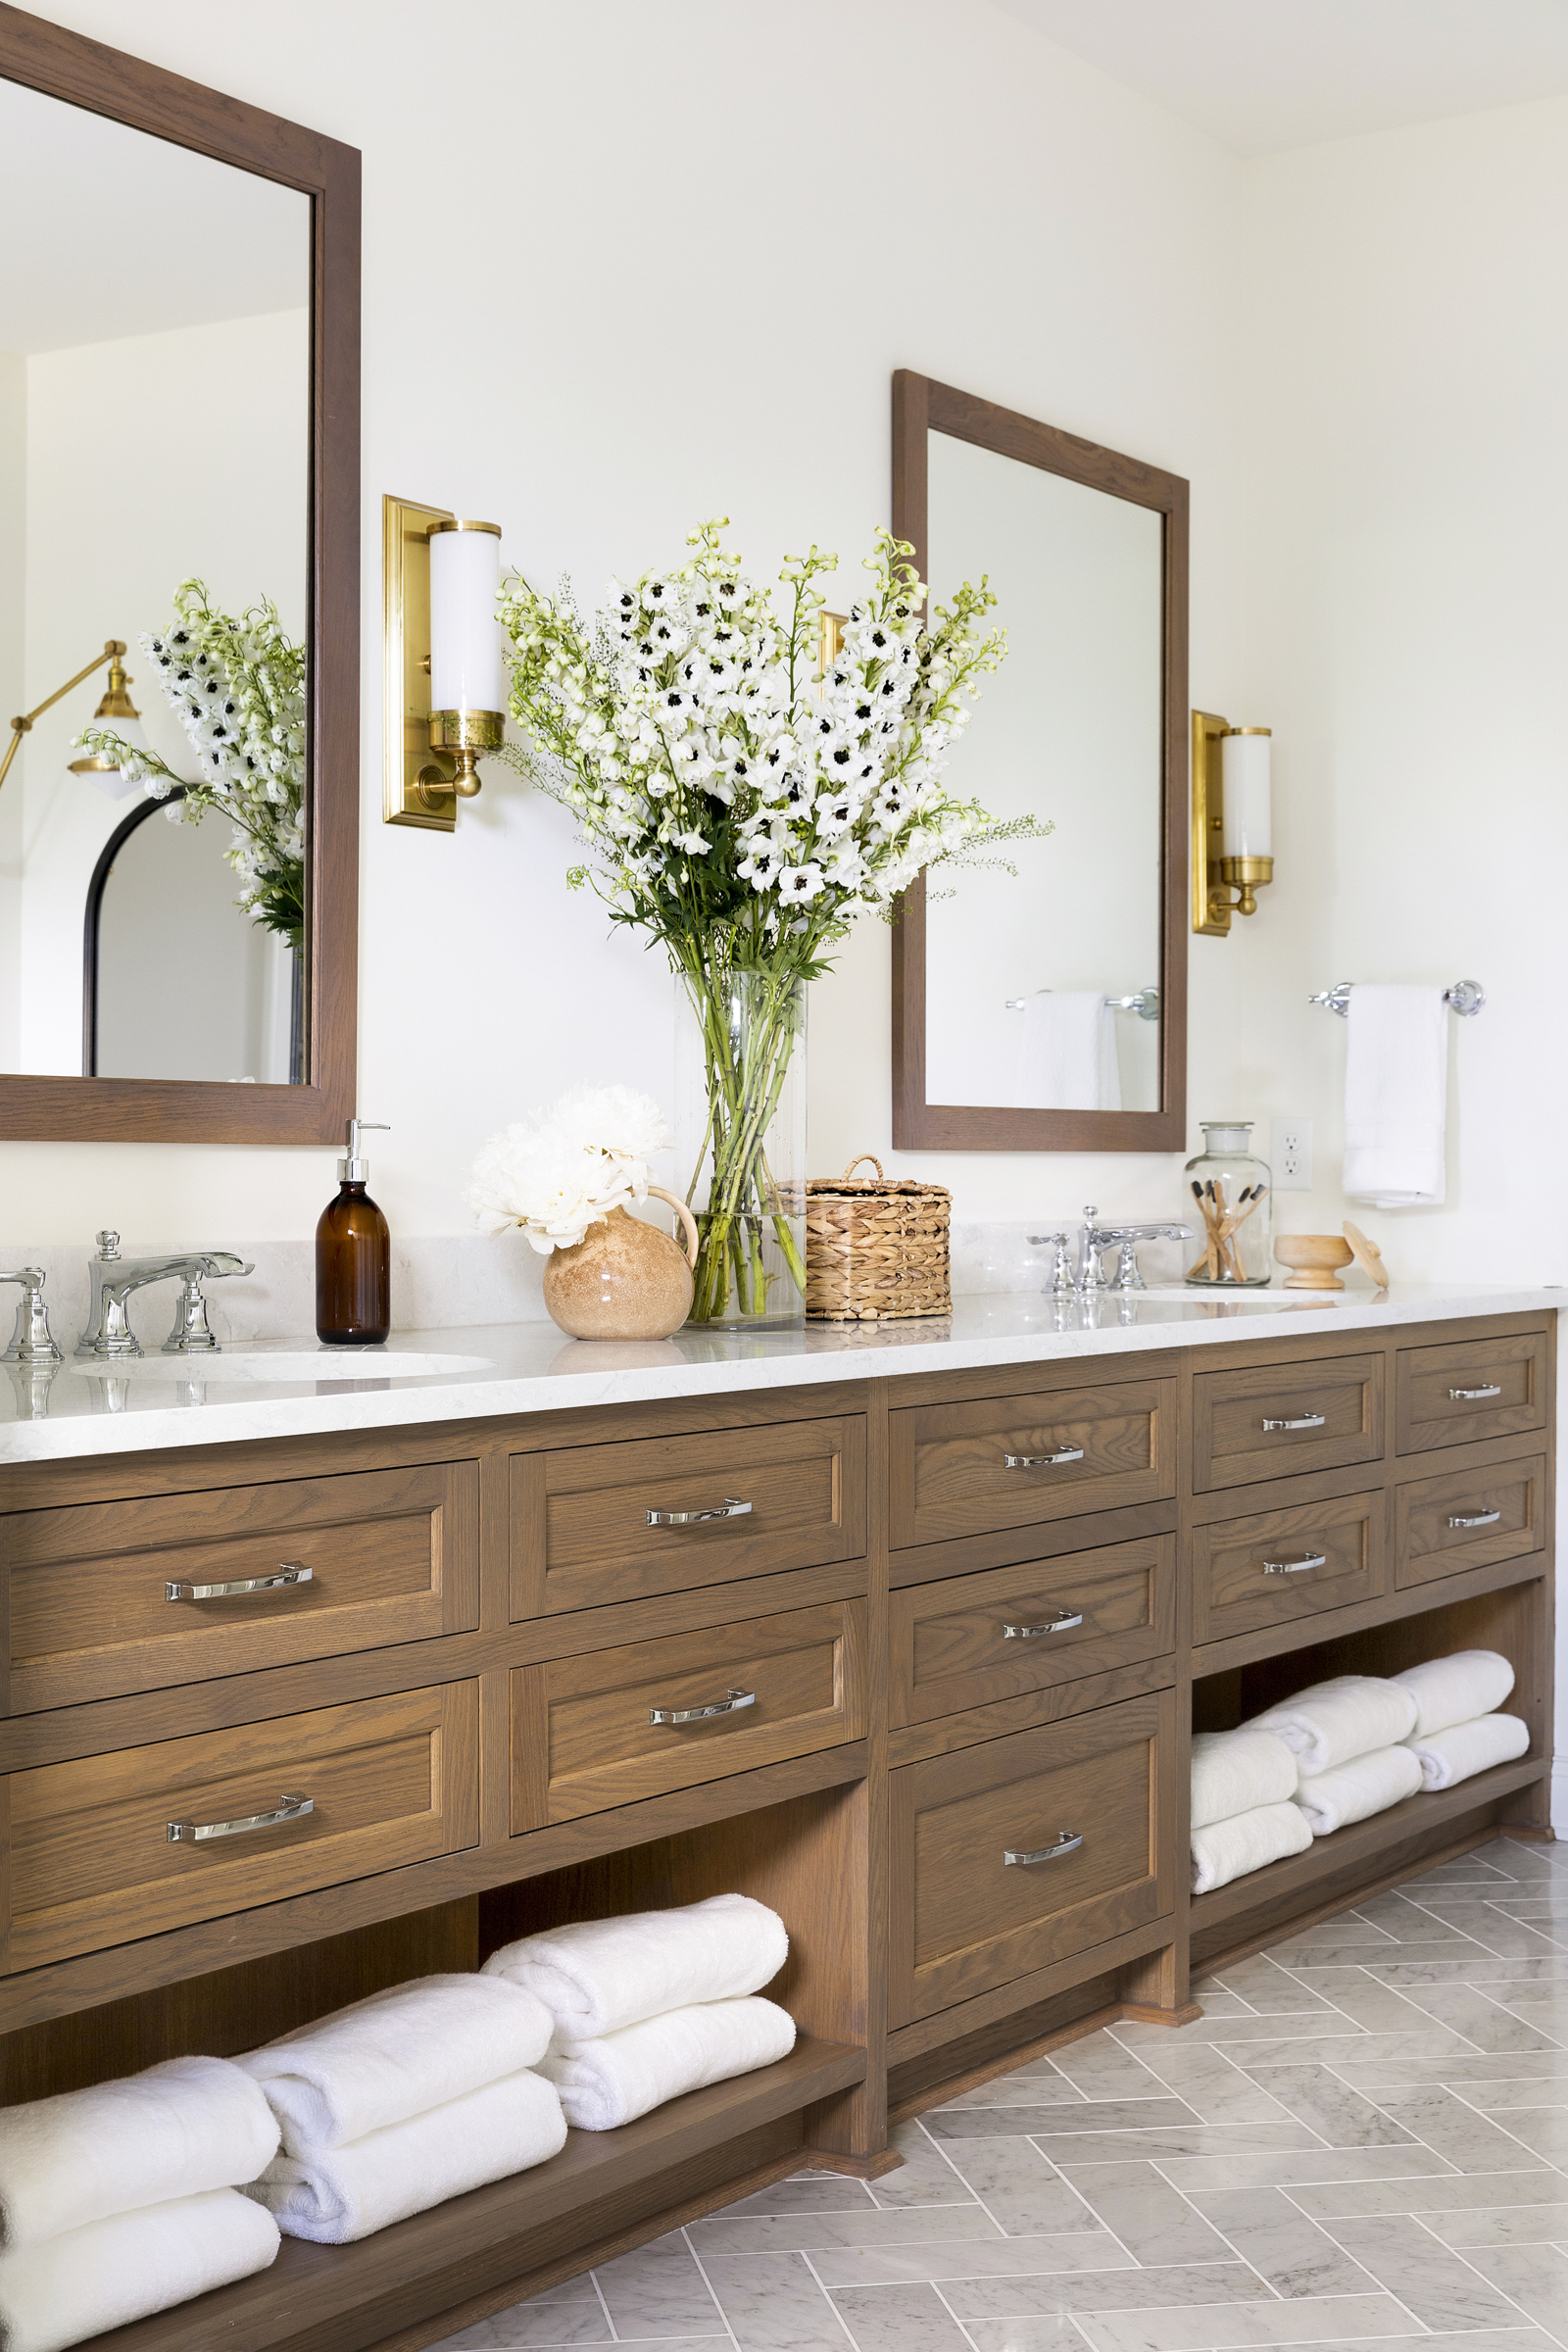
Successfully mixing metals is an art, and this vanity area shows how to do it right. The rule of thumb is to choose one dominant metal and add one or two as accents. Here, chrome is the functional, dominant metal used for the faucets and pulls—the pieces you touch and use. Gold is the decorative accent, used in the sconces to add warmth and a touch of glamour at eye level. This intentional separation of duties (functional vs. decorative) makes the mix look deliberate and sophisticated, not accidental.
📐 Style Math
A double vanity is a dream for busy couples, but be honest about your storage needs. While this vanity offers a good number of drawers, the open shelving at the bottom looks beautiful when perfectly styled with fluffy, neatly folded white towels. In reality, this space can quickly become a cluttered catch-all for extra toilet paper, cleaning supplies, and kids’ bath toys. If you’re not committed to maintaining that perfectly styled look, opt for a vanity with closed cabinets at the bottom for more practical, hidden storage.
16. Pair a Freestanding Tub with a Rich Wood Vanity
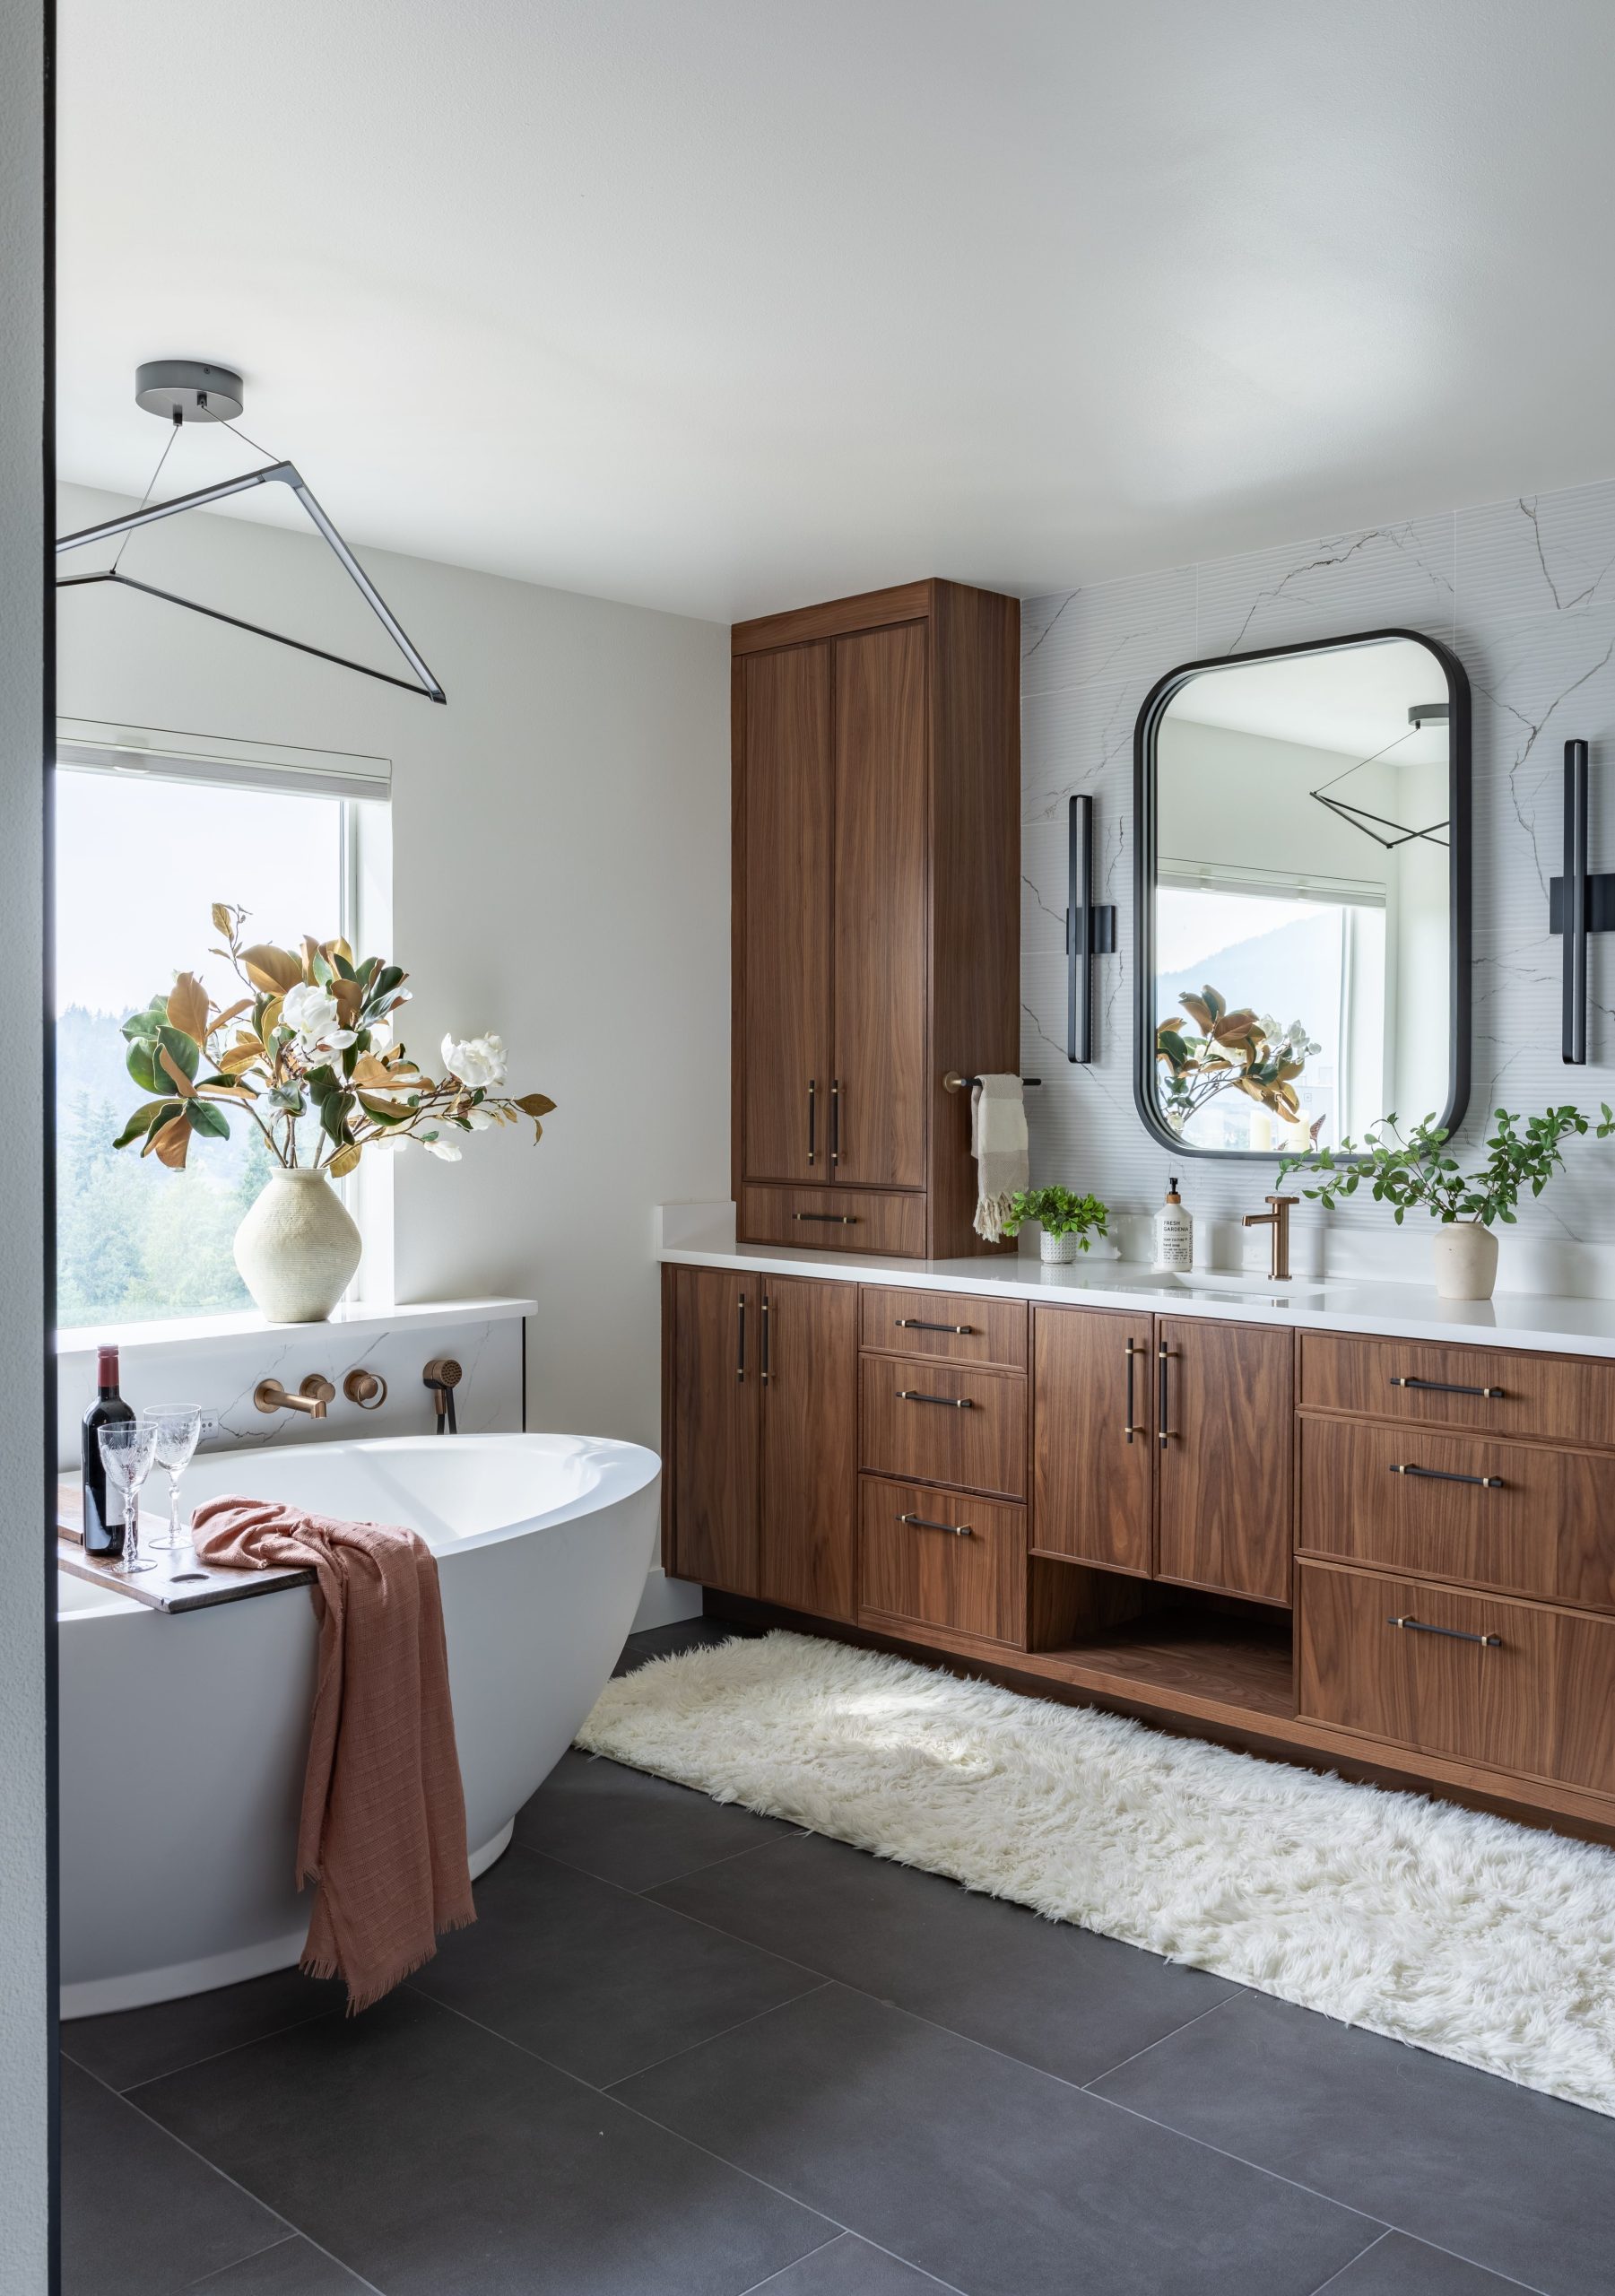
The success of this design lies in its bold juxtaposition of texture and form. The long, linear, and richly-grained wood vanity provides a strong, warm anchor to the room. This is contrasted with the smooth, sculptural curves of the white freestanding bathtub. The opposition between the sharp, horizontal lines of the cabinetry and the soft, organic shape of the tub creates a dynamic visual tension. The textured white wall tile adds another layer of complexity, while the charcoal floor grounds the entire composition, allowing the tub and vanity to be the heroes.
🎯 What Makes It Work
A long vanity paired with a freestanding tub requires a generous footprint. This layout works best in a master bathroom that is at least 100-150 square feet, and ideally has a width of 10 feet or more. You need at least 30-36 inches of clear walkway space between the vanity and the tub for comfortable movement. Anything less will make the room feel crowded and ruin the luxurious, spacious effect. For smaller rooms, consider a shorter vanity or a built-in tub as seen in Idea #6.
17. Try a Modern Farmhouse Look with a Fluted Wood Vanity
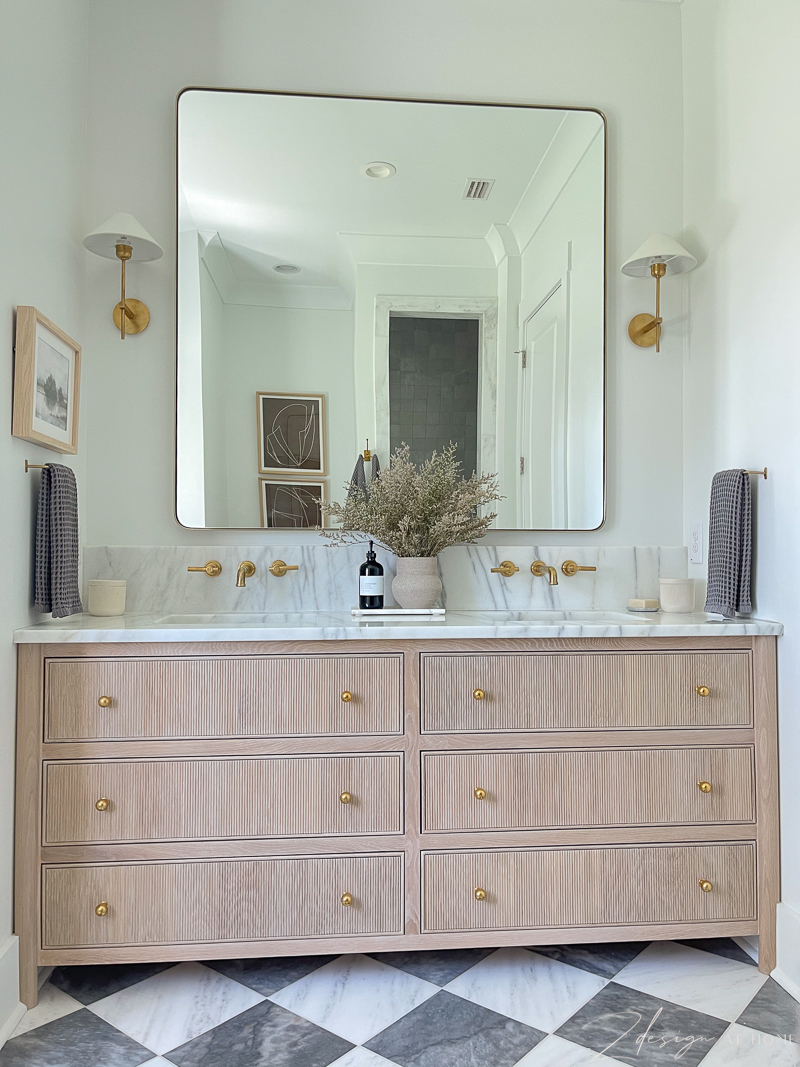
Fluted wood vanities are having a major moment, and it’s easy to see why. This trend represents an evolution of the modern farmhouse style into something more refined and sophisticated. The fluting adds a layer of textural detail and rhythm that feels both contemporary and classic, referencing Art Deco and mid-century design. It’s a way to add character and craftsmanship to the bathroom without resorting to rustic clichés. Paired with the clean lines of the marble and the warmth of the gold fixtures, it feels fresh, current, and built to last.
🧹 Maintenance Reality
Ready to embrace the fluted vanity look? Check these items first:
- Confirm your plumbing: This design uses wall-mounted faucets, which require plumbing lines to be run inside the wall behind the sink. This is a significant plumbing job that must be planned before drywall goes up. If you have standard plumbing coming from the floor or wall base, you’ll need a vanity that supports deck-mounted faucets.
- Check floor levelness: The bold checkered pattern will make any unevenness in your floor glaringly obvious. Ensure your subfloor is perfectly level before laying tile.
- Sample your whites: The soft off-white on the walls is key to making the white marble and gold fixtures pop without feeling stark. Test paint samples next to your tile and vanity to find the perfect shade.
18. Go Bold with a Green Double Vanity and Ornate Gold Mirrors
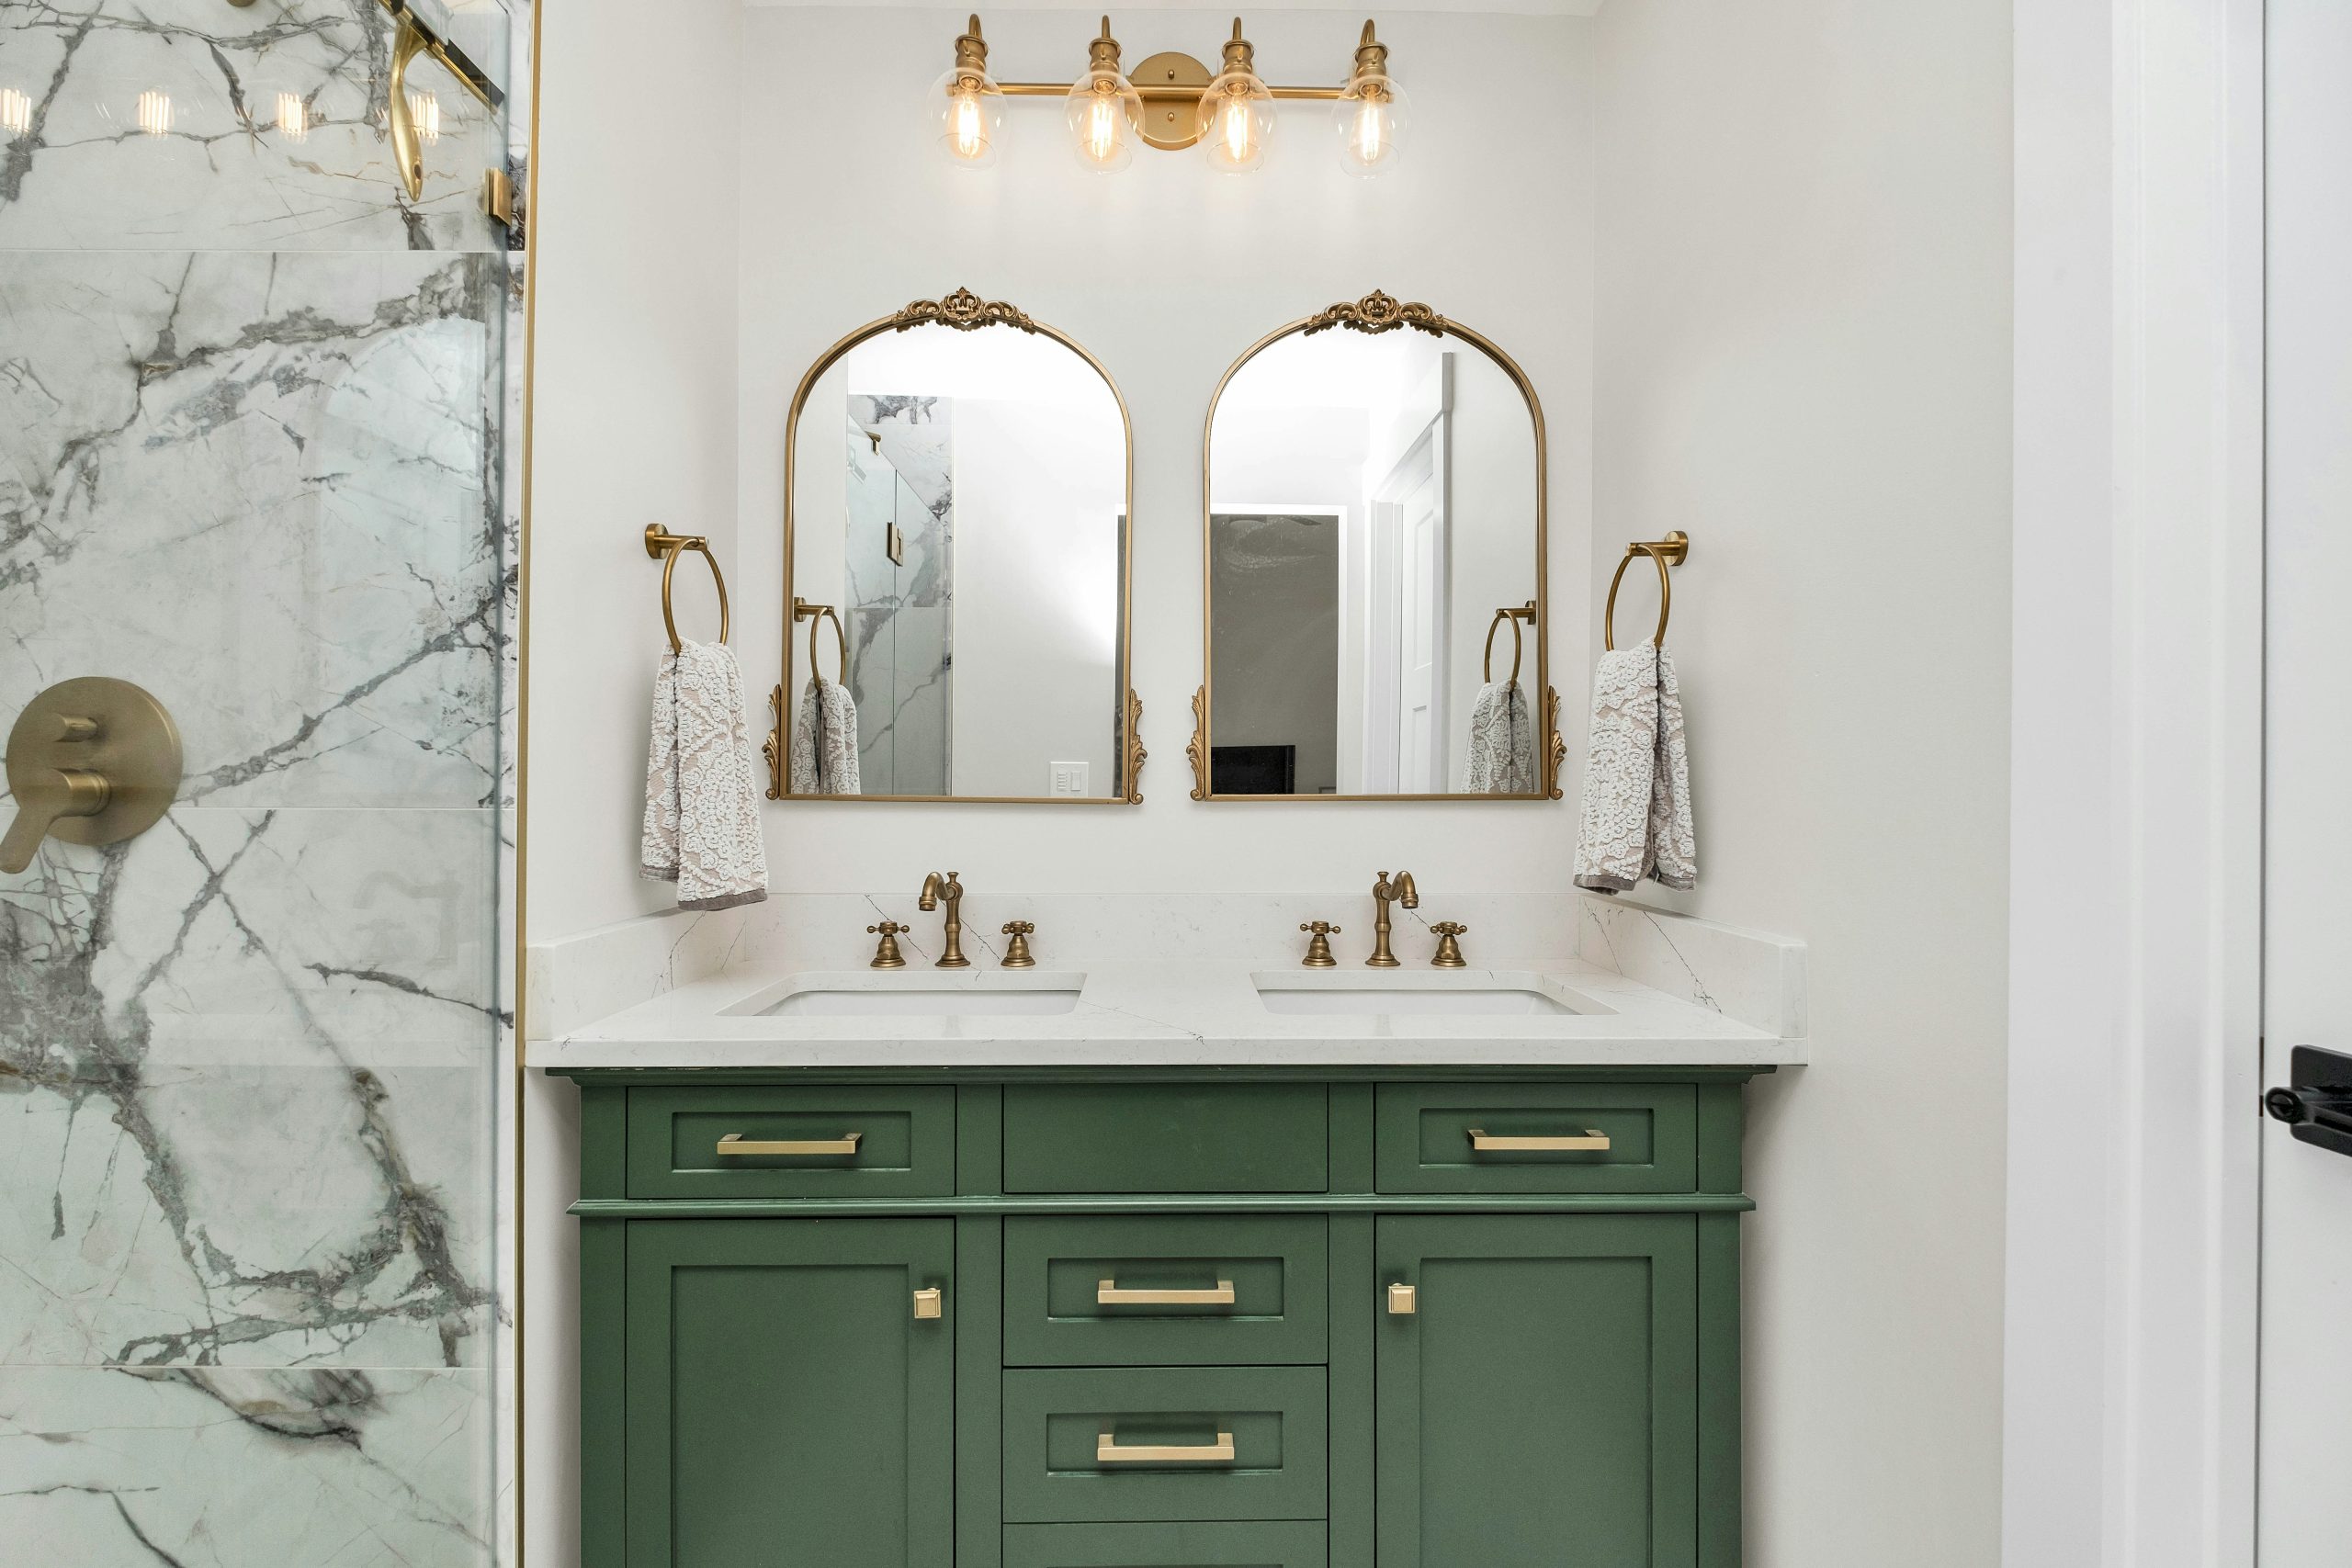
A bold, painted vanity is a fantastic way to inject personality, but it requires commitment. Fashions change, and that vibrant green you love today might feel dated in five years. Repainting cabinetry is a labor-intensive job. Furthermore, the ornate gold mirrors are a very specific style choice. If you ever decide to change the green vanity, you might find the mirrors no longer work. This look is stunningly cohesive now, but its specific nature makes it less flexible for future updates compared to the more neutral wood vanity in Idea #15.
🔧 How-To Brief
This bathroom achieves its classic-with-a-twist vibe with a clear formula: 50% timeless luxury (the white marble on the countertop and in the shower), 40% bold personality (the deep green vanity), and 10% glamorous detail (the ornate gold mirrors and brass fixtures). The marble acts as a calming, high-end base that can handle the strong color and intricate details. Without the marble, the green and gold could feel overwhelming. It’s the balance that makes it feel elegant rather than gaudy.
19. Create a Polished Look with Mirrored and Marbled Surfaces
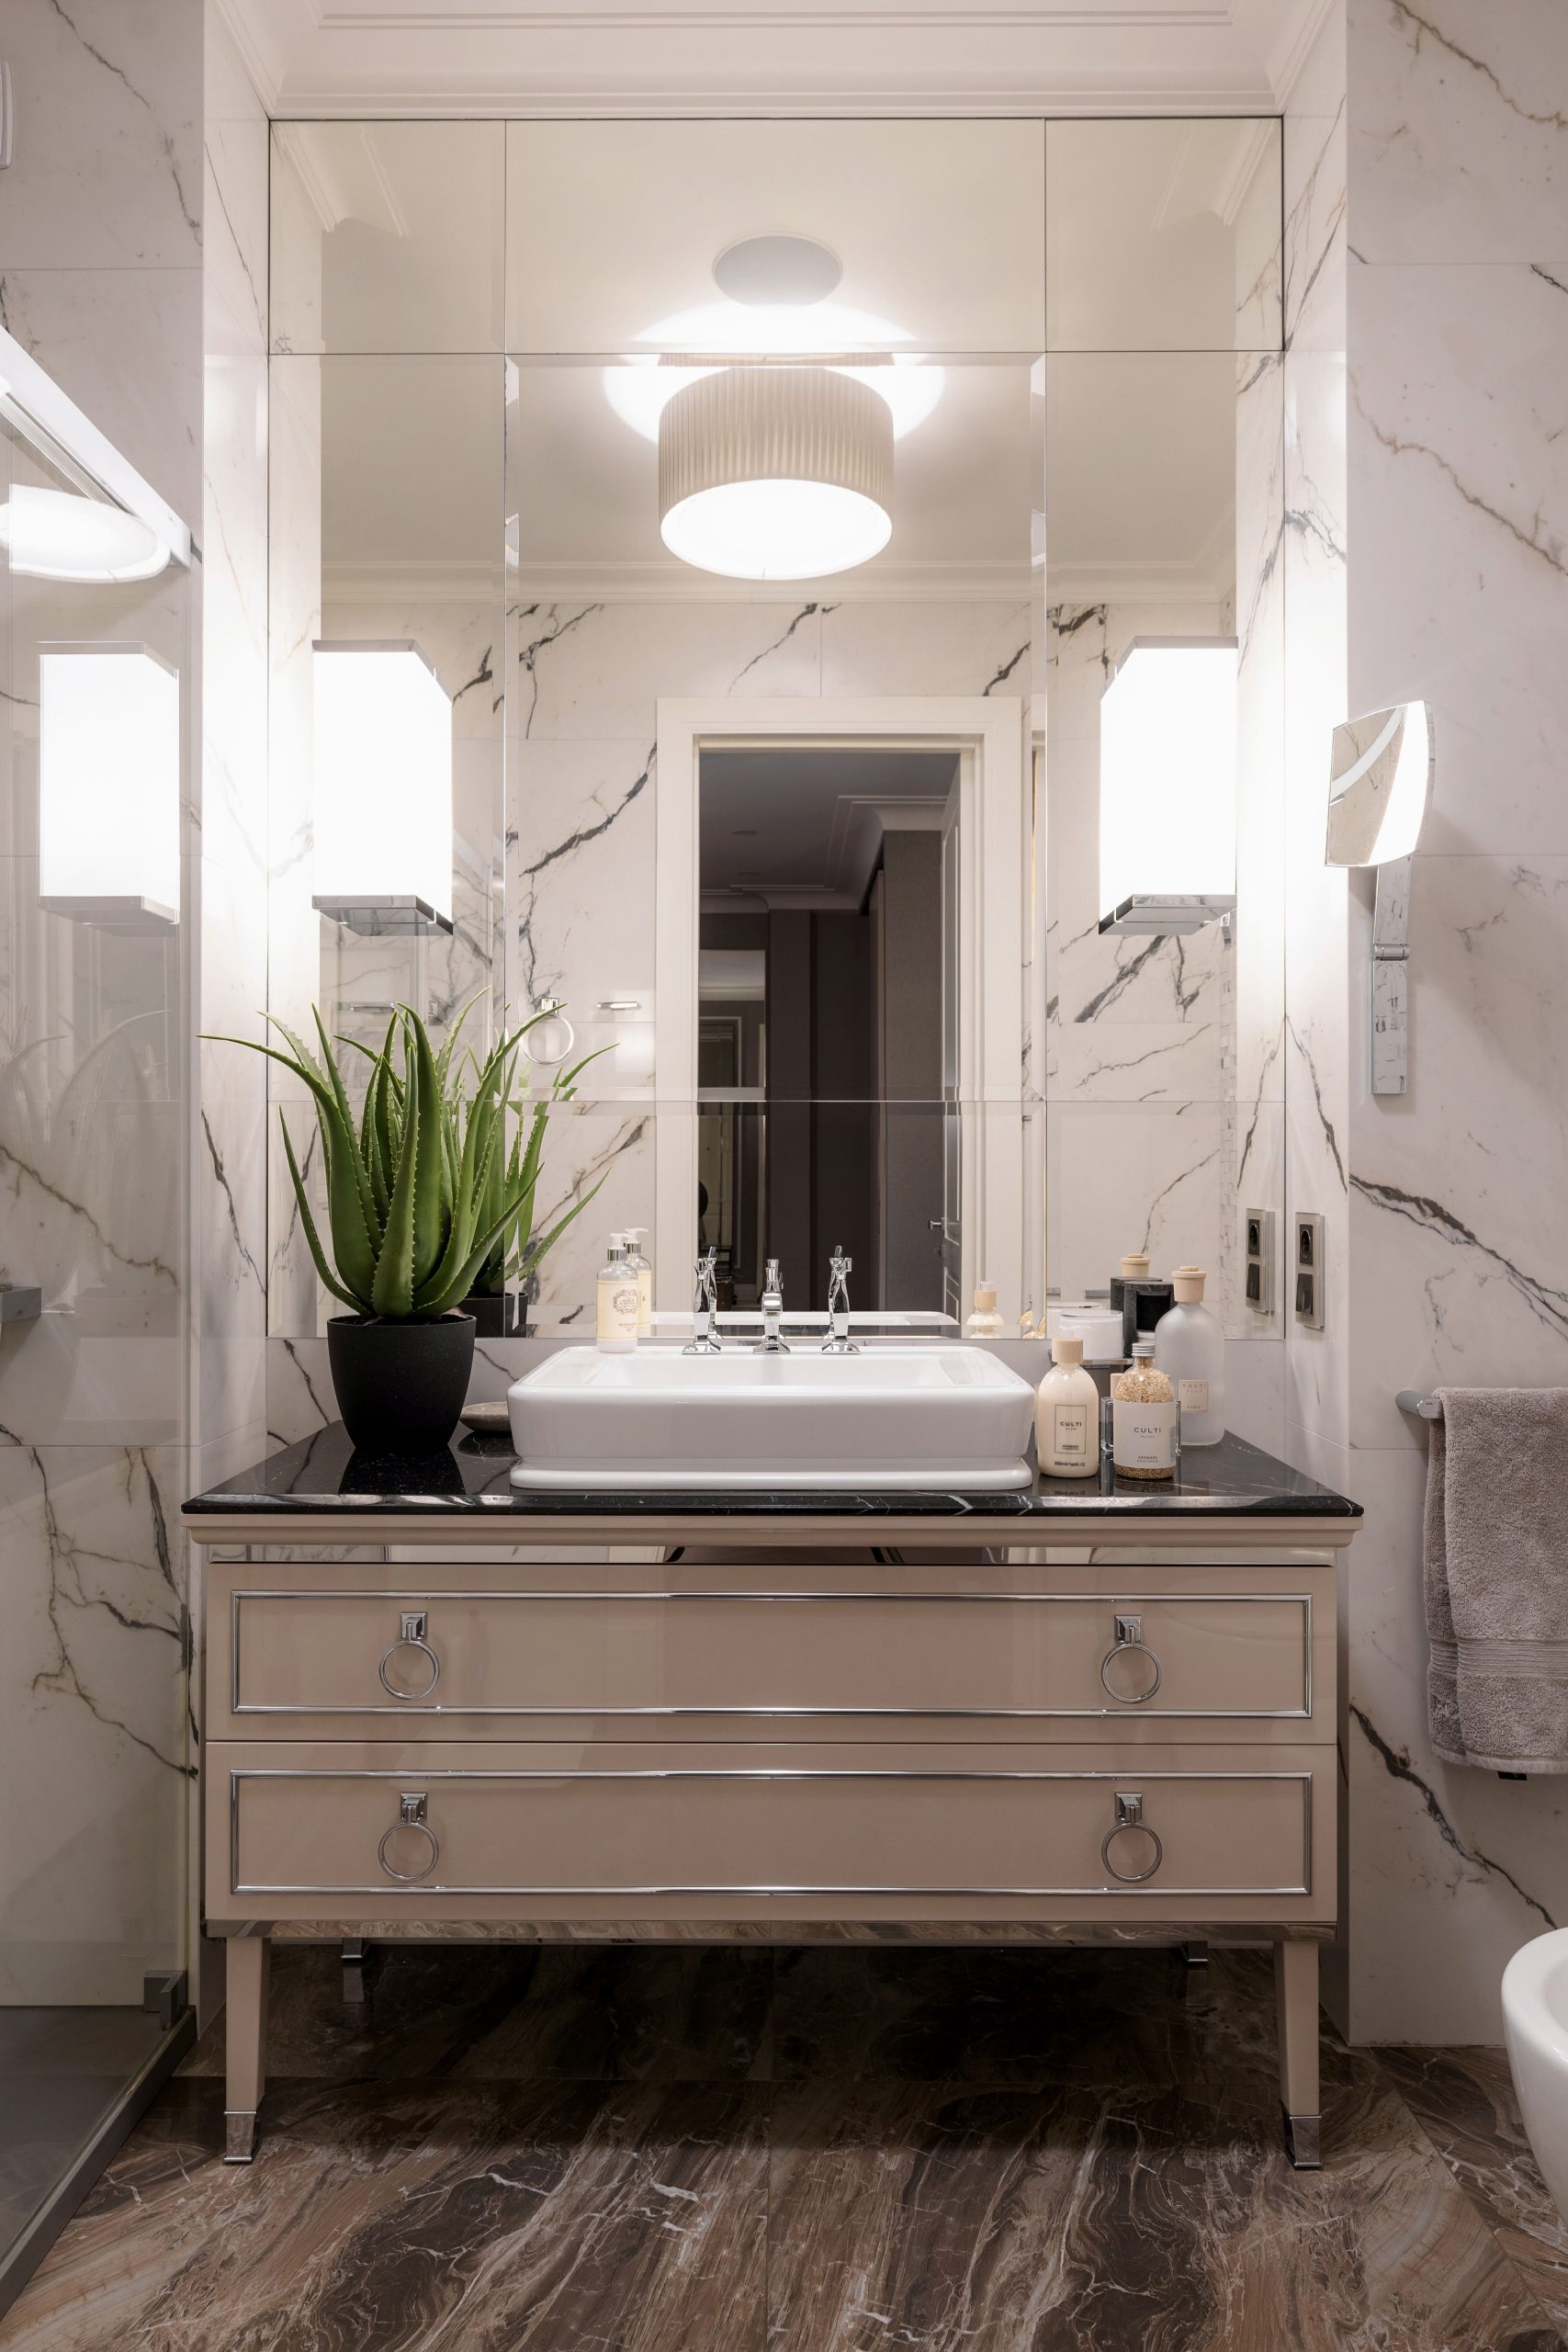
This bathroom screams luxury, but all those reflective surfaces come with a maintenance commitment. The large mirrored backsplash, chrome accents, and polished marble walls will show every single fingerprint, water spot, and streak of dust. To keep this space looking pristine, you’ll need to squeegee the marble walls after showering and wipe down the mirror and chrome fixtures daily with a microfiber cloth. The dark, glossy floor tiles can also be unforgiving, highlighting dust and footprints. This is a high-style look that demands a meticulous cleaning routine.
🔥 Trending Context
The sense of drama in this bathroom comes from the powerful use of reflection and high-contrast materials. The huge mirror above the vanity doesn’t just show your reflection; it doubles the visual space of the room and bounces light everywhere. This is set against the dramatic, dark-veined white marble walls and the deeply colored, swirling pattern of the floor tiles. The contrast between the light walls and dark floor creates a strong graphic foundation, while the mirrored surfaces add a layer of dazzling, light-filled energy. It’s a bold combination designed for maximum impact.
20. Pair a Dark Wood Vanity with Light Grey Tile and Brass
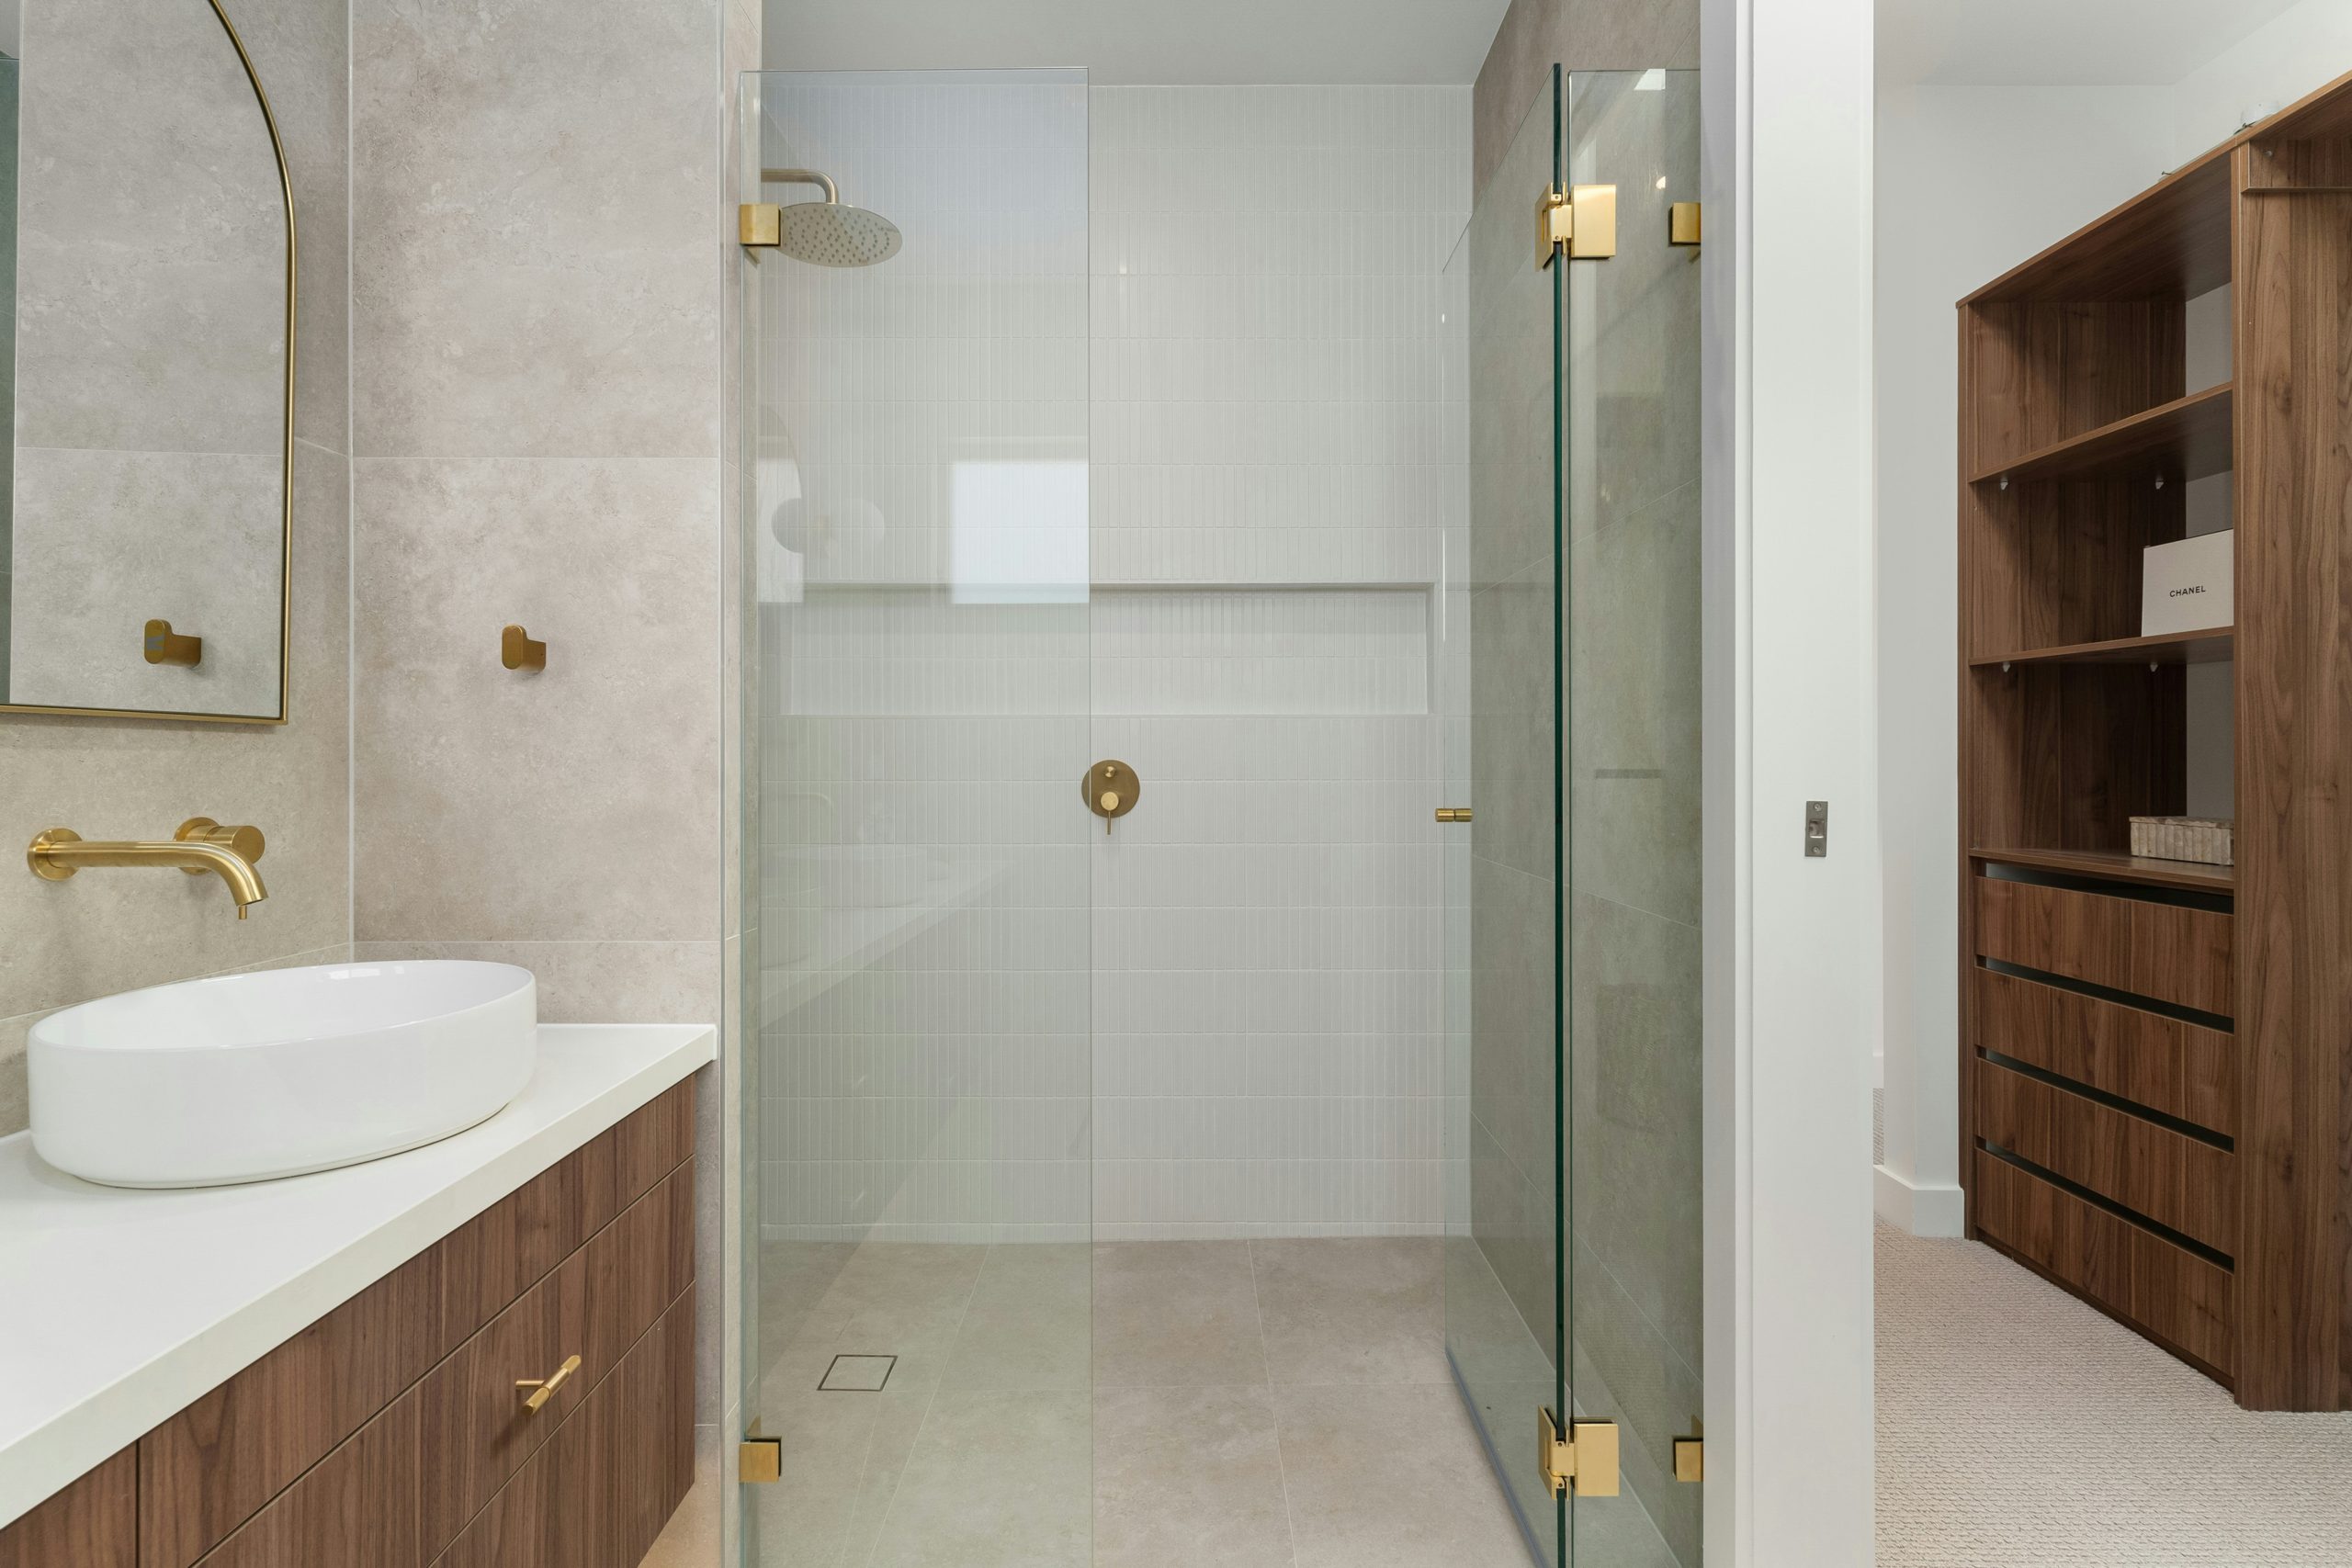
When creating a cohesive look like this, the height of your fixtures is critical. A great rule of thumb for a wall-mounted faucet above a vessel sink is to place the faucet spout about 1 inch above the rim of the sink. The center of the mirror should be at eye level for the average user, which is typically 60-65 inches from the floor. Planning these placements in advance ensures the final composition feels balanced and is comfortable to use, avoiding awkward leaning or splashing.
💸 Get This Look For Less
This design, which cleverly integrates open closet shelving next to the main bathroom area, is perfect for a master suite layout where space is a bit more generous, ideally 120 square feet or more. The glass shower enclosure maintains an open sightline, making the two zones feel connected. This layout would be challenging in a smaller, more compartmentalized bathroom, as it relies on that visual flow to feel intentional and not just like a closet was tacked on. Think about the path from the shower to the closet—you want it to be direct and feel natural.
21. Choose One Standout Fixture as a Focal Point
Sometimes, the entire design of a luxury bathroom hinges on a single, exceptional piece. In a high-end remodel, this is often an elegant master bathroom fixture—perhaps a sculptural freestanding tub filler, a dramatic chandelier over the bath, or a set of artisan-crafted sconces. This one element serves as the jewelry for the room, the piece that all other design choices support. It sets the tone and acts as the undeniable focal point, elevating the entire space from merely functional to truly unforgettable. Choosing this piece first can help guide all subsequent decisions.
📏 Scale Guide
Investing in a high-end, statement fixture from a luxury brand or custom fabricator often means dealing with longer lead times and more complex installation requirements. These aren’t off-the-shelf items. You may need to wait several weeks or even months for it to be fabricated and delivered. Furthermore, the installation might require a specialist. For example, a heavy chandelier may need extra blocking in the ceiling for support. It’s a worthy investment for a one-of-a-kind look, but it requires patience and professional planning.
22. Make a Statement with a Dramatic Brown and Gold Marble Wall
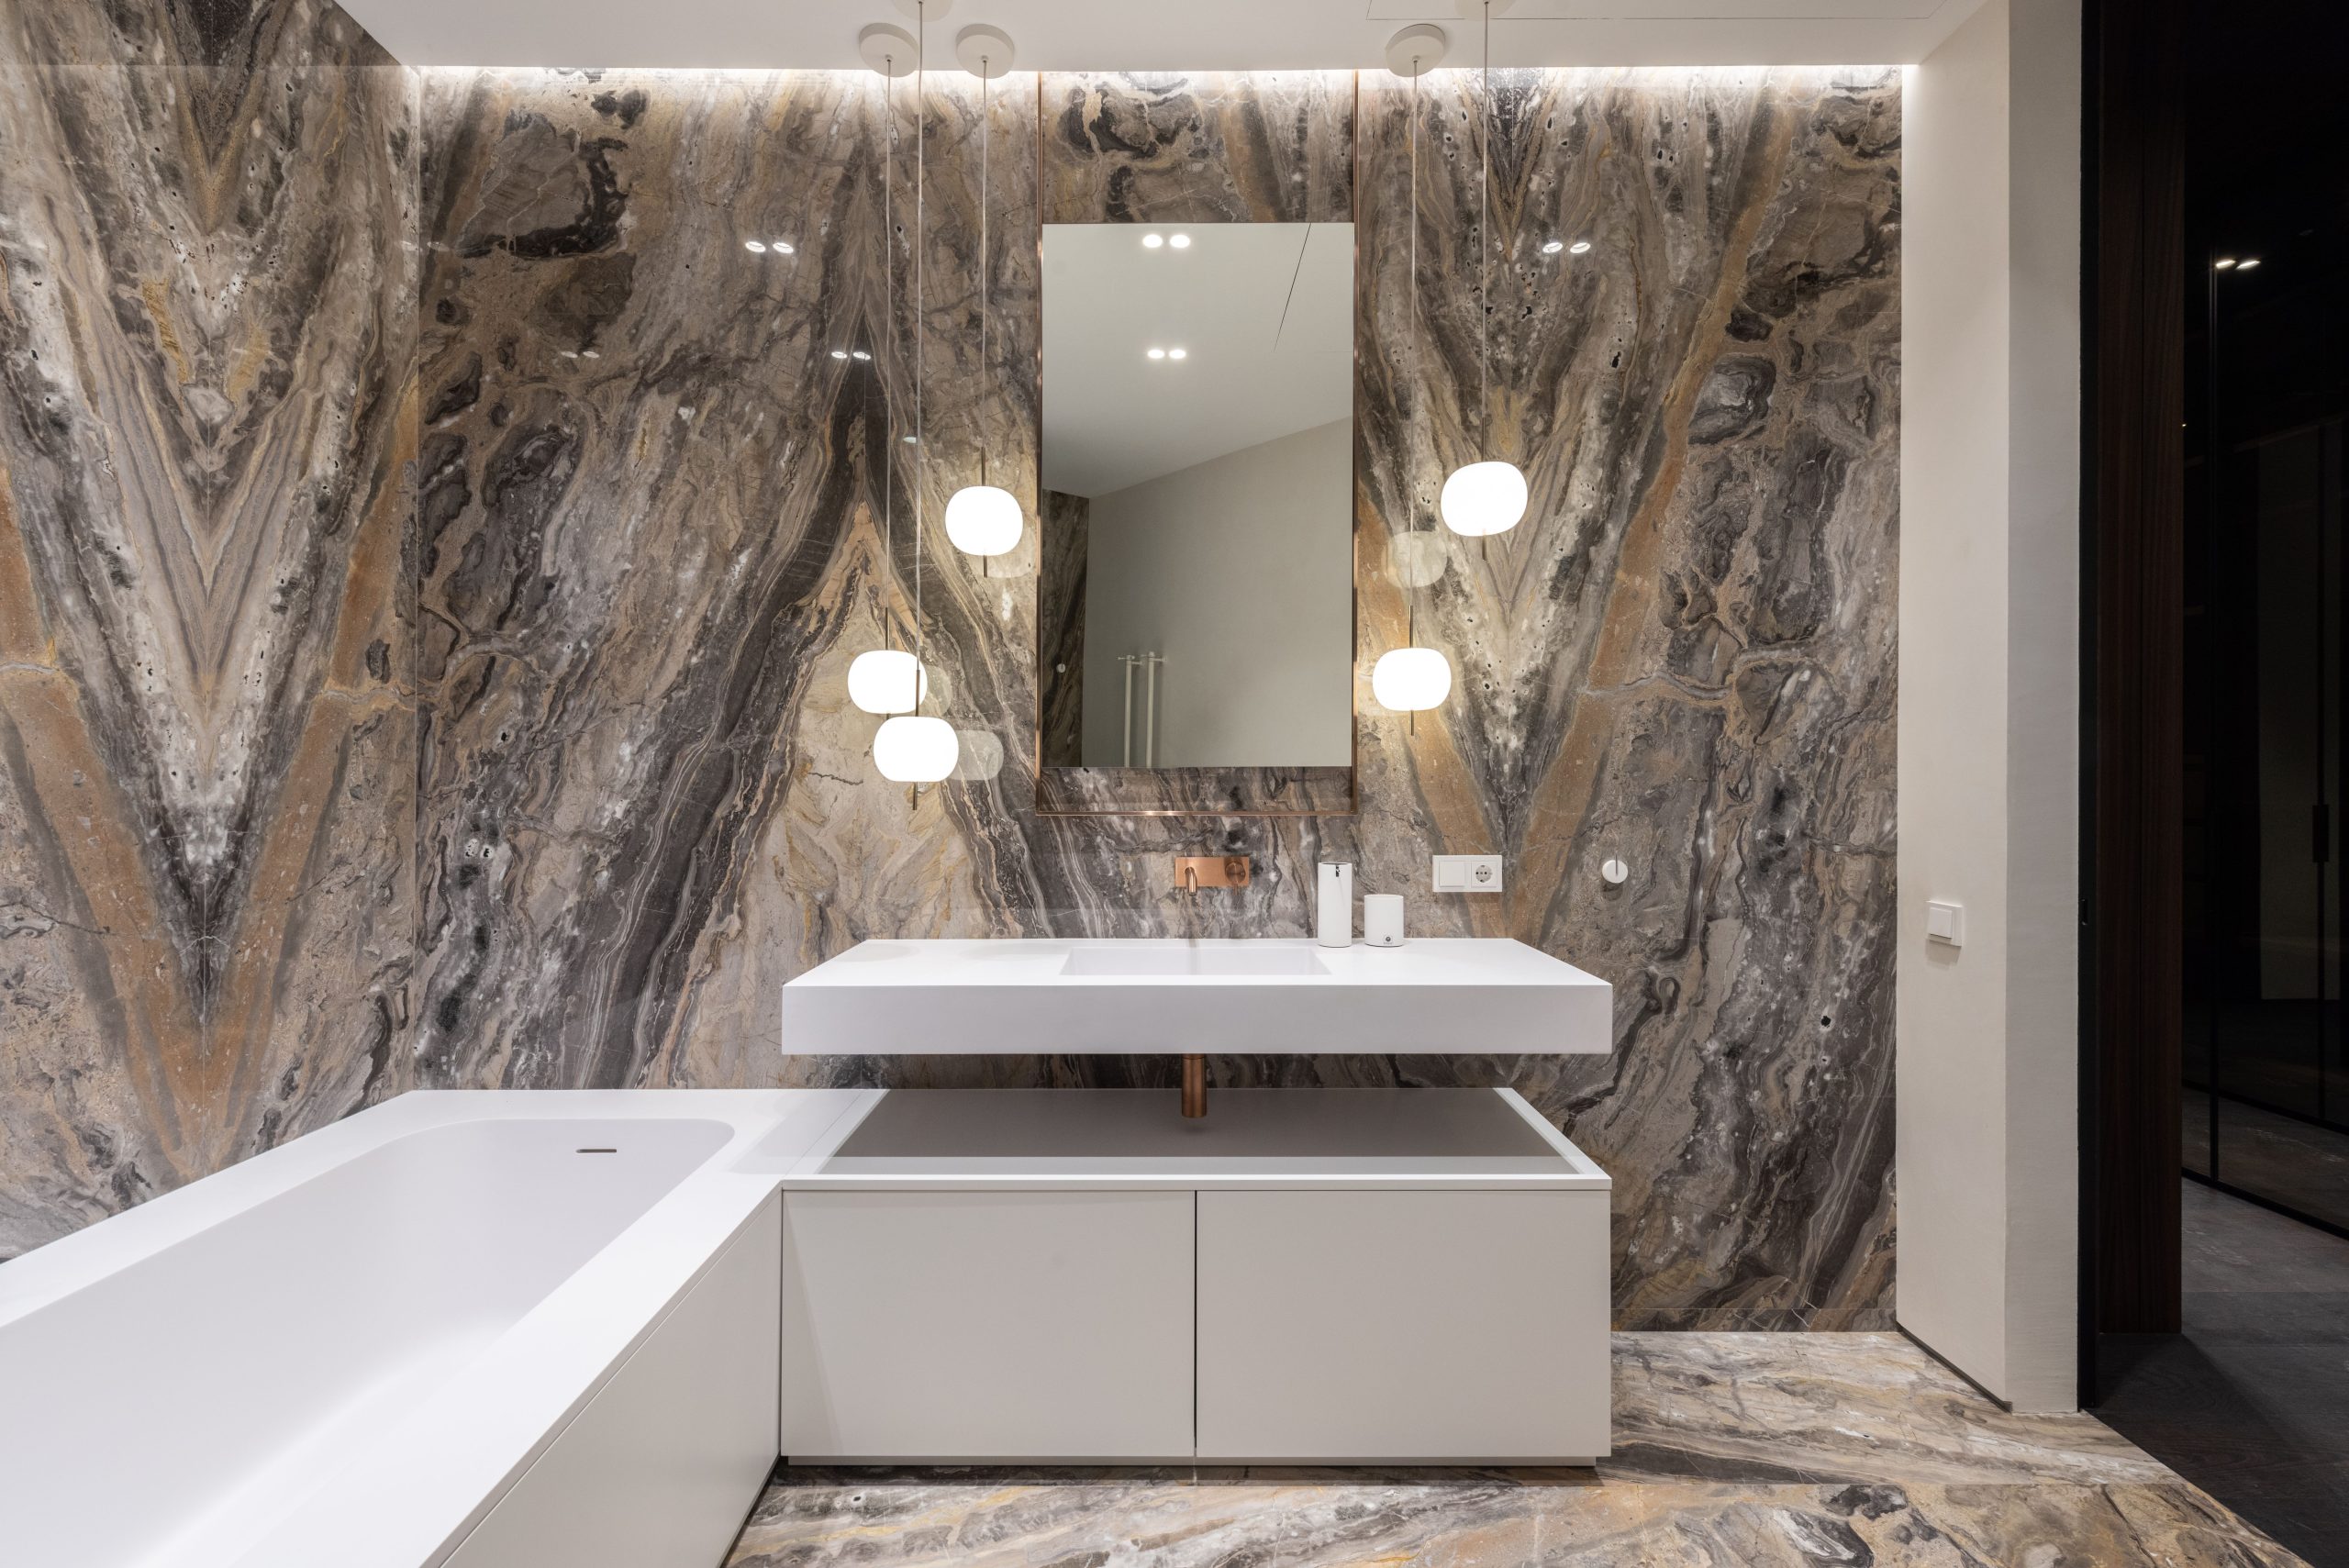
This bathroom’s high-drama aesthetic follows a bold formula: 60% dramatic pattern (the bookmatched dark marble with gold veins), 30% crisp minimalism (the white floating vanity, cabinets, and tub), and 10% warm metallic accent (the copper fixtures). The minimalist white elements are crucial; they provide a “quiet” space for the eye to rest, which makes the marble feel exciting rather than overwhelming. The copper adds a final, unexpected touch of warmth that complements the gold veining in the stone beautifully.
💡 Designer Tip
A floor-to-ceiling accent wall of exotic marble can cost a fortune. To get this jaw-dropping look for less, seek out large-format porcelain slabs. Companies now create incredibly realistic porcelain panels that mimic the look of bookmatched marble, complete with dramatic veining. A single 5×10 foot panel can create a seamless accent wall behind the vanity for a fraction of the cost and maintenance of real stone. Pair it with an affordable floating vanity from IKEA and copper-finish fixtures from an online retailer to complete the look.
23. Combine Grey Tile, Natural Wood, and a Floating Vanity
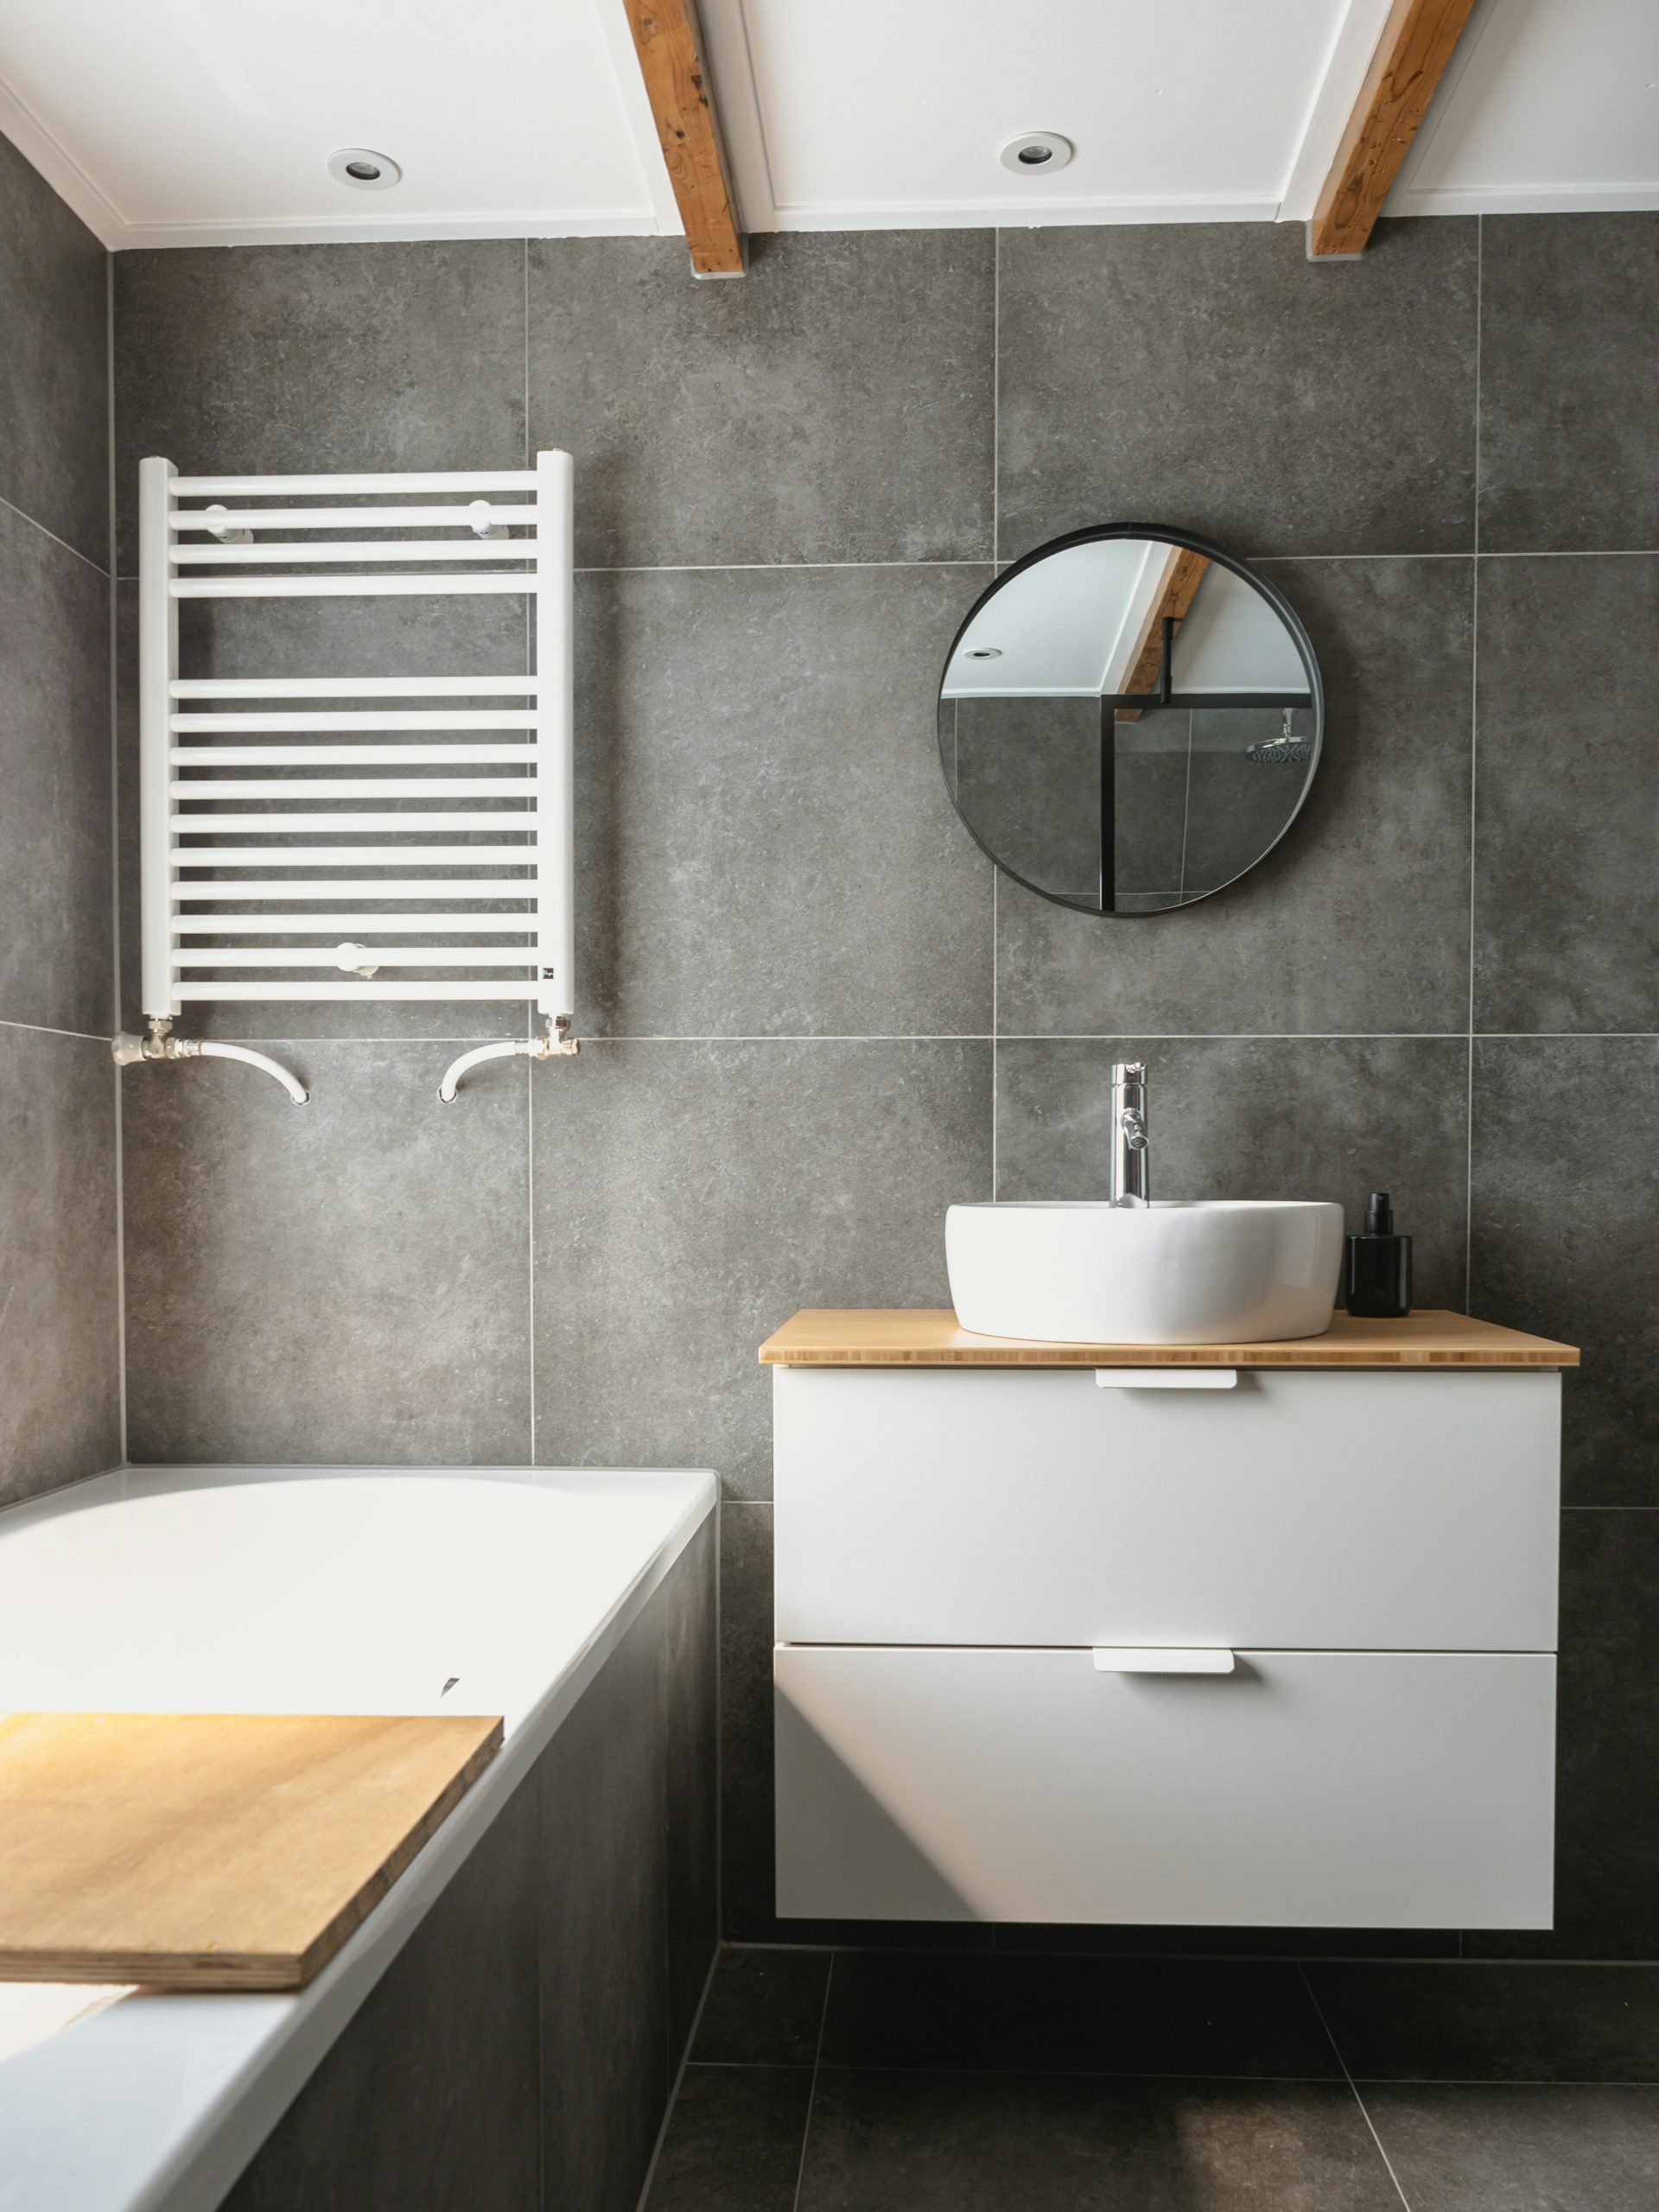
This design feels both modern and warm, thanks to a thoughtful blend of materials. The large-format grey tiles on the wall and floor create a sleek, contemporary shell. However, the introduction of natural wood on the vanity countertop and ceiling beams injects essential warmth and organic texture, preventing the grey from feeling cold or industrial. The white floating vanity base keeps the look light and airy, while the black-framed mirror adds a sharp, graphic accent. It’s this balance of cool, warm, light, and dark that makes the space feel so complete.
💰 Budget Breakdown
When using a vessel sink, especially a round one, on a floating vanity, think beyond just the faucet. The round shape of the sink and the round mirror create a strong geometric theme. To reinforce this, consider the smaller accessories. A round soap dispenser, a cylindrical cup for toothbrushes, or even round wall hooks can subtly echo the main shapes, making the entire design feel more cohesive and intentionally styled. Small details can have a big impact on the overall feel.
24. Anchor a Neutral Bathroom with a Charcoal Freestanding Tub
The single element that gives this bathroom its unique personality is the charcoal-colored freestanding tub. In a world of white bathtubs, this choice is unexpected and incredibly sophisticated. It acts as a dramatic anchor in an otherwise light and neutral space. The contrast between the dark, moody tub and the light grey paneled wall, warm wood vanity, and soft brass fixtures is what creates the visual excitement. Without it, this would be a lovely, warm neutral bathroom. With it, it’s a memorable, designer-quality space.
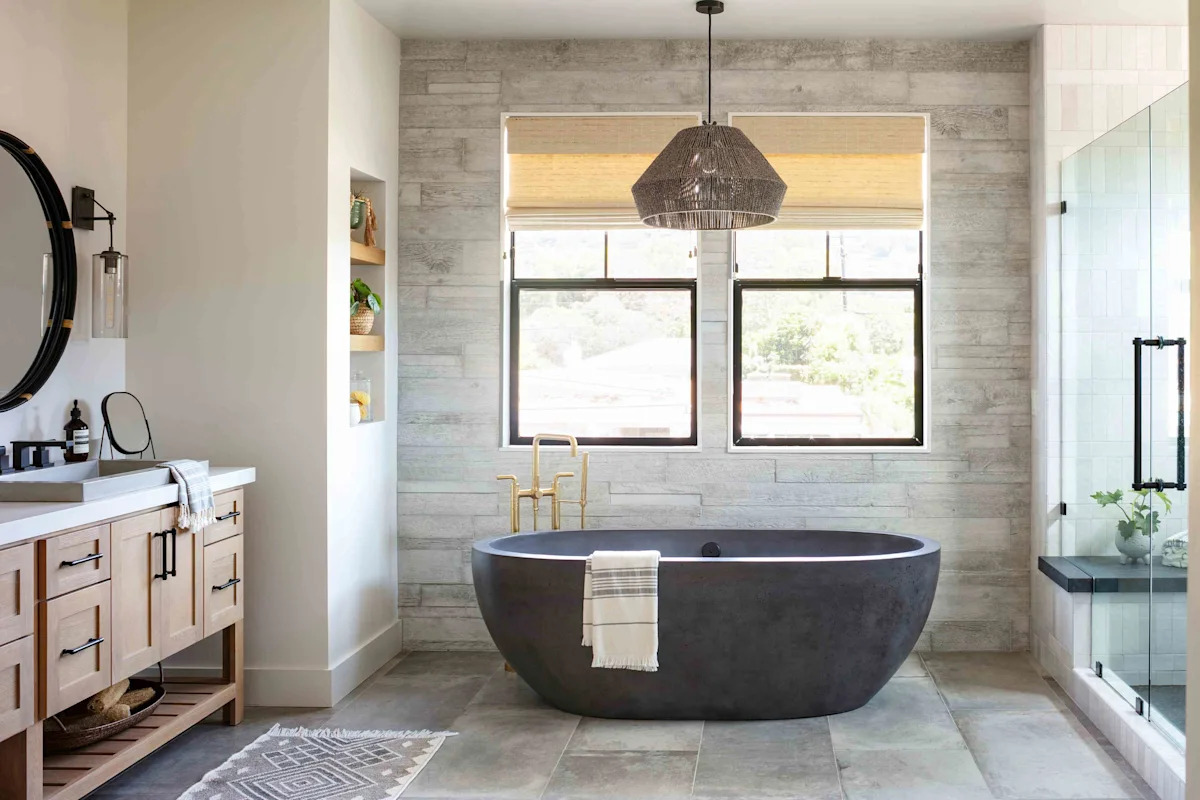
⚠️ Real Talk
A horizontally paneled (shiplap) accent wall adds instant character. Here’s a quick guide to creating one:
- Time: 1 weekend. Cost: $3-$8 per square foot.
- Choose your material. You can use traditional shiplap boards or save money with thin plywood strips (often called “faux-lap”).
- Find and mark the studs on your wall. Your boards must be nailed into studs for a secure hold.
- Start from the top and work your way down, using a level for every single board.
- Use a spacer—like a nickel—between boards to ensure a consistent gap.
- Fill nail holes, caulk the edges, and then paint. Choose a satin or semi-gloss finish for a bathroom to resist moisture.
25. Define a Walk-In Shower with a Black-Framed Glass Enclosure
This design expertly defines zones without building solid walls. The black-framed glass enclosure acts like a picture frame for the shower, turning it into a distinct visual element. The contrast of the black metal against the light wall tiles provides a strong graphic punch, a popular look seen in modern farmhouse and industrial styles. Inside the “frame,” the designer created another moment of contrast with the dark herringbone floor tiles. This use of “a room within a room” makes the space feel larger and more thoughtfully designed. The matching black window frame and fixtures tie the whole look together.
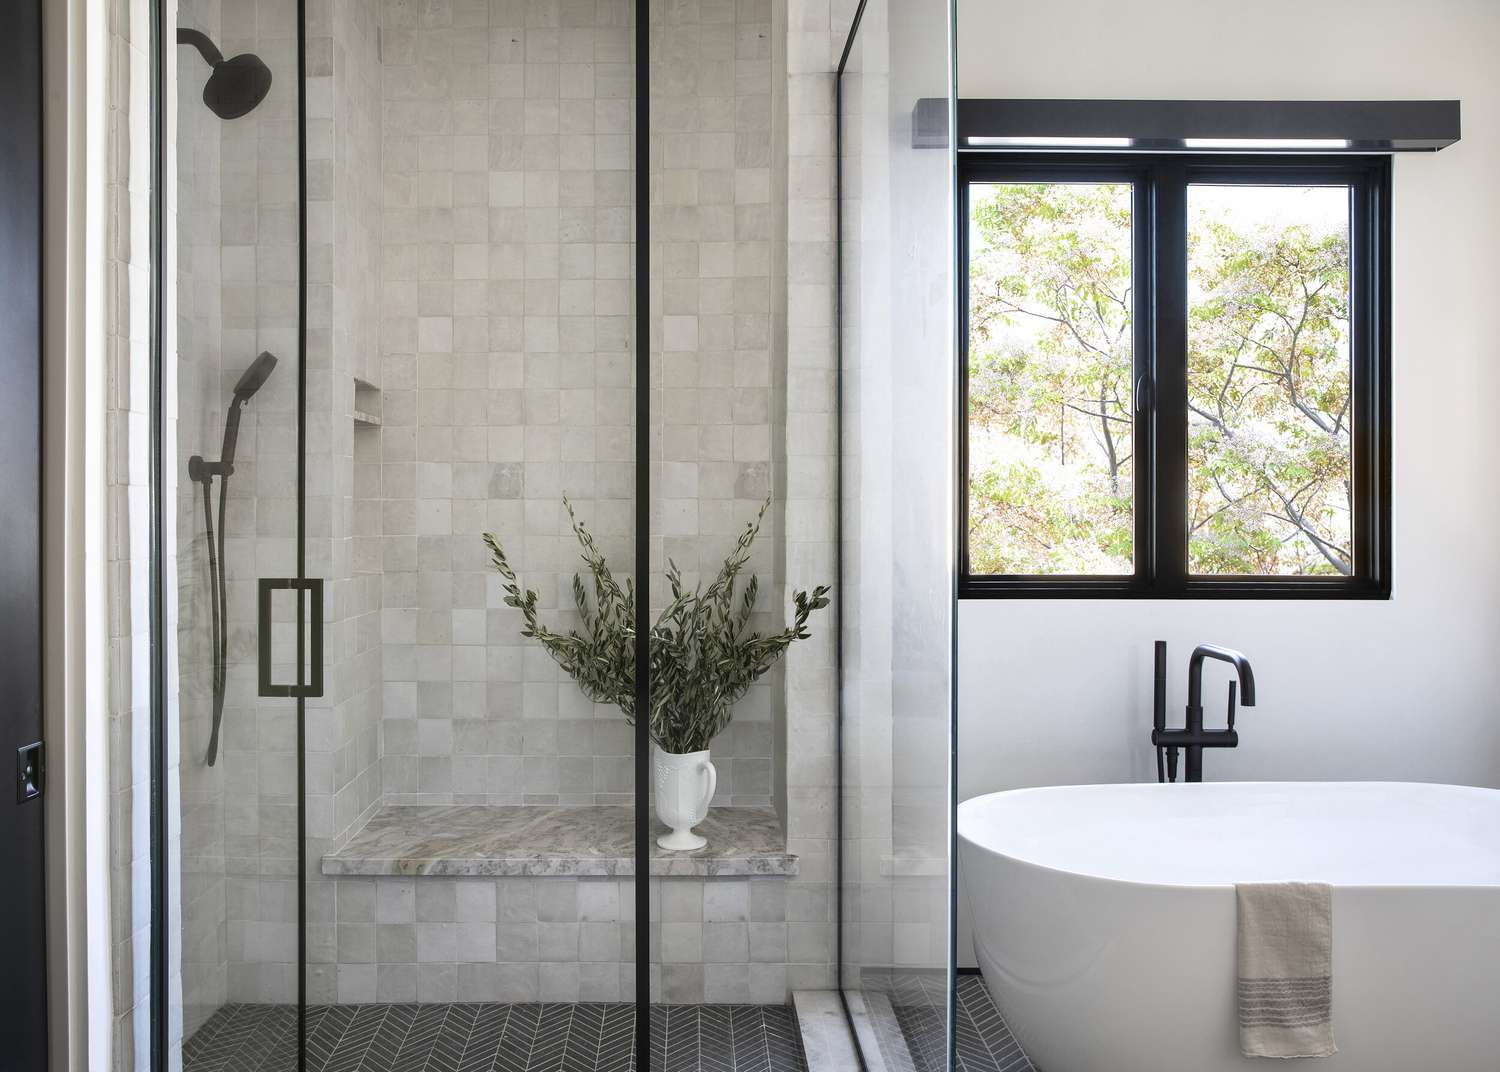
✅ Before You Start
Here’s a potential cost breakdown for this serene, high-contrast look. Labor costs for tile and plumbing are a major factor here.
26. Embrace Minimalism with a Floating Wood Vanity and Marble Tile
This clean, minimalist aesthetic is incredibly versatile and scales well for most master bathrooms, from a compact 70 square feet to a sprawling 200+. In a smaller space, the floating vanity, glass shower, and continuous marble-look tile create an unbroken sense of space, making the room feel larger. In a bigger bathroom, the same elements contribute to a grand, spa-like atmosphere. The key is the simplicity of the forms; the floating vanity and frameless glass are visually light, allowing them to adapt to different room dimensions without overwhelming them.
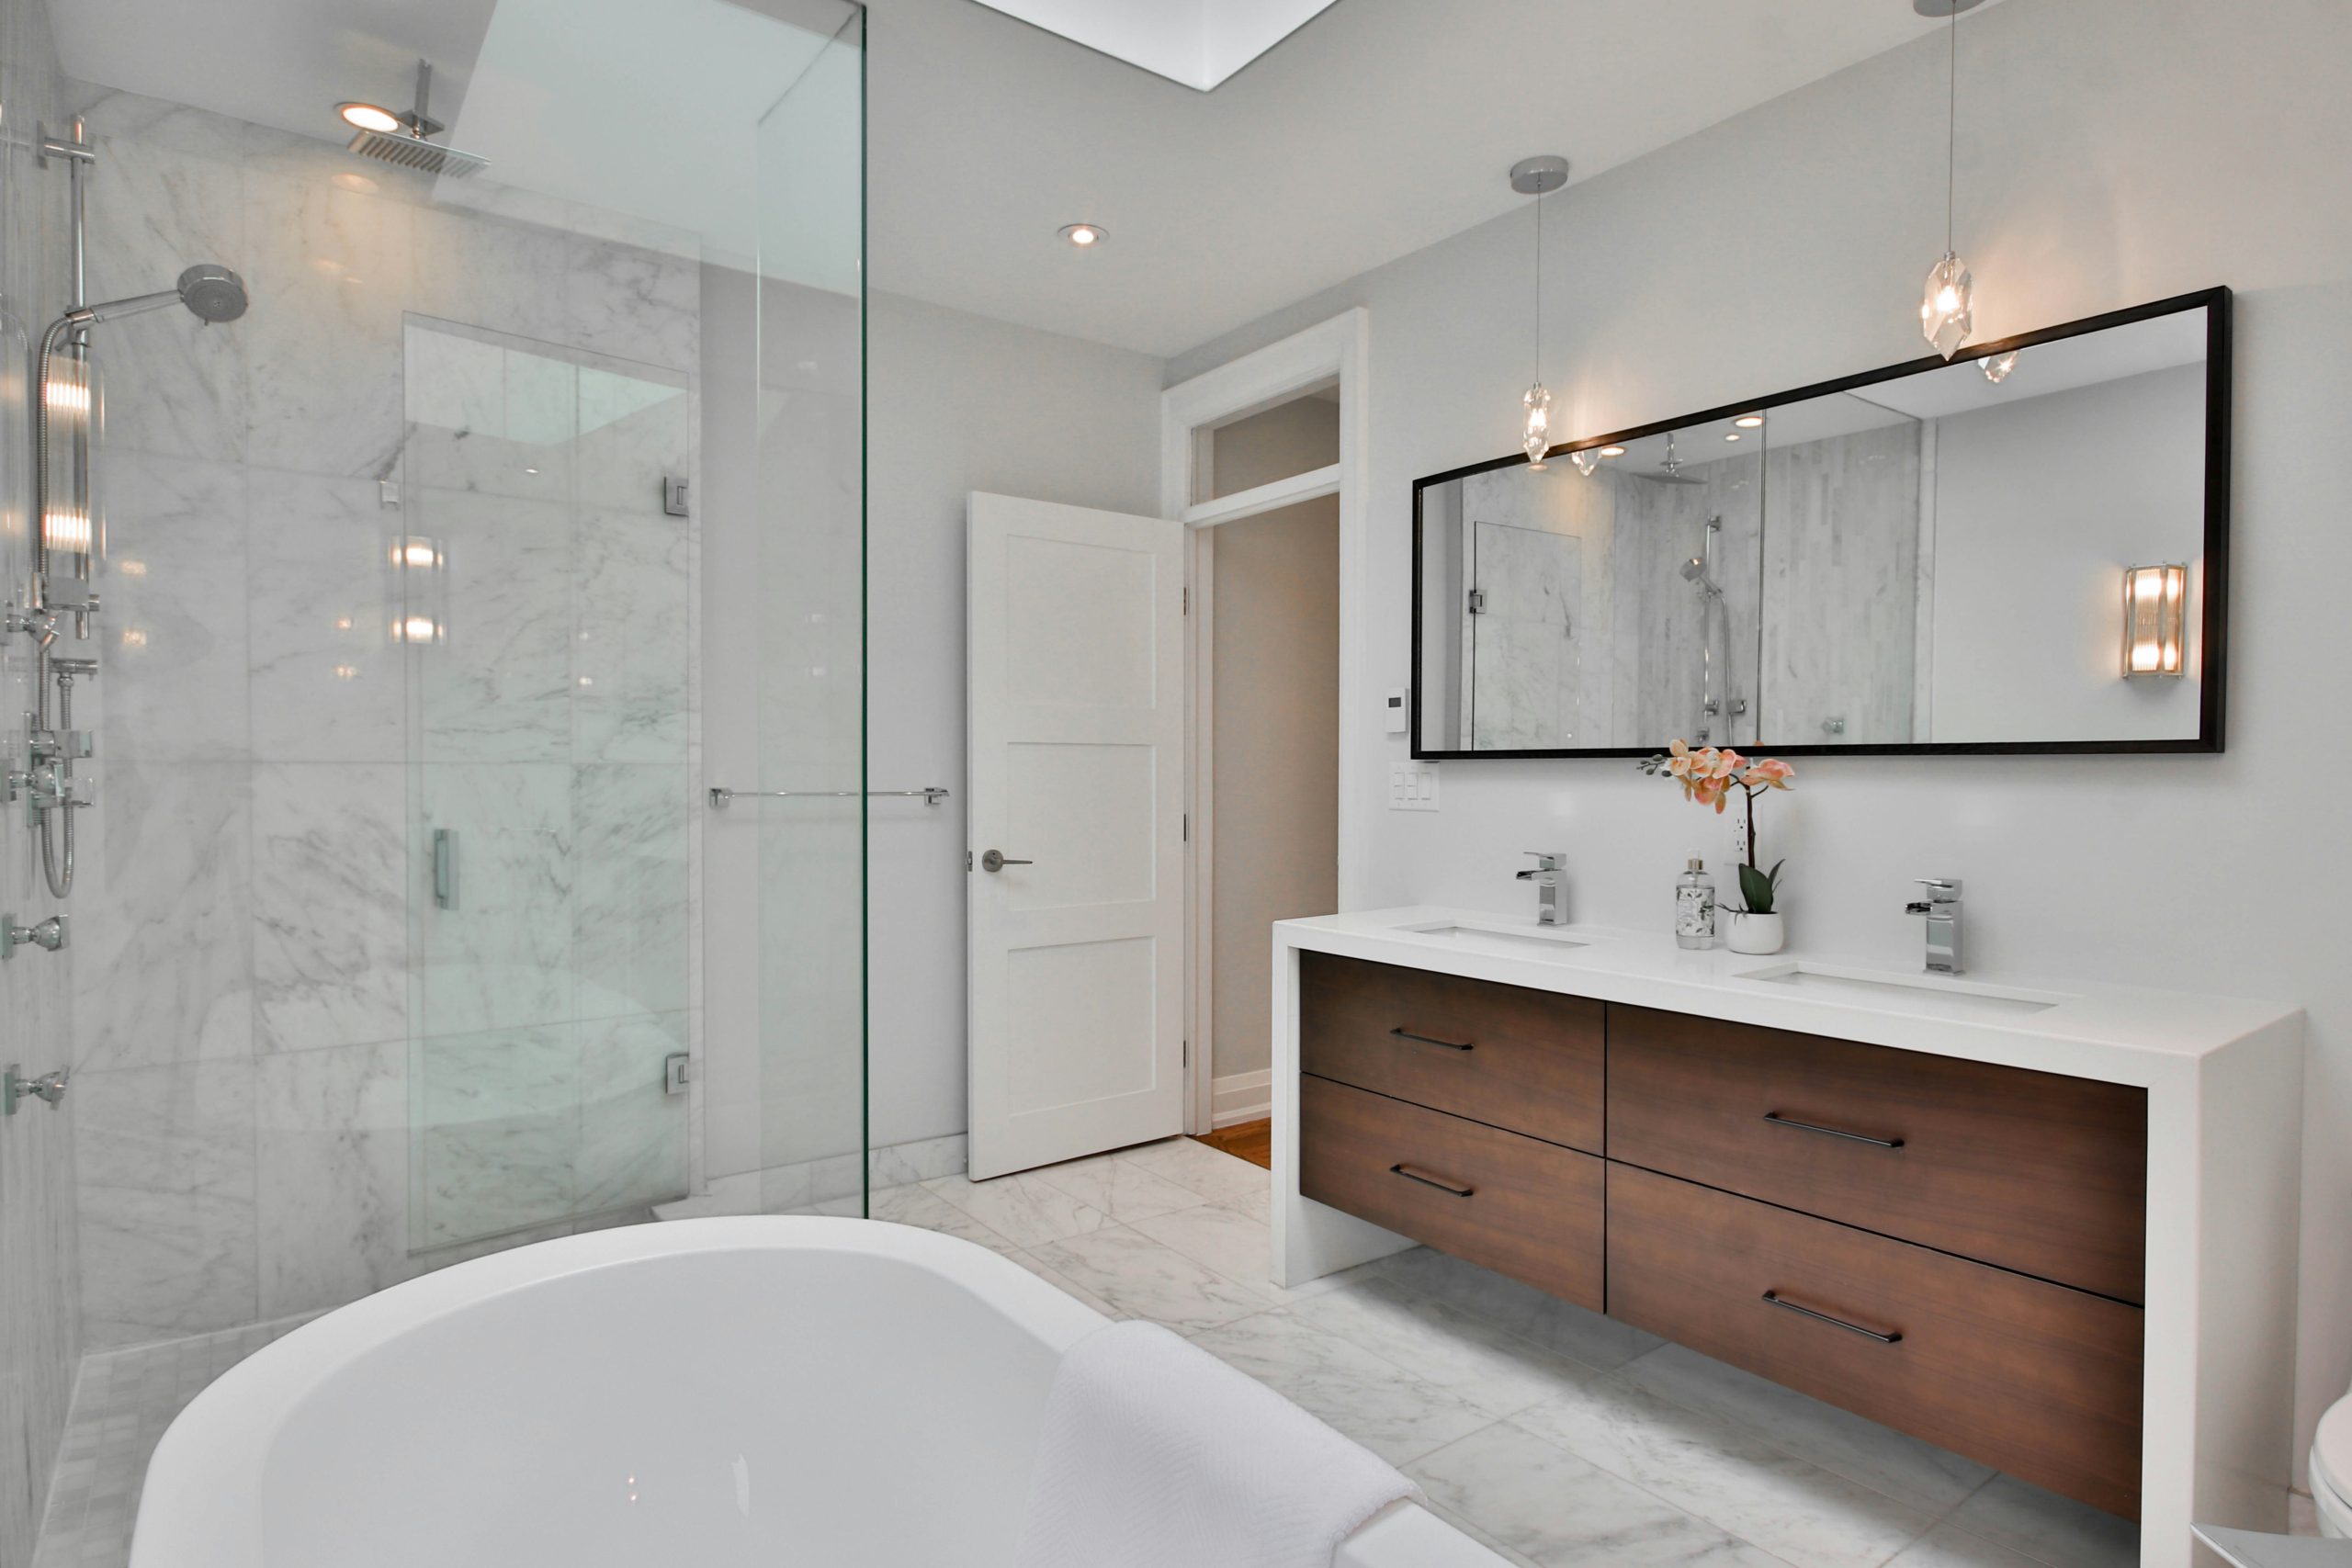
⭐ The One Thing
A floating vanity looks incredibly chic, but it comes with a trade-off: storage. By design, you lose the cabinet space that would typically go all the way to the floor. While this vanity has two large drawers, it offers less total cubic footage than a traditional floor-mounted vanity of the same width. Be honest with yourself about how much “stuff” you need to store. If you have a large collection of products, you may need to supplement with a separate linen tower or medicine cabinet to keep the space from feeling cluttered.
27. Go Moody with a Dark Wood Vanity and Black Sinks
When designing a bathroom with this level of sophisticated minimalism, lighting is not an afterthought—it’s a crucial architectural element. The combination of recessed ceiling lights for general ambient light and hidden linear LED strips (likely tucked above or below the mirror) for focused task lighting is key. This layered approach ensures the space is functional while also highlighting the textures of the stone and wood. For a truly high-end feel, install dimmers on all light sources to adjust the mood from bright and energizing to soft and relaxing.
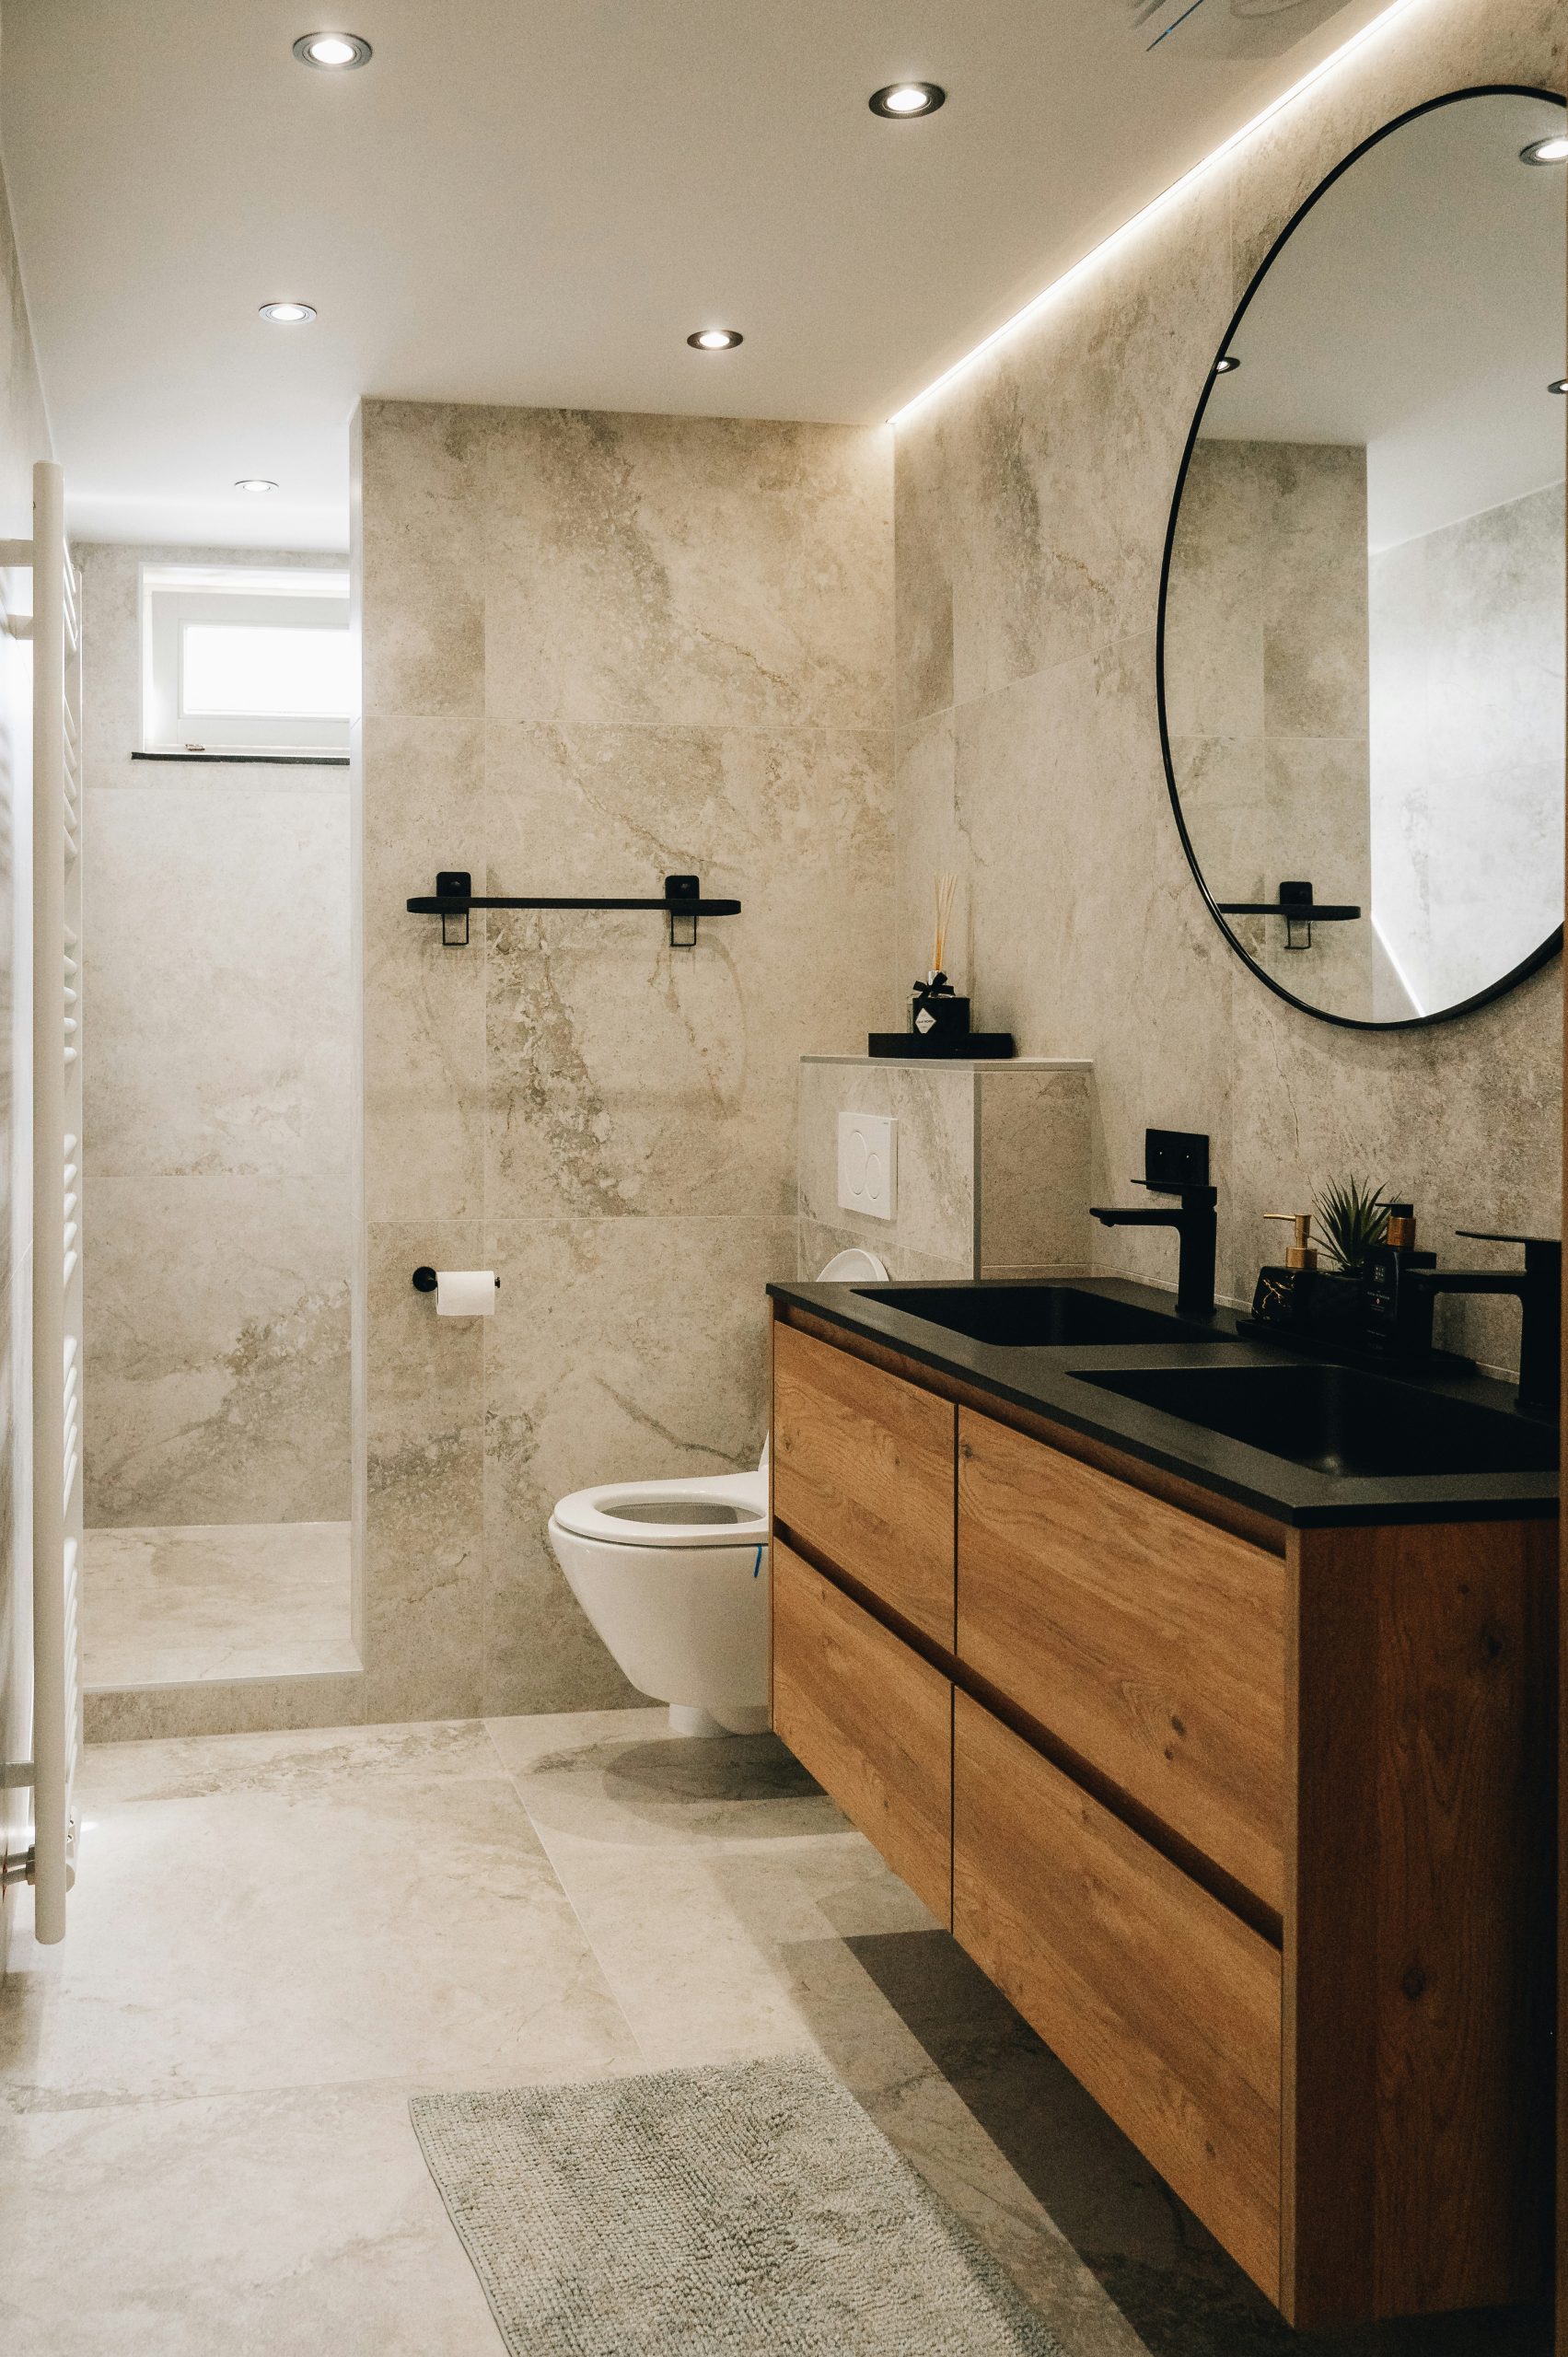
📐 Style Math
This bathroom feels so grounded and calming due to its deep, natural palette and textural consistency. The large-format stone tiles on the floor and walls create an enveloping, cave-like sense of sanctuary. The dark wood of the floating vanity adds a layer of organic warmth, while the matte black sinks and faucets provide a sharp, modern contrast. By keeping the color palette tight—shades of beige, brown, and black—the focus shifts entirely to the beautiful textures of the materials themselves.
28. Invest in a Fixture That Doubles as Art
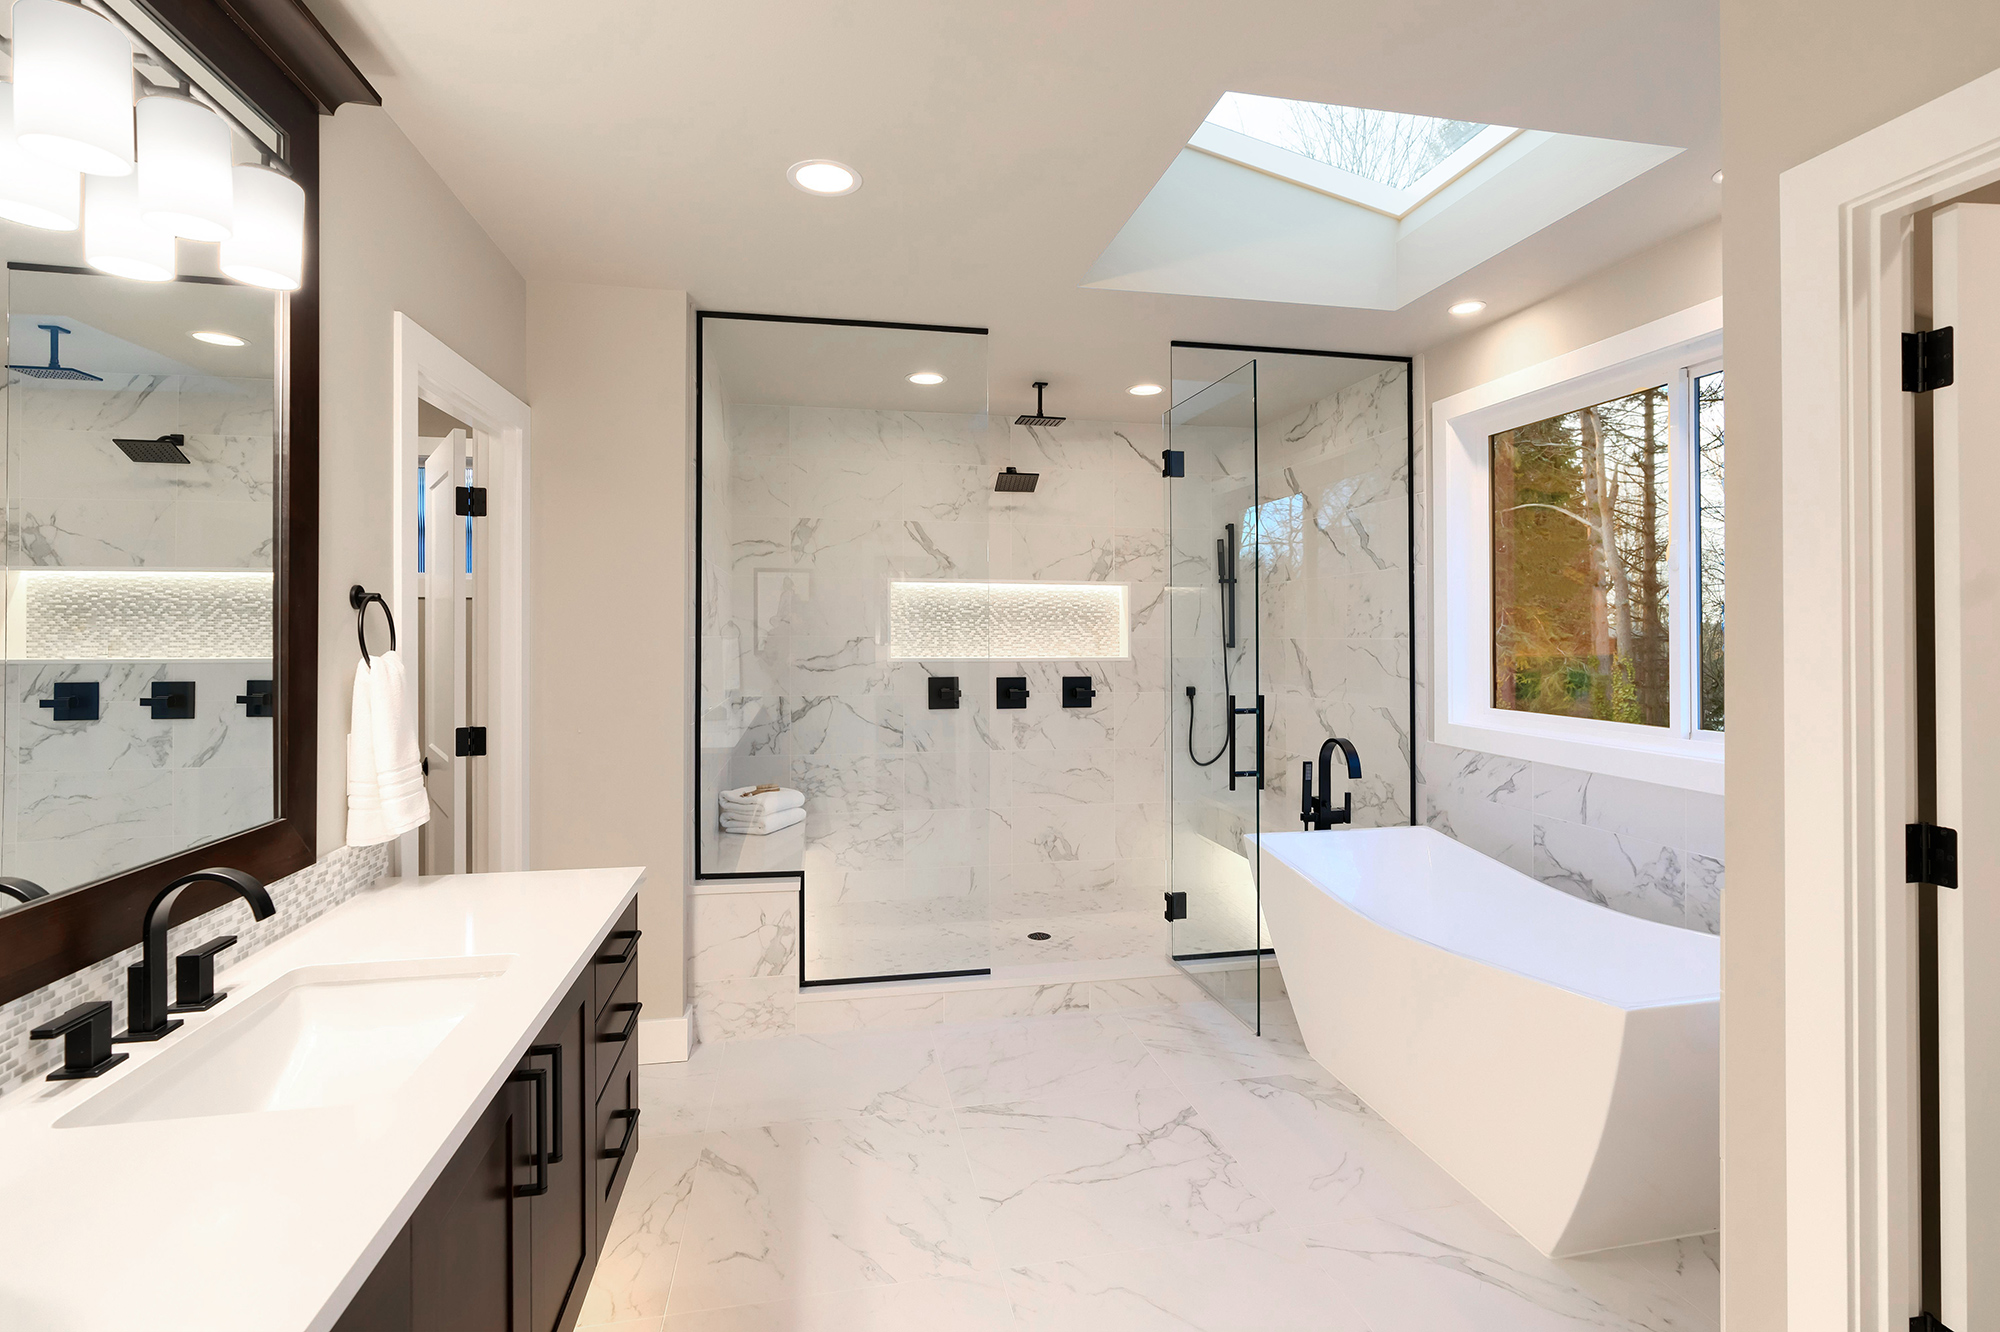
What truly elevates a master bathroom remodel from good to great is often one spectacular investment piece. It could be an elegant, sculptural tub filler that looks like a piece of modern art, a dramatic chandelier, or a custom-built vanity. This single item becomes the soul of the room. It’s the element that tells a story and feels personal and unique. While timeless tile and functional layouts are the foundation, this one special fixture is what you—and your guests—will always remember. It’s the difference between a bathroom and a sanctuary.
🎯 What Makes It Work
As homeowners spend more time at home, we’re seeing a major trend towards investing in “permanent art”—pieces that are integrated into the home’s architecture itself. A striking, elegant master bathroom fixture is a perfect example. Instead of just buying another framed print, people are putting their design budget into functional items that also provide aesthetic joy on a daily basis. It’s about finding beauty in the everyday, a cultural shift that prioritizes quality and craftsmanship over fleeting decor trends.
29. Create a Calm Oasis with Pale Blue-Green Walls
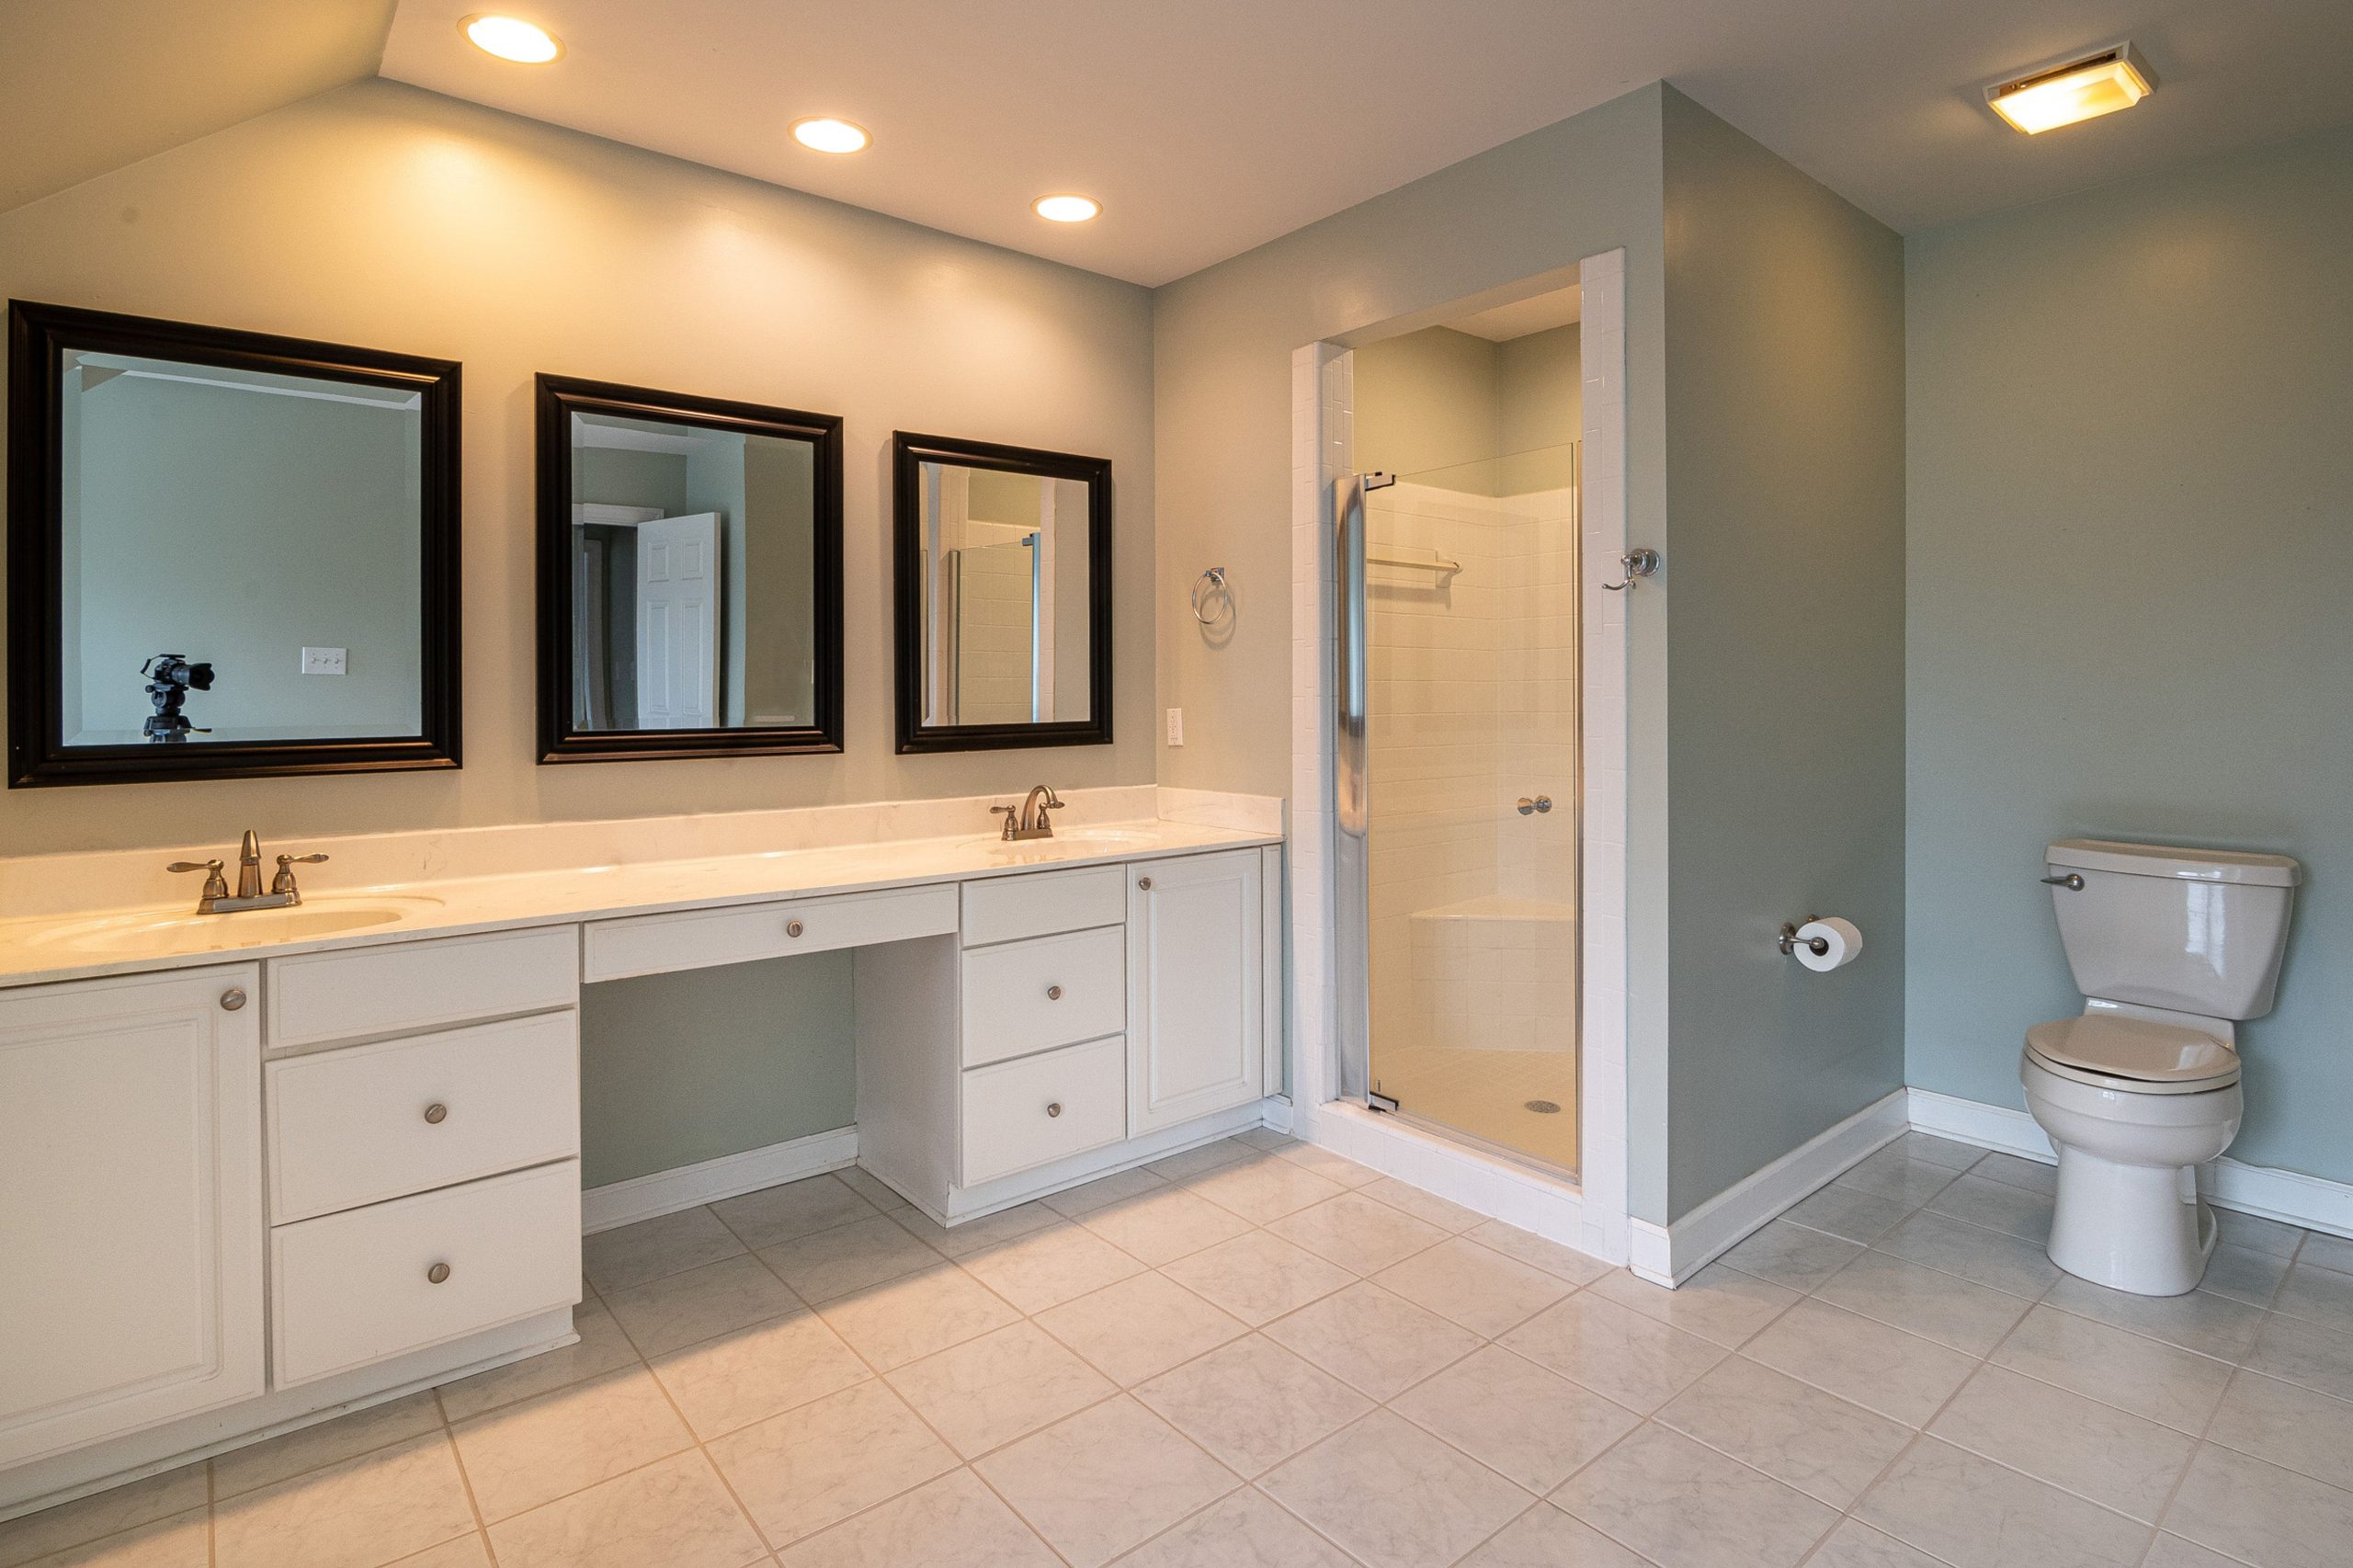
This look is proof that you don’t need expensive tile or a massive renovation to create a fresh, updated bathroom. The star here is simply a can of paint. A serene, pale blue-green color on the walls instantly creates a calming, spa-like atmosphere. You can find a long, functional double vanity at a home improvement store like Lowe’s or Home Depot for under $1,000. Pair it with simple, dark-framed mirrors from Target or Wayfair to get that touch of contrast. This is a high-impact, low-cost makeover that relies on color and smart shopping.
🧹 Maintenance Reality
This bathroom feels so light and pleasant because it follows a classic design principle: using a soft, receding color to make a space feel larger and more airy. The pale blue-green on the walls has a low visual weight, making the walls seem to pull back. The long, horizontal line of the white vanity enhances the sense of width in the room. Finally, the dark frames of the mirrors provide a necessary focal point and a touch of graphic punch, preventing the soft-colored space from feeling washed out. It’s a simple, effective, and timeless combination.
30. Create a Dynamic Accent with Textured Hexagonal Tiles
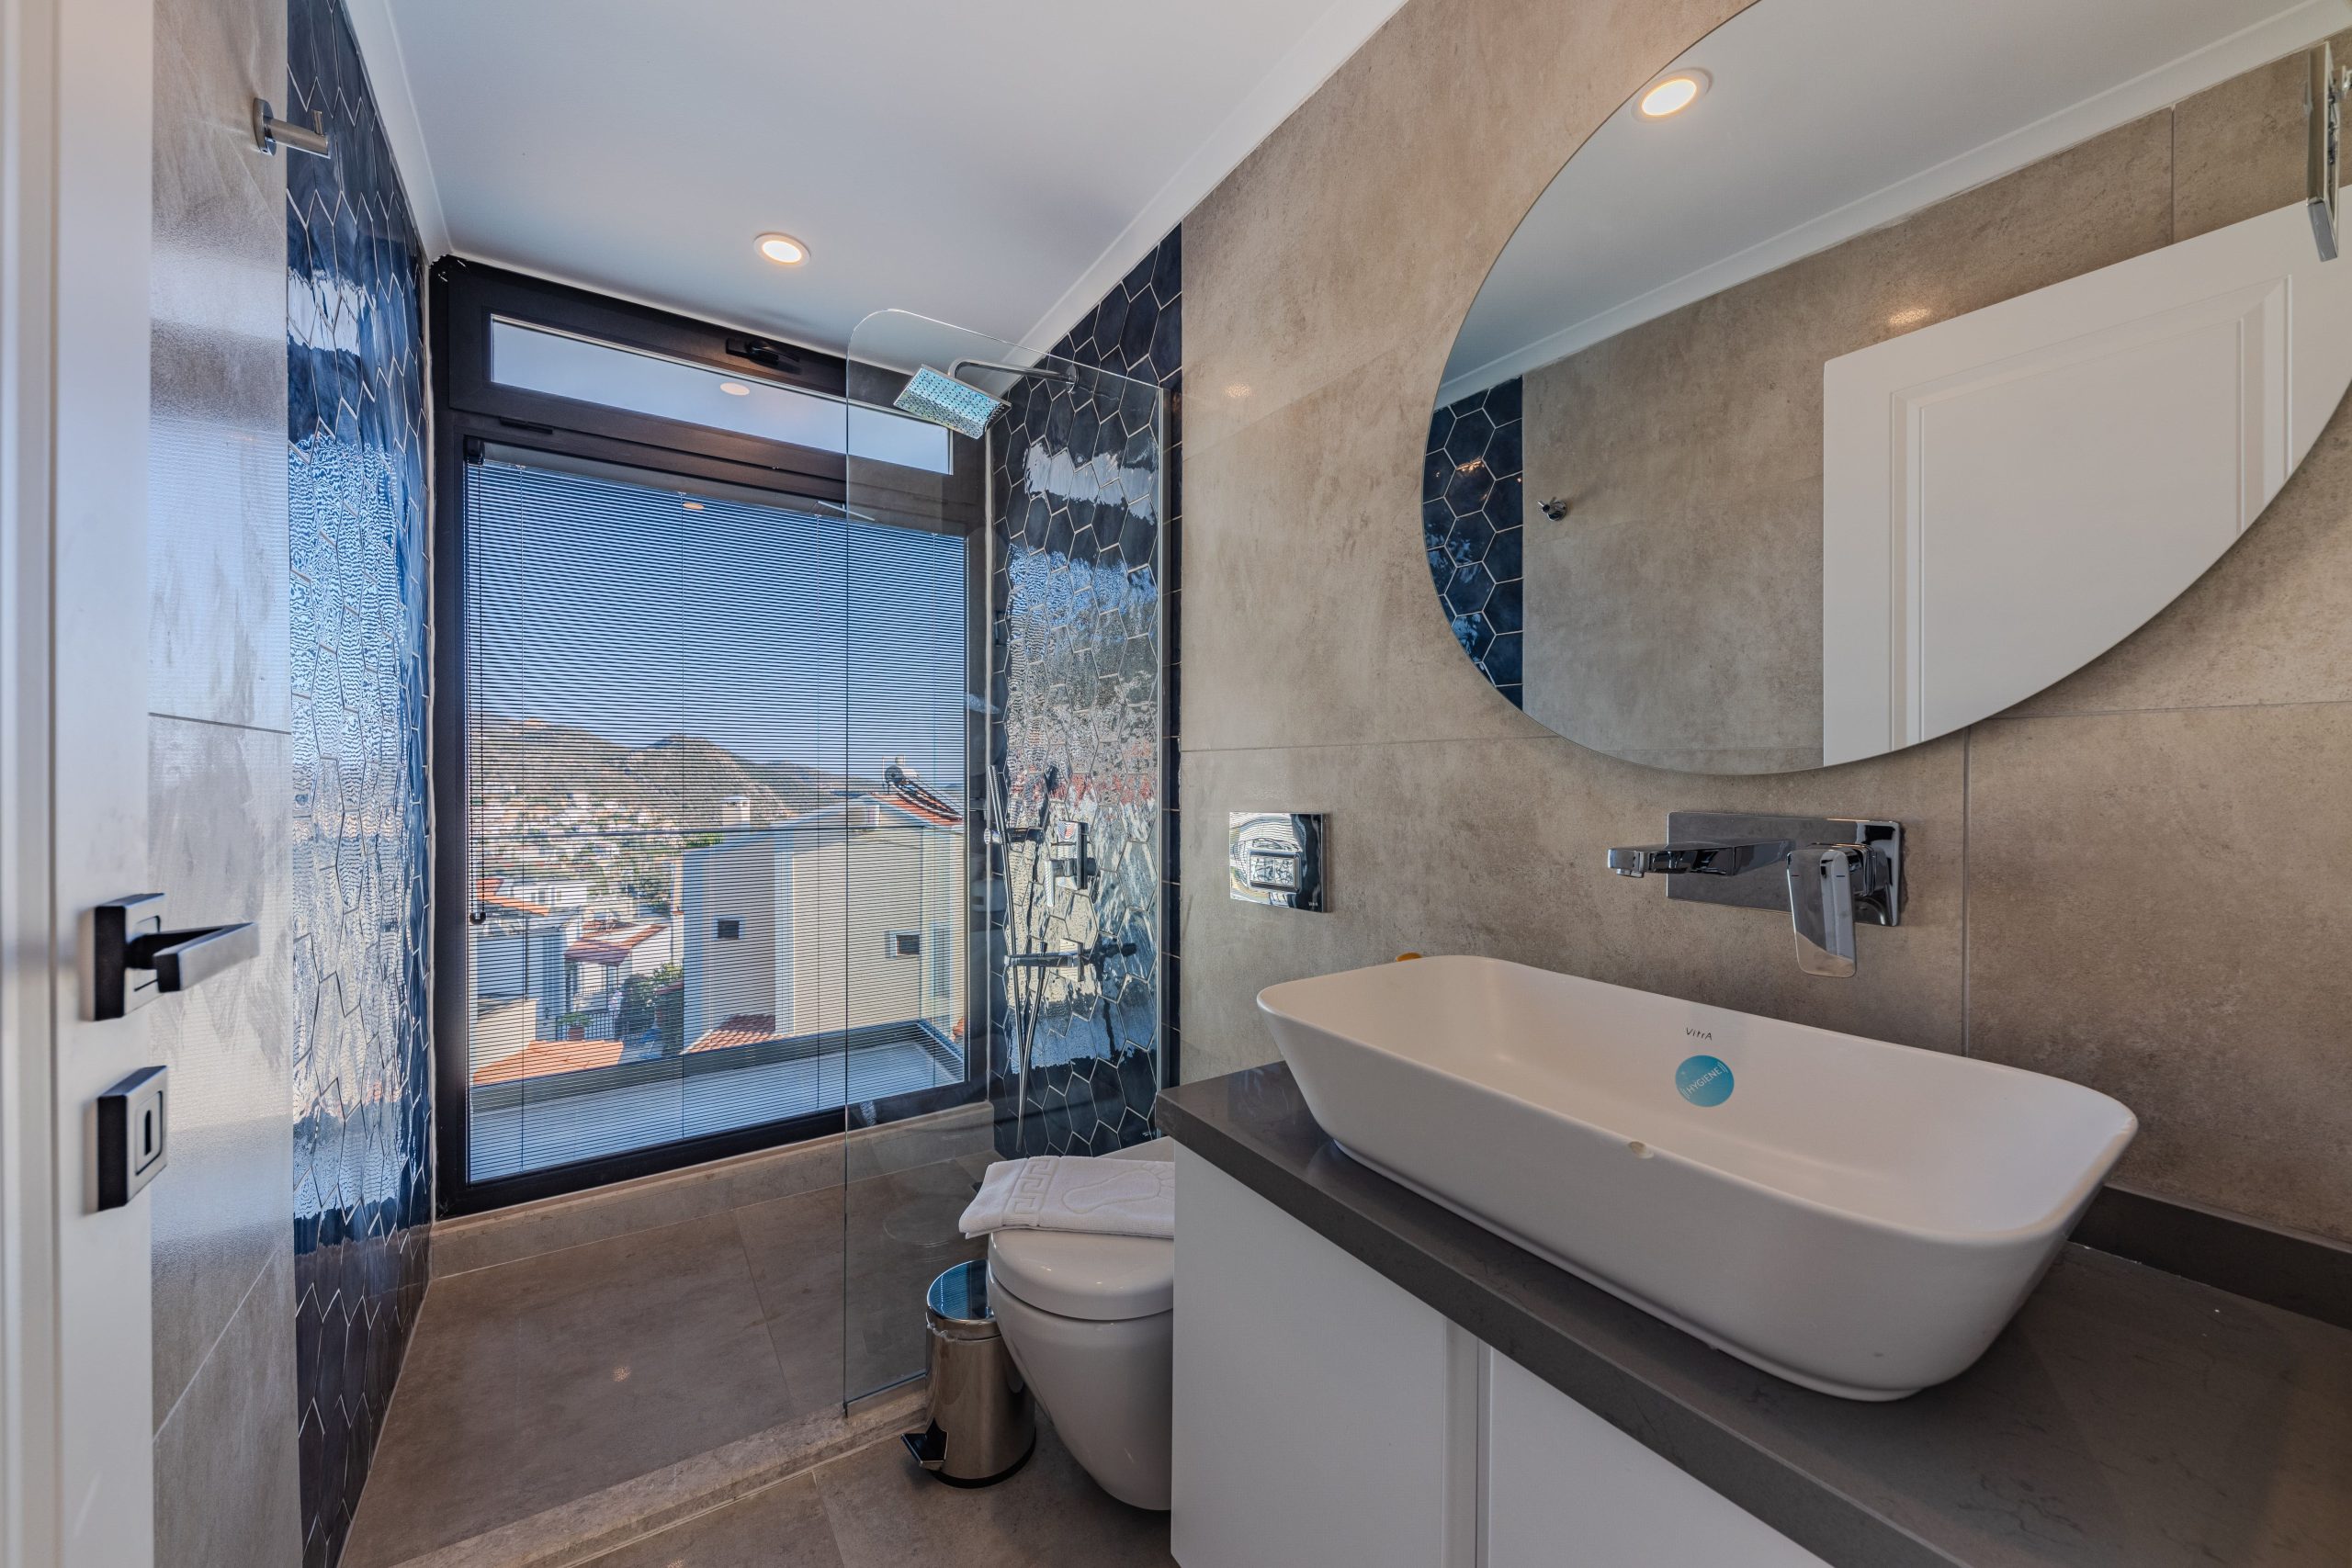
When creating a tile accent column like this, the transition between the accent tile and the main field tile is key to a professional look. For a seamless transition with no bulky trim pieces, plan for the hexagonal tile column to terminate at an inside corner or be framed by the window and vanity, as shown here. This creates clean, natural stopping points. If your layout doesn’t allow for that, use a very thin, minimalist metal tile edge, in a finish that matches your fixtures, to frame out the accent section elegantly.
🔧 How-To Brief
The visual recipe for this sleek, modern bathroom is a lesson in balanced texture and color. It breaks down to roughly 70% smooth, neutral surfaces (the greige rectangular tiles and white vanity), 20% bold textural accent (the dark blue hexagonal tile column), and 10% reflective shine (the chrome fixtures and circular mirror). This formula ensures the statement tile is the undeniable star of the show, while the neutral base keeps the look feeling calm and uncluttered. The pop of blue is what gives the room its unique identity.
Time to Design Your Dream Escape
Now that you’re armed with plenty of inspiration, the next step is to start planning. Remember, the best design reflects your personal style and daily rituals. The most beautiful bathroom is one that feels like a true reflection of you and supports the way you live.
What will your dream bathroom look like? Start a board on Pinterest and begin saving your favorites to find out!