
26 Jaw-Dropping Cape Cod House Exterior Design Ideas You Need to See in 2026
You know that feeling when you finally find the Cape Cod exterior that looks exactly right? It’s a style that feels both timeless and perfectly current, but sifting through endless Pinterest boards can be overwhelming. We get it. That’s why we did the heavy lifting, curating 26 distinct and achievable Cape Cod exteriors that strike the perfect balance between classic charm and 2026 curb appeal. And stay until the end — we break down the most common mistakes that can ruin these looks. 📌 Save this to Pinterest for later — you’ll want to revisit these ideas.
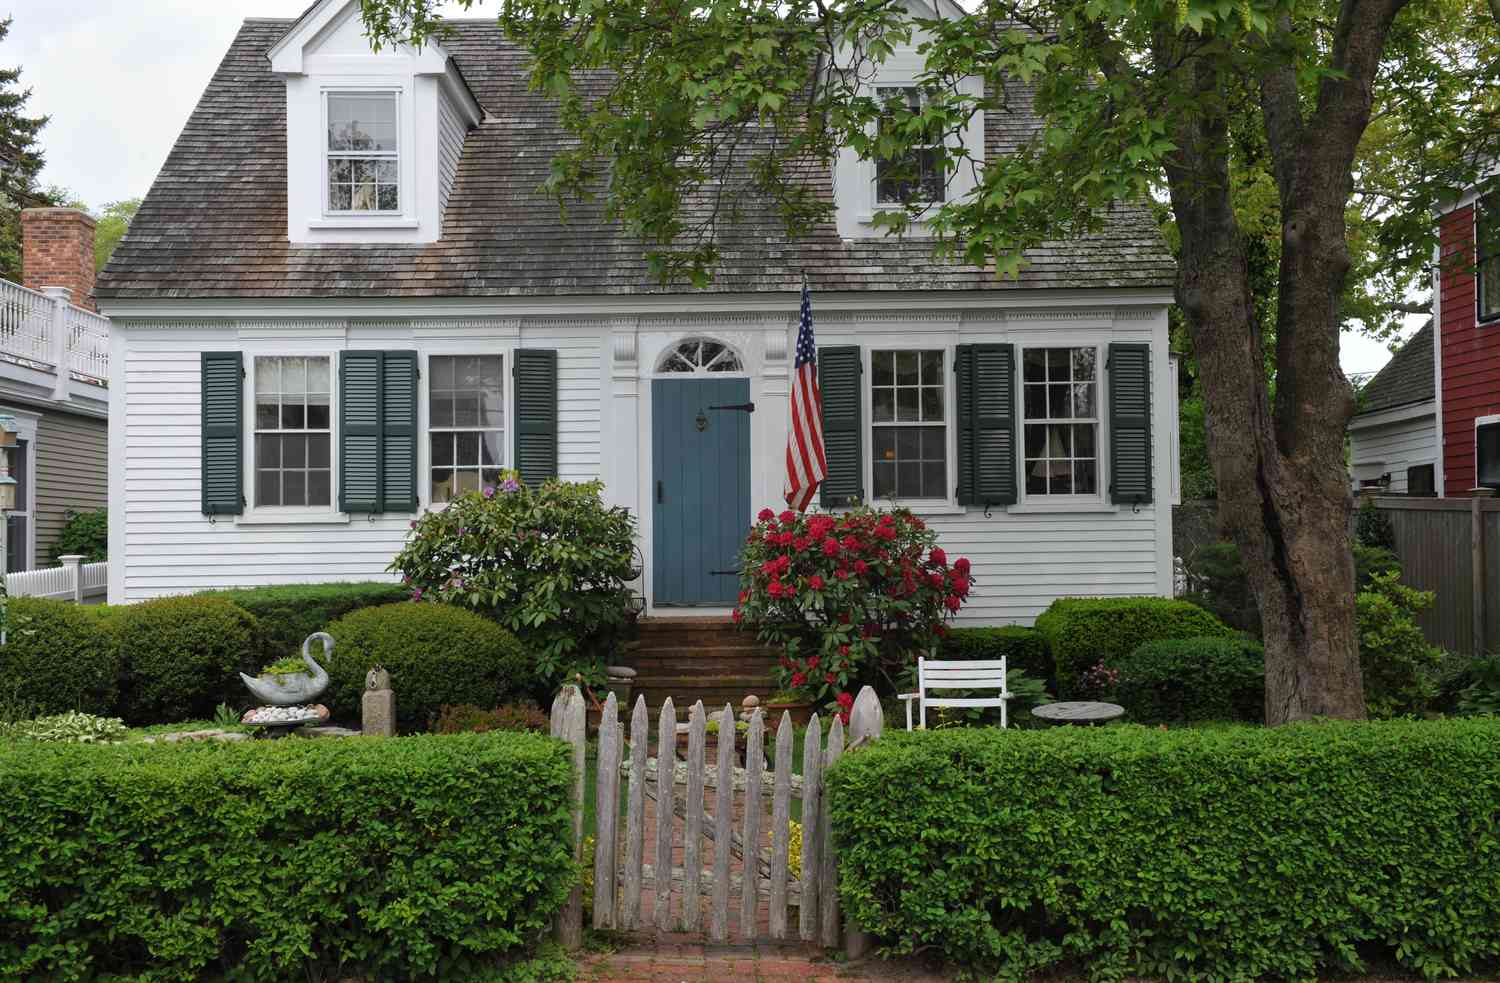
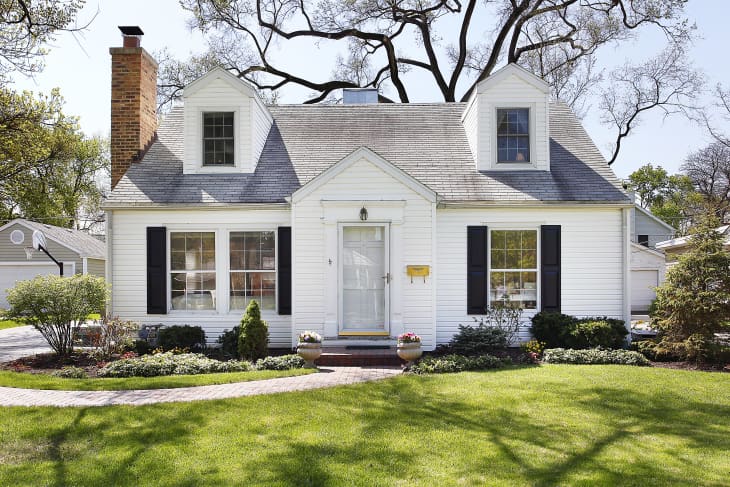
1. Embrace Timeless Contrast with a White Façade and Dark Roof
There’s a reason this combination is an undying classic. The stark contrast between the bright white clapboard siding and the dark, sheltering roof creates a powerful visual anchor. It’s clean, graphic, and feels incredibly stately. The black shutters act as a perfect mid-tone, adding rhythm and detail without complicating the palette. This trio of white, black, and grey is a foundational formula in residential architecture because it simply always looks good, highlighting the home’s structure and form.

🔧 How-To Brief
When installing a picket fence, the biggest mistake is setting the posts too shallow. For a standard 4-foot high fence, your support posts should be sunk at least 2 feet into the ground, with a third of the total post length being the rule of thumb. For a fence this iconic, you want it to be perfectly straight and last for decades. Use a concrete footing for each post to prevent shifting and sagging over time, ensuring those clean, idyllic lines remain flawless.
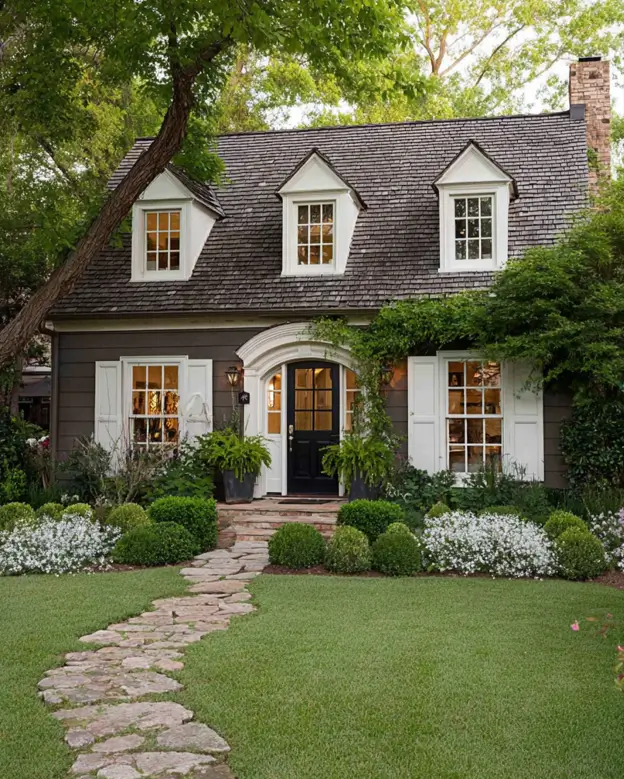
2. Soften the Entry with a Pebble Path and Lush Garden
The single most impactful element here is the garden path. Without it, this would be a lovely but standard shingle home. The meandering pebble walkway with its organic stone pavers completely transforms the experience of approaching the house. It slows down the journey from the street to the front door, creating a sense of discovery and decompression. It’s an intentional choice that says the landscape is just as important as the architecture, turning a simple entryway into a serene garden moment.

📐 Style Math
A pebble pathway looks incredible, but let’s be real about the upkeep. Weeds are inevitable. To minimize them, ensure a high-quality, permeable landscape fabric is installed underneath the pebbles. Even so, you’ll be doing some hand-weeding. Pebbles also shift and can get kicked into the lawn, so plan on raking them back into place monthly and topping them off every couple of years. It’s not a set-it-and-forget-it feature, but the aesthetic payoff is huge if you’re prepared for a little tidying.
3. Defining the Core Elements of a Classic Cape Cod Façade
Before you commit to a Cape Cod look, it’s crucial to understand its DNA. This isn’t just about slapping some shingles on a house. Ask yourself these questions to refine your vision and ensure your project stays true to the style’s roots. This checklist will help you speak the same language as your architect or builder. Getting these foundational elements right is more important than any decorative flourish you add later.
⚠️ Real Talk
- What is my roof pitch? A classic Cape Cod has a steep roof, typically between a 10/12 and 12/12 pitch.
- Symmetry or Asymmetry? Decide early if you want a true, half, or three-quarter Cape, as it dictates window and door placement.
- How prominent should the chimney be? Traditionally, a large, central chimney was the heart of the home.
- What is the siding-to-trim ratio? Ensure trim is substantial enough to frame the features, not look like an afterthought.
Think of the classic Cape Cod aesthetic as a simple mathematical formula. It’s roughly 60% siding (whether clapboard or shingle), 30% roof, and 10% trim and accents (shutters, door). For a modern take, you might shift the formula: maybe 50% siding, 20% expansive window glass, 20% roof, and 10% minimal trim. Understanding this balance allows you to innovate while still honoring the home’s essential character. Change the materials, but respect the proportions.
4. Create a Cheerful Welcome with a Blue and Yellow Palette
Recreating this charming, colorful look is surprisingly accessible. The key is in the paint and curated details, not a massive structural overhaul. Here’s a rough estimate to achieve this specific vibe on a standard 1,500 sq. ft. Cape.
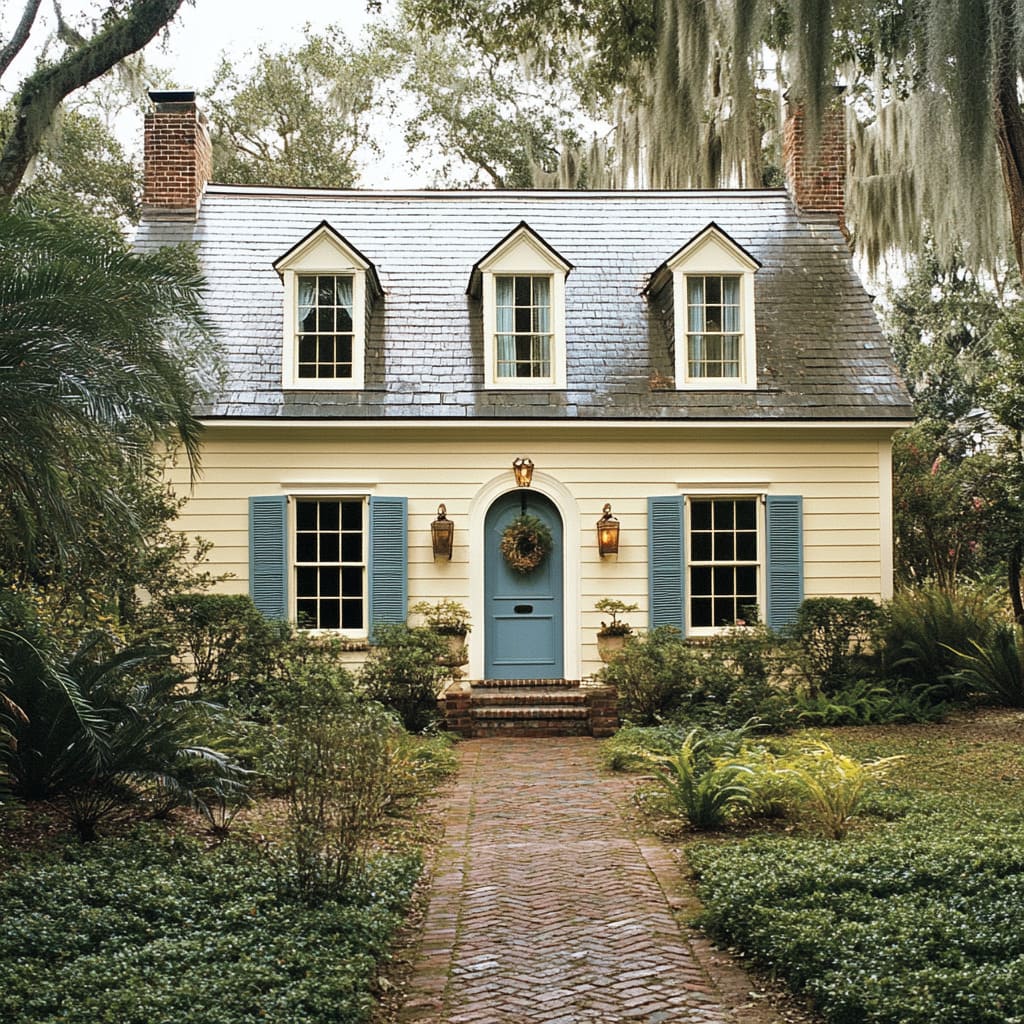
⭐ The One Thing
- Paint (Siding & Trim): $1,500 – $3,000 (Pro-grade exterior paint)
- Custom Arched Front Door: $2,500 – $6,000
- Louvered Shutters (6 pairs): $900 – $2,500
- Solid Brass Lanterns (2): $600 – $1,500
- TOTAL: $5,500 – $13,000
- Budget Alternative: Get the vibe for around $2,000 by painting your existing door, using high-quality vinyl shutters, and choosing brass-finished aluminum lanterns.
An arched wooden door is a showstopper, but it requires commitment. Wood expands and contracts with humidity, so it will need repainting or resealing every 2-4 years to prevent peeling and warping, especially if it gets direct sun or rain. Likewise, solid brass lanterns are gorgeous, but they will develop a patina over time. If you love the bright, shiny look, you’ll need to polish them annually. If you’re not up for that maintenance, you can either embrace the weathered look or opt for a powder-coated aluminum fixture instead.
5. Key Principles for a Modern Cape Cod Exterior
The secret to modernizing a Cape without losing its soul is to simplify and exaggerate. Instead of adding more details, you subtract them. Use a monochromatic color scheme, like all-white or all-grey, to unify the massing. Then, exaggerate the scale of one or two key features. Think oversized windows with minimal black frames, or a wider, more dramatic front porch. The goal is to distill the classic form down to its cleanest lines. Resist the urge to add fussy details; modernism is about confident restraint.
🔥 Trending Context
Why is the modern Cape Cod having such a moment? It’s the perfect answer to our collective desire for homes that feel both nostalgic and new. After years of sharp, sometimes cold minimalism, there’s a cultural shift towards “soft modernism.” We want the clean lines and open-plan living of contemporary design but with the warmth, history, and inviting scale of a traditional home. The Cape Cod, with its simple, strong geometry, provides the perfect canvas for this blend. It feels established yet allows for personal, modern expression.
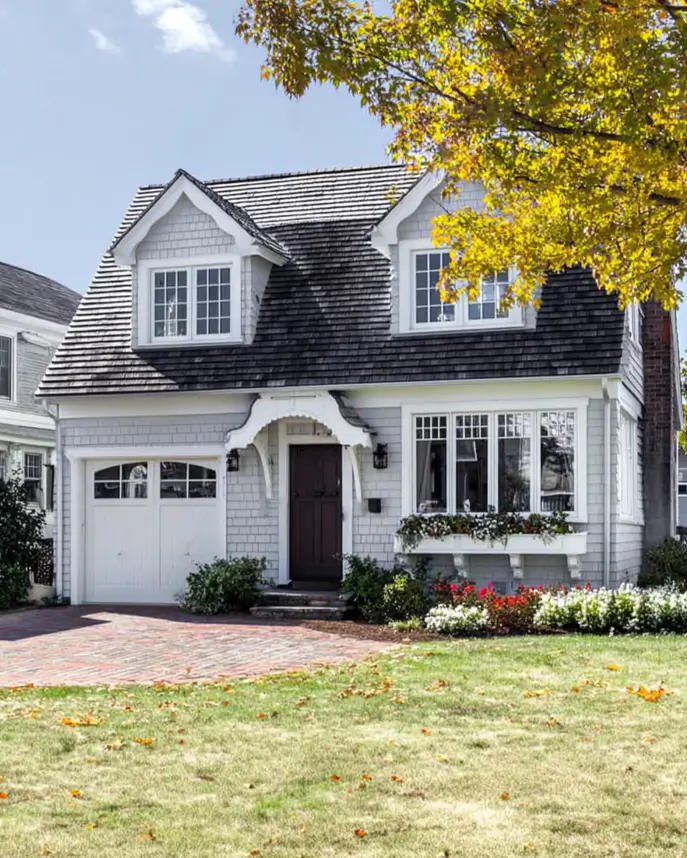
6. Add a Touch of Whimsy with a Striped Dormer Awning
It’s the awning. Absolutely, one hundred percent, it’s the black and white striped dormer awning. Remove it, and you have a beautiful but expected gray-shingled home. With it, the house gains a personality. It’s a playful, slightly European touch that injects bespoke charm and breaks up the sea of gray siding. It suggests a thoughtful homeowner who doesn’t take themselves too seriously. This single detail elevates the entire facade from “nicely done” to “memorable and special,” proving that small, smart additions can have an outsized impact.
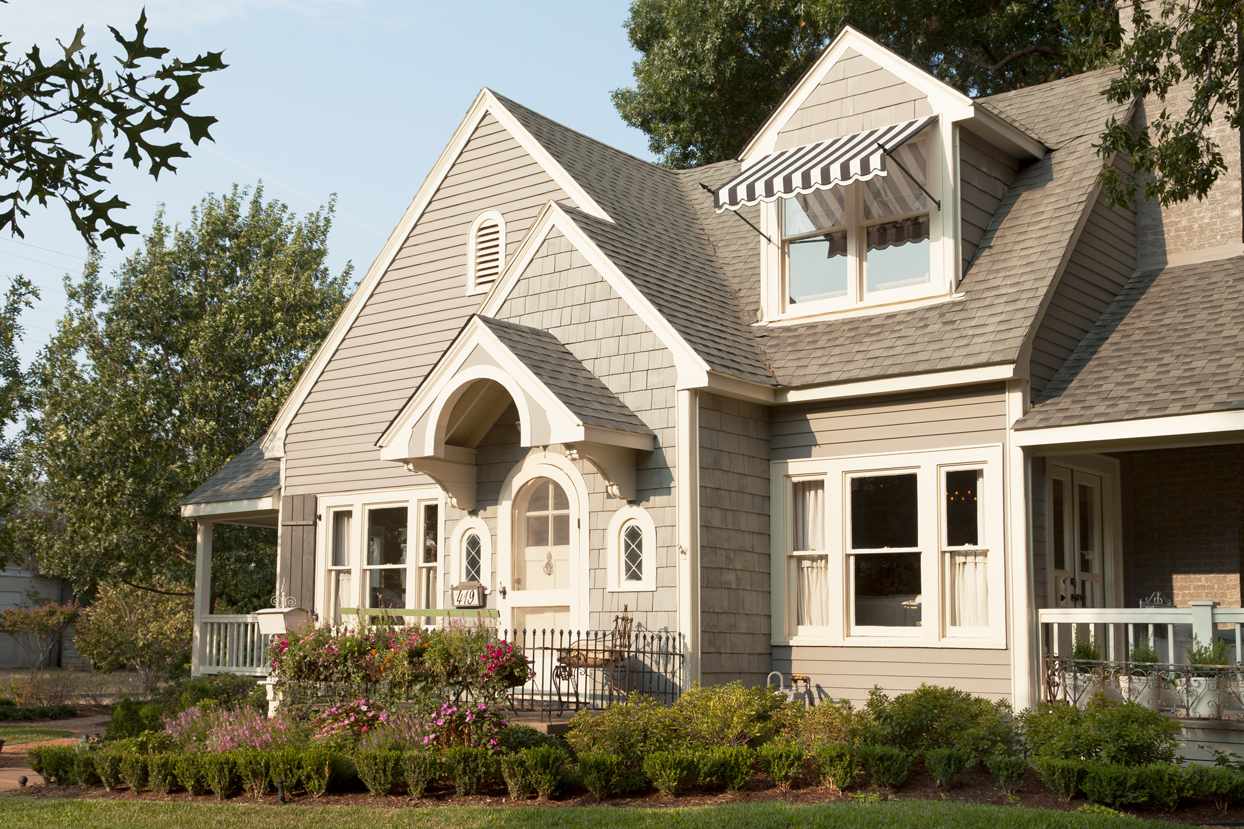
💸 Get This Look For Less
You don’t need a custom Sunbrella awning to capture this spirit. You can find surprisingly affordable and durable fixed awnings online for $200-$400. For a super-budget-friendly version, you could even create a DIY decorative awning for a window box using outdoor fabric and a simple wooden frame for under $100. The key is the crisp stripe and the confidence to add a little flair. This proves style isn’t about price, it’s about the idea. For another example of a high-impact accent, see the colorful doors in Idea #16.
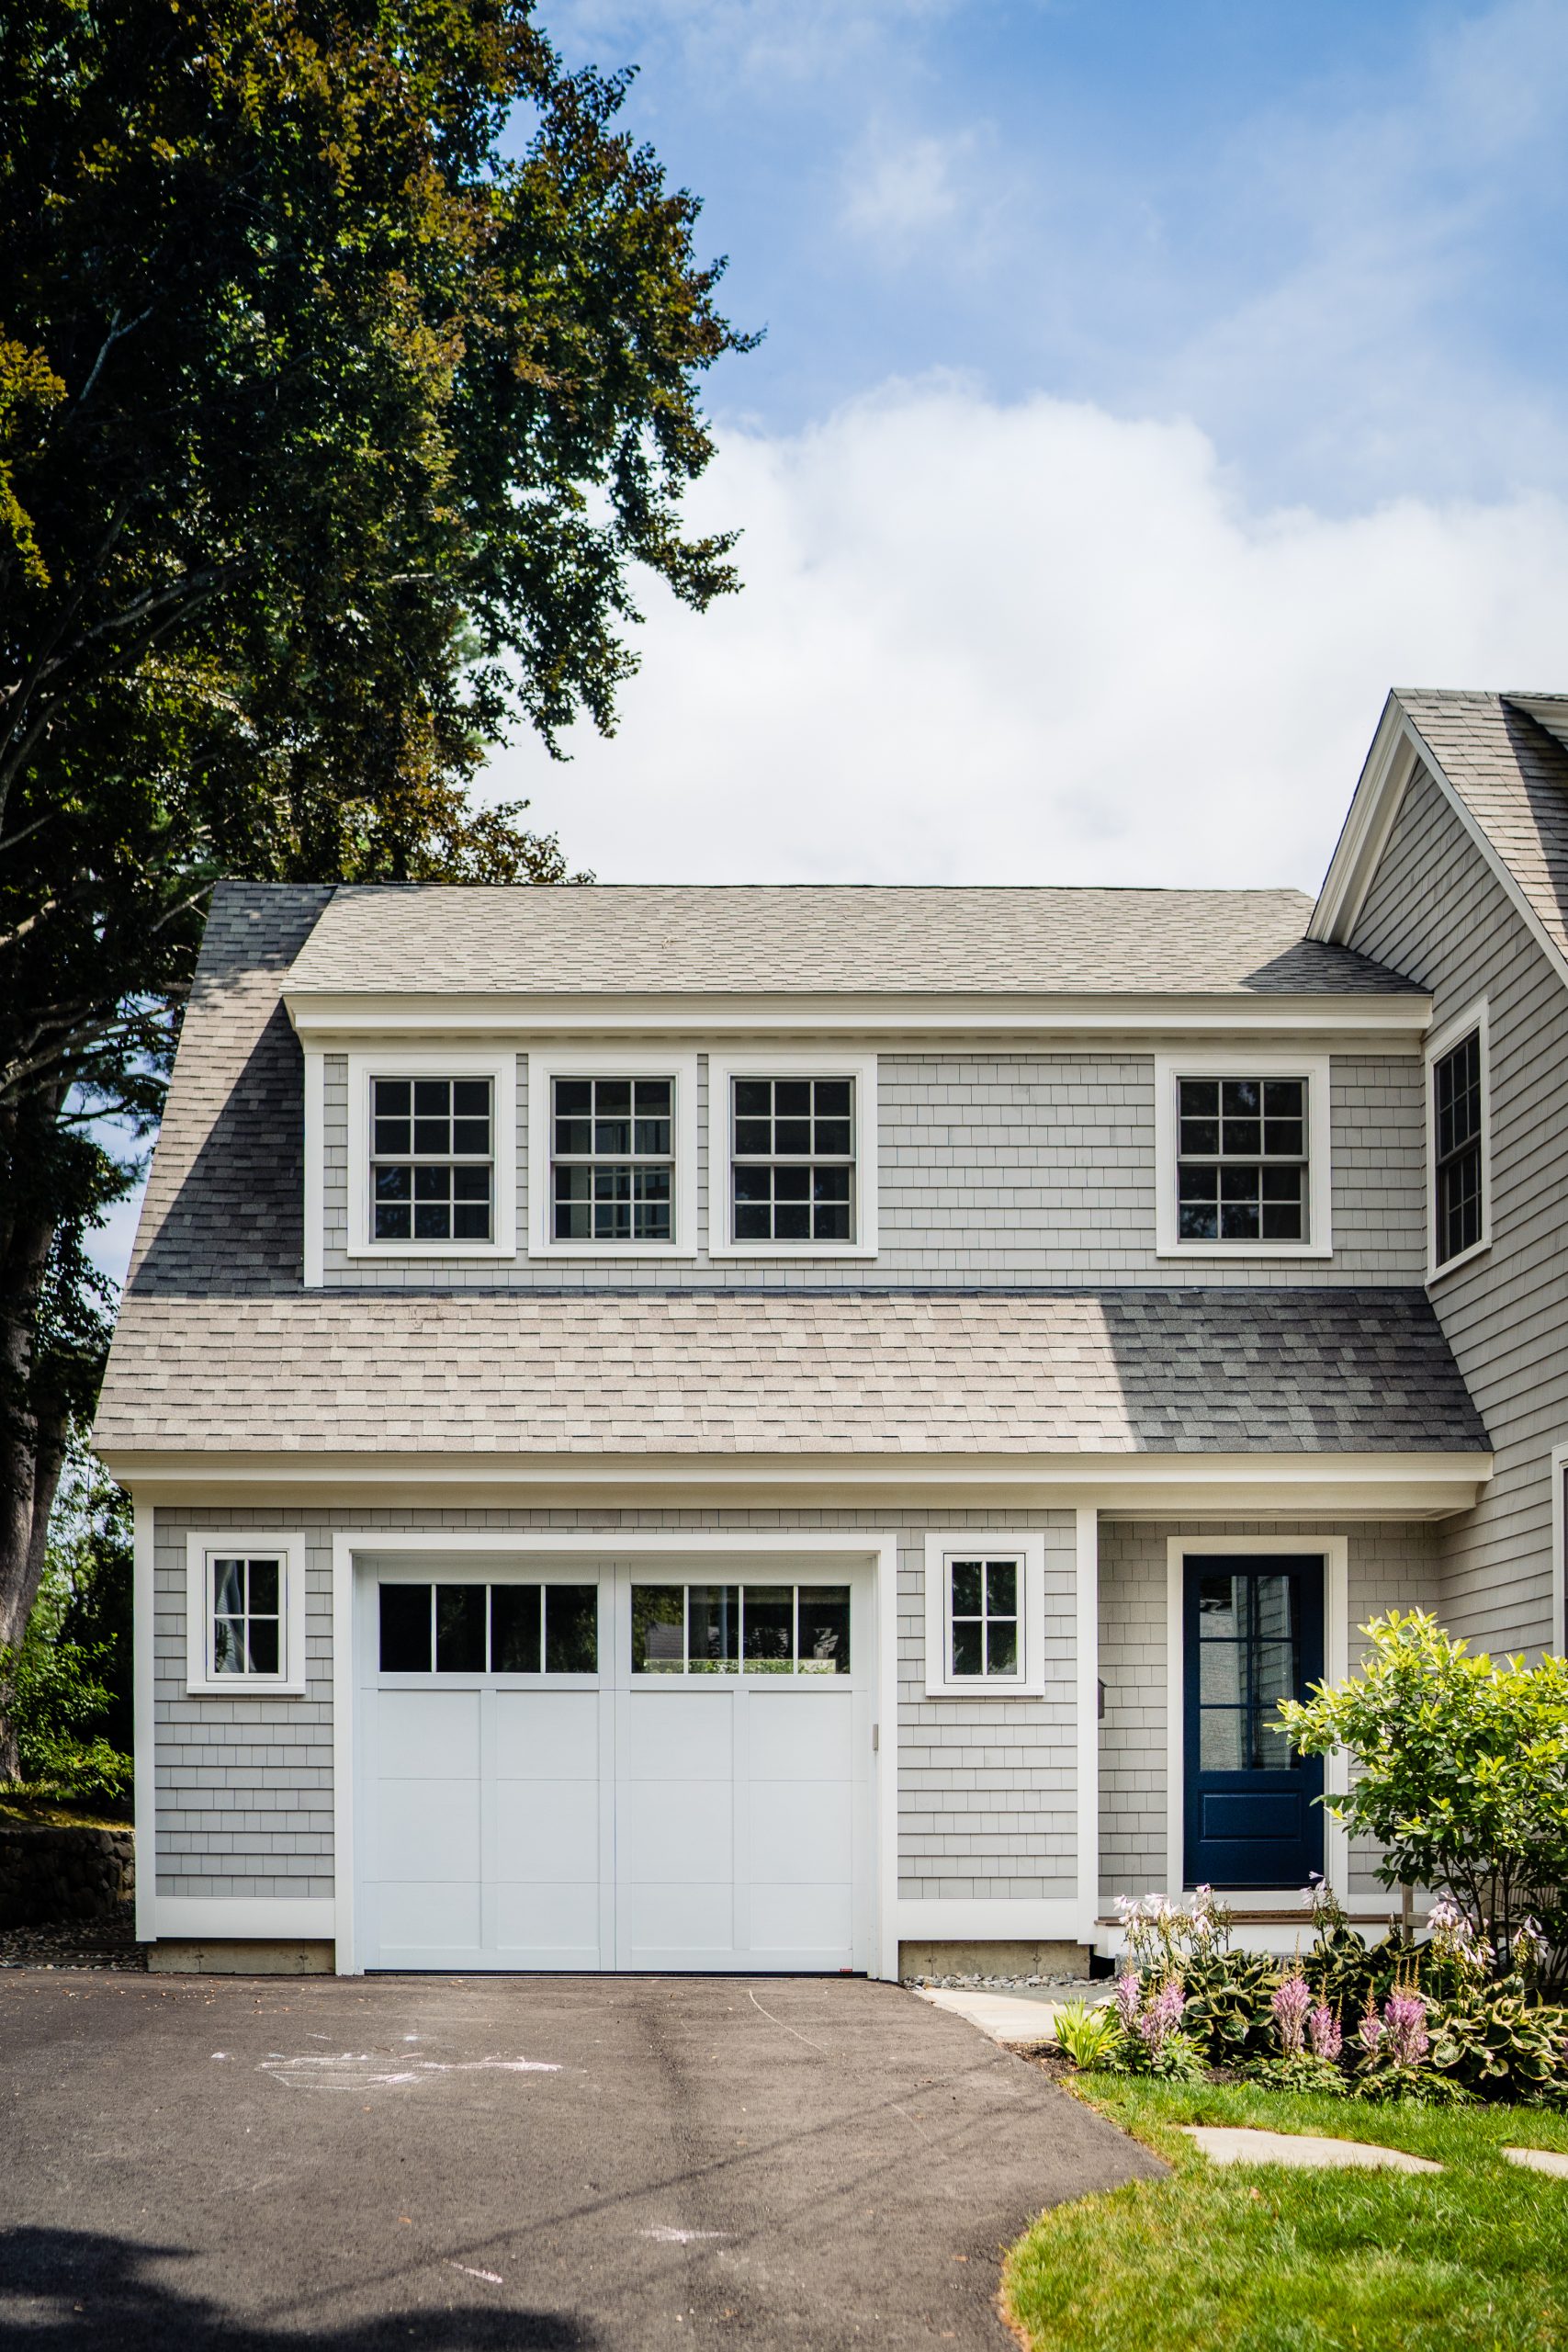
7. Balance a Two-Car Garage with a Classic Bay Window
A simple flower box can instantly add life and color to a bay window. Here’s a quick guide to building one yourself.
- Measure the width of your bay window’s base and decide on a height (typically 8-10 inches).
- Construct a simple box using cedar or pine boards (cedar is more rot-resistant). Use galvanized screws to assemble the bottom and four sides.
- Drill at least five half-inch drainage holes in the bottom of the box. This is non-negotiable for healthy plants.
- Sand, prime, and paint the box to match your home’s trim color for a seamless, built-in look.
- Mount the box securely to the house using heavy-duty brackets. Ensure they are screwed into studs, not just the siding.
💡 Designer Tip
This design works best on a medium to large suburban lot, typically 7,500 sq. ft. or more. The inclusion of a two-car garage gives the home a significant footprint, and it needs adequate space around it to avoid feeling cramped. The width of the house requires a wider lot to maintain pleasing proportions and allow for the kind of landscaping and driveway seen here. For a Cape Cod idea better suited to a smaller, more narrow property, check out the symmetrical design in Idea #23.
8. Planning for a Second-Story Addition or Dormer Expansion
Expanding upward is a classic Cape Cod strategy, but it requires careful planning. Before you even call an architect, work through this initial checklist to make sure you’re prepared.
🧹 Maintenance Reality
- Check Setbacks & Height Limits: Your local zoning laws will dictate how high you can build and how close you can be to your property lines. Don’t fall in love with a plan that isn’t legal.
- Foundation Assessment: Have a structural engineer confirm that your existing foundation can support the weight of a second story. This is a critical, can’t-skip step.
- Roofline Integration: How will the new roofline tie into the old? A poorly-designed addition looks tacked-on. Collect photos of additions you like to show your designer.
- Mechanicals Plan: How will you run HVAC, plumbing, and electrical to the new space? It’s often more complex than people assume.
Let’s talk about the reality of blending old and new construction. It is incredibly difficult to make new materials perfectly match old ones. Siding will be from a different batch, trim profiles may be slightly off, and even white paint can look different. The most successful additions often don’t try to match perfectly. Instead, they aim to “complement.” Sometimes, choosing a different but harmonious siding material for the dormers can look more intentional and stylish than a near-miss match. Be flexible and listen to your builder’s advice on sourcing materials.
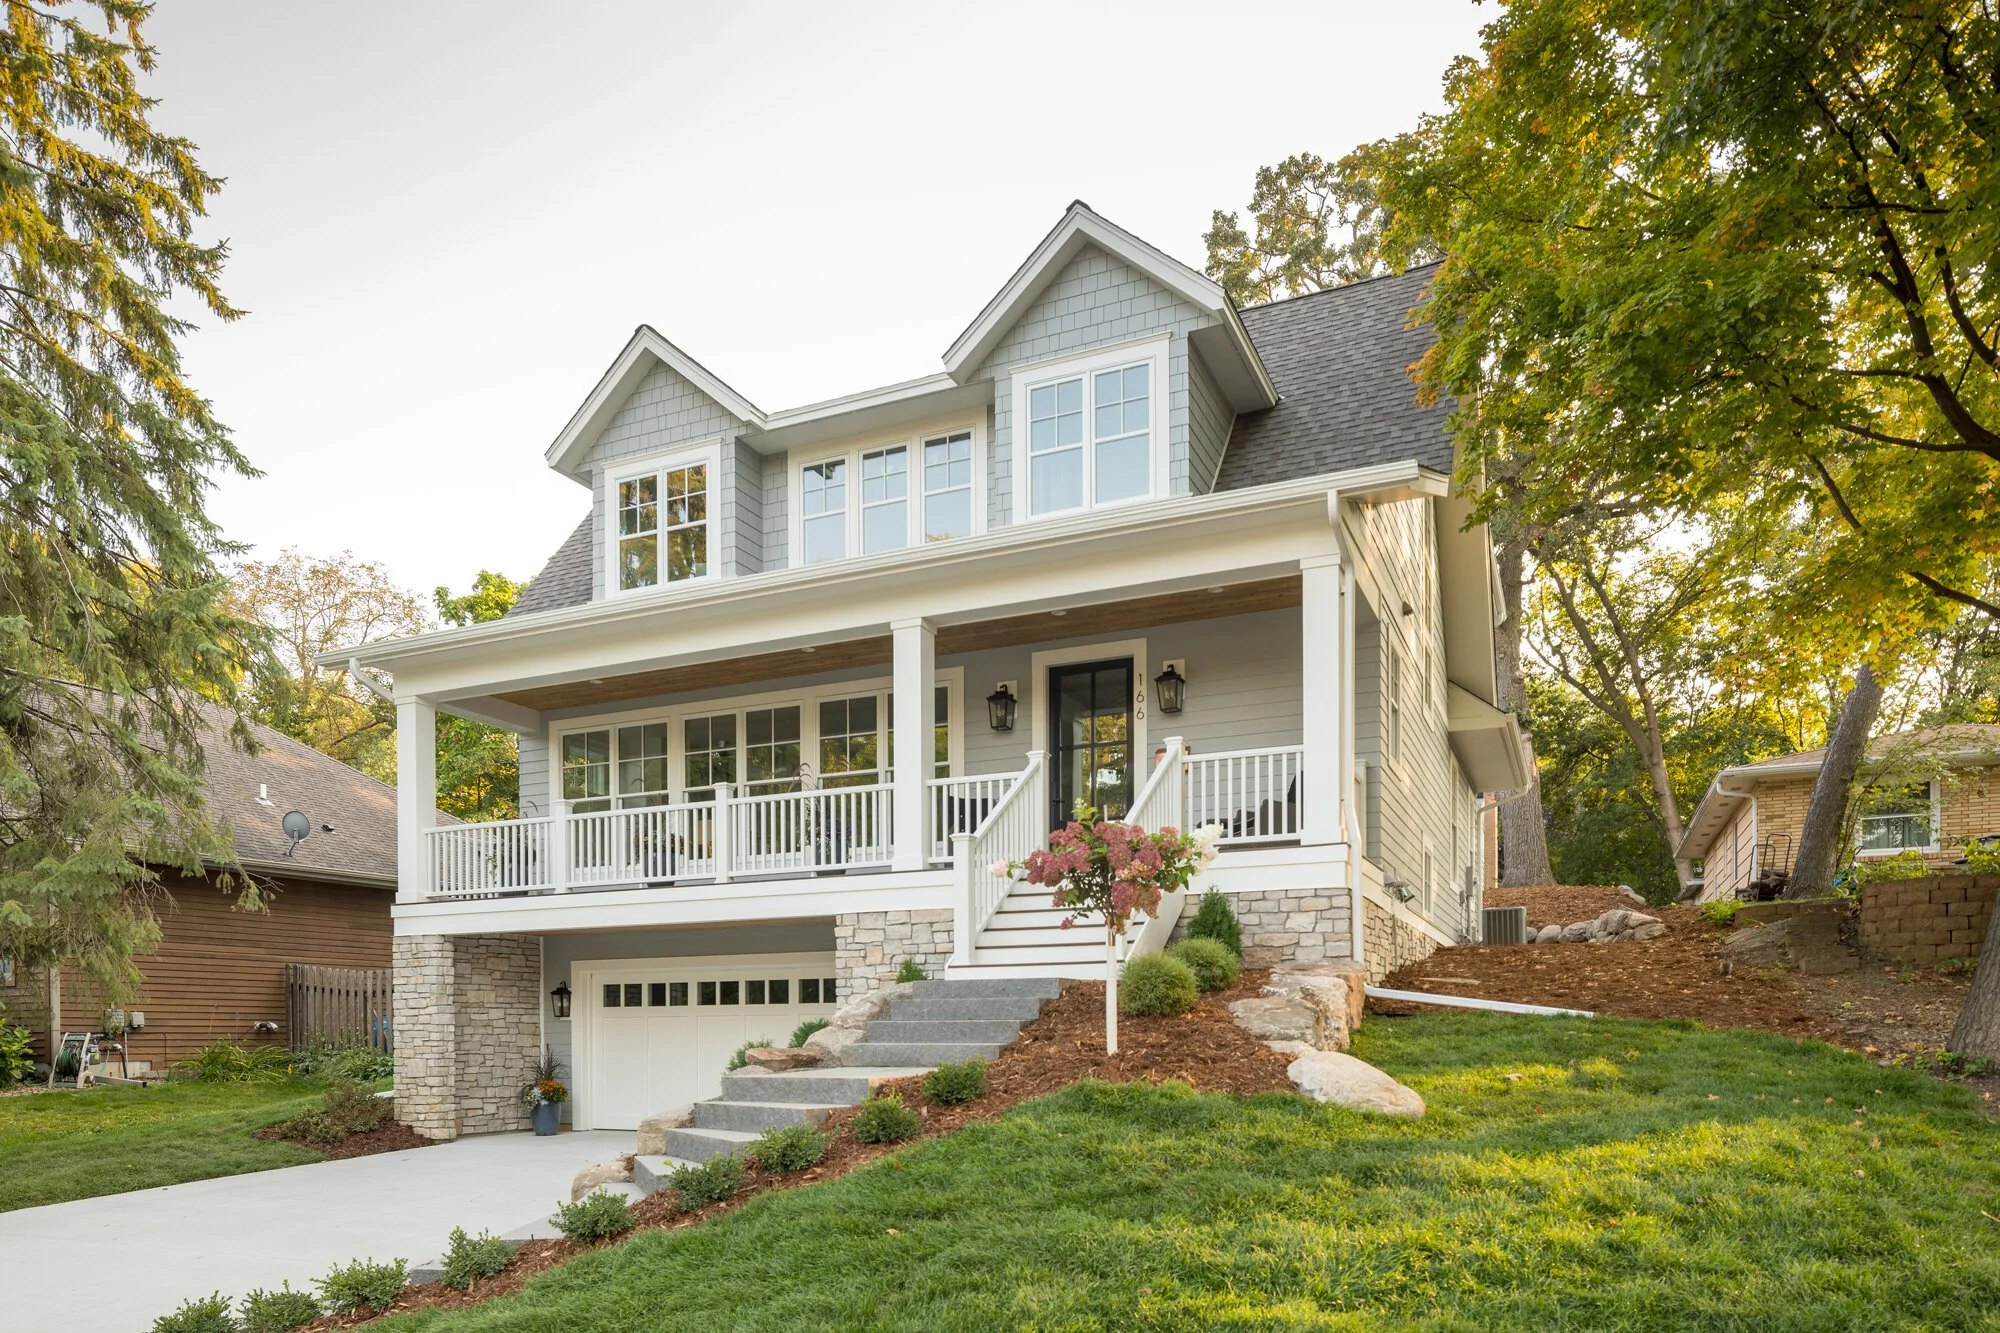
9. Ground a Blue-Gray Cape with a Natural Stone Foundation
What makes this home feel so substantial and rooted in its landscape is the masterfully layered use of materials. The design creates a visual hierarchy from the ground up. It starts with the heavy, textural stone of the foundation and retaining walls, which feels solid and permanent. This transitions to the crisp white of the porch columns, providing a clean horizontal break. Finally, the light blue-gray siding of the main house feels lighter and more residential. This progression from rugged to refined gives the home a sense of history and permanence.
🎯 What Makes It Work
A natural stone foundation is incredibly durable, but it’s not zero-maintenance. The primary task is checking the mortar joints every few years. Over time, small cracks can develop from freeze-thaw cycles. If you see crumbling mortar, it’s important to have it professionally repointed (about $20-$30 per square foot) to prevent water from getting behind the stone and causing major issues. Also, keep an eye out for efflorescence—a white, powdery deposit—which can indicate moisture problems. It can usually be cleaned with a stiff brush and water.
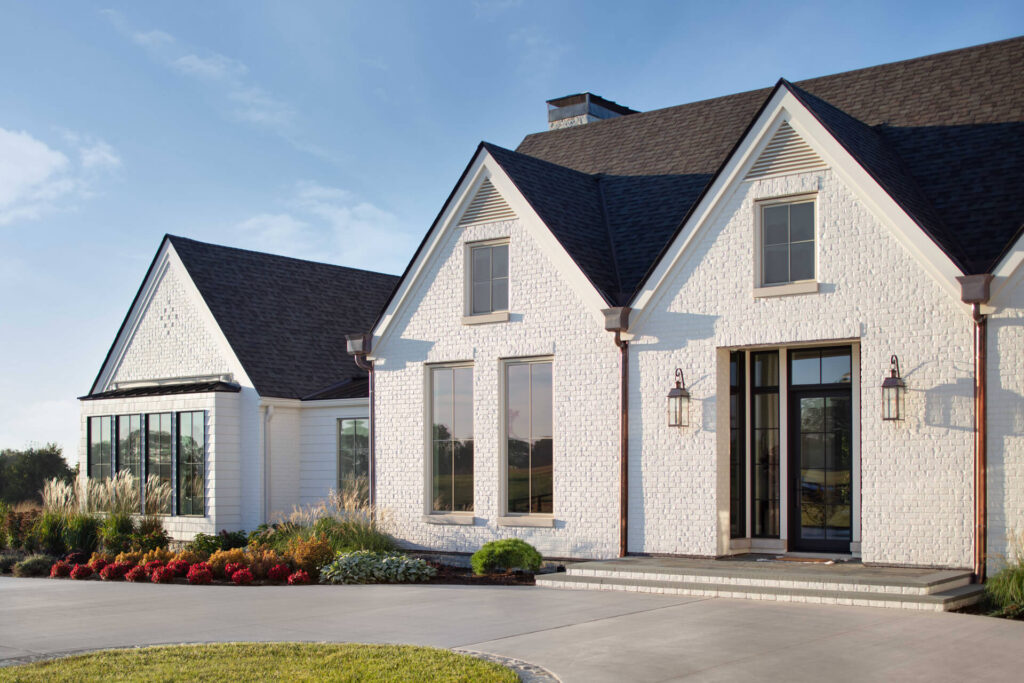
10. Mix Modern White Brick with the Warmth of Copper
This high-contrast, elegant look is a significant investment, primarily due to the material choices. The brick, copper, and extensive window package are all premium features. Here’s a ballpark for a large home like this.
✅ Before You Start
- White Brick Siding (Installed): $30 – $50 per sq. ft.
- Copper Gutters & Downspouts: $40 – $100 per linear foot
- Black Framed Windows (Whole House): $30,000 – $80,000+
- Asphalt Shingle Roof: $15,000 – $25,000
- TOTAL: Substantial, likely well into six figures for a new build or full renovation.
- Budget Alternative: Get a similar vibe by painting existing brick white, using black aluminum gutters, and painting your existing window frames black. This is what we call facade-level thinking, as seen in Idea #1.
The beauty of real copper is in its living finish. When installed, it will be bright and shiny like a new penny. But within a few months, it will start to darken, and over several years, it will develop that coveted blue-green patina (verdigris). Do NOT seal it if you want this effect. The rate of change depends on your climate’s humidity and air quality. You need to love the entire lifecycle of the material, from shiny to dark to green. If you only love one stage, you’ll be disappointed. This is a material that tells a story over time.
11. Achieve Grandeur with Multiple Gables and an Arched Entry
This is a home designed for a grand scale. To pull off a complex roofline with this many gables and a prominent arched entryway, you need a lot width of at least 100-120 feet and a deep setback from the street. The minimum heated square footage to justify this level of exterior complexity would be around 4,000 square feet, with ceilings of at least 9 feet on the main floor. On a smaller lot, this design would feel overwhelming and compressed, losing its intended elegance and appearing ostentatious instead.
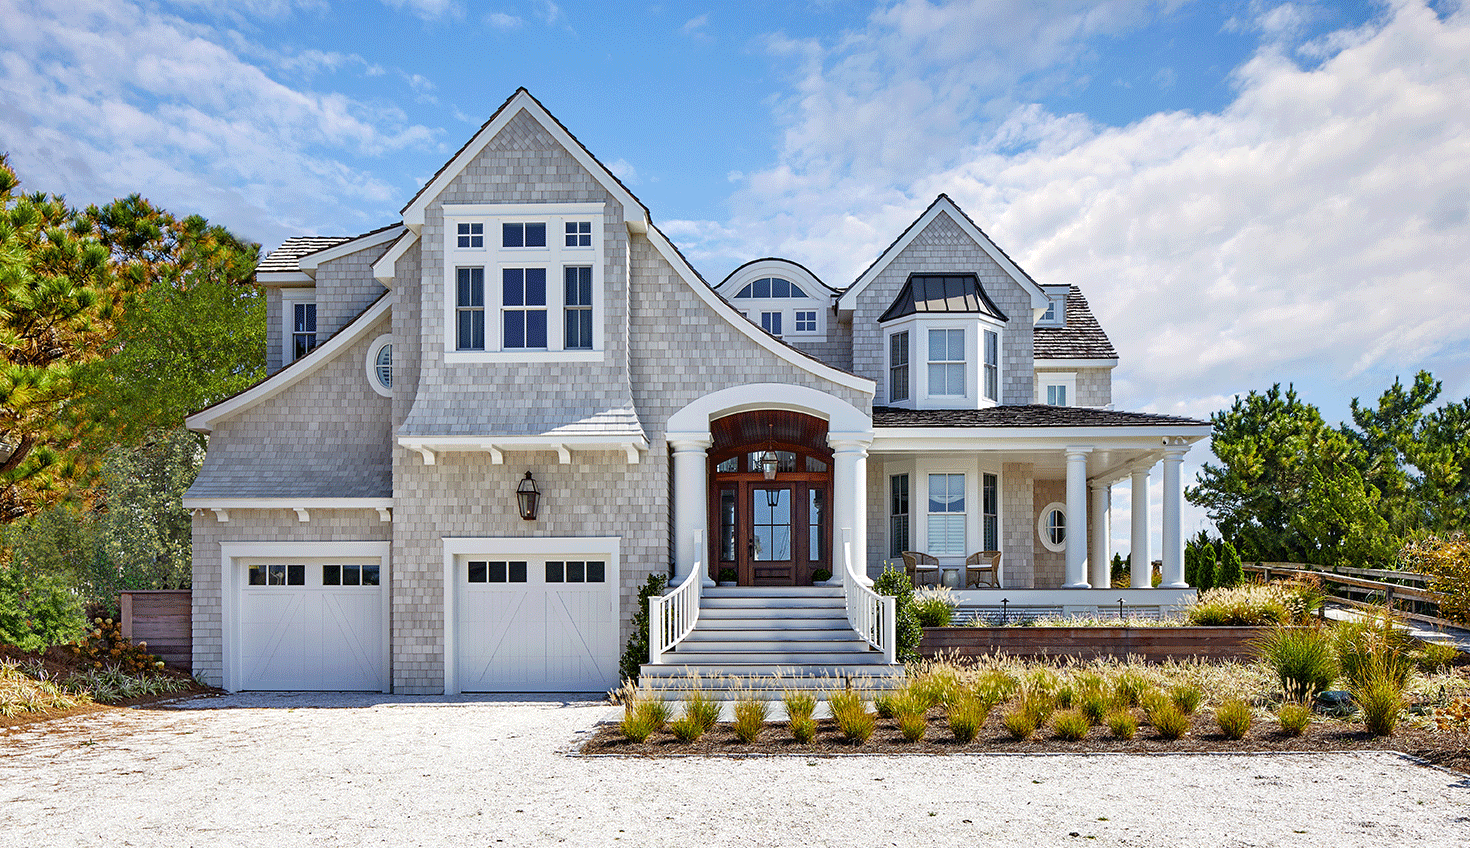
💰 Budget Breakdown
The single element holding this entire, complex design together is the dark wood arched entry door. In a sea of cool-toned grey shingles and crisp white trim, the door provides a necessary focal point of warmth and organic texture. Its arch shape echoes in the windows but is rendered in a richer, more commanding material. It’s the visual ‘you are here’ sign for the entire facade. If you were to swap it for a standard white door, the house would instantly feel less custom, less grand, and less welcoming.
12. Pair Natural Cedar Shingles with Deep Blue Shutters
The visual formula here is a perfect balance of texture, color, and crispness. It breaks down to roughly 70% warm texture (the cedar shingles), 20% crisp neutral (the white trim and columns), and 10% saturated accent color (the dark blue shutters). This balance is key. The large expanse of wood prevents the home from feeling sterile, the white trim keeps it looking sharp and defined, and the pop of blue adds personality and a classic coastal feel. You could swap the blue for a deep green or black and maintain the same successful ratio.
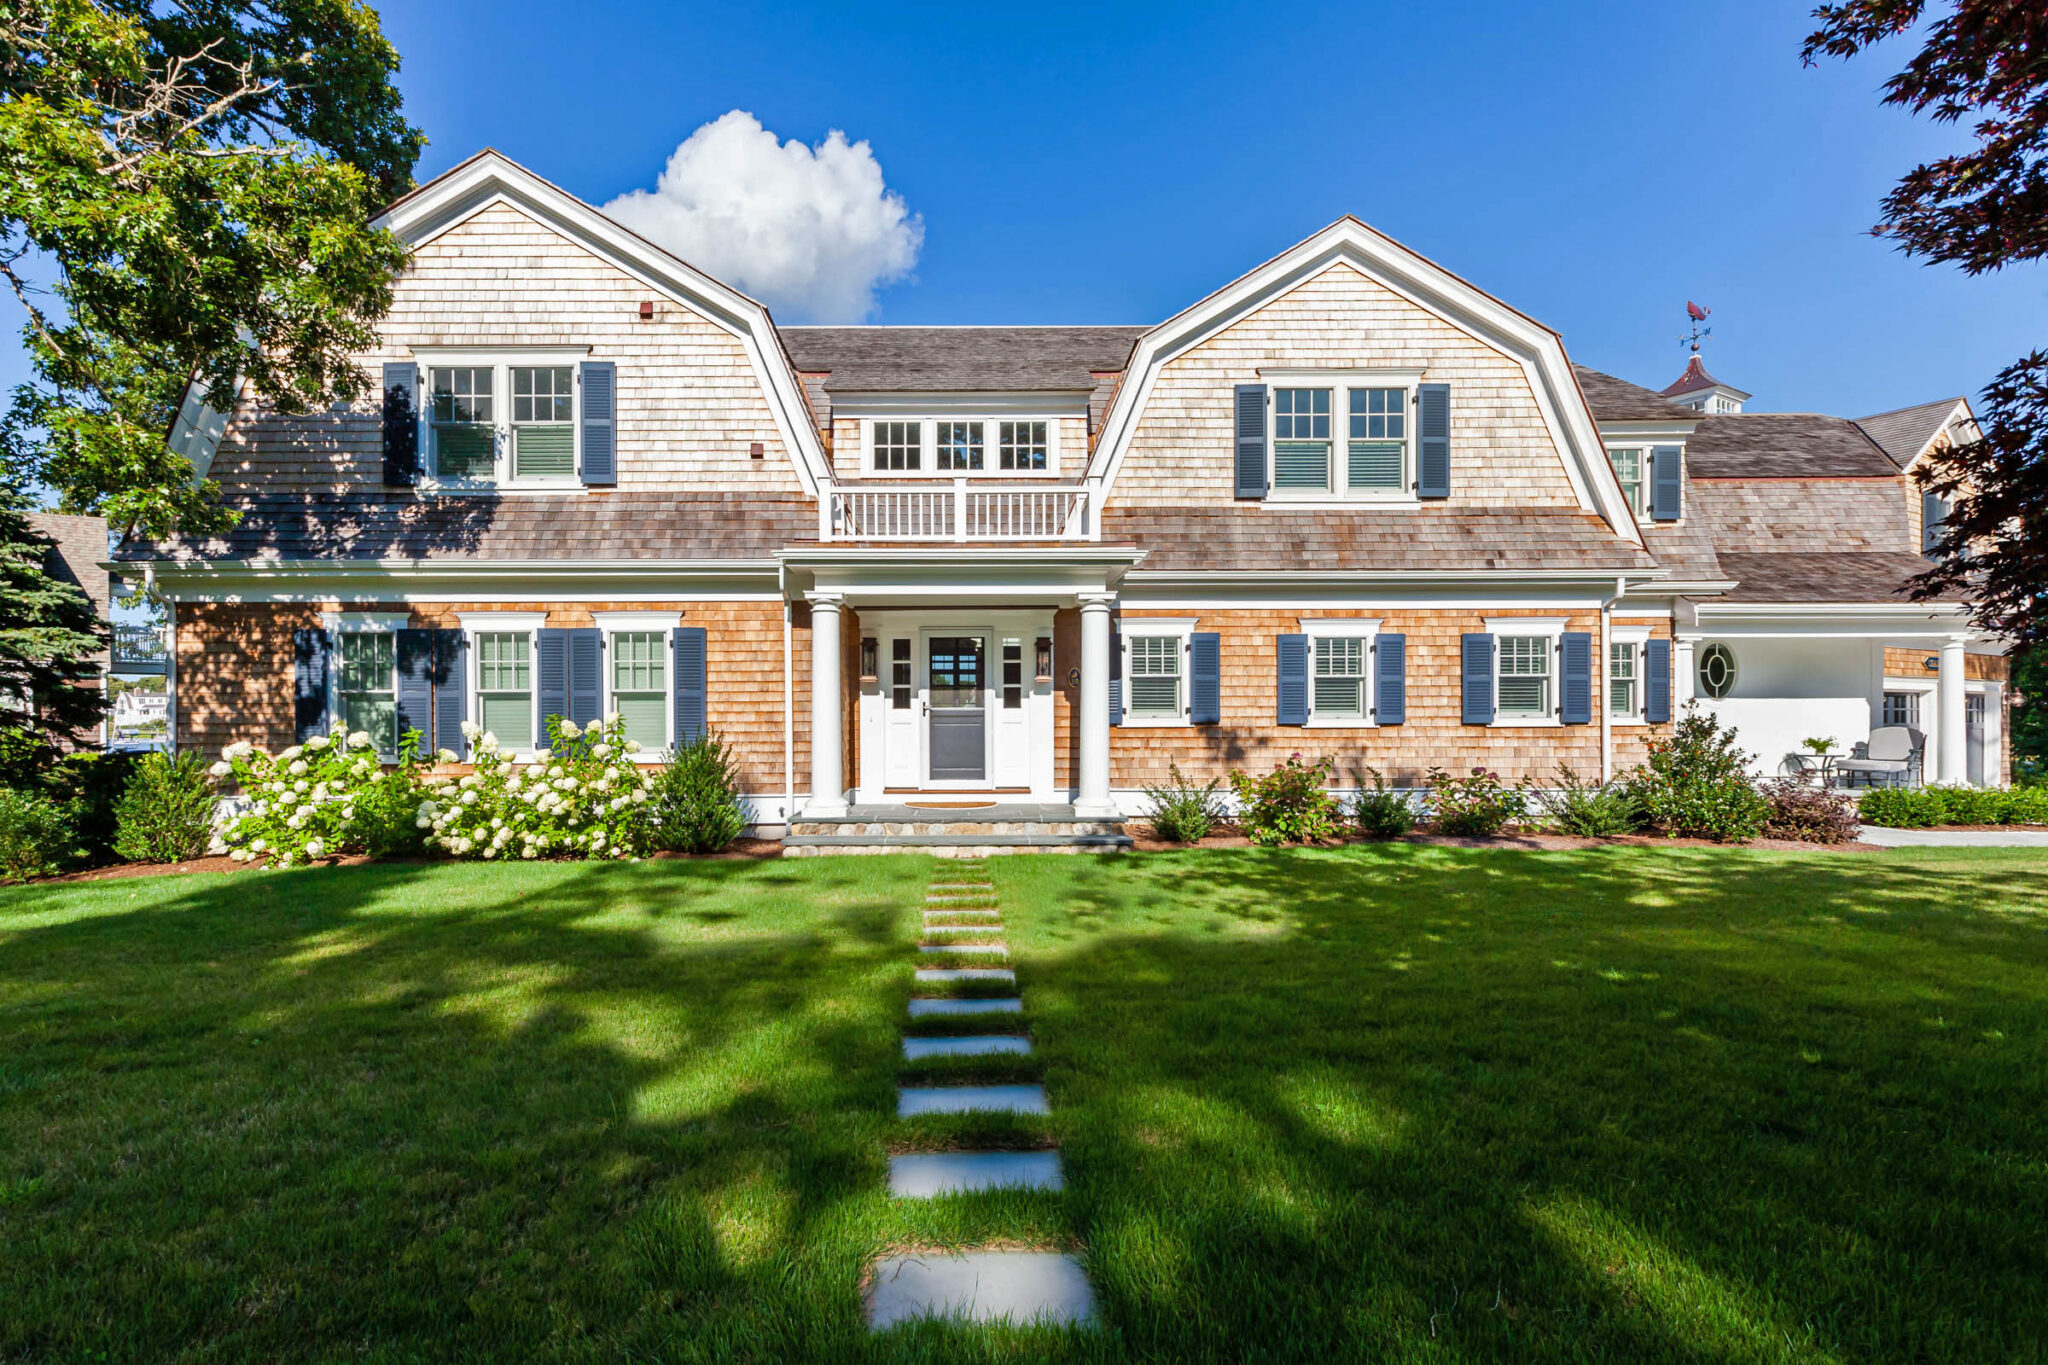
📏 Scale Guide
Real cedar shingles are beautiful but pricey. To get this look for less, consider using vinyl or fiber cement shingles that have a realistic cedar-look texture and grain. Brands like CertainTeed and James Hardie offer fantastic options that cost 30-50% less than real wood and require far less maintenance. You can find ready-made vinyl shutters at any home improvement store for $50-$100 a pair. A gallon of quality exterior paint for the front door is another $60. You can achieve this entire aesthetic on a much more approachable budget. Compare this earthy look with the painted shingles of Idea #13.
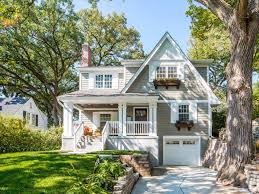
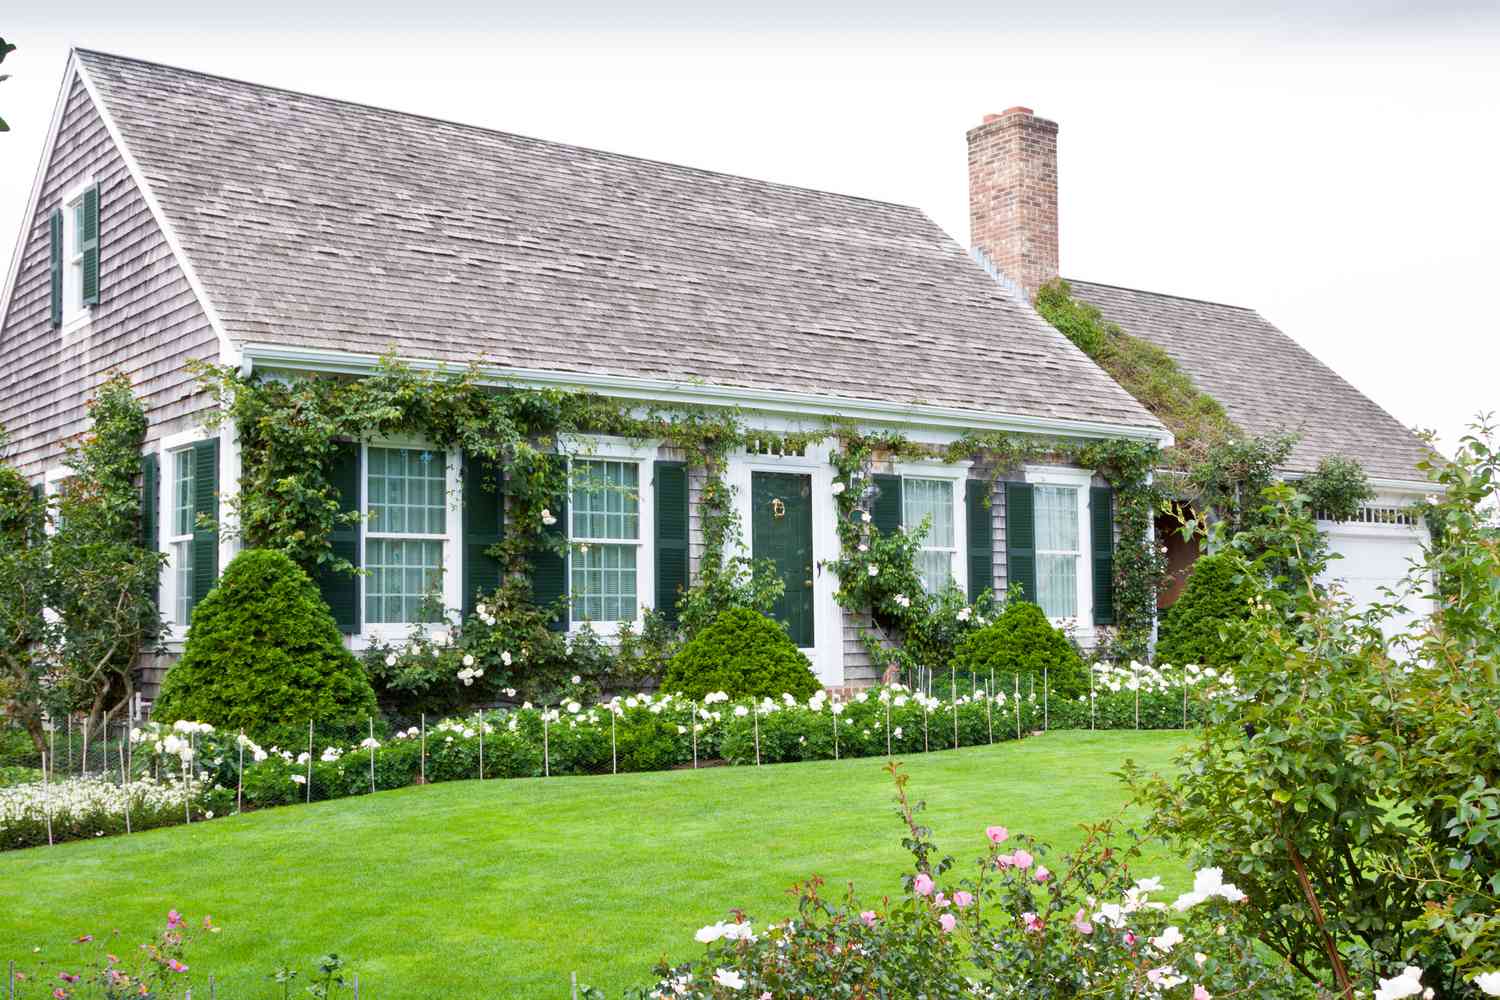
13. Let Blue Hydrangeas Define Your Summer Curb Appeal
The magic of this scene is the brilliant use of complementary colors. The weathered grey shingles and white trim of the house create a cool, neutral backdrop. Against this canvas, the vibrant blue of the hydrangeas is electric. Blue and grey are analogous (next to each other on the color wheel), creating a serene, cohesive feel, while the pops of green foliage add life. It’s a masterclass in letting a single, powerful landscaping element become the star of the show. The house is the supporting actor; the hydrangeas get top billing.
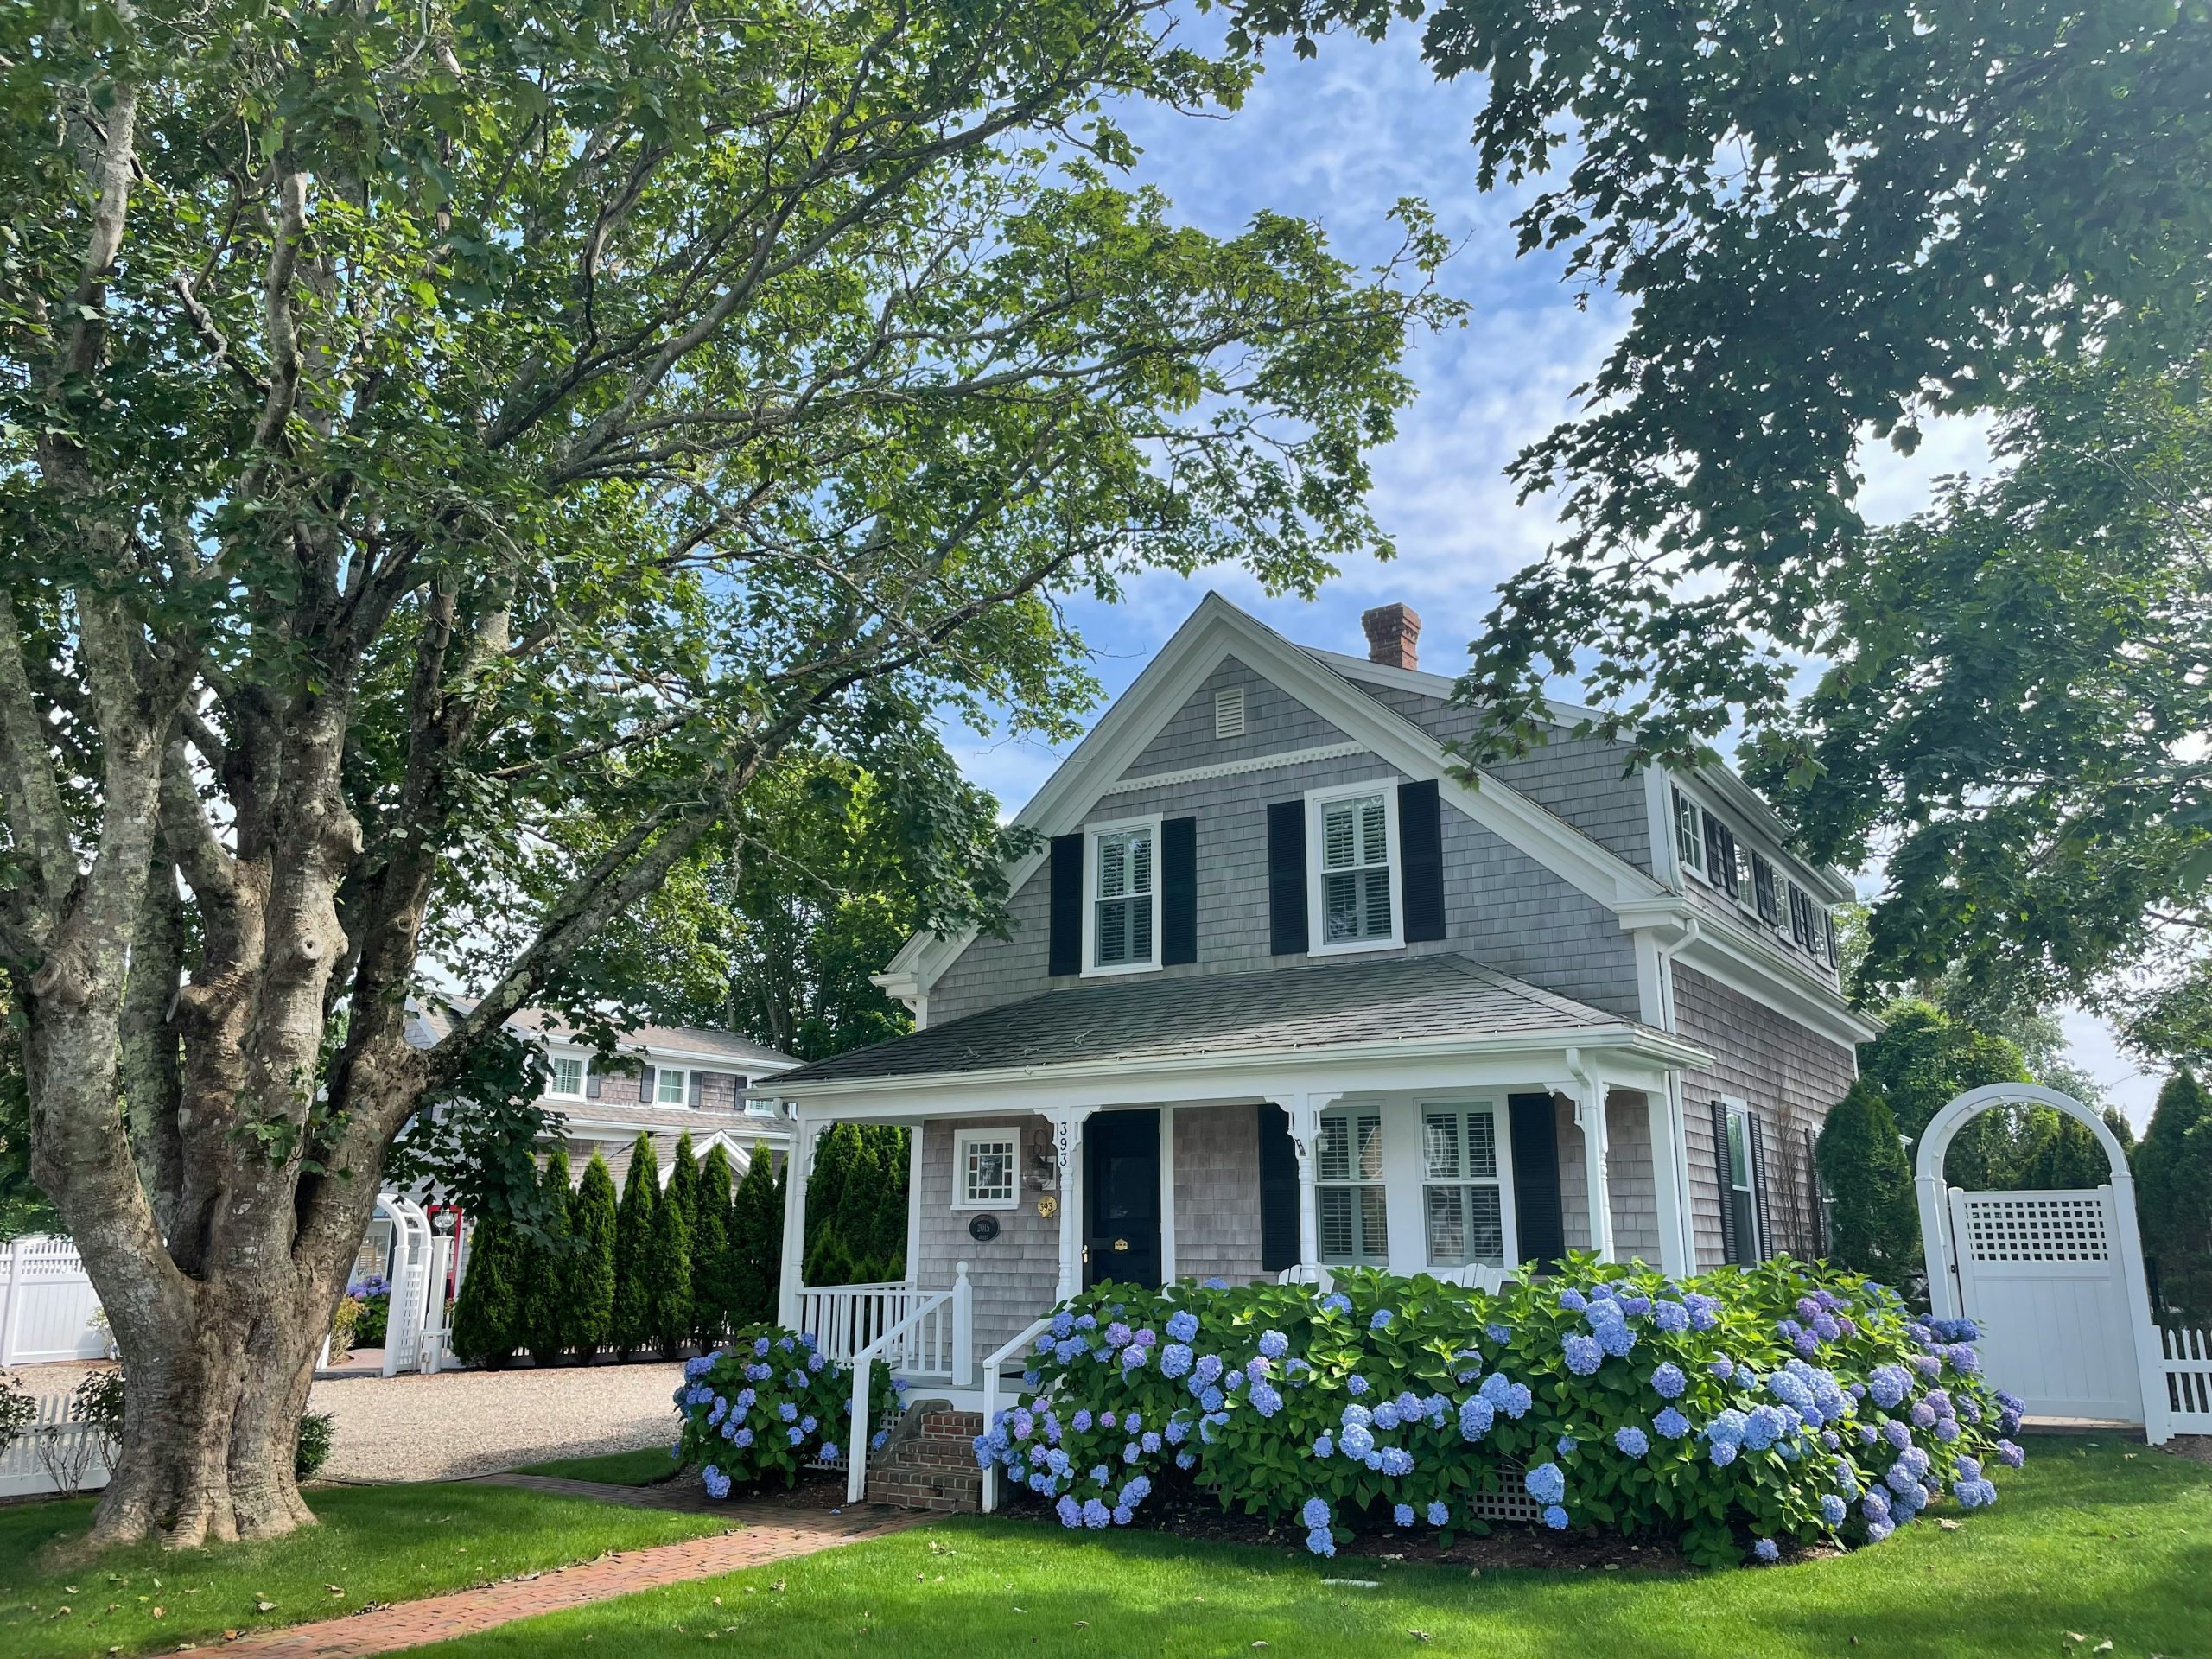
🔧 How-To Brief
Want that vibrant, deep blue in your hydrangeas and not a pale lavender or pink? The secret is your soil’s pH. Blue flowers require acidic soil (a pH of 6.0 or lower). You can make your soil more acidic by adding a soil acidifier, which you can buy at any garden center. Look for products containing sulfur or aluminum sulfate. Start applying it in the spring as the plant begins to grow. It’s a simple trick that landscape designers use to guarantee the color they want, and it works like a charm.
14. Anchor a Gray Façade with a Natural Wood Double Door
A solid wood entry door is a thing of beauty, but it’s a commitment, especially if your porch doesn’t offer full protection from sun and rain. Direct sun exposure can cause the finish to peel and the wood to fade in as little as two years. Rain and humidity can cause the wood to swell, making the doors difficult to open and close. To keep them looking their best, you’ll need to sand and re-apply a high-quality marine varnish or exterior-grade sealant every 2-3 years without fail. It’s a labor of love for a truly stunning feature.
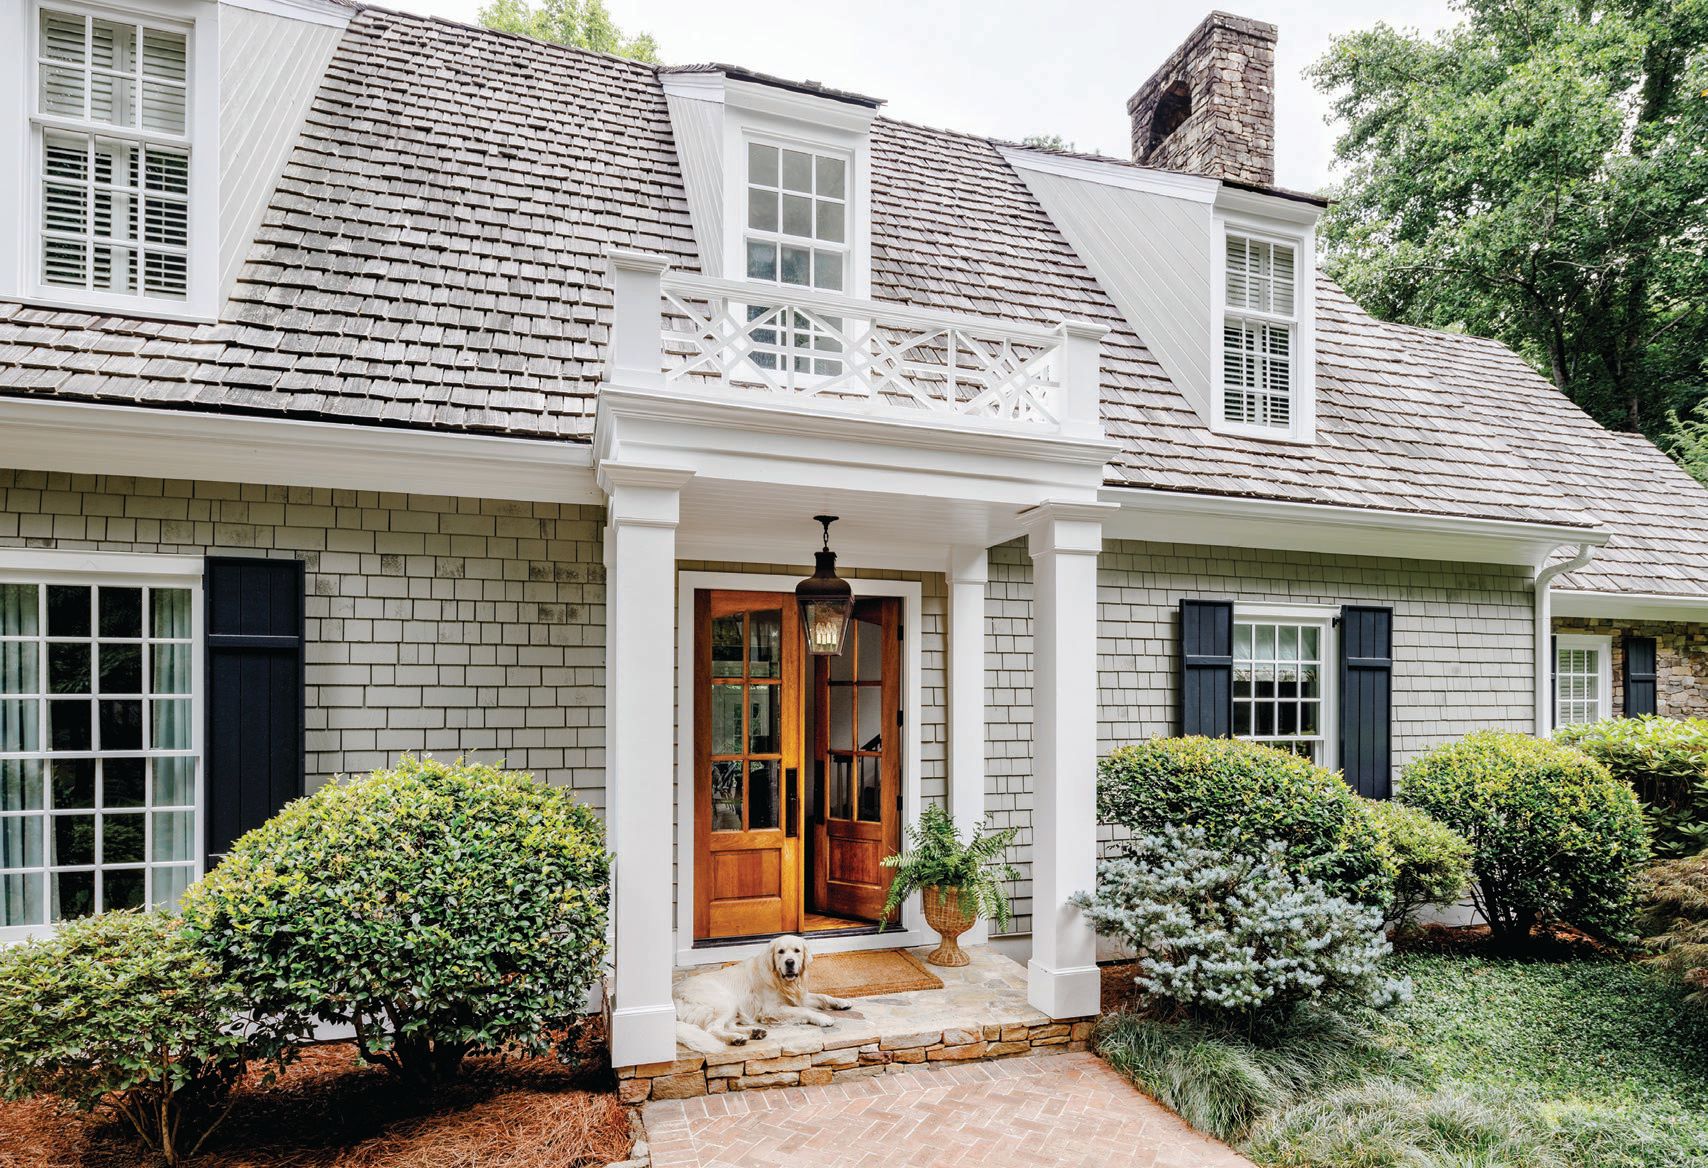
📐 Style Math
Choosing the right exterior lantern is about more than just looks; it’s about scale and placement. Here’s a quick guide:
- Scale: For a double door like this, the lantern should be approximately one-quarter of the door’s height. A small lantern will look lost and cheap.
- Placement: Center the lantern above the door frame. The bottom of the fixture should be at least 6 inches above the top of the door to allow for clearance and prevent it from feeling crammed.
- Bulb Choice: Always choose a bulb with a warm white color temperature (2700K). A cool or daylight bulb can look harsh and sterile at an entryway.
- Finish: Match the lantern’s finish to your door hardware for a cohesive, intentional look. Here, a dark bronze or black finish ties in beautifully.
15. Make a Statement with Bold, Dark Red Window Frames
This look is a brilliant exercise in the 80/20 rule. The house is 80% calm, neutral, and classic, with its light gray shingle siding and matching roof. This serene base allows the final 20%—the bold, dark red window and door frames—to make a massive impact without overwhelming the design. This formula allows for personalization; you could swap the red for a deep navy, a forest green, or even a dramatic black and the principle would still hold. The key is a quiet majority and a loud, confident minority.
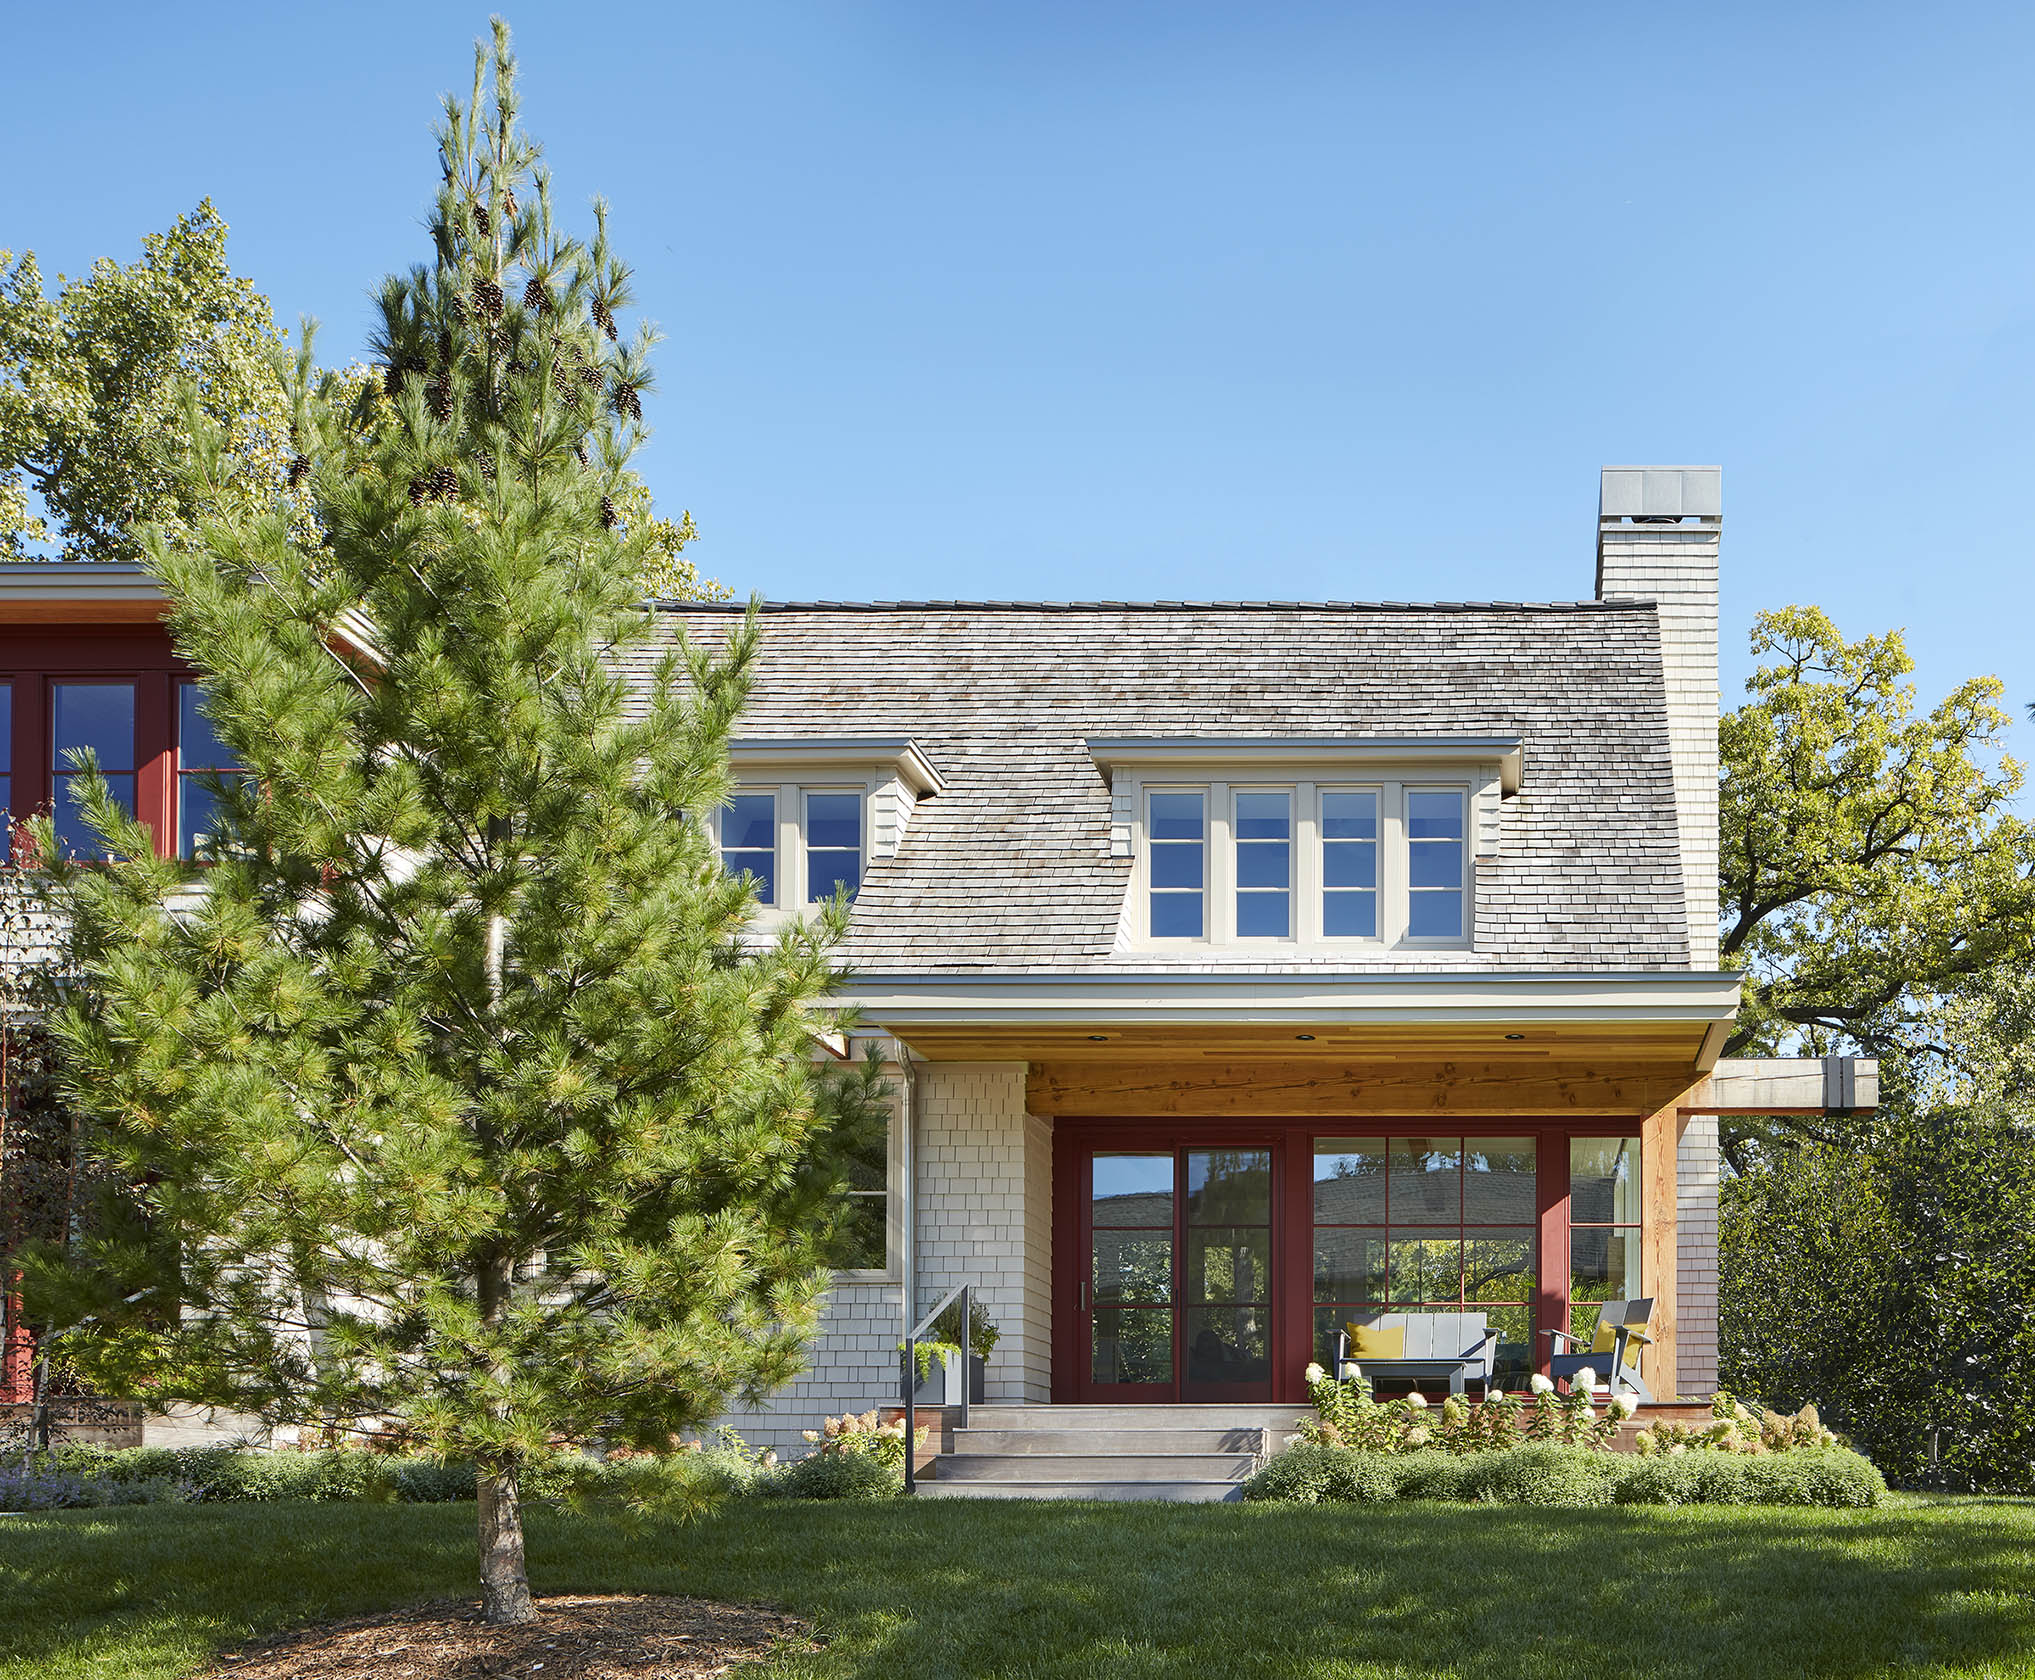
⚠️ Real Talk
We’re seeing a major trend away from the all-white-everything farmhouse look and towards more personal, colorful expressions in exterior design. For years, the default was white windows, or maybe black for a modern edge. Now, homeowners and designers are embracing colors like deep greens, blues, and rich reds for their window frames. It’s a sign of growing confidence in design choices and a desire for homes that feel unique and curated, not just copied from a catalog. This house is a perfect example of that shift.
16. Inject Joyful Energy with Bright Yellow Doors
The hero of this entire design is undeniably the choice of a sunny, vibrant yellow for the doors. It’s a shot of pure optimism. Against the calm, traditional backdrop of the blue siding and white trim, the yellow is unexpected, playful, and utterly joyful. It tells you that the people who live here don’t take themselves too seriously. It’s proof that you don’t need to change the architecture to completely change the mood of your home. A single gallon of paint and a confident color choice can do all the heavy lifting. Compared to the classic look in Idea #12, this shows the power of a bold accent.
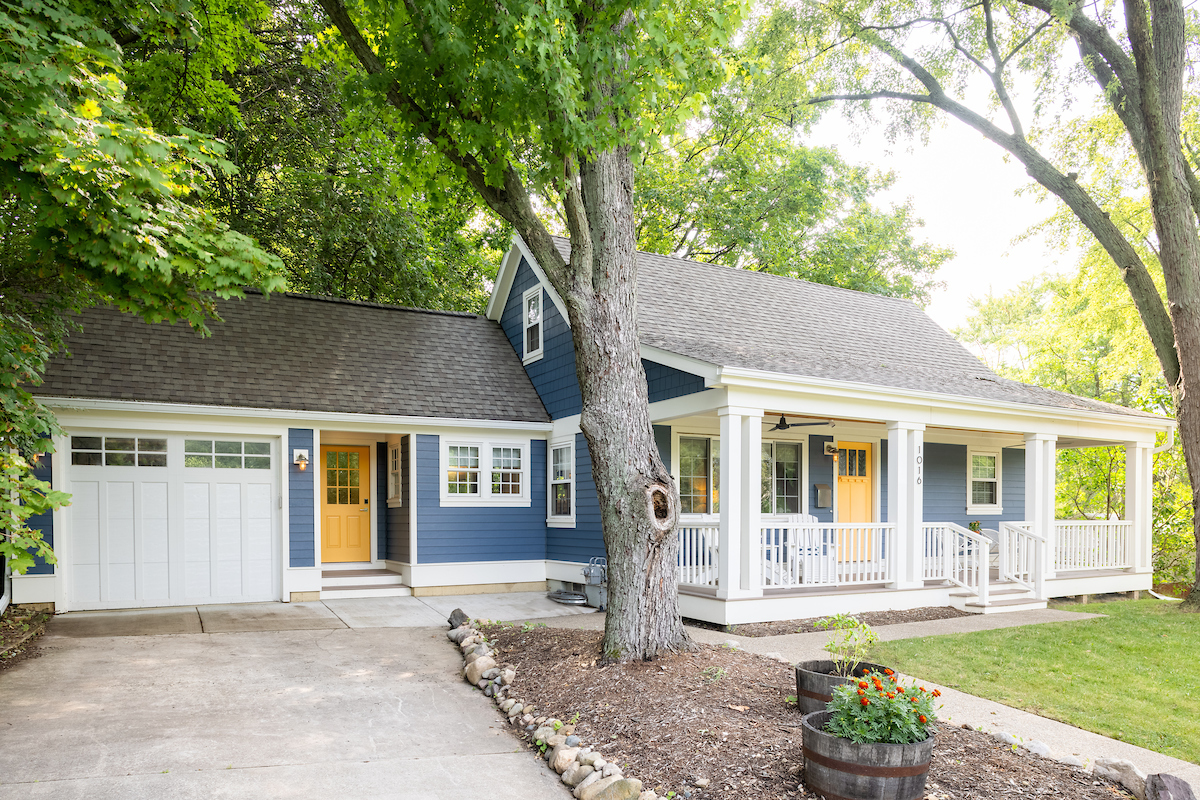
⭐ The One Thing
A colorful front door is one of the most budget-friendly, high-impact upgrades you can make. A top-quality quart of exterior paint (which is more than enough for a door or two) from Benjamin Moore or Sherwin-Williams will cost you about $30-$40. Add another $20 for a good brush, some sandpaper, and painter’s tape. For a weekend afternoon and around $60, you can completely transform your home’s curb appeal and inject a huge dose of personality. There is no other project that delivers this much bang for your buck.
17. Mastering Dormer Placement and Proportion on a Cape Front
The success of dormers is all about getting the scale right relative to the main roof. A common mistake is making them too small, which looks timid, or too large, which can overwhelm the house. A good rule of thumb is that the combined width of the dormer windows should not exceed 50% of the length of the roof they sit on. This ensures the roof remains the dominant feature, and the dormers read as elegant, functional additions rather than a clumsy afterthought. Observe the sightlines from the street to ensure they feel balanced.
🔥 Trending Context
When placing shed dormers (dormers with a single, gently sloping roof), the pitch of the dormer roof should be less steep than the main roof, but not flat. A 2/12 or 3/12 pitch is often ideal. For gable dormers, like the ones in this style of house, the ridge of the dormer should always sit visibly below the main ridge of the house. Having the dormer ridge meet or exceed the main ridge is a major architectural faux pas that throws off the entire home’s proportions. Proper placement is a subtle detail that makes a world of difference.
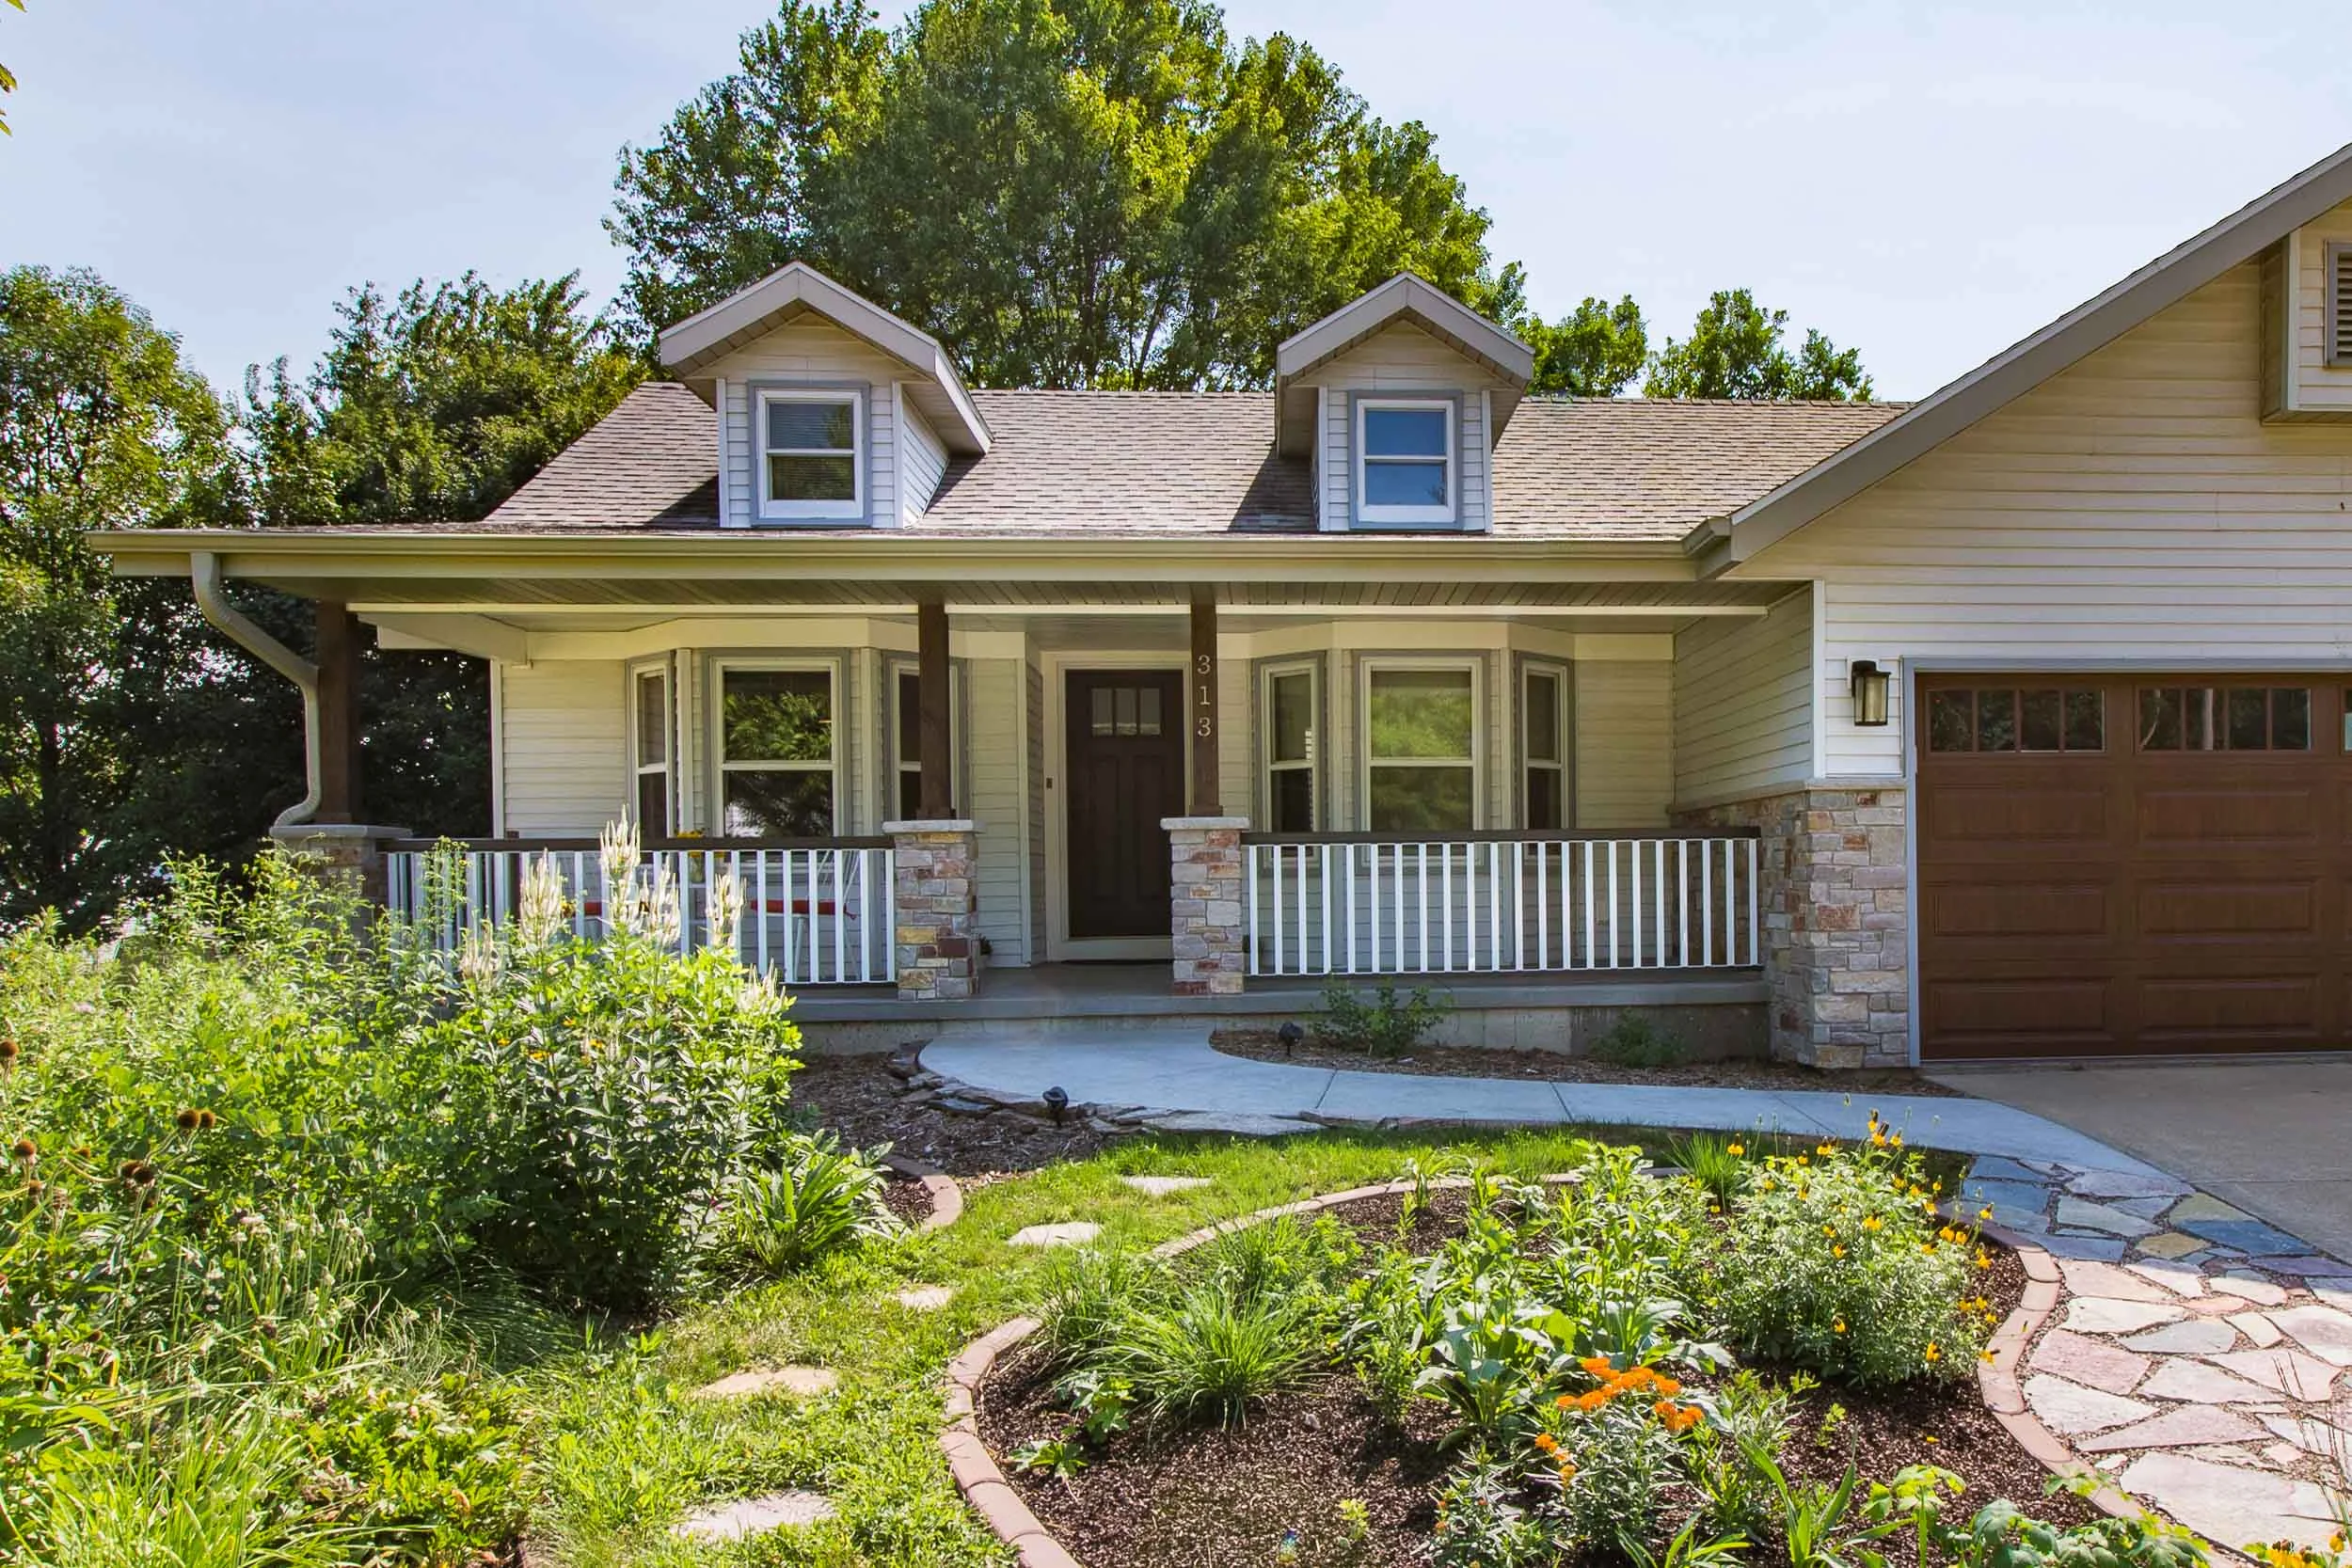
18. Harmonize Siding, Brick, and a Bright Red Door
This exterior works because it creates a cohesive visual triangle of warm tones. The bright red of the front door is the most intense point. This color is echoed more subtly in the varied tones of the red brick chimney. The warm, light beige of the siding acts as the base of the triangle, connecting these two red elements. This repetition of color, in different materials and saturations, makes the design feel intentional and harmonious rather than random. The brown roof adds another layer of warmth, tying it all together.
💸 Get This Look For Less
If you have an older brick chimney, especially on a home from the mid-20th century or earlier, it’s crucial to have it inspected before you do any other exterior work. Look for spalling (flaking or peeling bricks) and deteriorating mortar joints. Water is the enemy. It can get into cracks, freeze, and slowly push the chimney apart. A professional chimney sweep or mason can inspect it for about $100-$250. Repointing or sealing it might cost a few thousand dollars, but that’s far cheaper than dealing with a major leak or structural failure down the road.
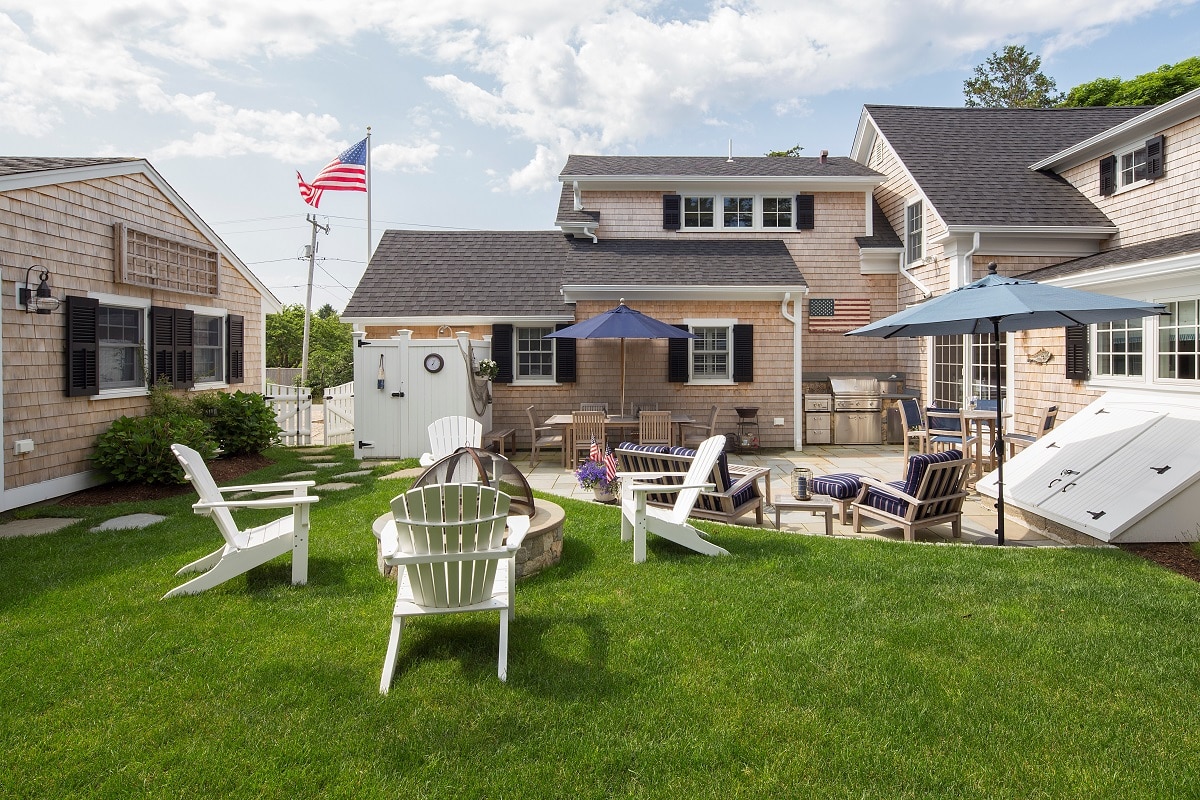
19. Create a Backyard Oasis with Multiple Living Zones
Creating a multi-zone backyard like this involves more than just buying furniture. The cost is primarily in the hardscaping and structures that define the spaces. Here’s a potential breakdown.
💡 Designer Tip
- Paver Patio (400 sq. ft.): $6,000 – $12,000 professionally installed
- Outdoor Shower Enclosure (Prefab Kit or Custom): $1,500 – $5,000+
- Adirondack Chairs (4): $600 – $2,000 (for quality wood or polywood)
- Gas Fire Pit: $500 – $3,000
- TOTAL: $8,600 – $22,000
- Budget Alternative: Use stamped concrete for the patio ($4,000), place chairs around a portable wood-burning fire pit ($200), and opt for a simple, exposed outdoor shower fixture against a fence ($500).
An outdoor shower is a fantastic coastal luxury, but think through the practicalities. Where does the water go? Unless you have a dedicated dry well or drainage system, you can create a perpetually soggy, mosquito-attracting spot in your yard. Also consider privacy. What can your neighbors see from their second-story windows? Lastly, remember you’ll need to have the pipes professionally winterized each fall in any climate with freezing temperatures to prevent them from bursting, which is an annual maintenance cost.
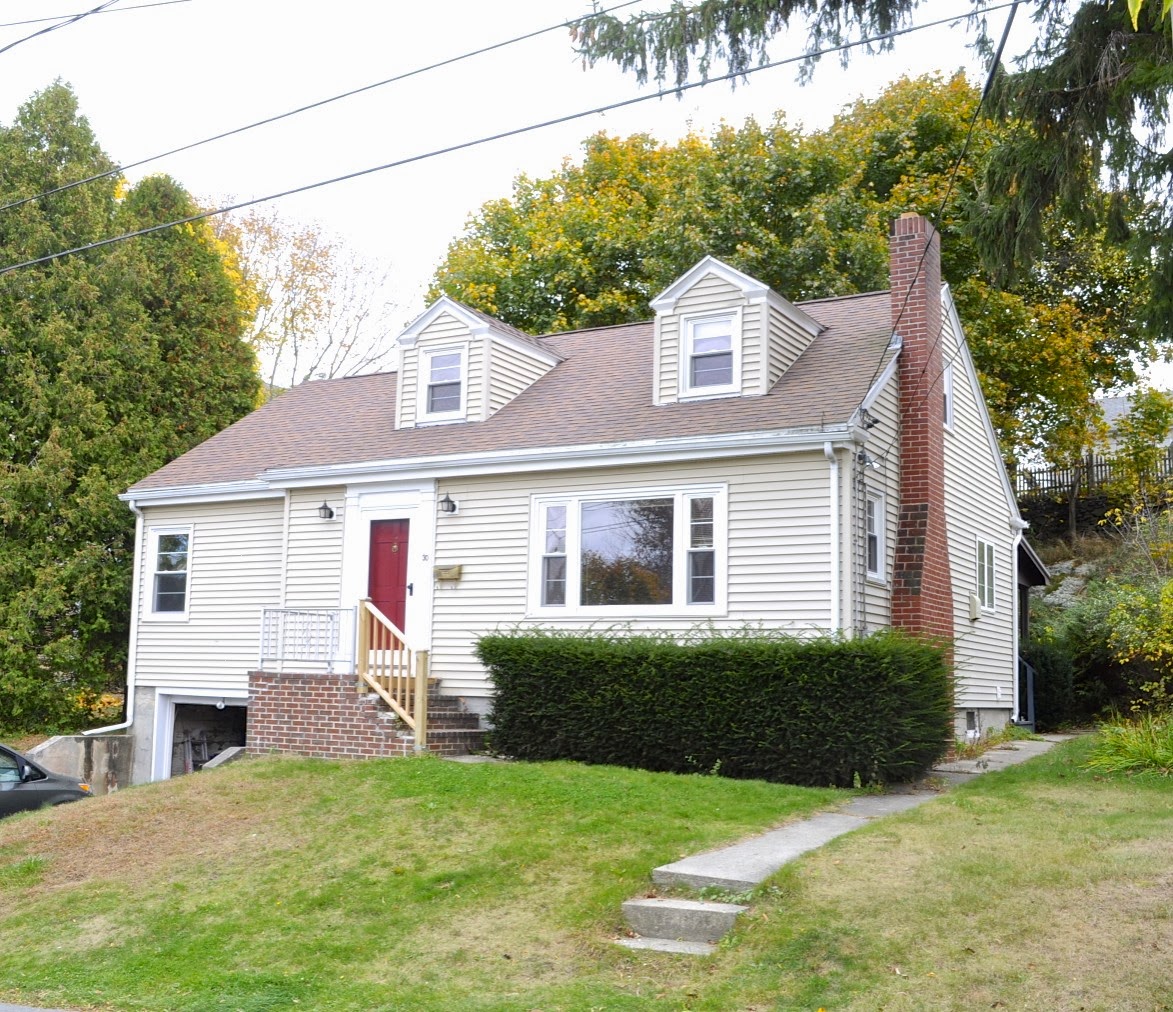
20. Choose a Moody Dark Gray Siding for a Modern Edge
This striking look is achieved with a high-contrast formula: about 75% dark, moody color (the gray siding and roof) and 25% bright, crisp white (the dormers, shutters, and trim). The dark body makes the house feel grounded and sophisticated, while the extensive white trim acts like a liner, sharply defining all the architectural features. Without the white, the house would be a dark blob. Without the dark gray, it would be just another white house. The tension between the two is what creates the drama and style.
🧹 Maintenance Reality
When you have a dark, dramatic facade, the landscaping’s role is to provide softness and prevent the home from looking too severe. Use plants with varied, lush green textures to create a gentle buffer between the foundation and the lawn. A mix of hostas, ferns, and boxwoods works beautifully. Allowing a climbing vine like the one framing the entry arch is a perfect way to organically break up the hard lines of the architecture. The goal is to create a partnership where the lushness of nature balances the strength of the structure.
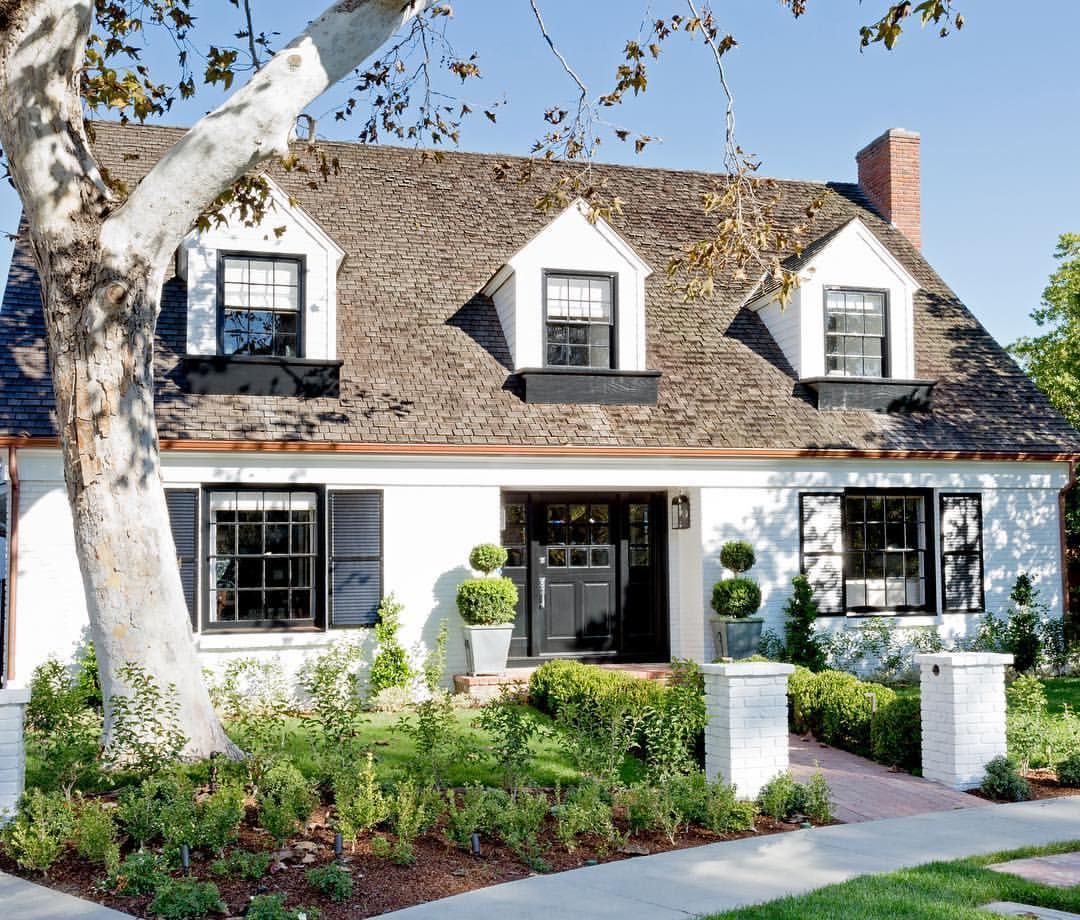
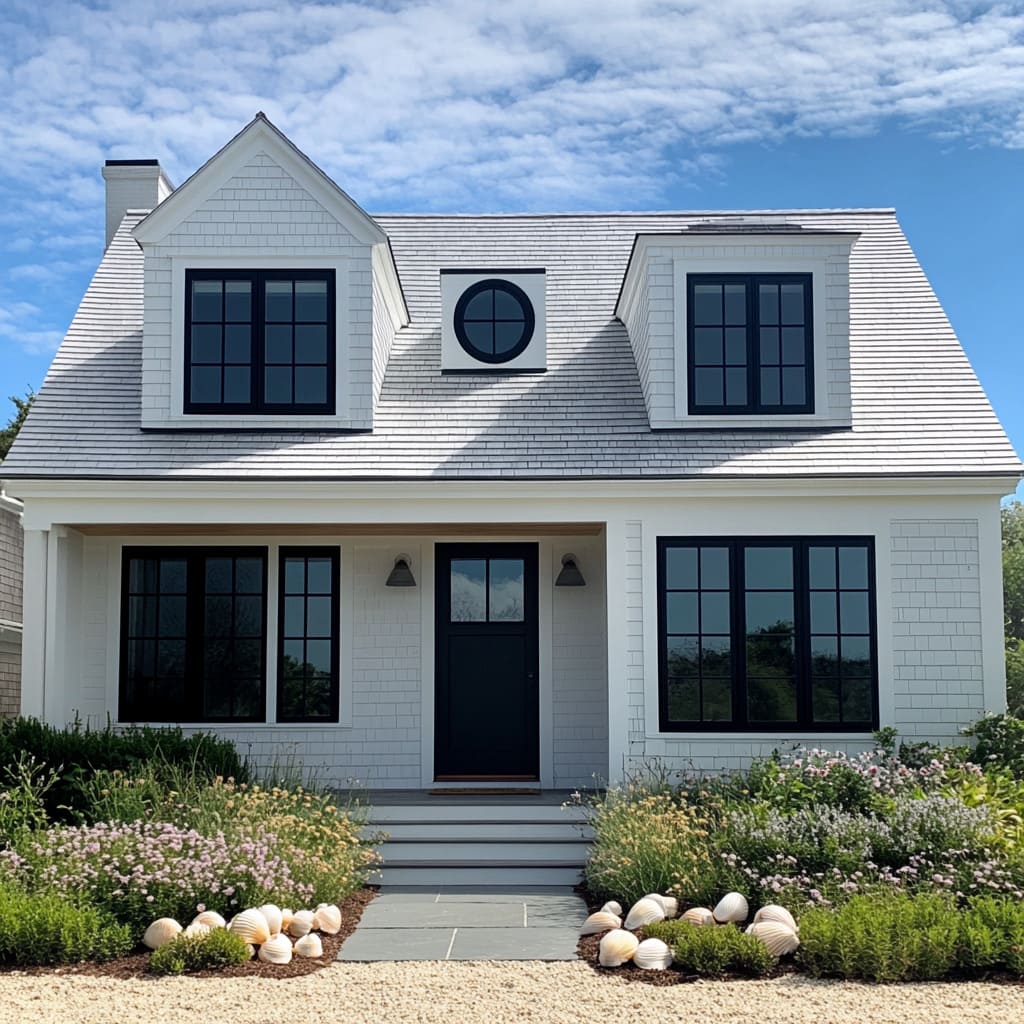
21. Go for Graphic Impact with White Shingles and Black Windows
A pea gravel path with seashells offers incredible coastal charm, but it demands a specific kind of maintenance. Over time, the gravel will compact, and the lovely seashells will get crushed or sink. Plan to “fluff” the gravel with a hard rake every month or so and top it off with a fresh layer of gravel and shells every 2-3 years. It’s also a magnet for leaves and debris, so a leaf blower (used gently!) will be your best friend. It’s not a great surface for high heels or rolling suitcases, so consider its placement carefully.
🎯 What Makes It Work
The single element that elevates this home from classic coastal to modern chic is the bold choice of black window frames. This is a crucial detail. With traditional white windows, this would be a perfectly nice, beachy Cape Cod. With the black frames, as seen in the classic Idea #1, the entire facade becomes more graphic, intentional, and contemporary. It’s a high-impact choice that signals a modern design sensibility, creating sharp, eye-catching contrast against the classic white shingles. It’s the design equivalent of drawing a clean, confident line.
22. Designing a Foundation Garden for Your Cape Cod
A foundation planting is the garden bed that lines the front of your house, and it’s essential for settling your home into the landscape. Here’s a quick guide to creating a classic Cape Cod look.
- Define the Bed: Use a garden hose to lay out a curving bed line about 4-6 feet deep. Soft curves are more welcoming than rigid straight lines.
- Layer Your Plants: Place taller evergreen shrubs (like boxwood or yew) at the back, against the house. They provide year-round structure.
- Add Mid-Layer Color: In front of the evergreens, plant flowering shrubs like hydrangeas, roses, or azaleas. This is where you get your seasonal pop.
- Finish with a Perennial Border: Use lower-growing perennials like hostas, catmint, or daylilies along the front edge of the bed for texture and continued interest.
✅ Before You Start
Landscaping can be shockingly expensive, but you can achieve a lush look on a budget. The key is to buy smaller, younger plants. A one-gallon hydrangea might be $25, while a mature five-gallon one is $80. With a few years of patience, that small plant will be just as big. Visit your local nursery at the end of the season (late fall) when they often have huge sales on perennials. Finally, focus your spending on the key structural shrubs near the entryway and fill in other areas with more affordable, fast-spreading groundcovers.
23. The Timeless Appeal of a Symmetrical White Cape Cod
This is the quintessential Cape Cod, and its enduring appeal lies in its perfect, comforting symmetry. The door is dead center, flanked by an equal number of windows on each side. The two dormers are perfectly balanced on the roof. This creates a sense of order, stability, and calm that is deeply pleasing to the human eye. The simple, high-contrast palette of white siding, black shutters, and a grey roof enhances this clarity, allowing the home’s pure, balanced geometry to be the star. The red brick chimney adds just enough warmth to keep it from feeling stark.
💰 Budget Breakdown
A symmetrical design like this is incredibly versatile but it truly shines on a standard suburban lot of about 50-75 feet in width. Its balanced, compact form doesn’t require a massive amount of space to look good. This makes it an ideal choice for neighborhoods where lots are more uniform. Unlike the sprawling, multi-gabled design in Idea #11, which needs a vast canvas, this classic version feels complete and handsome even on a smaller property, making it both an aesthetic and a practical choice for many homeowners.
24. Designing the Back of the House: Patio and Deck Considerations
The back of your house is just as important as the front. Before you build a deck or patio, think about flow and function.
- Sun and Shade: Track the sun for a few days. Where is the shade in the hot afternoon? Where is the sunny spot for morning coffee? Let the sun dictate your layout.
- The Kitchen Connection: The best patios have a direct, easy connection to the kitchen. No one wants to carry trays of food through a living room and two hallways to get outside.
- Public vs. Private Zones: Do you need a large, open area for entertaining? Or a smaller, more intimate nook for quiet reading? Good design can create both.
- View from Inside: What will you be looking at from your kitchen or living room window? Plan your outdoor structures to frame a pleasant view, not obstruct it.

📏 Scale Guide
Let’s be honest about backyard privacy. In many neighborhoods, your neighbors can see right into your backyard, especially from second-story windows. When planning a deck or patio, don’t just think about the view from your yard, think about the view *into* your yard. This might mean investing in a tall privacy fence, a strategically planted row of evergreens (like Arborvitae), or a pergola with retractable shades or curtains. Factoring in the cost and effort of creating privacy from the beginning is much smarter than realizing you feel exposed after the project is already done.
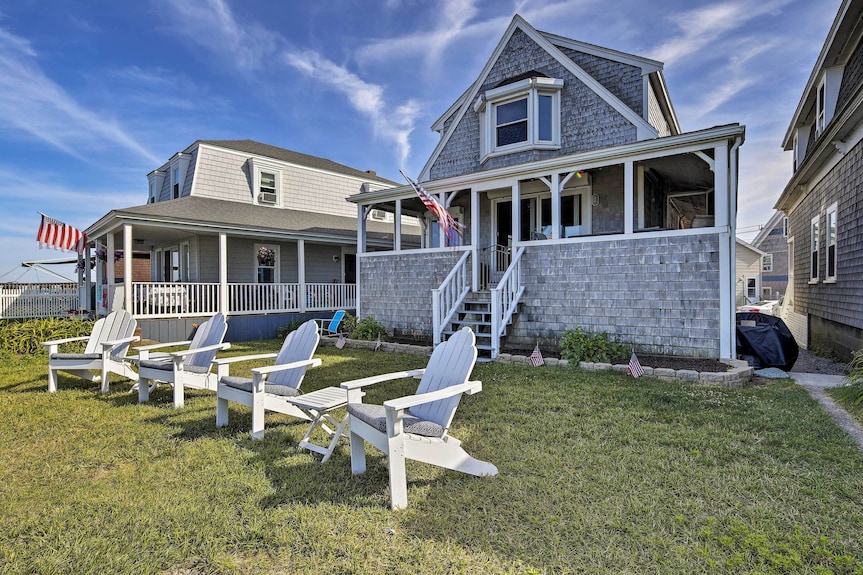
25. Create a Welcoming Front Lawn with a Group of Adirondack Chairs
You don’t need to spend a fortune on classic Adirondack chairs. While premium teak or polywood versions from brands like L.L. Bean or Polywood can cost $400+ per chair, you can find excellent budget-friendly options. Target often has stylish wood or resin versions for around $150. Walmart and Amazon offer even cheaper sets. And don’t forget Facebook Marketplace! People are always moving and selling their patio sets. A little sanding and a fresh coat of exterior paint can make a $40 thrifted chair look brand new.
🔧 How-To Brief
Achieving this relaxed, “come-sit-a-while” vibe is a simple style equation: 50% classic architecture (the shingled house and porch), 30% manicured green space (the lawn), and 20% intentional comfort (the grouping of chairs). The chairs signal that this is a home meant for living in, not just looking at. They transform the front lawn from a simple buffer into an active, social space. The key is arranging them in a conversational grouping, not just lining them up. It’s an invitation to relax and connect with neighbors.
26. A Cool and Composed Palette of Gray, White, and Dark Blue
The paint finish on your front door matters more than you think. For a dark, saturated color like this navy blue, I almost always recommend a semi-gloss or satin sheen. A matte or eggshell finish on a dark color can look dull and chalky outdoors, and it’s much harder to clean. A semi-gloss finish, however, provides a subtle, elegant luster that catches the light beautifully, making the color appear richer and deeper. It also offers superior durability and is easy to wipe down, which is essential for a high-touch surface like a front door.
📐 Style Math
This exterior palette is so successful because it’s based entirely on cool tones. The light grey of the siding, the crisp white of the trim, the dark grey of the roof, and the deep blue of the door all share a blue or black base. This creates an incredibly cohesive and serene look. The only warmth comes from the green foliage of the landscaping, which provides a perfect, natural contrast. This disciplined approach to color temperature is what gives the home its calm, composed, and sophisticated coastal character.
Ready to Write Your Home’s Next Chapter?
With a foundation in classic style and a flair for personal touches, the modern Cape Cod is all about creating a home that feels uniquely yours. Each of these ideas is a starting point for your own story. Ready for more inspiration? Follow us on Pinterest for the best in home design, delivered daily.